A single flash is often enough to light a portrait convincingly. When you use only one light source, you immediately see how every shift affects the face, shadows and background. That is exactly what makes this setup so instructive.
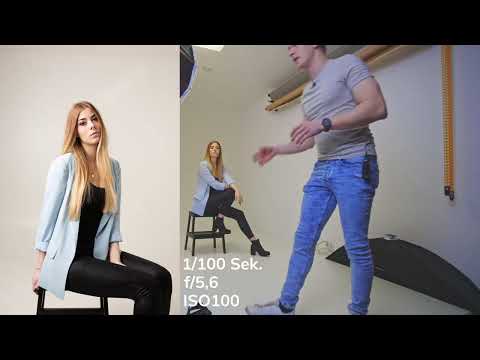
The video is only loaded from YouTube when you play it – data (including your IP address) is then transmitted to YouTube/Google. More in the privacy policy
Introduction
In this tutorial, I'll show you how to build a portrait with a single light and refine it step by step. Denis serves as the model, lending us his face and posture. You will see that distance, angle and exposure let you create very different looks without needing any additional equipment. With a softbox and a speedlight, you can easily recreate this setup.
Key Takeaways
- A light source placed to the side and slightly above the model creates depth and looks more natural than frontal light.
- The distance of the lamp determines the softness of the light and the brightness.
- Exposure is controlled via the ratio of flash light to ambient light, not through the brightness of the lamp alone.
- With aperture and shutter speed, you can make the background darker or brighter.
- The shape of the light mainly influences the reflections in the eyes.
Step 1: Position the Light to the Side and from Above
Don't place the light source directly in front of the face, but slightly further to the right and above eye level. This angle corresponds to typical sunlight outdoors, which rarely hits the face head-on. Even this small shift makes the face look noticeably more three-dimensional, because the nose, cheeks and chin cast soft shadows. You will notice that the image looks more natural as a result.

Step 2: Understand the Softbox and Its Effect
For this example, I'm using a large softbox. Its shape is almost round, slightly angular, and this shape is less decisive for the quality of the light than you might think. The shape of the light mainly affects the reflections in the eye, the so-called catchlights. In the overall picture, the difference often isn't even that noticeable. So when setting up, pay particular attention to the angle and the distance before you think about the exact shape.

Step 3: Set the Camera Settings
For the first test shots, I set the camera to a shutter speed of one second, aperture f/5.6 and ISO 100. With a fixed base setting, you can judge the influence of the light much more clearly later on. The flash is triggered by a trigger that responds to the photocell. This means that a speedlight can also work independently of the camera. Before you start, check with a test shot whether the flash fires reliably.

Step 4: Aim the Flash Correctly
Aim the flash so that its light does not point directly toward the subject and camera. A test shot in the direction of the light source helps you find the position. Make sure you don't turn too far toward the light. Otherwise, the light ends up coming from the front after all, and you can no longer see how the other half of the face lies in shadow. A small turn of the model is often enough to achieve the desired contrast.

Step 5: Bring the Light Source Closer
When you bring the light source closer to the model, the light becomes softer. At the same time, less light falls on the background, and it becomes darker. When moving it, make sure the light doesn't end up too far to the right, because then you lose the face. Small movements make a big difference here, so it's worth trying out position by position.

Step 6: Adjust the Exposure to the New Light Intensity
Because of the shorter distance, the light becomes much more intense. Your image will therefore probably be far too bright. That's no reason to worry, because that's exactly what test shots are for. Take a shot, compare the result with the previous image and think about what has changed. You now have two options: either you pull the lamp back a little, or you set the camera darker. I decided to stop down from f/5.6 to f/8. This makes the image noticeably darker, and the background looks gray.

Step 7: Using the Ratio of Light and Background
Now you can make the background even darker. It helps to change the flash power or increase the exposure time. Perhaps the flash is at a quarter of its power, and you can turn it up to full power. Then the image is initially completely overexposed. However, that is not a problem, because you can stop down further or lengthen the exposure time. With a little experience, you will quickly find the right combination.
The decisive point is the ratio. The more light you put on the subject from the front and the darker you set the surroundings, the less falls on the background. The model stays bright, the background disappears into the dark. This principle works just as well with a single light source as with several.

Step 8: Looking at the Result and Putting It into Context
When you compare the finished image with the original photo, you see how much a single light source can change the image. The setup is easy to build, but it offers many possibilities. This reduction to the essentials trains your eye for light and shadow enormously.

Outlook
The classic setup with side lighting is only the beginning. In the next step, you can work with more light sources and advanced light shaping. The foundation from this tutorial remains the same: distance, angle, and ratio determine the look.

Summary – One-Light-Setup Portrait: Lighting with Just One Lamp
With a single light source, you can achieve impressive portraits if you deliberately control angle, distance, and exposure. Position the light to the side and slightly above the model so that the face gains depth. Move the lamp closer to make the light softer, and then adjust the aperture or exposure time. The decisive factor is the ratio between the light on the subject and the brightness of the surroundings. Test shots help you quickly arrive at the desired result.
FAQ
Why should the light come from the side and not from the front?Side lighting creates shadows on the face and therefore looks more three-dimensional and natural than frontal light.
Does the shape of the softbox strongly affect the result?The shape mainly affects the reflections in the eyes. It usually has less influence on the overall image than distance and angle.
What should I do if the image is too bright after moving the light closer?You can close the aperture, that is, stop down, or adjust the exposure time to reduce the overall brightness.
How does the background get darker?The background gets darker when less light falls on it. You help with this by using a lower ambient brightness relative to the flash light on the subject.
What are test shots for?Test shots show you immediately how a change takes effect. This way you can improve deliberately instead of guessing for a long time.


