Imagine you want to take a product shot and you have two lamps on the table: a video light with continuous light and a studio flash. Both can light your subject, and yet the results look completely different. This very difference is the focus of this guide. You will learn why photographers use flash at all, when continuous light is the better choice, and how to find out with a simple method which light source suits your project.
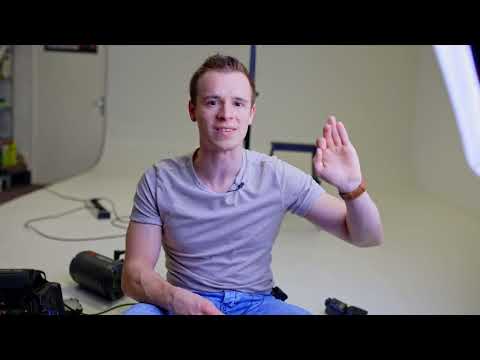
The video is only loaded from YouTube when you play it – data (including your IP address) is then transmitted to YouTube/Google. More in the privacy policy
I have been working with both systems for many years, both in studios and on outdoor shoots. I hear the question "Why not just use a powerful continuous lamp?" again and again in workshops, and the answer is surprisingly nuanced.
Key Takeaways
Continuous light is ideal for getting started because you see the result immediately. You can spot mistakes in the lighting right away and correct them before you press the shutter button.
Flash delivers significantly more power. With continuous light, you only reach brightness levels of 600 watts with great technical effort, whereas flashes reach these values with comparatively little effort.
Flashes freeze motion. The light pulse is extremely short, which makes images look sharper and clearer than with continuous light.
Continuous light produces a softer, often more atmospheric look, which in the studio occasionally "has more effect" than intended. This can be a real advantage for portraits and videos.
In the long run, switching to flash is worthwhile. The greater freedom in aperture choice and the sharper results with a closed aperture are hard to replace for ambitious projects.
Step-by-Step Guide
Step 1: Start with continuous light and make the light visible
The most sensible way to start is with continuous light. You immediately see where shadows form, how hard or soft the light falls, and whether a reflector or a diffuser would change anything. This feedback is harder to get at first when using flash, because you only see the result on the display after triggering.
The important thing here is: you don't have to choose one side. If you already own both, use the continuous light as a learning tool. Move the softbox, change the distance to the subject, and observe what happens. Make a note of which positions you like, because these insights transfer directly to the flash later.

Step 2: Realistically assess the light output you need
Before you plan your setup, you should check the output you actually need. Continuous lamps for home use often work with around 60 watts, and even models with about 120 watts quickly reach their limits with larger setups. If you want to move into a higher power class, continuous light quickly becomes expensive, difficult to cool, and unwieldy.
A flash reaches comparable or significantly higher brightness values with much less technical effort. Especially for outdoor shots or large subjects, this is a decisive advantage. So first calculate how much light you need for your aperture, your ISO value, and your distance, and decide afterwards.

Step 3: Freeze motion with the flash
This is where the biggest technical difference lies. Continuous light burns constantly, and your camera determines via the exposure time how long light hits the sensor. If your subject moves during this time, blur occurs. A flash, on the other hand, emits only an extremely short pulse of light, often in the range of fractions of a millisecond.
You can therefore think of the flash as a second, very short exposure time. Even if your camera works with a longer exposure time, the flash pulse dominates the image and freezes the subject. The result looks crisper and sharper. This effect is especially clear with sports, dance, liquids, or animals.
Keep in mind that flashes only store a limited amount of energy for each trigger. With very fast burst shooting, the flash can burn out or the recharge time becomes noticeable. Factor this limit into your shots.

Step 4: Consciously choose the character of the light
Continuous light has a character that many photographers appreciate. It often looks like natural light and shows you the effect in real time. Especially for portraits, video recordings, or product photography with a calm atmosphere, this can be an advantage. The downside: in the studio, continuous light often looks too soft or too flat, and you have less control over the hard contrast you need for crisp images.
Flash, on the other hand, brings precision and power. You can place shadows more deliberately, light backgrounds separately, and work in a very nuanced way with modifiers such as softboxes or reflectors. So decide consciously which look suits your project, instead of simply using whichever light source happens to be within reach.

Step 5: Plan the Switch to Flash
If you want to pursue photography in the long term, I recommend switching to flash step by step. In doing so, you will learn the exposure triangle, flash synchronization, and light shaping in a form that will give you a lot of freedom later on. The aperture in particular is an important point: since the flash provides sufficient brightness, you can stop the aperture down further. This gives you more depth of field, and most lenses deliver their sharpest results at medium aperture values.
Start with a single flash, without using continuous light as the main light. Try out different power levels and observe how shadows, brightness, and motion sharpness change. Over time you will notice that flashing feels unfamiliar at first, but afterwards opens up enormous creative possibilities for you.

Step 6: Prepare the Camera Settings for the Flash
The next logical step is setting up your camera. Once you have understood why flash freezes motion and what advantages the aperture offers, it is worth adjusting the camera specifically for it. I will show you which values to choose in the next section of my series. Until then, it is enough to go through your notes from steps 1 to 5 and come to a clear decision for your first project.

Summary – Flash or Continuous Light: Which Light Source Suits Your Project
Continuous light is an excellent starting point because you see the light immediately and can spot mistakes right away. Flash, on the other hand, offers significantly more power, reliably freezes movement, and enables sharper images with a stopped-down aperture. For small projects with calm light, continuous light is often enough. For large setups, outdoor shots, or dynamic subjects, flash is the better choice. In the long run, it is worth learning how to use flash, as it offers you the greatest creative freedom.
FAQ
Question: Should I start with flash or continuous light as a beginner?Answer: Start with continuous light because you see the result immediately. Switch to flash later, once you have understood the basics of light shaping.
Question: Why does flash freeze movement better than continuous light?Answer: The flash emits only an extremely short pulse of light. As a result, it acts like an additional, very short exposure time that prevents motion blur.
Question: Can continuous light reach the same brightness as a flash?Answer: With continuous light, this is only possible with great technical effort. Powerful continuous lights are expensive, hard to cool, and often require their own power supply.
Question: Why can I stop the aperture down further with flash?Answer: The flash provides enough light even when little light passes through a small aperture opening. This gives you more depth of field and often sharper results.
Question: Does continuous light in the studio always look worse than flash?Answer: No. Continuous light creates a soft, natural look that can suit portraits and videos very well. However, it often lacks control over hard contrasts.
Question: Does a flash burn out quickly with frequent firing?Answer: With very fast burst shooting, the recycling time can become noticeable or the flash can reach its limits. For burst shooting, therefore, plan sufficient breaks or reduce the flash power.


