
Imagine a photo in which dense fog swallows everything and no sun can be seen. That is exactly where this tutorial begins. You will learn how to create a light source in Photoshop Elements that is not present in the original image at all. The starting point is the lighting setup from the previous episode, in which two hard reflectors provided a raking light. In nature, two such light sources are rare. Breaks in the clouds through which the sun shines, however, can deliver exactly this effect.
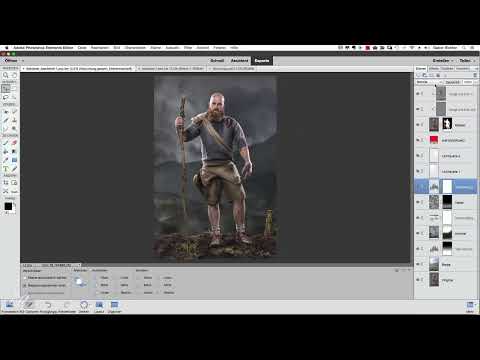
The video is only loaded from YouTube when you play it – data (including your IP address) is then transmitted to YouTube/Google. More in the privacy policy
The big advantage of this method is control. Each light source sits on its own layer. You can hide it, move it, resize it, and adjust its color without touching the rest of the image.
Key Takeaways
- An artificial light source is created on an empty layer with a soft, white brush.
- The blend mode "Overlay" makes bright areas stand out more strongly and look like real light.
- Each light source sits on its own clearly named layer and can therefore be controlled precisely.
- A Gaussian Blur and a reduced opacity take the hard edges off the light areas.
- A color fill in the "Screen" mode with an inverted mask brings warmth exactly where you want it.
Creating the Foundation
Step 1: Creating the First Light Source
First, create a new empty layer. Give it a meaningful name right away, for example "Light Source 1". That sounds like a small thing, but it saves you a lot of searching later when you have several lights in the document.

Step 2: Setting Up a Soft Brush and Placing the First Dot
Select the brush and set the foreground color to white. Leave the opacity at 100 percent and set the hardness to very soft. A soft brush is crucial, because hard edges would immediately look retouched. Then, with a single click, place the white dot at the spot where the light should break in.

Step 3: Changing the Blend Mode to Overlay
Now change the blend mode of the layer to "Overlay". The effect is immediately visible: the dot looks like a burst of light shining into the image from behind. At first, however, the light source is still far too small to look convincing.
Step 4: Enlarging and Positioning the Light Source
Enlarge the dot considerably until it reaches the desired extent. Then move it to the position where the sun should break through the clouds. Gabor recommends zooming out slightly from time to time to judge the effect in the overall image. If the light source is too dominant, reduce the size a little again until it looks harmonious.

Adding More Light Sources
Step 5: Duplicating and Moving the Light Source
For a second burst of light, you don't have to build the layer from scratch. Hold down the Alt key (the Option key on a Mac) and drag the layer upward in the Layers panel. This creates a duplicate. Rename it "Light Source 2" so that you can clearly tell the two layers apart. Then move the duplicate to the desired spot, for example to the right, and make it slightly smaller.

Step 6: Understanding the Effect of the Blend Mode
You will notice that the second light source is considerably less conspicuous than the first. This is due to the blend mode "Overlay". It affects bright areas more strongly than dark ones. Where the image is bright anyway, the light becomes strongly visible; where it is dark, it remains barely noticeable. Once you understand this mechanism, you can use it deliberately to emphasize light areas in a targeted way.

Creating the Light Base
Step 7: Creating a Layer for the Soft Glow of Light
So that the sun doesn't appear merely as a hard dot but gently brightens its surroundings, you create an additional layer. Name it "Light Base". Choose a soft, white brush again. Lower the opacity to about 20 percent and increase the size to around 200 pixels.

Step 8: Paint over the light area irregularly
Now, with one or two clicks, paint a slight glow of light in the area where the sun should shine in. Feel free to work irregularly here. A perfectly round shape looks artificial, while an uneven gradient looks much more natural. The more irregular the shape, the more believable the result.
Step 9: Check the effect in comparison
First, show both light layers and look at the result. Often the effect now looks much more real than two isolated spots in the background. However, the light sources are usually still too strong. Reduce the opacity of the layers, for example to about 30 percent, until the light looks more subtle.

Step 10: Soften the edges with the Gaussian Blur
The transitions are often still too sharp-edged afterwards. You fix this via the "Filter" menu, then "Blur" and "Gaussian Blur". Set the radius so that the edges blend softly without the structure becoming blurred. Gabor uses a value of about 34 for this. Afterwards, you reduce the opacity once more until the light no longer looks intrusive. In his case, the opacity ends up at about 16 percent.

Add warmth and color
Step 11: Insert an orange color fill
To make the light look not only bright but also warm, you create a new color fill. Choose an orange tone that is not too vivid, because otherwise the image quickly looks artificial. Confirm the color with OK. Then you set the blend mode of the color fill to "Screen". The warmth now appears over the entire image, which, however, is not yet the goal in this step.

Step 12: Invert the mask and limit the sunlight
So that the color only takes effect where the light falls, you invert the layer mask. To do this, press Command and I (on Windows Ctrl and I). The mask is now black, so the color is hidden. Again take a brush with 100 percent opacity and a white foreground color and place a dot at the spot where the sun breaks through. Enlarge this area until the light falls convincingly into the scene. You can then reduce the opacity of this layer to about 80 percent.

Step 13: Name the layer and adjust the color
Finally, name the layer "Sunlight" so it is clear what function it has. If you want to change the color, simply double-click the color fill. There you can choose any color tone you like, for example a cool blue for a different mood. With the "Current" button you can return to the original color at any time. Then check whether the intensity fits, and confirm the selection with OK.

Summary ??? Artificially creating light sources in Photoshop Elements
With an empty layer, a soft white brush and the blend mode "Overlay", you create a light source in Photoshop Elements that did not exist in the photo. By duplicating, moving and adding a separate light base, the incidence of light looks believable. With the Gaussian Blur, reduced opacity and an inverted mask for the color fill, you bring warmth exactly where it belongs. Since each light source sits on its own clearly named layers, you keep control at all times, even in complex scenes.
FAQ
Why does my light source look so small after placing the dot?The dot is deliberately chosen too small at the beginning so that you can then enlarge it step by step and adapt it to the scene.
What is the Overlay blend mode used for?It blends bright areas more strongly than dark ones. As a result, the white light looks like a real burst of light that blends into the image.
Why should I create each light source on its own layer?Only that way can you hide, move, or change the opacity and color of individual lights without affecting the others.
How do I avoid hard edges on the light areas?Use a very soft brush, reduce the opacity, and then apply the Gaussian Blur with a moderate radius.
How can I change the color of the sunlight afterwards?Double-click the color fill, choose a new tone in the color picker, and confirm with OK. With "Current" you return to the original color.


