If you want to capture the mood of an image correctly, it often comes down to the right lighting and color composition. Sometimes, a background that is too bright or busy distracts from the main subject. To ensure your image achieves the right effect, I will show you in this guide how to darken and adjust the background of your image in Photoshop Elements. With some simple steps, you can achieve a balanced image composition and convey the desired atmosphere to your viewers.
Key Insights
- By specifically adjusting color saturation and using the fog effect, you can effectively diminish the background and draw attention to the main subject.
- Working with adjustment layers allows for non-destructive editing, enabling you to make changes at any time.
- Naming layers keeps things organized and facilitates future edits.
Step-by-Step Guide
First, you need to ensure that your image is well-prepared. Primarily, we will focus on adjusting the background to highlight the main subject.
Step 1: Create an Adjustment Layer To darken the background, you need an adjustment layer for color saturation. Go to the adjustment layers and select the "Hue/Saturation" adjustment. Reduce the saturation to -100 to significantly desaturate the background, thus directing focus to the main subject.

Step 2: Reduce the Opacity Since a completely black-and-white background is not ideal, reduce the opacity of the adjustment layer to about 60%. This way, some color remains in the background, and the image does not appear too flat.

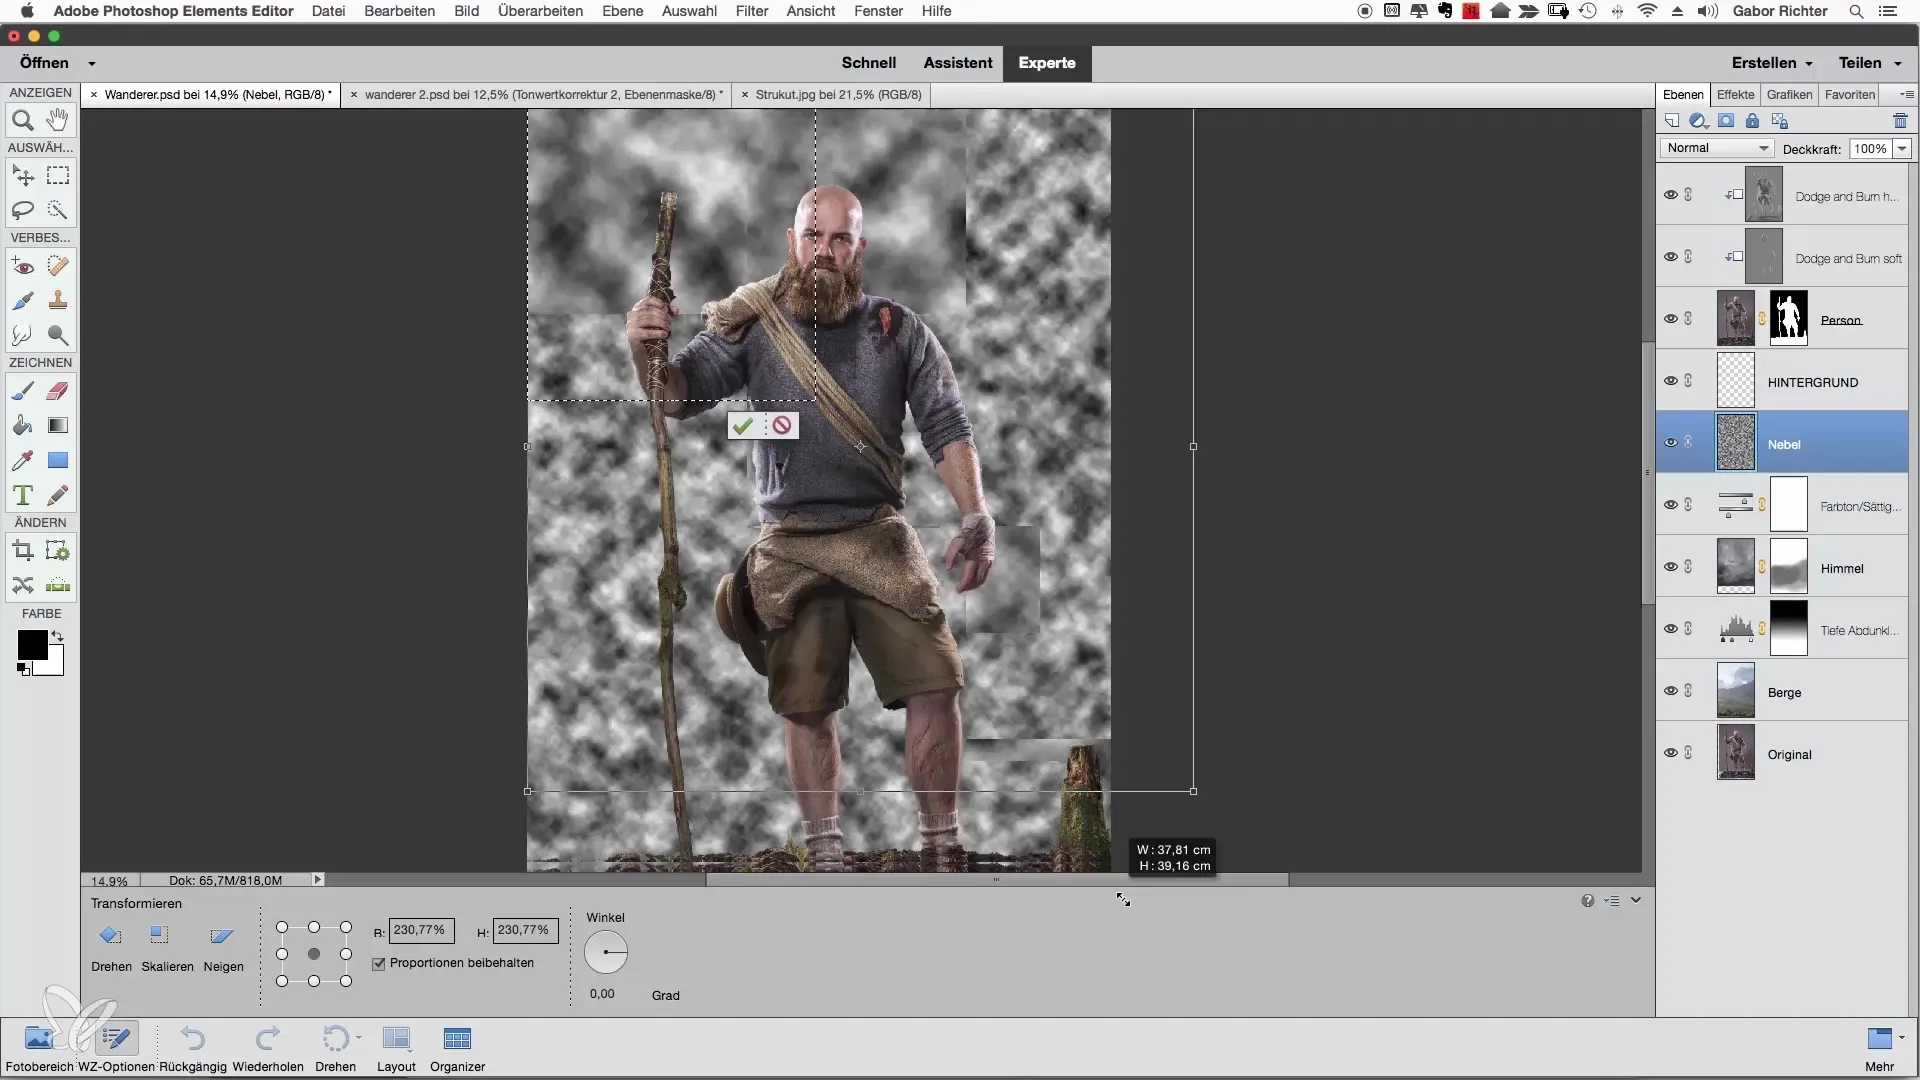
Step 3: Create a New Background for More Depth To add extra depth to the image, create a new layer that you name "Fog". Make sure to name your layers well so you can keep track of them later.
Step 4: Fill the Layer Fill this new fog layer with black. This is the first step in creating a fog effect. You can set the foreground color to black and fill the area.

Step 5: Apply the Fog Filter Now it gets exciting! Apply the "Difference Clouds" filter to create the fog effect. Go to Filter > Render Filters > Difference Clouds. This filter gives you a cloud-like pattern through which the fog is created.
Step 6: Transform the Fog The generated fog may be too intense. Select an area you want to use and transform it by pressing "Ctrl + T" (or "Cmd + T" on Mac) to adjust the size of the fog. Complete the transformation.

Step 7: Create a Fog Mask To use the fog selectively, create a mask for the fog layer. By default, the mask will be white. You can invert it with "Ctrl + I" (or "Cmd + I") so that the fog becomes invisible.
Step 8: Add Fog with the Brush Use the brush to bring the fog back selectively. Set the brush to "soft" and an opacity of 8%. Start from the top and work your way down to create a smooth transition.

Step 9: Check the Effect Compare the effect of the fog on and off. Pay attention to how the fog influences the image and ensure that it stands out the most in the desired areas.

Step 10: Darken the Background with Levels Now it’s time to darken the entire background. Create another adjustment layer, this time for "Levels", and move the midtones to the right. This will darken the entire image. Find the right balance to create the darker mood.

Step 11: Edit the Sky Check the mask to ensure that the sky is no longer visible. If necessary, further reduce the opacity of the mask to create a harmonious transition.

Step 12: Finishing Touches Intensify the fog if it appears too weak. You can adjust the opacity at any time to achieve the desired intensity. Don't forget to name your layers to keep track of things.

Summary - Effectively Darkening and Adjusting Backgrounds with Photoshop Elements
In this guide, you learned how to darken and adjust the background of an image in Photoshop Elements. By working with adjustment layers and targeted fog effects, you can shape the mood of your image just as you desire. Explore the diverse possibilities of image editing to elevate your photography to the next level!
Frequently Asked Questions
How can I adjust the saturation of an image?Go to the adjustment layers and select “Hue/Saturation”. Reduce the saturation to the desired value.
How do I create a new layer in Photoshop Elements?Click on the layers panel and choose the “New Layer” option. Name it as desired.
Can I undo an edit?Yes, by working with adjustment layers, you can make changes at any time without altering the original layer.
How can I change the opacity of a layer?Select the layer, go to the opacity field in the layers panel, and adjust the value.
Why should I name my layers?Naming layers helps maintain organization and facilitates working with complex edits.


