The best image can be significantly enhanced through the right look to express its emotions and values. In this guide, you will learn how to individually design the image look of your photos using Photoshop Elements. You will learn how to effectively use colors to create the desired atmosphere. By making targeted adjustments to hue, contrast, and brightness, you will make your image shine.
Key Insights
- The image look is shaped by targeted adjustments to color and brightness.
- It is important to choose a base color mood before making further changes.
- With different adjustment layers, you can selectively adjust colors and change the overall statement of your image.
Step-by-Step Guide
Step 1: Separating Layers
Start by establishing a clear structure in your Photoshop document. This structure will facilitate the later editing of your image look. First, create a new layer named "Person". This layer should be above your background layer.
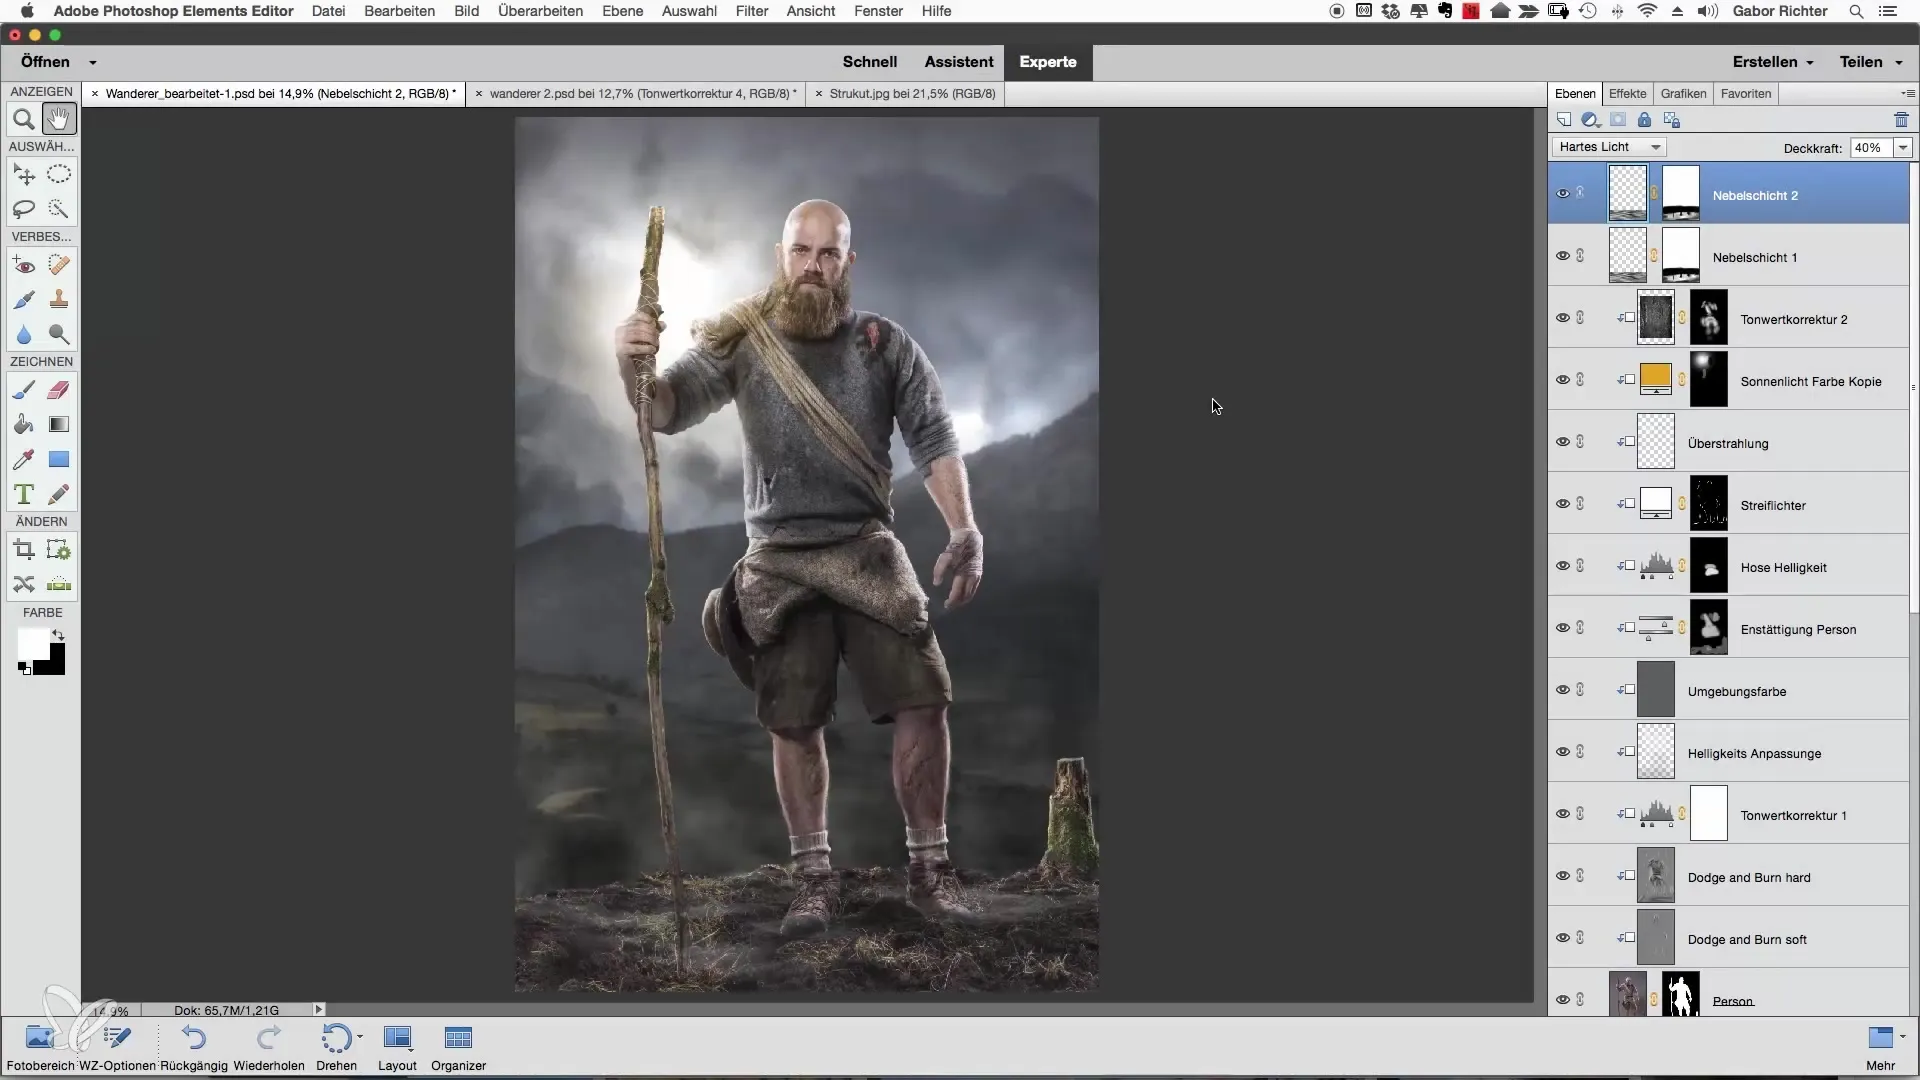
Step 2: Choose Color Mood
Choose a base color for your image look. I recommend using a warm tone that is not too strong. Make sure the colors are more pastel tones to achieve a natural effect. In this tutorial, we are using a warm orange.
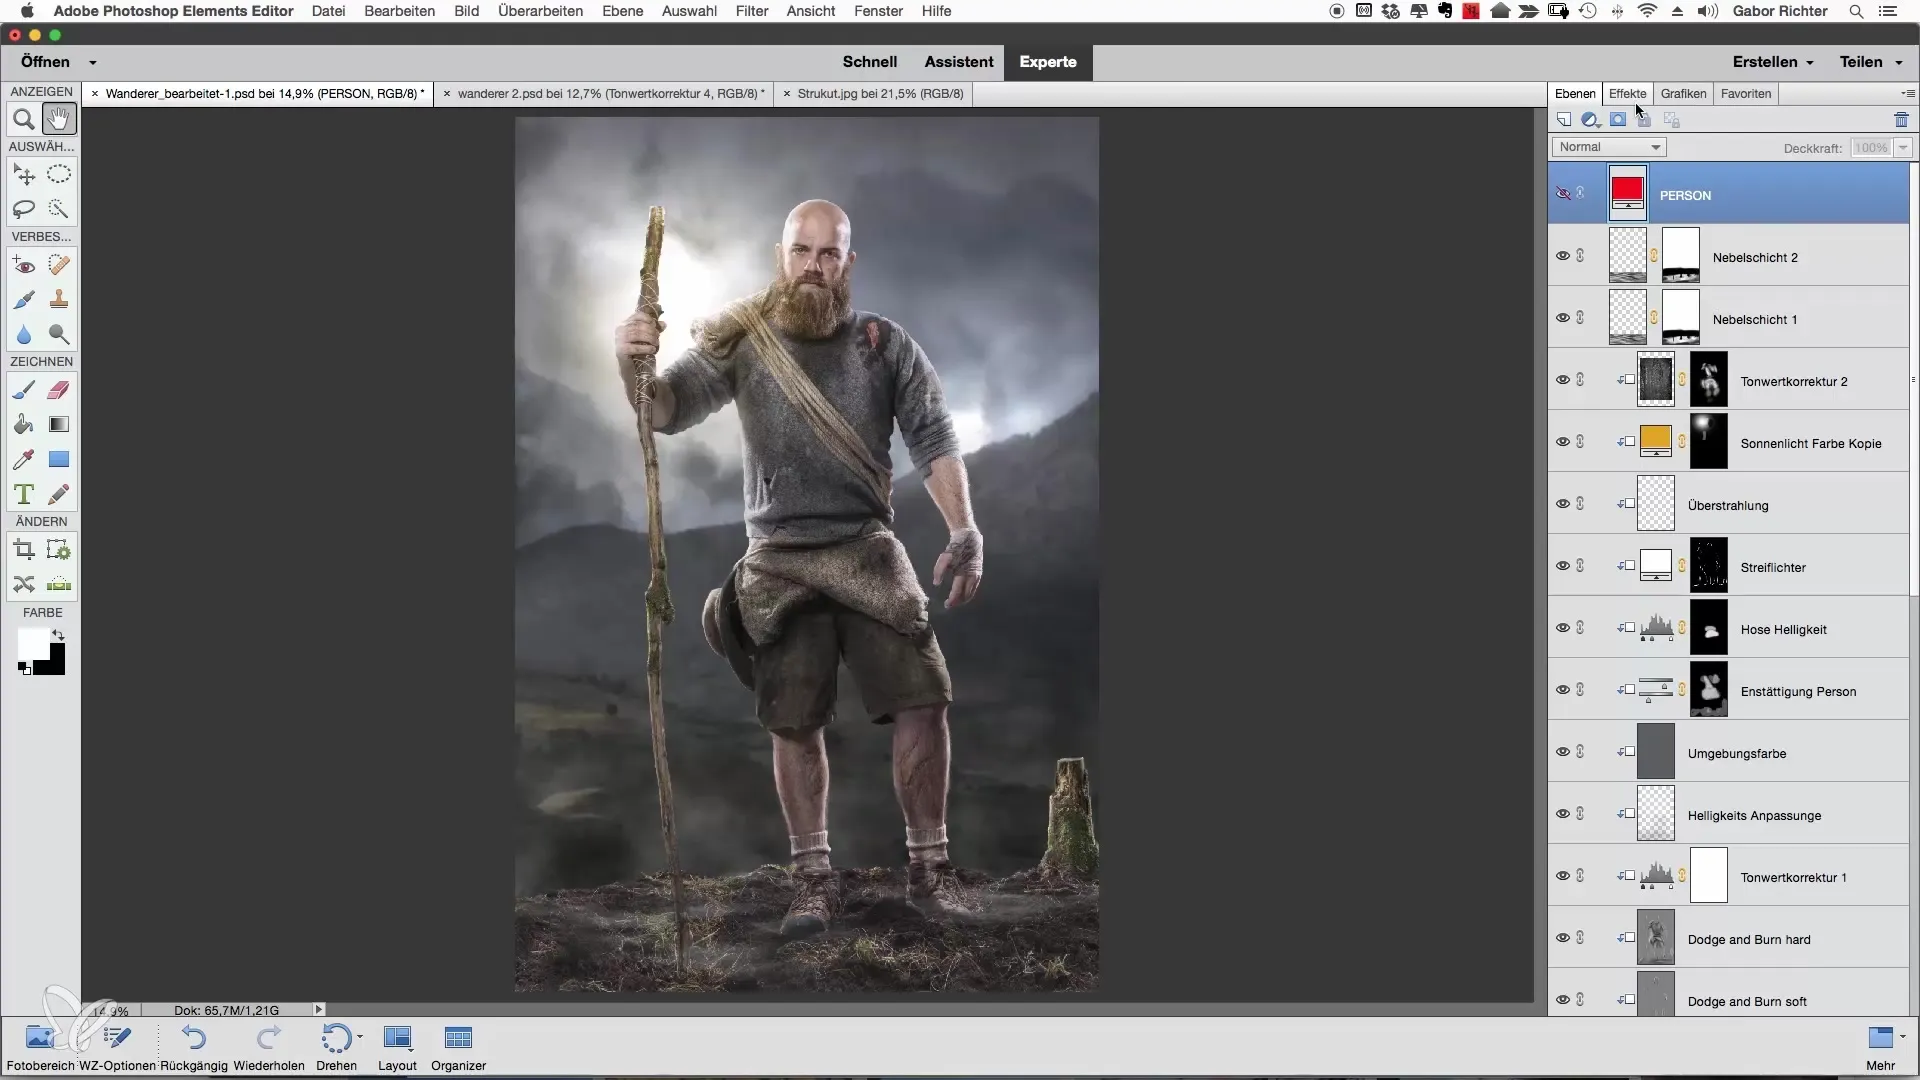
Step 3: Add Color Layer
Now create a color layer above your "Person" layer. Select the orange that you defined earlier. Set the layer mode to "soft light" to color the image harmoniously. You can adjust the intensity of the color layer using the opacity – in this case, a value of around 30% is optimal.
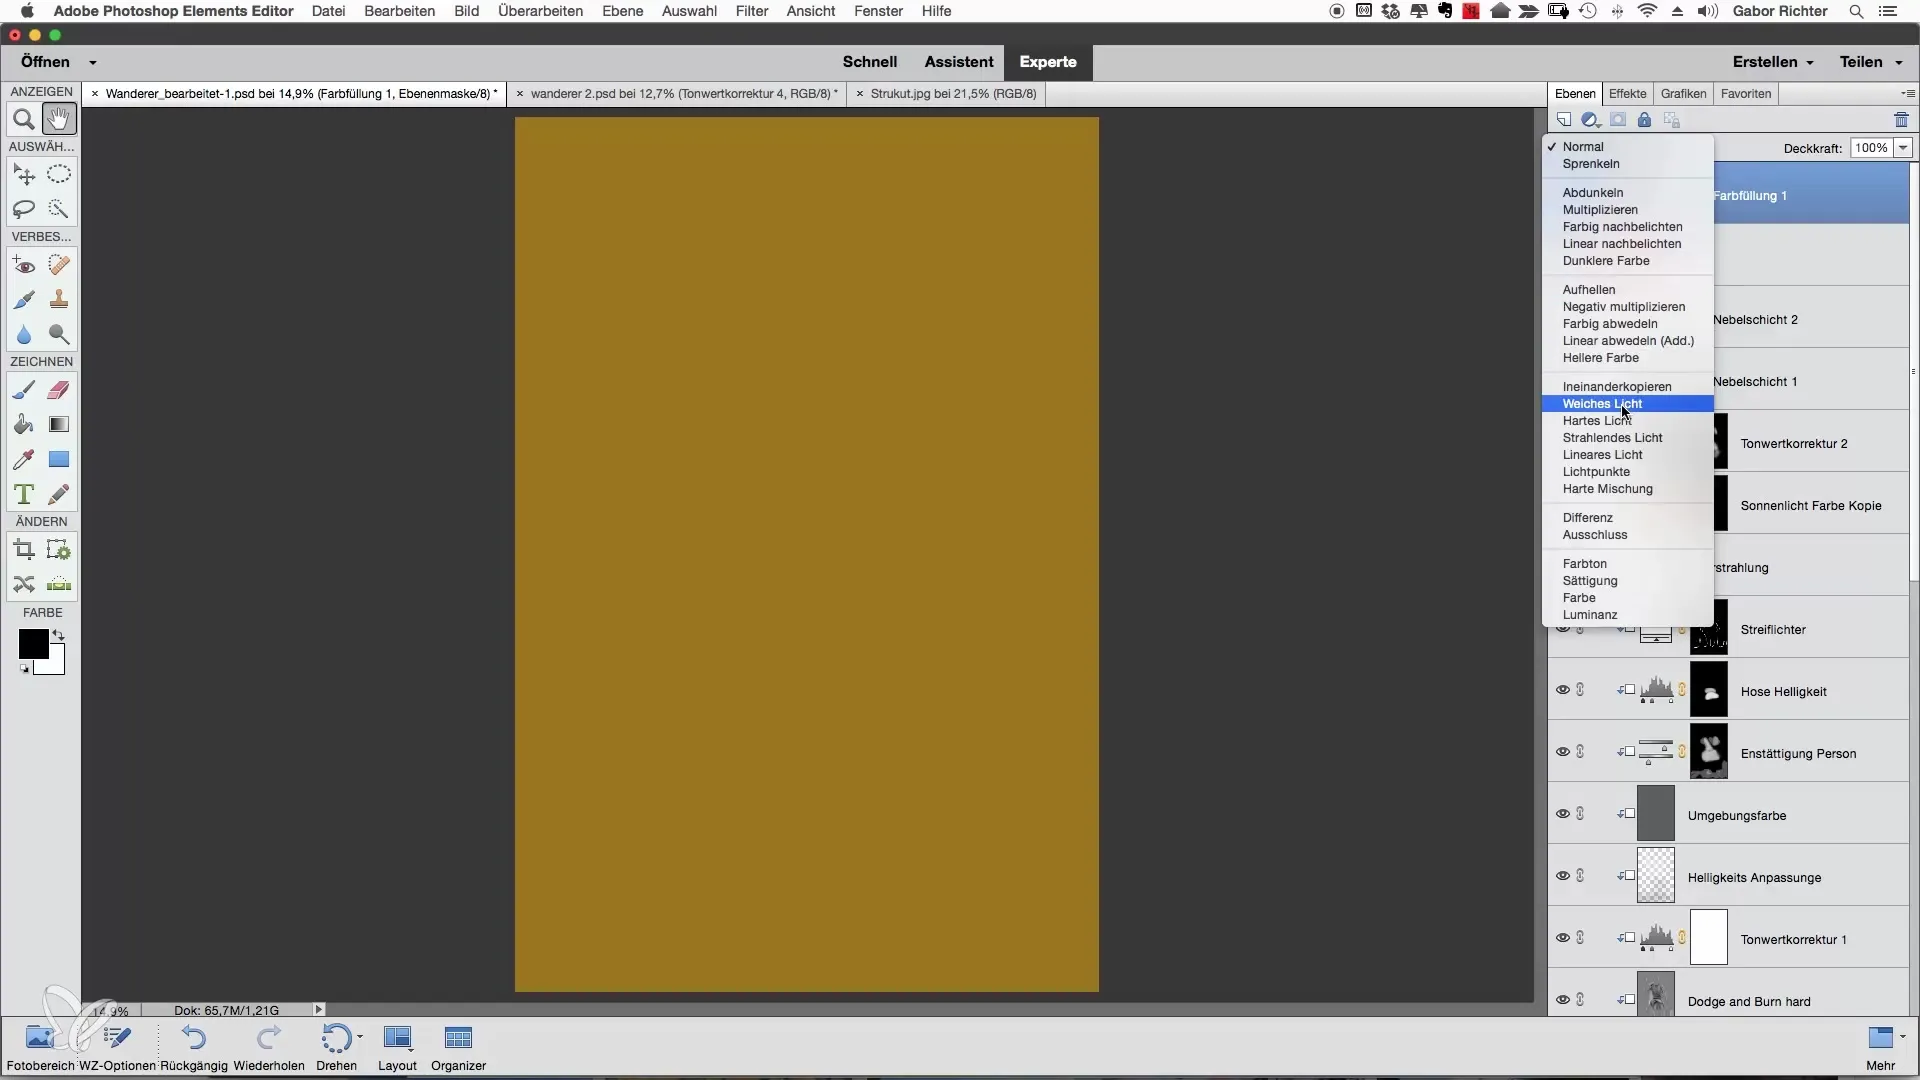
Step 4: Increase Contrast
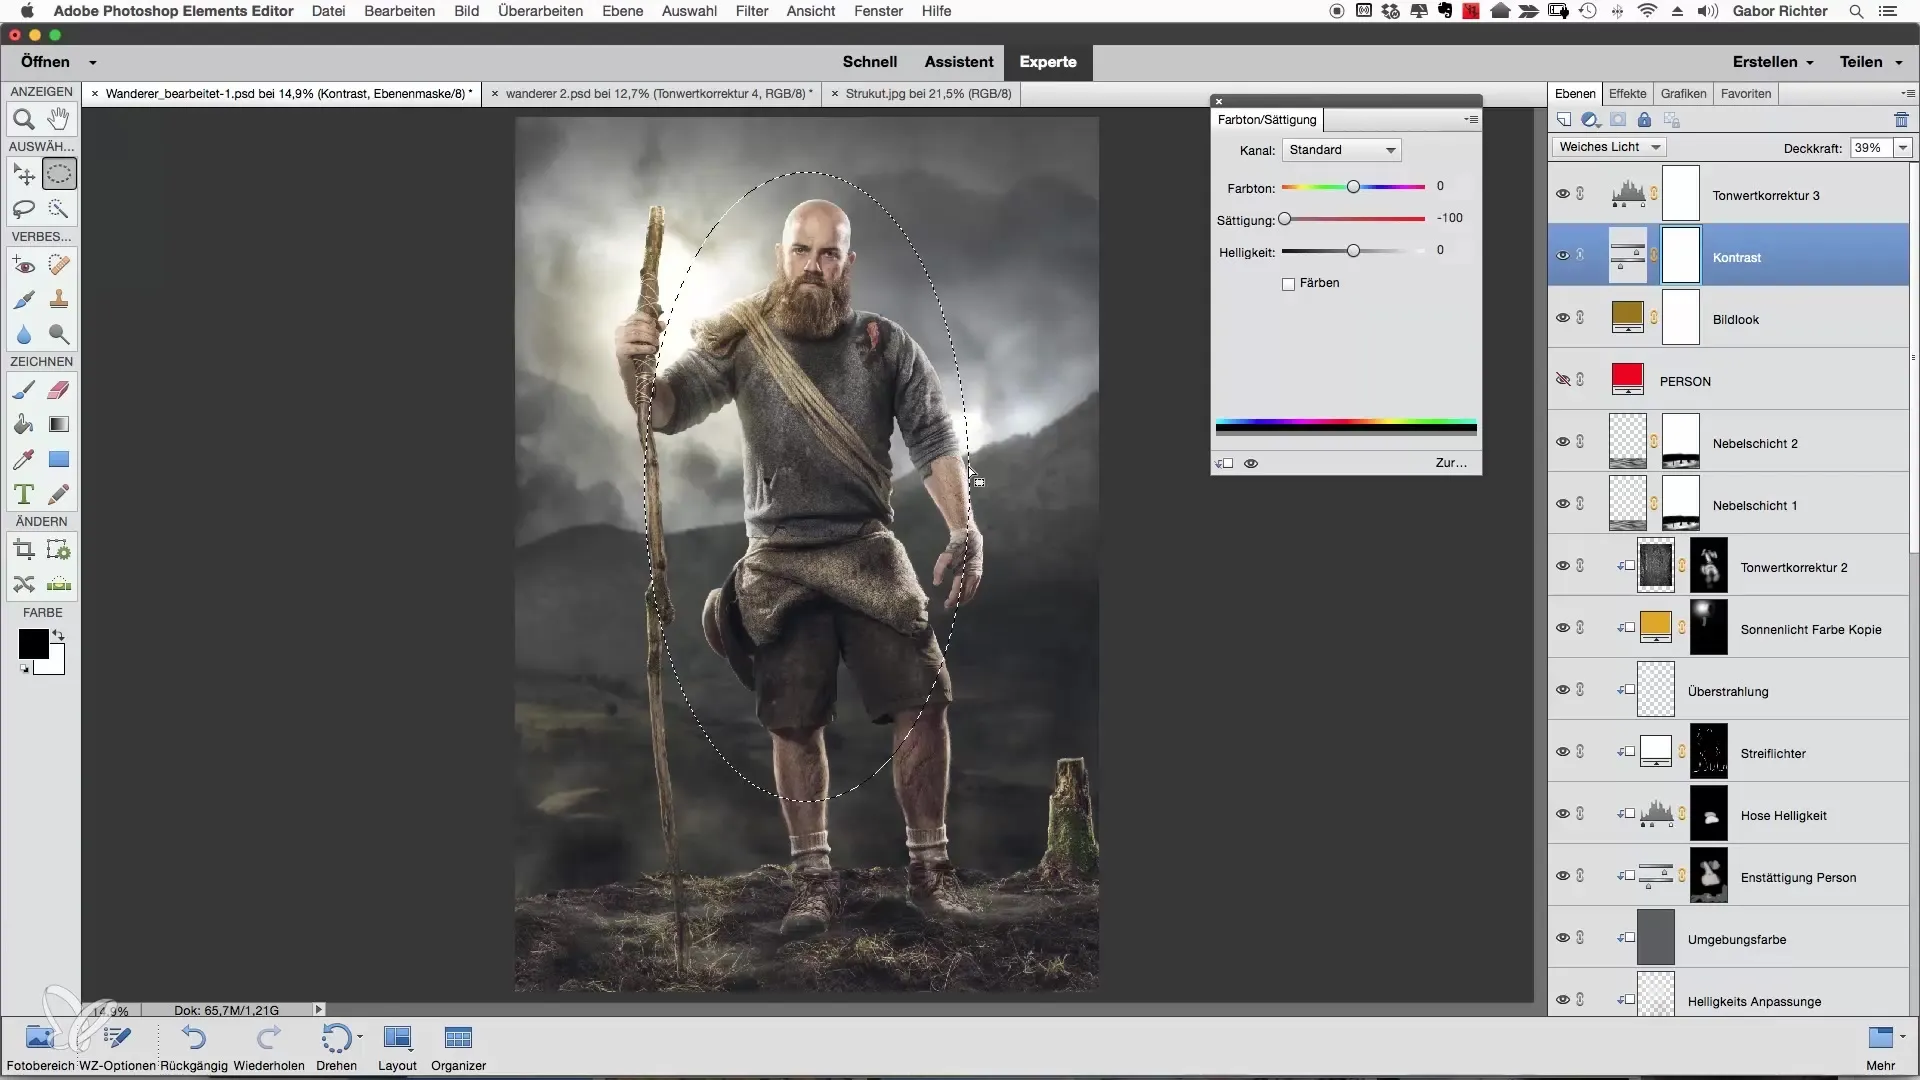
To further enhance the image look, add an adjustment layer for hue/saturation. Set the saturation to -0 to retain only the brightness information, and choose "soft light" as the blending mode. This creates a pleasant contrast in your image.
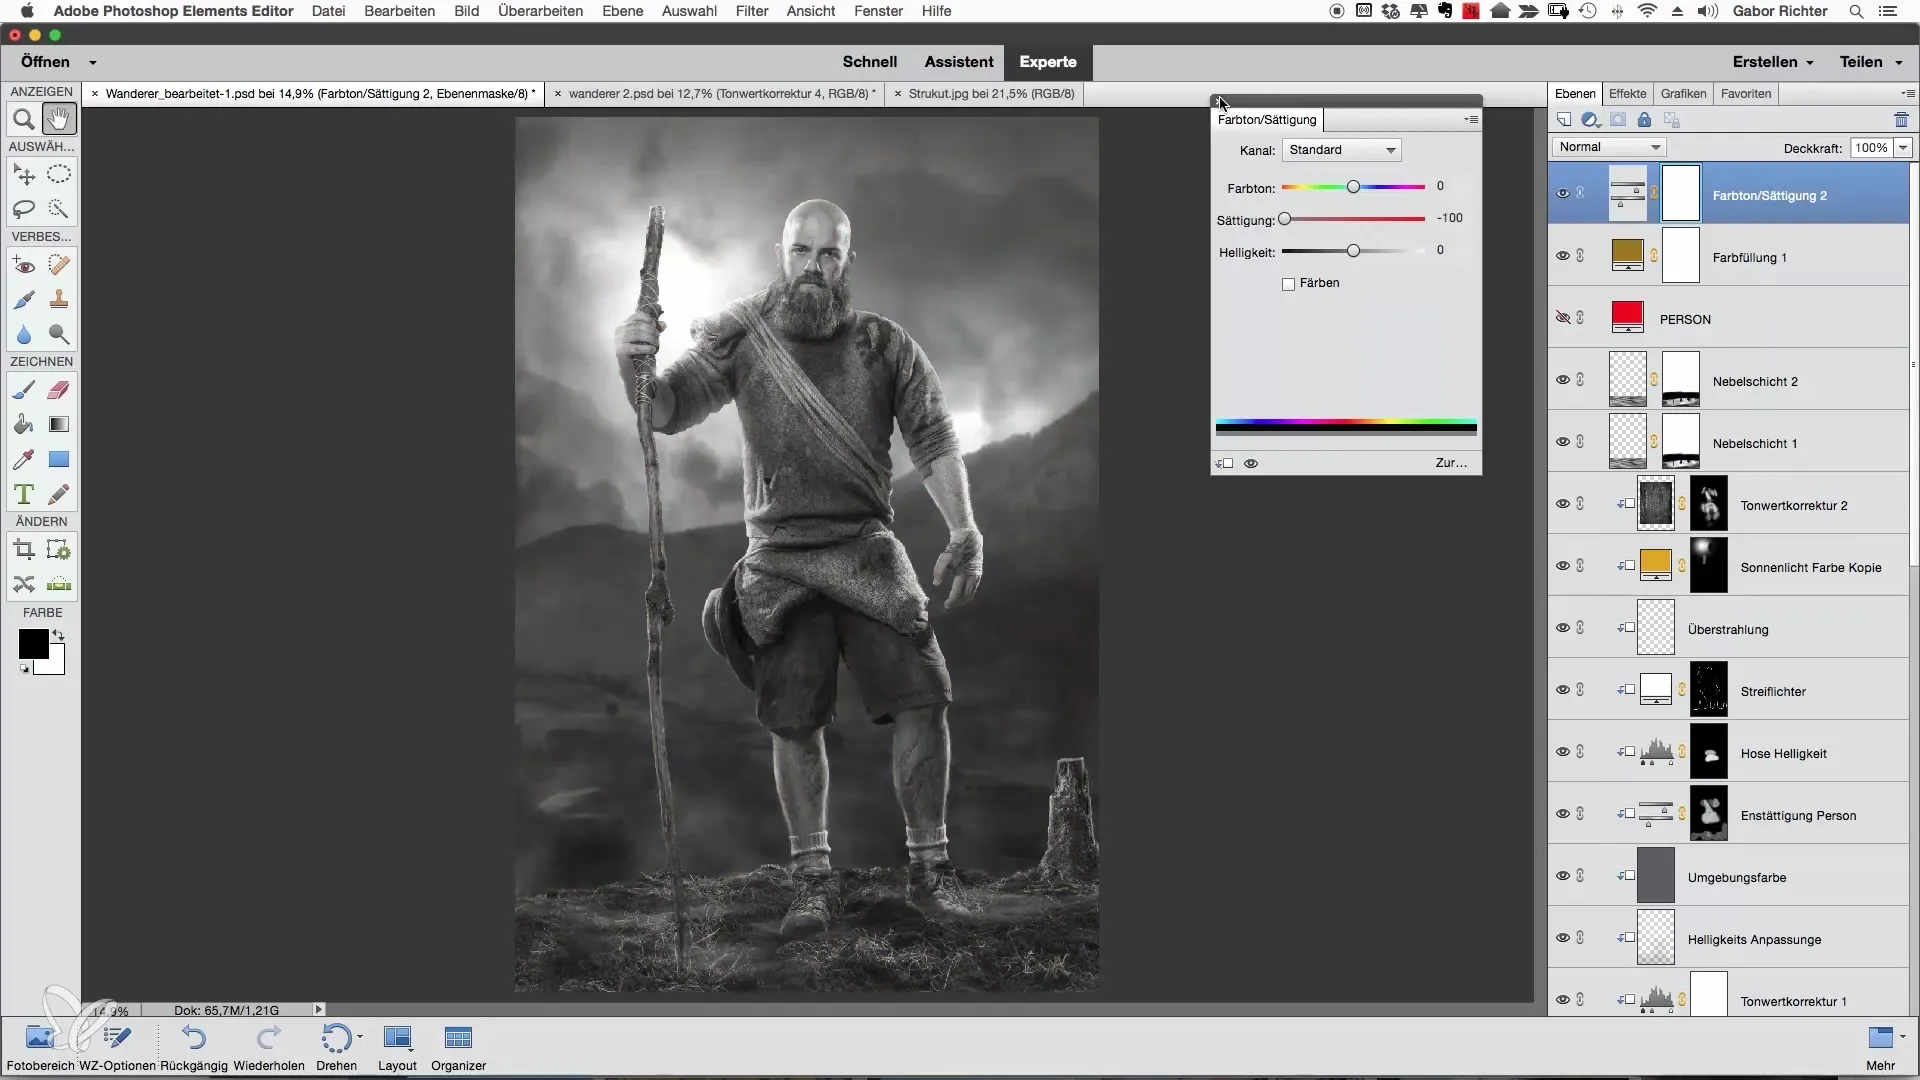
Step 5: Color the Shadows
Now you should selectively color the shadows in your image composition. Go to the settings for the levels adjustment. Check if you can make the image a bit brighter, and then specifically adjust the blue tones in the shadows. Adding a minimal yellow tone can help balance out the blue color.
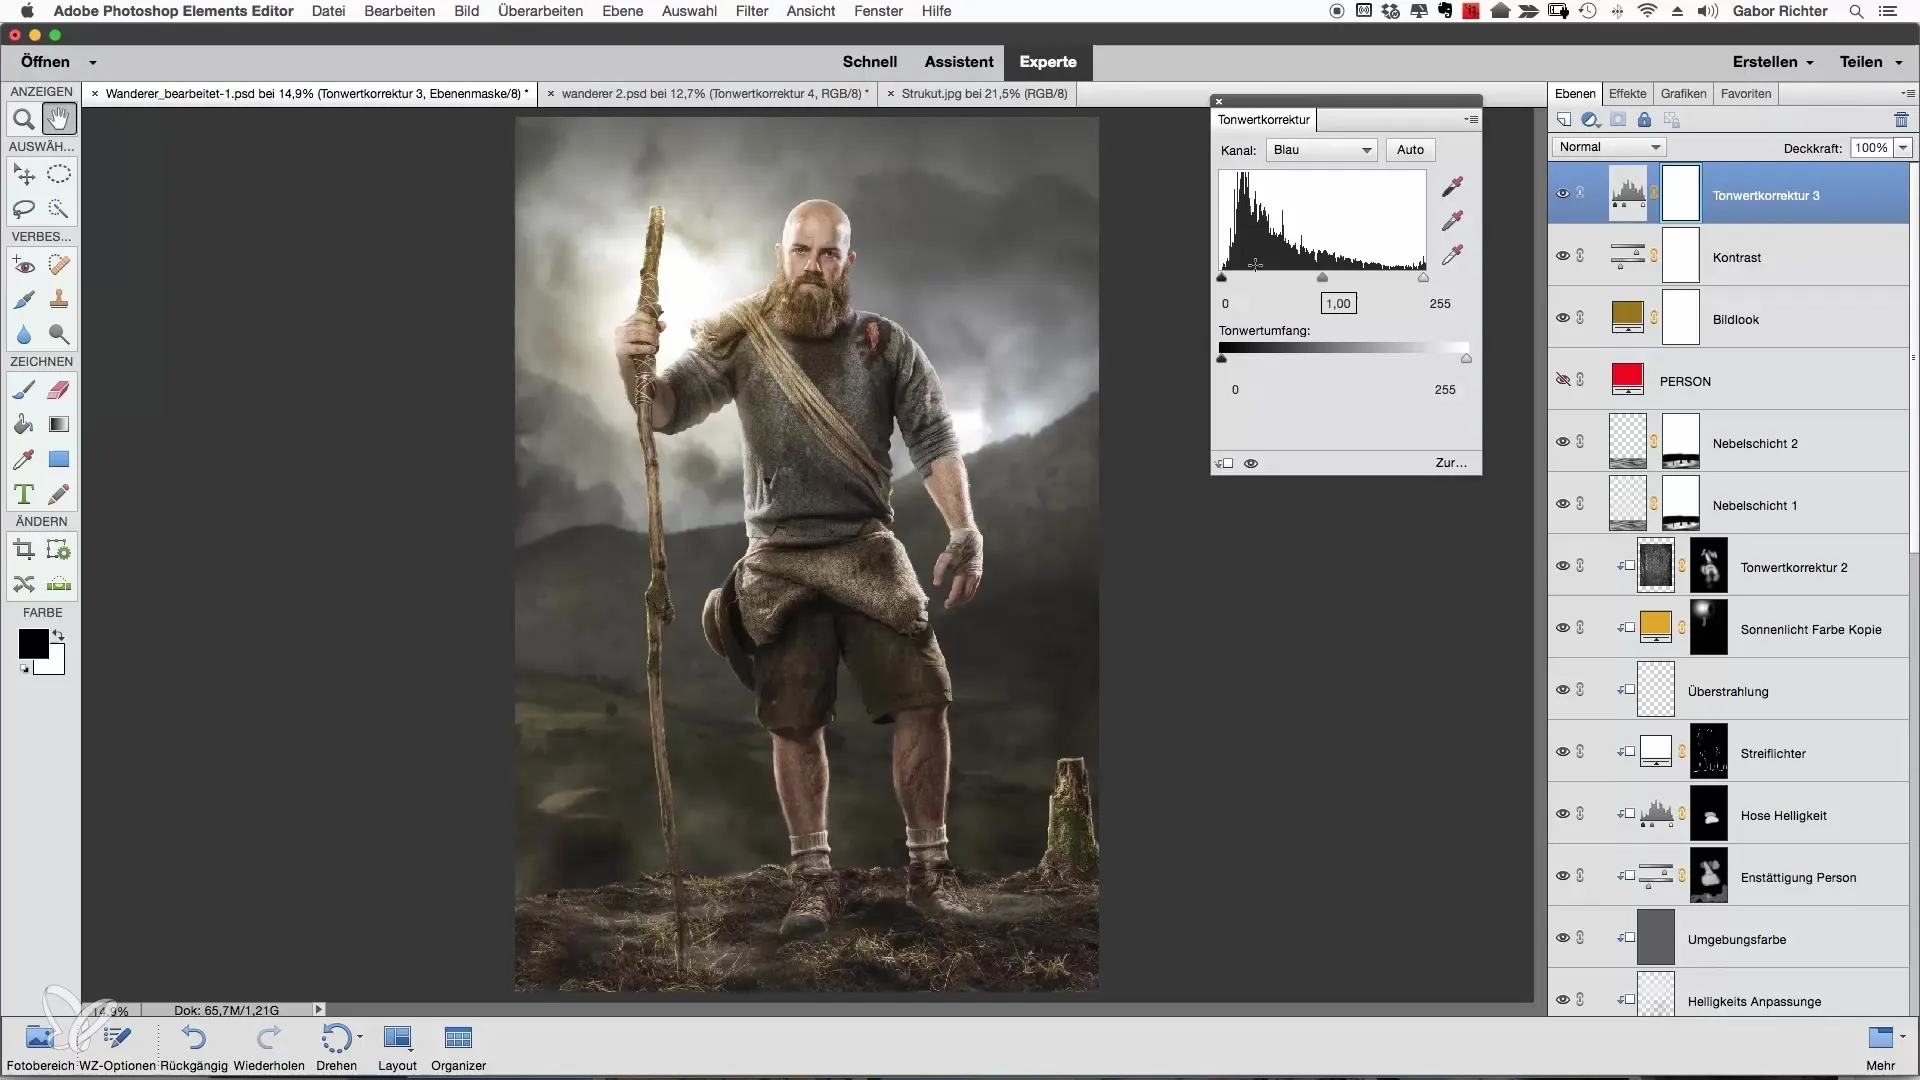
Step 6: Use of Vignettes
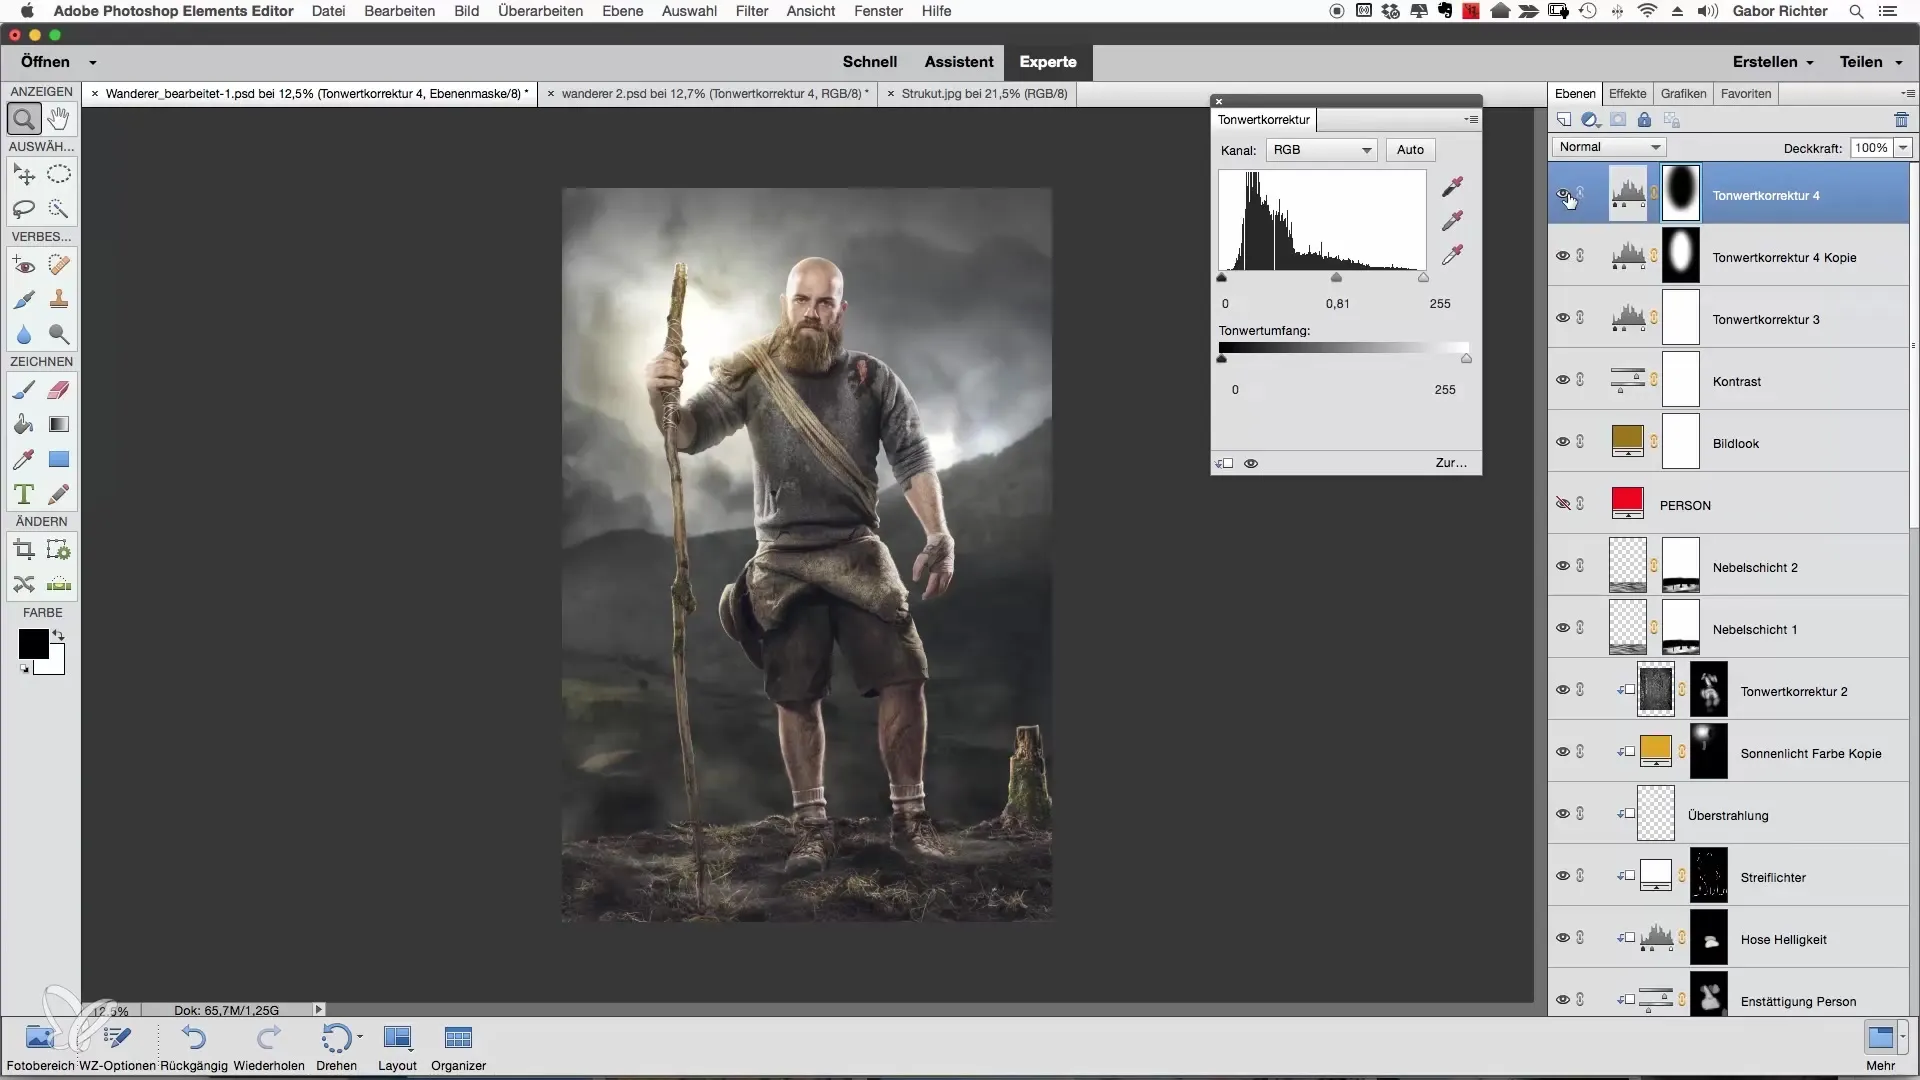
To draw even more attention to the person in the image, you can add a vignette. Draw an ellipse and place it over the person. Change the brightness in the central area to better highlight the focus.
Step 7: Adjust Vignette
You should adjust the ellipse to ensure that the effect does not appear too harsh. Increase the vignette if necessary, and use the levels adjustment to lower the darkness. A well-adapted vignette will make the main subject in the image stand out better.
Step 8: Final Adjustments
Finally, check if you are satisfied with the overall image. You have now created an image look that suits your person and conveys the desired atmosphere. If necessary, you can still adjust contrasts or hues to further optimize your image.
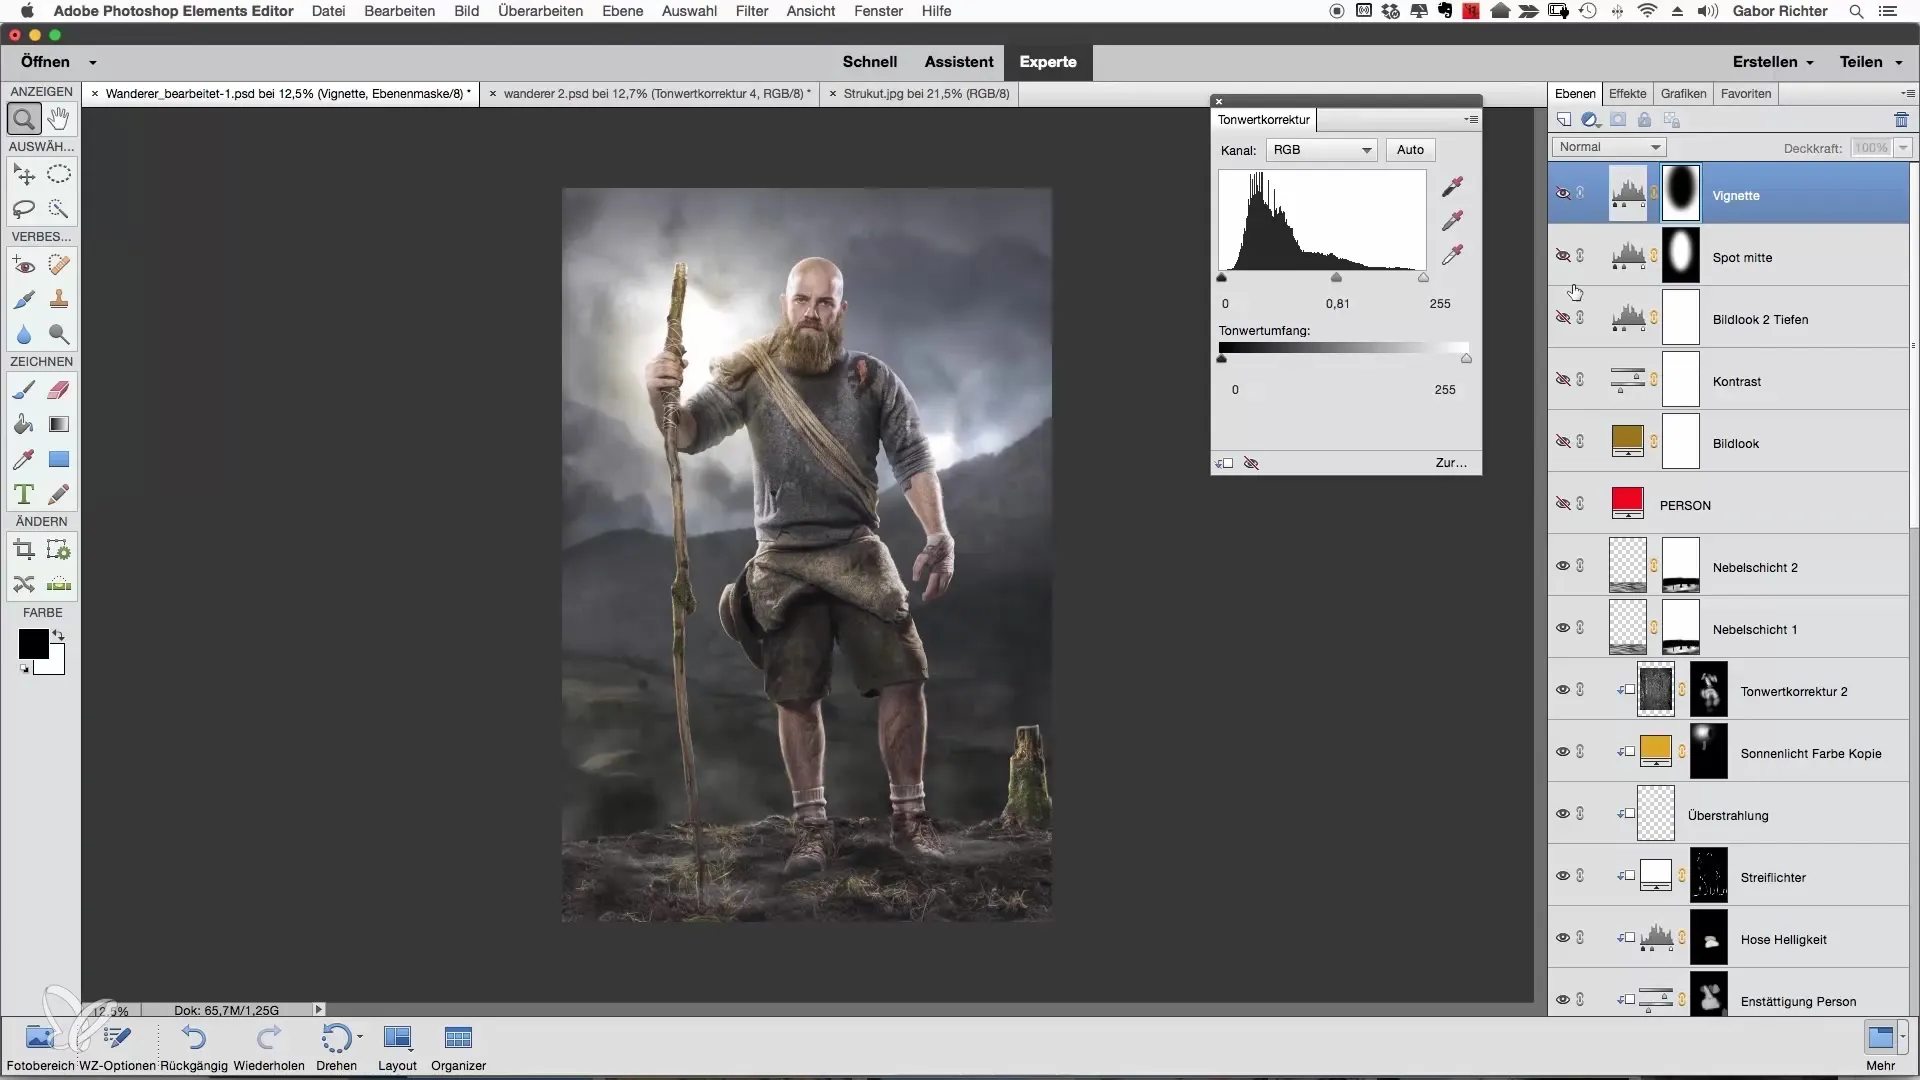
Summary - Adjusting Image Look in Photoshop Elements: A Comprehensive Guide
You have now learned the steps to design the image look in Photoshop Elements. With the proper use of colors, contrasts, and brightness, you can give your image the desired expression and make it unique.
Frequently Asked Questions
How do I choose the right color mood for my image?First, decide whether you want a warm or cool tone depending on the desired mood and feel.
What is the advantage of adjustment layers?Adjustment layers allow you to edit colors and contrasts non-destructively and make changes at any time.
Can I be creative with color selection?Yes, experiment with different colors and shades to achieve the best possible look for your image.
How can I adjust the effect of a vignette?The size and intensity of the vignette can be altered through transformation and adjustment of the levels.
What effect does opacity have on the color layer?Opacity influences how strongly the hue interacts with the image. A lower opacity results in more subtle color adjustments.


