
A freshly photographed outfit often looks too clean, especially when the person is supposed to look adventurous or rustic. You don't have to redo the shoot to change that. With Photoshop Elements, you place a stone texture over the clothing and thereby create dirt, roughness, and uneven stains. In the following, you will learn how to prepare the texture, insert it, blur it, and use it only where it belongs.
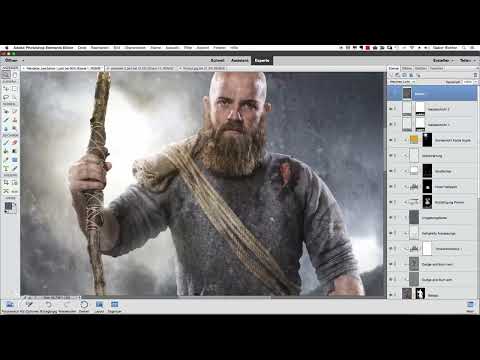
The video is only loaded from YouTube when you play it – data (including your IP address) is then transmitted to YouTube/Google. More in the privacy policy
Key Takeaways
- Use a black-and-white texture so that no unwanted colors are carried over into your image.
- Set the blending mode of the texture layer to "Soft Light". This way, the brightness and shadows of the original photo are preserved.
- Blur the texture slightly (about 3 to 4 pixels) so that the dirt looks patchy rather than overly detailed.
- Work with an inverted layer mask and a low opacity so that you apply the dirt in a targeted and measured way.
- Use a clipping mask so that the texture appears only on the person and not on the background.
- Pay attention to moderation: If it looks too strong, reduce the opacity or remove the layer again.
Step-by-Step Guide
Step 1: Choose the Right Stone Texture
Start with a stone texture that you have opened as an image file. What matters is that it is black and white. You can also take a color photo of the texture and then convert it to black and white. If you kept the colors, they would be transferred to your clothing when overlaid, and that quickly looks unnatural.

Step 2: Insert the Texture into the Image and Move It to the Very Top
Drag the texture into your image document. Make sure the new layer is at the very top of the layers panel so that it covers all the elements beneath it. If the texture doesn't fit, you can rotate or scale it until it covers all the clothing. At the moment, the result probably still looks rather strange. That is normal and will change in the next step.

Step 3: Change the Blending Mode to "Soft Light"
In the layers panel, change the blending mode from "Normal" to "Soft Light". Now the structure appears directly on the fabric, and the highlights and shadows of the clothing are preserved. The result already looks quite good, but still appears very sharp-edged.

Step 4: Blur the Texture
Go to the menu "Filter", then "Blur", and choose "Gaussian Blur". Set the radius to about 3 to 4 pixels. With a gentle blur, the fine, hard patterns disappear, and softer patches remain. Too strong a blur, on the other hand, completely smears the structure, so it is worth experimenting carefully. Then confirm with "OK".

Step 5: Name the Layer and Invert the Mask
Give the layer a meaningful name, for example "Dirt Clothing". This will help you later when you are working with many layers. Then create a layer mask and invert it. As a result, the texture is initially completely hidden, and you decide yourself where it should become visible. With white paint, you then reveal only the areas where the dirt should actually appear.

Step 6: Set the Opacity and Brush Size
Set the brush opacity to about 10 percent. This way, you build up the dirt gradually instead of applying it at full strength right away. For the brush size, a value of about 250 proved effective in the video. For larger areas such as the sweater, this is practical because you can work quickly with it.

Step 7: Strengthen the Structure on the Sweater
Paint over the sweater with the brush. You often have to go over the same spots several times so that the structure becomes clearly visible. Compare the state with and without the texture from time to time by briefly showing and hiding the layer. This way, you can see whether the effect is already right or should be strengthened further.
Step 8: Apply a clipping mask and position the texture
So that the texture is only visible on the person and not in the background, you use a clipping mask. To do this, hold down the Alt key and click between the texture layer and the person layer beneath it. Then move the texture into place so that it sits exactly on the person again.

Step 9: Selectively strengthen the texture on the trousers
The trousers are often the area that looks the cleanest and therefore has the greatest potential. Here you can increase the brush size and work over larger areas. A quick comparison with and without the texture shows you how strong the effect has become. Especially on trousers, subtle dirt on the knees and thighs often looks particularly believable.

Step 10: Subtly refine the hat
The hat can also take a little more dirt. Carefully paint over the surface with the brush until the texture becomes visible. Be careful not to overdo it, because a hat that is too clean looks just as out of place as one that is overloaded.

Step 11: Undo too much and reduce the opacity
It's easy to apply too much. If the result looks exaggerated, you don't have to start over completely. Simply reduce the opacity of the layer until the dirt looks subtle again. Deleting individual brush strokes via the mask is also possible. This flexibility is one of the greatest advantages of this method.
Step 12: Treat the skin only very subtly
You can also use the texture on the skin, which will then look a little dirtier. However, be very restrained, because skin reacts sensitively to too much texture. A light application on the hands or arms is usually enough to achieve a realistic effect.

Step 13: Check the overall result
View the entire image once with and once without the texture. This way you can see whether the change is coherent overall. If it still looks too tame to you, you can duplicate the layer, for example with Ctrl+J. The duplicated layer strengthens the effect without you having to repaint everything. However, make sure it doesn't get too dirty.

Step 14: Try alternative blend modes
If you finally try the blend mode "Overlay", the result becomes noticeably rougher, grittier and more rustic. For a subtle result, however, this is often too much. "Soft Light" therefore usually remains the better choice, because the dirt then looks inconspicuously embedded in the fabric.

Step 15: Achieve a clean final result
In the end, the clothing should look noticeably dirtier and more lively, without the change looking like a filter. You achieve this with a few targeted adjustments and by handling the opacity carefully. Compare the result once more with the original before you save the file.
Summary ??? Creating realistic dirt on clothing in Photoshop Elements
With a black-and-white stone texture, the blend mode "Soft Light", a light Gaussian blur and an inverted layer mask, you create believable dirt in Photoshop Elements. The clipping mask ensures that the texture appears only on the person. It is important that you work with low opacity and check each area individually. This way you can readjust at any time without ruining the photo.
FAQ
Does the texture absolutely have to be black and white?Yes, a black-and-white texture is recommended. A colored texture would transfer its colors to the clothing. However, you can also photograph a colored texture and convert it to black and white beforehand.
What blur value makes sense?In the video, a radius of about 3 to 4 pixels is used. This value softens the texture without blurring it completely. It's best to try out the value on your own image.
Why is the layer mask inverted?By inverting it, the texture is initially completely hidden. You then paint in only the areas where the dirt should appear. This way you keep full control over the effect.
What should I do if the dirt looks too strong?Reduce the opacity of the texture layer or remove individual areas via the mask. You don't have to start over, because the editing remains fully changeable.


