
At first glance, the figure in the image already looks quite tidy, almost too clean for the editor's taste. This is exactly where this tutorial comes in. You will learn how to use a Dodge-and-Burn layer to reshape the skin areas and the body shape, place light and shadow deliberately, and give the subject a subtle, three-dimensional look. All you need is Photoshop Elements, a graphics mouse or a graphics tablet, and some patience, because the technique requires a feel for light that develops over time.
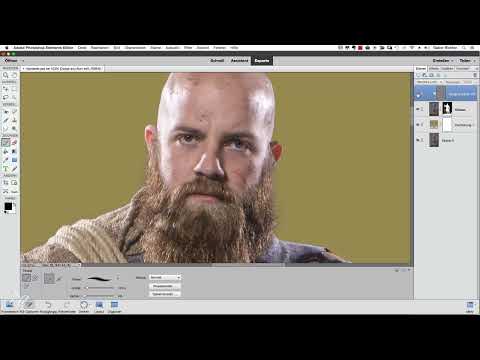
The video is only loaded from YouTube when you play it – data (including your IP address) is then transmitted to YouTube/Google. More in the privacy policy
Key Takeaways
Key Takeaways
- Dodge and Burn works on a separate layer in Soft Light mode that is filled with 50% gray. This way the original image remains unchanged.
- Black with a low opacity darkens and creates depth, white brightens and sets highlights.
- A clipping mask limits the effect to the person, so that the background remains untouched.
- A soft brush with a hardness of 0 prevents harsh transitions.
- With low opacities of about 3 to 5%, you work step by step and keep control over the result.
Step-by-Step Guide
1. Create the Dodge-and-Burn Layer
Start by creating a new layer that serves as the Dodge-and-Burn layer. Drag the default object in the Layers panel onto the trash icon so that no unwanted layer is left over. Then hold down the Alt key and click the New Layer icon. This opens a dialog window in which you can give the layer a name right away. Name it, for example, "Dodge and Burn soft", because the soft effect is crucial for skin editing.

2. Activate Soft Light Blend Mode and 50% Gray
In the dialog window, change the mode from Normal to Soft Light. This mode ensures that light and dark brush strokes act gently on the underlying image and do not create harsh contrasts. As soon as you select Soft Light, the option to fill the layer with 50% gray appears. Activate the checkbox. A layer filled with neutral gray does not change the image at first, so you only work where you explicitly want to.

3. Place the Layer Above the Person and Name It
Make sure the Dodge-and-Burn layer is above the person's layer in the layer stack. Only then can it take effect later. Also name the person layer, for example "Person Form". Clear naming helps you keep track, especially in more complex projects.

4. Set Up the Brush for Soft Transitions
Select the Brush tool and enlarge the brush tip so that you can see the effect clearly at first. For demonstration purposes, you should initially set the opacity to 50%. However, the hardness is important: open the brush settings and set the hardness to 0%. A hard brush would leave visible edges that look unnatural in the finished image. With a soft brush, on the other hand, the strokes blend imperceptibly into their surroundings.

5. Darken with Black and Brighten with White
In this layer, black stands for shadows, white for highlights. So paint with black where depressions are meant to appear, and switch to white for brightening. Switching between the two colors is part of the working rhythm. Make sure to reduce the opacity to about 5% for the actual fine work. This way you can build up slowly in several passes, instead of overdoing it with a single strong stroke.

6. Create a Clipping Mask and Limit the Effect
At first, every stroke affects the entire image. But you don't want that, because the background should remain untouched. To do this, right-click the Dodge-and-Burn layer and choose Create Clipping Mask. The layer now only affects the person underneath. Alternatively, you can hold down the Alt key and click on the dividing line between the layer and the person. Both ways lead to the same result, and you can release the clipping mask at any time by repeating the same procedure.

7. Modeling Facial Features with Eyebrows, Nose, and Eye Sockets
Now zoom into the face and keep the brush hardness at 0%. The opacity stays at about 5%. Start with the facial features: Darken the eyebrows slightly with black so that they stand out more. You model the nose by lightening the middle area with white and darkening the side contours with black. You may also darken the eye sockets slightly. This technique looks authentic, since shadows naturally form in the sockets. The forehead can also be emphasized a bit with subtle shadows in the forehead wrinkles. At every step, it is worth comparing with the original state: Briefly hide the layer to see what has changed.

8. Thinking of the Head as a Ball
A helpful mental image when modeling is to think of a ball. In the middle of a ball is the brightest point, and it gets darker toward the edge. Apply this principle to the head: Bring out the center with white and darken the edges with black. This gives the head more spatial form. If dark spots appear that you don't like, you can specifically lighten them with white. This is also possible at any time afterwards, because the Dodge and Burn layer remains flexible.

9. Emphasizing Cheeks and Beard
For a grittier look, you darken the cheeks a bit. The editor already likes the beard, but wants it to stand out even more clearly. Therefore, you work with black on the areas around the beard and on its contours. Then briefly increase the brush opacity to about 10 to 15% to paint individual highlights into the hair. Afterwards, you can further emphasize the structure of the beard with targeted darkening. Make sure to lower the opacity again afterwards so that the changes remain subtle.

10. Strengthening the Eye Contours
To draw more attention to the eyes, you strengthen their contours. Choose a smaller brush with a size of about 5 pixels, leave the hardness at 0%, and set the opacity back to around 5%. Paint with black along the edges of the eyelids. The effect resembles a subtle eyeliner. At the same time, you can lighten the reflections in the eye with white so that the eye looks alive. Afterwards, compare the result with the overall picture, because a good focus only arises from the interplay of all elements.

11. Setting Reflections and Highlights
In the next step, you work on the light reflections of the face. You may carefully lighten the reflections on the forehead, nose, and cheekbones. Additionally, you can add more highlights if the overall impression calls for it. To do this, enlarge the brush and paint with white over the areas that would catch light. Then look at the image as a whole and then at the face alone to check the effect. This way you can quickly tell whether the lights work together harmoniously.

12. Modeling Arms and Hand
The arms can also be shaped with Dodge and Burn. Reduce the opacity to about 3% so that you can work very finely. Darken the arms in the inner areas and lighten the outer edges. This way the arm looks rounder. On the hand, you can create more contrast with black and add a rim light effect with white. This effect emphasizes the shape of the fingers and knuckles. It is important to approach the effect slowly, because with strokes that are too strong, the result quickly tips into the exaggerated.

13. Shaping Calves and Adding Rim Lights
For rounder-looking calves, you lighten the middle of the muscle areas and darken the outer areas. At the transition to bones and tendons, rim lights help to further emphasize the shape. To do this, switch between black and white as needed, depending on whether you want to add shadows or light. Rim lights along the contours in particular make the body look significantly more three-dimensional. Afterwards, compare the version before and after editing to see the progress.

14. Making Reflections Softer
Finally, check all skin areas. A reflection that has become too tight can be toned down with a softer gradient. To do this, spread the reflection out a little and work over it with low opacity. After that, you should not rework the result but let it take effect. Often it is enough to stop at this point, since too many corrections quickly make the image look unnatural.
Summary ??? Sculpting Skin with Dodge and Burn in Photoshop Elements
You have learned how to remodel the skin and body shape of a subject using a Dodge and Burn layer in Soft Light mode, filled with 50% gray. A clipping mask ensures that only the person is affected. With a soft brush and low opacity, you build up shadows and highlights step by step. Facial features, body shapes, and reflections all benefit equally. Dodge and Burn takes some practice, but rewards you with great creative freedom. In the next step, the same technique can also be applied to clothing to add further contrast.
FAQ
What is the advantage of a separate Dodge and Burn layer?The layer does not permanently change the original image, so you can correct it or reduce the effect at any time.
Why should the layer be filled with 50% gray?Neutral gray in Soft Light mode initially has no visible effect. Only your strokes with black or white change the image.
Why is the brush hardness set to 0%?A soft brush creates smooth transitions. Hard brushes produce visible edges that look unnatural.
What happens if I don't create a clipping mask?Then shadows and highlights affect the entire image, including the background. The clipping mask limits the effect to the person.
How can I release the clipping mask again?You right-click on the layer again and choose the option to remove the clipping mask. Alternatively, you can also hold the Alt key and click on the dividing line.
Why do you work with low opacity?With 3 to 5%, you can build up slowly over several passes. The result looks more natural than a single, strong stroke.
How can I tell if my editing is too strong?Hide the Dodge and Burn layer regularly and compare the result with the original. It also helps to view the face and the overall image separately.


