
You've redefined your image crop and suddenly there are empty spots along the edges where there are no pixels left? This often happens as soon as you crop a photo or change the perspective. In this tutorial, I'll show you how to close such gaps in Photoshop Elements using Transform and the Clone Stamp, without the result looking artificial.
The video is only loaded from YouTube when you play it – data (including your IP address) is then transmitted to YouTube/Google. More in the privacy policy
Using a photo of a person sitting on a stick as an example, you'll see which areas are affected, how to fill them step by step, and what to pay attention to during the fine-tuning.
Key Takeaways
- Gaps at the edge of the image can be closed quickly with a selection and the Transform command, as long as the distortion doesn't become visible.
- Areas with important details, such as shoes or background structures, shouldn't be distorted, but edited with the Clone Stamp instead.
- With the Clone Stamp, an opacity of 60 to 80 percent and several passes produce a cleaner result than a single pass at 100 percent.
- Repetitions in the copied material quickly stand out. So make sure to use different source areas and remove noticeable duplications.
Step-by-Step Guide
Step 1: Identify the Problem Areas
Before you get started, take a calm look at your image. Not every empty area has to be corrected right away. An area that will be cut out or cropped later anyway can possibly wait for the time being. Still, it's worth filling such spots too, so that your image remains coherent as a whole.
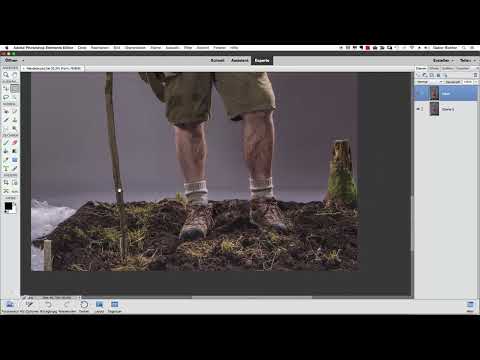
In the example, there are three problem zones: an area on the left, an area at the bottom, and a distracting foil that has to be removed. The gap on the left seems harmless at first, but it's a good introduction to the technique.

Step 2: Create the Selection for the Left Gap
Choose the Selection tool and mark an area directly adjacent to the empty space. It's important that your selection extends to the edge and fully encompasses the gap. At the same time, make sure your selection doesn't reach too far into the subject. In the example, the selection deliberately ends just before the person's hand, because distorted pixels would be immediately noticeable right there.
The selection should extend all the way down so that the gap can be closed cleanly later.
Step 3: Transform and Distort the Section
With the key combination Command plus T on a Mac or Ctrl plus T on Windows, you activate the Transform command. To stretch the image area, drag one of the edge handles. In the example, the pixels are pulled to the left until the gap is closed.
Once the area is completely filled, confirm the transformation with the Enter key. Alternatively, you can click the checkmark in the options bar. Afterwards, deselect with Command plus D or Ctrl plus D.
Step 4: Critically Check the Result
Now zoom in on the edited spot. You'll notice that the pixels are slightly distorted. When viewed from a normal distance, this generally isn't noticeable, especially if the area is of secondary importance. What matters is that the transition looks coherent overall. The subject stays at the center, and the viewer's attention is directed there.
Step 5: Close the Bottom Gap in the Same Way
You approach the bottom area similarly. Make a selection that includes the area below the shoes, but not the shoes themselves. Working close to the soles of the shoes is fine, but you shouldn't include the shoe itself. The stick may be included in the selection, since it remains part of the scene anyway.
Activate the Transform command again with the corresponding key combination, pull the pixels downward, and confirm with the Enter key. Then deselect again.

Step 6: Edit the Area with the Clone Stamp
The foil on the right side can't simply be distorted. If you pulled the pixels further to the left, the distortion would be clearly visible, especially on the left shoe, which is supposed to remain visible. This is where the Clone Stamp helps.
First, zoom in on the affected area. Then select the Clone Stamp tool and adjust the size in the tool options. In the example, it is about 200 pixels, which suits this image section well. Set the opacity to 60 to 80 percent so that you don't layer individual pixels on top of each other harshly.

Step 7: Define the source
Hold down the Alt key and click on the spot you want to use as the source. This source should have similar structures, colors, and brightness as the area you want to fill. Release the Alt key, move the stamp into the gap, and paint over the area.

Step 8: Multiple passes instead of one harsh transition
At an opacity of 80 percent, the first pass often still looks a bit weak. Therefore, go over the same spot several times. This way the area builds up step by step, and you achieve a softer transition than with a single stroke at 100 percent.
Change the source regularly so that the structure doesn't become too uniform. If a stroke fails, you can remove it with Undo, that is, Command plus Z or Ctrl plus Z, and start a new attempt.

Step 9: Incorporate irregularities and avoid repetitions
When copying, make sure you don't always draw from the same area. If you take pixels from different spots, a repetition is hardly noticeable. With larger areas, you would otherwise quickly see identical patterns, for example a conspicuous clump of earth that appears twice in the image.
If you discover such a duplication, you can deliberately cover it with the Clone Stamp or edit the affected spot again with a different source. This way you distribute the material more evenly.

Step 10: Check the overall picture
Finally, zoom out again and look at the image as a whole. If it looks coherent, you've made it. Pay particular attention to the spots you edited last, because small inconsistencies often still arise there. Touch-ups with the Clone Stamp are possible at any time.
A look at the new image section shows that the subject is now more centered in the scene. The legs appear slightly further to the right, which doesn't harm the overall impression, because the stick balances the subject.

Summary – Patching missing pixels in Photoshop Elements: Step by step
Missing pixels after cropping are no reason to panic. With the Transform command, you can close larger gaps in non-critical areas quickly and easily. For areas with visible details, the Clone Stamp is better suited, provided you work with moderate opacity, changing sources, and multiple passes. Finally, check the result in the overall picture, and you'll get a correction that isn't noticeable in everyday use.


