
Imagine you have perfectly isolated a subject, but the background simply doesn't fit. This is exactly where this tutorial comes in. You will learn how to remove an old background, insert a new landscape, scale it to fit, and create believable depth with tonal correction, layer masks, and blend modes. In the end, you will have not just a new background, but a completely rebuilt image world.
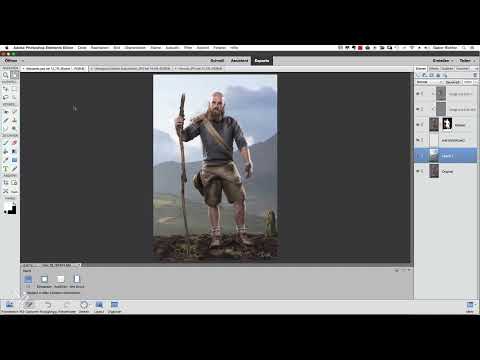
The video is only loaded from YouTube when you play it – data (including your IP address) is then transmitted to YouTube/Google. More in the privacy policy
This lesson is the start of a larger project. From here on, a cutout becomes a real image composite. Before you get started, you should keep an eye on your layers panel, because the more layers you create, the more important a clean structure becomes.
Key Takeaways
- It's best to delete a layer you no longer need right away by dragging it to the trash.
- Give your layers clear names, for example "Original", "Background", "Mountains", or "Sky". This way you keep an overview as complexity grows.
- With an empty separator layer, you can organize areas in the layers panel, even though it has no function itself.
- When scaling, hold down the Shift key to work proportionally. With the Alt key, you scale from the center.
- A tonal correction with a gradient in the layer mask creates a natural darkening in the lower area and thus conveys depth.
- For the sky, your own photos work well, which you blend in using the Multiply blend mode.
Step-by-Step Guide
Removing the Old Background
Start by getting rid of the existing background area. In the example, it is a beige to orange color fill, which was helpful for the cutout but is no longer needed now. Grab the corresponding adjustment layer and drag it toward the trash. This removes the distracting area completely from the document, and you continue working from a tidy starting point.

Securing and Naming the Original Layer
Next, hide all layers so that you can clearly identify the base layer. This layer is your starting point. Name it "Original" right away. That sounds like a small thing, but it prevents mix-ups later when you stack several versions of the subject, such as a person at different stages of editing, on top of each other.

Creating a Separator Layer for the Background Group
Now create an empty layer and name it "Background". This layer has no function in the image; it serves exclusively as a separator in the layers panel. Everything you create below this layer belongs to the background. Especially with many layers, this structure makes orientation much easier. You can hide the separator layer at any time if needed.
Inserting the Background Scene
Now it's time for the new landscape. In the example, the scene comes from a trip and may be used for the training video. Drag the image into your document and release it there. The scene immediately appears as a new layer in your composite. When inserting, make sure that you actually own the rights to images from other sources or have permission to use them.

Arranging the Layer Correctly and Enlarging the Workspace
For organizational reasons, move the background scene below the "Background" layer. Then zoom the view out a little so that you have enough working area around the image. A large working area is indispensable when scaling and positioning, because otherwise you can't see the edges of the layer well.
Scaling the Background Layer
Now select the background layer and activate the transformation with Command plus T on the Mac or Ctrl plus T on Windows. Hold down the Alt key and the Shift key and drag a corner of the frame. The Shift key ensures proportional scaling, the Alt key scaling from the center.
The goal is a specific effect. The trees in the lower area are very close and would destroy the impression of distance. Therefore, scale far enough that these foreground elements disappear from the image, while the mountains in the background remain clearly visible. This creates the impression of distance, and the landscape appears to rise slightly.

Confirm the Transformation
When the position and size are right, confirm the transformation with the Enter key. Take your time looking at the result, because this is the point where it is decided whether the background will look harmonious later on.
Create Depth with a Levels Adjustment
So that the foreground does not look flat, you need some depth. To do this, create an adjustment layer and choose Levels. Darken the area strongly until the effect is clearly visible. You don't have to get everything perfect, because the mask will limit the effect in a targeted way in the next step. Use an area you like as a reference. Every adjustment layer automatically comes with a layer mask, which you will now use.

Limit the Darkening with a Gradient
Take the Gradient tool and make sure that black and white are active as the foreground and background colors. Select the layer mask of the Levels adjustment. Hold down the Shift key and drag the gradient from bottom to top. At the bottom the mask stays white, at the top it becomes black. Everything that is black remains invisible. The darkening therefore only affects the lower third and creates the desired canyon effect.
One advantage of this method: you can readjust the strength of the darkening at any time in the Levels settings. If it becomes too dark for you, pull the values back until the depth feels right.

Insert the Sky as a Separate Layer
The mountains are now well positioned, but the sky is not convincing yet. Here it is advisable to use your own shots. It is best to photograph skies yourself that are free of distracting buildings. Such stock materials are much easier to fit into your composite later than images with lots of details on the horizon. In the example, the source material was unfortunately full of houses, which are laborious to retouch.
Position the sky layer below the mountains, name it "Sky," and rename the mountain layer accordingly for a better overview.

Adjust the Sky and Change the Blend Mode
Scale the sky so that it fills the upper area of the image well. You can also distort the layer slightly until the course of the horizon matches the landscape. Then confirm the transformation. Set the blend mode of the layer to Multiply. This makes light areas of the sky transparent, and the sky seems to blend seamlessly into the scene.

Refine the Sky with a Mask
If the sky extends too strongly over the mountains in some places, a layer mask helps. Add a mask to the sky layer and choose a soft brush with black color. The hardness should be at zero, the opacity at about 15 percent. Then carefully paint over the areas that show too much structure or appear too prominent. With low opacity you work gently, and you can build up the effect bit by bit.

Check the Overall Result
Now zoom far out and look at the complete image. Check whether the mountains, the depth of the canyon, and the sky together make a coherent scene. Also pay attention to how the cutout subject looks in its new surroundings. In the example, the person fits well into the landscape, even though some fine-tuning of light and color is still to follow.

Test Alternative Blend Modes
Feel free to experiment with other blend modes. Overlay or Soft Light can deliver better results with a sky that is less bright. With very bright backgrounds, Multiply usually remains the right choice so that the structure of the sky is preserved. So it always depends on your specific material.

Tidy Up the Layers
Finally, it is worth taking a look at the Layers panel. Make sure that the area of the background layers stays organized. Many individual layers can be sensibly merged later, so that you keep your composite clear and can continue editing the file more easily.
Summary ??? Positioning a Background in Photoshop Elements: Step by Step
You have learned how to remove a distracting background, insert a new landscape, and scale it to fit. With a levels adjustment and a gradient mask, you create depth, and with your own sky material, you complete the scene. The Multiply blend mode ensures that everything blends together harmoniously. Keep your layers clearly named and organized from the start, because the complexity of an image composite grows quickly.
FAQ
How do I remove an old background that is no longer needed?Drag the corresponding layer into the trash using drag-and-drop, or delete it via the menu of the Layers panel.
Why should I create an empty layer as a separator?The empty layer structures the Layers panel. Everything below it belongs to the background, and you keep an overview even with many layers.
Which keyboard shortcut do I use to scale a layer?On Mac you use Command plus T, on Windows Ctrl plus T. Holding the Shift key preserves the aspect ratio, and with Alt you scale from the center.
How do I create a darkening only in the lower area of the image?Create a levels adjustment, darken the image strongly, and drag with the Gradient tool from bottom to top in the layer mask. The upper part turns black and thus becomes invisible.
Why are your own sky photos better suited?Your own photos can be taken specifically for your scene, for example without distracting buildings. This means you have to retouch less and can adapt the sky more easily.
What does the Multiply blend mode do for the sky?Bright areas become transparent, dark ones remain visible. This way the sky appears to blend seamlessly with the landscape.
When should I try other blend modes such as Soft Light?With a less bright sky, Soft Light can deliver better results. Try different modes and compare the effect.


