
Your image is basically finished, but one last finishing touch can turn a good picture into a truly impressive one. That is exactly what the free Color Efex filter from Nik is suited for, as it helps you add fine sharpness and strong contrast after the fact. In this tutorial, I'll show you how to split up the image, edit the background and the person separately, and then merge the results back together in Photoshop Elements.
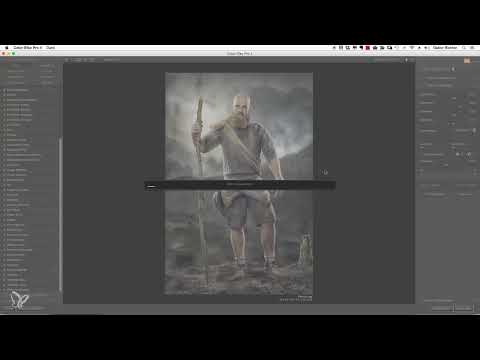
The video is only loaded from YouTube when you play it – data (including your IP address) is then transmitted to YouTube/Google. More in the privacy policy
Key Takeaways
Key Takeaways
- Color Efex is a free filter that is ideal for the final finishing touch.
- You save your image twice: once as the background and once as the person.
- The background and the person get different filters and strengths.
- Strong filters often look too harsh, so you work with reduced opacity.
- With layer masks, you selectively blend in the effect exactly where it should take effect, keeping edges and the face balanced.
Step-by-Step Guide
Step 1: Save the image twice
Before you work with the filter, save your finished image twice. To do this, go to "File" and "Save As". Save one version as the background and a second one as the person, each as a JPEG at the highest resolution. That way, you have a separate file for each area that you can edit independently of each other.

Step 2: Open the background in Color Efex
Start the Nik filter and open the file with the background image via "Open Images". Feel free to test several presets, because there is a suitable look for almost every image. For the background, a soft, painterly style is a good choice, letting the surroundings recede pleasantly.

Step 3: Choose the right look for the background
Take your time looking at the preview and decide on a look that you like. In the video, a painterly effect is chosen that makes the background softer and a bit more atmospheric. On the right side, further presets can be set, but you can also leave them unchanged if you are happy with the result. Then save the file. It will be overwritten directly.

Step 4: Place the background in Photoshop Elements
Switch to Photoshop Elements and place the edited background file via "File" and "Place". Afterwards, you can see how the background looks in the overall image. This step quickly shows you whether the painterly look suits your image.

Step 5: Sharpen the person with the Detail Extractor
Now open the same template again in Color Efex, but this time the file with the person. Choose the "Detail Extractor" filter. It brings out high-contrast sharpness and clearly defines fine structures. Your goal is to make the details visible without overloading the image. Set the opacity subtly, around 50 percent in the video.

Step 6: Test the Tonal Contrast and tone it down
In the next step, you can add the "Tonal Contrast" filter. It brings strong contrast into the image. With this image, however, the effect at full strength is too harsh and would literally ruin the picture. Therefore, reduce it significantly. Since this is mainly about the person, you can concentrate on their appearance and hide the background.

Step 7: Place the person file and simplify the layer
Place the edited person file in Photoshop Elements via "File" and "Place". So that you can still adjust the filter effect later, you first have to simplify the layer. To do this, click "Layer" at the top and choose "Simplify Layer". Only then can the settings be edited as desired.

Step 8: Check the effect of the filter on the cutout
To get a feel for the effect, activate the layer mask of the cutout. With an Alt-click on the mask, you can see the mask directly in the image. Compare the subject before and after. The effect can look too strong in some places, such as the glare in the background. In that case, reduce the opacity to about 40 percent until the result looks harmonious.

Step 9: Adjust the layers of the background layer
Now it's about the interplay of the two layers. Take the background layer and reduce its opacity to about 50 percent so that it no longer looks fully opaque. The person gets their own share of the overall image in the process. This way the painterly background remains visible but doesn't dominate.

Step 10: Paint in the sharpness selectively with layer masks
Delete the existing mask on the person layer completely. Then create a new mask and invert it so that it is initially completely hidden. With a soft brush, you now paint exactly where you want to bring back the sharpness. To do this, reduce the brush opacity, to about 20 percent in the video. Work your way forward bit by bit and keep adjusting the brush size.

Step 11: Refine the face and clothing
Concentrate on the face, which forms the most important area of the image. Make the brush smaller when you work in corners or on fine transitions. The clothing also benefits from the contrast sharpening, so you mask it generously as well. Always keep the overall picture in view.

Step 12: Fine-tune the effect
If the effect is pronounced, lower the opacity of the mask, to about 30 percent in the video. This way you bring back the fine details without overloading the image. Paint in the inner area of the subject and avoid working along the contour. There, the result can quickly look unattractive and artificial. Use a smaller brush on sensitive areas and proceed carefully.

Step 13: Compare the result with the original
Finally, you compare the state before and after editing. Look at the subject as a whole and pay attention to the balance between background and person. If you like the overall picture, you can leave the result as it is.

Summary ??? Nik Color Efex Finishing: Sharpness and Contrast in Photoshop Elements
With the free Color Efex filter from Nik, you get a finishing touch that gives your subject depth and sharpness. The key is to edit the background and the person separately, first reduce strong filters, and control the effect selectively via layer masks. Work carefully, compare regularly with the original, and stop when the image feels right to you.
FAQ
What costs are involved with the Nik filter Color Efex?The filter is described as free in the video and can be obtained online.
Why do you save the subject twice?This gives you one file for the background and one for the person. Both can then be edited with different filters and strengths.
Why shouldn't you apply Tonal Contrast at full strength?With this subject, the effect at full strength looks too harsh and can ruin the image. A reduced opacity delivers a more balanced result.
Why does the layer have to be simplified before editing?Only after simplifying can the filter effect and the layer mask be adjusted as desired.
Why shouldn't you paint along the contour when masking?At the contours, the result can quickly look ugly and unnatural. It is better to work in the inner area of the subject.


