Imagine you have only one studio light, but your portrait looks too dark on one side. This is exactly where a simple reflector comes in. With it, you bring light back into the shadow areas without having to set up a second lamp.
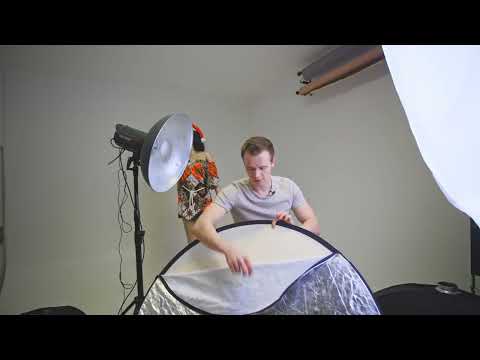
The video is only loaded from YouTube when you play it – data (including your IP address) is then transmitted to YouTube/Google. More in the privacy policy
Introduction
Many photographers start with a single light source, and that's perfectly fine. Your own setup with several flashes costs money, time, and space. But you don't have to upgrade right away if you want to improve your lighting. A reflector, which you can get for very little money, can mimic the effect of a second lamp.
In this tutorial, you'll learn how to achieve balanced lighting with a main light source and a reflector. You'll find out how to use the distance, the side, and the position of the reflector to control contrast. I'll also show you how to use the reflector as an improvised light modifier.
Key Takeaways
- In the studio, a reflector replaces a second light source by bouncing existing light back onto the shadow side.
- The distance to the subject determines the brightness: the closer the reflector is, the more light comes back.
- The silver side reflects significantly more strongly than the white side. The white side delivers a softer, more neutral light.
- With a translucent fabric, such as the inner panel of a 5-in-1 reflector, you can simulate a large round light modifier.
- The amount of light can't be controlled as precisely as with a second lamp. So experiment with distance and angle until the result is right.
Step-by-Step Guide
Step 1: Establish the Main Light Source as a Starting Point
Start with your single studio light. It forms the main light and determines the basic direction from which the light falls on your subject. Set it up so that a face is evenly lit, but dark shadows form on one side. This shadow side is exactly what you'll bring back with the reflector.

Step 2: Position the Reflector on the Shadow Side
Hold the reflector on the side of the subject facing away from the lamp. In the example in the video, it's the right half of the face. The reflector throws the light of the main lamp back onto the face and gently brightens the shadows. This way you bring more light into the area without setting up another light source. Make sure the reflector itself doesn't protrude into the frame.

Step 3: Control the Intensity via Distance
You regulate the brightness of the fill light through distance. If you move the reflector closer to the subject, the reflected light becomes more intense. If you place it farther away, the fill becomes weaker. This is the simplest way to fine-tune the contrast. Move the reflector slowly and watch the result until the shadows are brightened the way you imagine.

Step 4: Choose the Right Side of the Reflector
Many reflectors have several sides with different surfaces. The silver side reflects significantly more light than the white one. In return, the light from the silver side looks harder and more contrasty. The white side is softer and more neutral. In the studio, I usually use the silver side when I need more light. If the subject should look softer, choose the white side. Test both variants, because that's the quickest way to change the look.

Step 5: Use the Reflector as a Large Light Modifier
If you don't have a suitable light modifier, you can re-stretch a 5-in-1 reflector and use the inner, slightly translucent cover. Then hold the reflector in front of the light source so that the light passes through the fabric. The result is a soft, large-area light, similar to a round softbox light modifier. You don't need an expensive light modifier for this, just a simple reflector and a bit of creativity. Many such tricks work on the same principle.

Step 6: Securing the Reflector Safely
To keep the reflector stable, attach it to a tripod or a holder. There are special clamps and holders for this that can be mounted on the tripod. Make sure the reflector doesn't slip during the shot, because even a small shift changes the light distribution. If you hold the reflector freely in your hand, you can work more flexibly, but you have to stay calm and focused to get consistent results.

Step 7: Using the Reflector Outside the Studio as Well
A reflector doesn't only work in the studio. Outdoors it is just as useful, for example to brighten shadows on the face or to redirect sunlight back onto the subject. Especially for portraits, a reflector is part of the basic equipment. If you shoot a lot, it's worth always having a reflector with you.

Conclusion on Handling the Reflector
You don't have to buy several flashes right away to shoot with balanced lighting. A reflector helps you brighten shadows and control contrast. The downside is that you can't control the amount of light as precisely as with a second lamp. That's exactly why it's worth experimenting with distance, side, and angle. Get a suitable reflector for your studio and use it regularly.
Summary – Controlling Light Precisely with the Reflector in the Studio
With one main light source and a reflector, you can achieve balanced lighting. The reflector brightens the shadow side, and you control the intensity via the distance. The silver side delivers more light, the white side a softer result. With a translucent fabric, you can also recreate a large light modifier. A reflector is therefore a simple and inexpensive tool that can replace a second lamp both in the studio and outdoors.
FAQ
Can I really use a reflector as a replacement for a second lamp?Yes, for many situations a reflector is enough. It throws existing light back onto the subject and thus brightens the shadow side. However, the effect is softer and less controllable than with a second lamp.
Which side of the reflector should I choose?The silver side reflects significantly more strongly and is suitable for more light. The white side looks gentler and more neutral. Test both sides to find the look you want.
How do I control the brightness of the fill light?Through distance. If you bring the reflector closer to the subject, the fill light becomes stronger. If you move it away, it becomes weaker.
Can I recreate a light modifier with a reflector?Yes. If you hold the translucent inner panel of a 5-in-1 reflector in front of the light source, a soft, large-area light is created. This works even without an expensive light modifier.
Is a reflector also suitable for outdoor shots?Yes, outdoors it helps especially with portraits, to brighten shadows on the face or to bounce sunlight back onto the subject.


