
A portrait is almost perfect, but a single strand of hair across the face keeps drawing the eye away. In GIMP, you can remove such distractions without destroying the original image. This guide shows you two methods from Marco Kolditz's video tutorial: one approach using frequency separation with a high-pass filter and one that works with just the Healing tool.
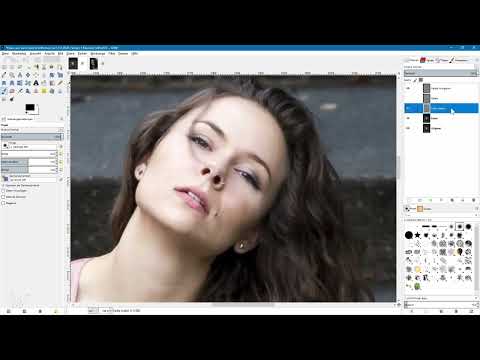
The video is only loaded from YouTube when you play it – data (including your IP address) is then transmitted to YouTube/Google. More in the privacy policy
Key Takeaways
- Frequency separation splits your image into a detail layer (structure) and a color layer. This lets you remove hair without distorting skin tones.
- The Gaussian blur radius and the high-pass filter radius must be identical, otherwise colors and details won't match.
- With the Healing tool, you hold down the Ctrl key to pick up a source from a hair-free area. Be careful not to create repeating patterns.
- Color corrections are made on a transparent layer using the color picker. The option "Sample merged" must be enabled for this.
- All corrections are on their own layers. You can go back at any time, hide layers, or delete them.
Step 1: Examine the Original Image
Before you get started, you should check the image carefully. Open your portrait in GIMP and use the Zoom tool to zoom in on the spot where the strand of hair runs. Only up close can you tell which little hairs are really distracting and which ones you want to deliberately leave. Especially in portraits, fine hairs around the eye area are often more problematic than a large strand that looks natural.

Step 2: Duplicate the Original Image
The original stays untouched when you work this way. Select the original layer in the Layers palette and click the "Duplicate layer" icon twice. You get two copies. Rename the top layer "Details" by double-clicking it, and the middle one "Color". Then hide the detail layer using the eye icon so that you initially work only on the color layer.

Step 3: Blur the Color Layer
Select the "Color" layer and open the Filters menu, then Blur and Gaussian Blur. In the preview window, you navigate through the image with the crosshair. Increase the blur radius until the details in the face disappear and only the color gradients remain. In this example, a value of 10 pixels worked well. For large shots where the model is only visible in the center, smaller values are often enough. If the image shows the whole face, on the other hand, you need a higher radius. You should definitely remember this value, because you will need it in the next step.

Step 4: Bring Back the Details with the High-Pass Filter
Show the detail layer again and select it as the active layer. Then open Filters, Generic and the High-Pass filter. This entry only appears if you have installed the high-pass plugin. There is no preview in the dialog. In the "Filter radius" field, enter exactly the value you used for the Gaussian blur, so 10. You should also disable the "Keep Original Layer" option. This way, the filter is applied directly to the detail layer and no additional layer is created.
You can recognize the result by the fact that the detail layer appears mostly in a medium gray and only shows structures and contours.

Step 5: Blend the Layers and Check the Result
Now details and colors have to be combined. Activate the detail layer and, in the layer mode menu, choose the mode intended for combining. In the video it is referred to as "Faser Mission", which means the layer mode that transfers the structure onto the color layer. The quickest way to find out what it is called in your GIMP version is via the list of layer modes. Once you have chosen the mode, the image looks natural again.
As proof, you can duplicate the original image and drag it all the way to the top. If you show and hide it, the image remains unchanged. This confirms that the detail and color layers together produce the original again. The frequency separation is thereby successfully completed.

Step 6: Create a correction layer for the structures
Now you remove the strand of hair via the detail layer. So that you don't work destructively, you duplicate the detail layer and name the copy, for example, "Correct details". You hide the other detail layer; it serves as a backup. If you make a mistake, you can fall back on it at any time.

Step 7: Set up the Healing tool correctly
Select the Healing tool and set the brush size to suit the subject. In the example, a value of about 12 was well suited. For very fine hairs, the brush can be even smaller. Also important are the paint dynamics, which you set to "Dynamics Off" so that size and opacity stay the same while painting, and the alignment, which you set to "aligned".

Step 8: Remove the hair structure with the Healing tool
Hold down the Ctrl key and click on a hairless area to take it as the source. Release the key and then paint over the hair that is supposed to go. You can pick a new source at any time. Make sure you don't always copy from the same spot, because otherwise recurring patterns appear that quickly stand out. You have to work especially carefully around the nose, because edges appear there quickly.
The results look blurry at first. That is normal, because you are only removing the structure on the detail layer. You correct the color differences separately in the next step.
Step 9: Correct the colors on a transparent layer
Create a new, transparent layer above the color layer and name it, for example, "Paint color". Then select the Paintbrush tool and the Color Picker. In the Color Picker you have to activate the option "Sample merged". Otherwise the picker would read the empty transparent layer, which contains no color. With the Ctrl key held down, you pick a skin color from the surrounding area with the picker and then switch back to the brush.
A very soft brush ensures smooth transitions. Reduce the opacity to about 75 percent or even less so that you can build up the colors gently. Keep picking up new color tones from the surroundings, especially in shadow areas. Work your way forward bit by bit and take your time.

Step 10: Refine light and dark areas
Regularly look at the overall image, because close-ups are easily deceptive. A helpful tool is a comparison, which you create by duplicating the original, moving it to the top and naming it "Comparison". That way you can see before and after at a glance. If light spots remain, this is often due to the detail layer. In this case, you switch to the detail layer and correct there with the Healing tool. You correct dark spots on the transparent color layer by picking up a nearby skin color and painting over them with low opacity. In the area of the eyes and the nose you should be especially careful so that no new irregularities appear.

The second variant: Working only with the Healing tool
With this method you forgo frequency separation. This is particularly suitable when the face is larger in the image and finer hairs become visible. Again create a copy of the original and name it, for example, "Correction". Select the Healing tool with a small brush size and a brush that is not too soft, but also not too hard.
First decide which hairs should stay. A large strand, for example, can safely remain, while fine hairs in front of the eye should be removed. With the Ctrl key held down, set a source from a hairless area and paint over the hairs. Make sure you respect shadow gradients. It is best to paint along the direction of the shadow and not across it, otherwise the result looks unnatural. If you create repetitions in the process, simply pick up a new source from a different spot.

Step 11: Shorten hair and design edges cleanly
If a strand is only to be shortened, you switch to a somewhat harder brush and work piece by piece. The structure is preserved in the process. Small blemishes can be removed in the same way. At the edge of the nose or other contours you have to take more care.
An important note: If you only paint over the edge of a hair, darker spots can appear that look as if color were flowing out of the hair. Therefore, it is better to take a dark spot as the source that covers the entire hair. For very fine contours, you can switch to a smaller, harder brush if necessary. Alternatively, the Clone tool helps if you want to make a transition softer or harder.

Step 12: Checking the Area Around the Mouth and the Eye
Finally, you check the critical areas. Strands that run across the mouth are removed in the same way. Pay particular attention to the area around the eye, because mistakes there are noticed immediately. Compare before and after until you are satisfied with the result. Stepping back from the screen helps you judge the image as a whole.

Summary ??? Removing Hair from the Face Non-Destructively with GIMP
You have learned two methods for removing hair from the face. Frequency separation with Gaussian blur and a high-pass filter separates structure and color from each other and allows you to make precise corrections. The Healing tool is particularly suitable for fine little hairs and can be used flexibly with a correction layer. What matters is that you choose sources carefully, avoid repetitions, and edit each layer separately. Try both variants on your own images and find out which method suits your subject better.
FAQ
Do I have to enter the high-pass filter radius exactly the same as for the blur?Yes, the value must be identical so that details and colors fit back together with the original image later.
What happens if I leave the "Keep Original Layer" option enabled?Then an additional layer is created, and the filter is not applied directly to the detail layer. This complicates the workflow unnecessarily.
Why do I see blurry spots after healing?With the Healing tool, you only edit the structure. The color differences arise on the color layer and are corrected separately there.
What is the "Sample merged" option for the color picker used for?It ensures that the color picker takes the color from the visible overall image and not from the empty transparent layer.
Why shouldn't I always take the source for the Healing tool from the same spot?Repeated structures are quickly noticeable and look artificial. Therefore, change the source regularly.
Can I undo a mistake?Yes. You can delete the correction layer and create a new copy of the original to start over.


