
A single subject glows in full color, while the rest of the photo looks gray and subdued. This exact look is called Colorkey, and it immediately draws the eye to what matters most. In GIMP, you can create this effect in two ways: using a mask that you prepare with the Channel Mixer, or much faster with the "Select by Color" tool. This tutorial shows you both methods using two example photos, a blossom and a skier. All you need is GIMP and a photo with a clearly distinguishable subject.
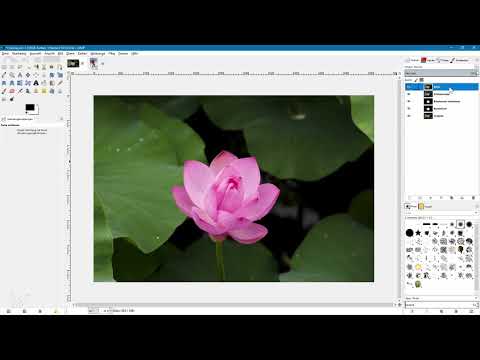
The video is only loaded from YouTube when you play it – data (including your IP address) is then transmitted to YouTube/Google. More in the privacy policy
Key Takeaways
- The Colorkey effect is based on a mask that separates the subject from its surroundings.
- For the blossom, the red channel works best because it provides the highest brightness contrast.
- With Dodge and Burn, you prepare the mask so that the subject and background are clearly separated.
- The "Select by Color" tool gets you to the goal much faster with strongly colored subjects.
- You have to readjust the threshold values and channel sliders for each photo.
Step-by-Step Guide
Step 1: Find the highest-contrast channel
Open your photo and switch to the Channels palette. With an RGB image, you see the channels Red, Green, and Blue. Show each channel one after the other and compare how much the subject and background differ from each other. With the blossom, the red channel stands out clearly: the background is dark, the blossom is bright. Green, on the other hand, looks flat because the background and blossom are similarly bright. The red channel is therefore your starting point.

Step 2: Create a layer copy and open the Channel Mixer
Duplicate your original layer using the icon in the Layers palette and give the copy a clear name, for example "Channel Mixer". This way the original stays untouched, and you work non-destructively. Select the copy and then open the "Channel Mixer" entry via the "Colors" menu, then "Components". In the dialog, activate the preview and, if necessary, enlarge the dialog box so that you can better judge the result.

Step 3: Activate Monochrome and balance the channels
In the Channel Mixer, enable the "Monochrome" option. By default, the red channel is set to 100 percent, green and blue to 0 percent. With the three sliders, you now mix the channels together. The goal is for the blossom to appear as white as possible and for the background to become almost black. To do this, increase the red share slightly, move the green slider to the left, and add a little blue. For the blossom in the video, the guide values ended up at about 100. Your image may require different values, though. It is fine if bright or dark areas are slightly blown out in the process, because for the mask you need the highest possible contrast. Then confirm with OK.

Step 4: Create a second copy and prepare highlights
Duplicate the Channel Mixer layer and name it, for example, "Optimize Channel Mixer". On this layer, you refine the mask. You will soon see that the blossom is bright, but there is still detail between the petals. You need to specifically brighten or darken these spots so that the mask becomes clean.
To do this, select the "Dodge" tool and set the type to "Highlights". Set the dynamics to "Dynamics Off" so that the size and opacity of the brush remain constant while painting. The opacity is at 100 percent, the exposure at about 50. Then paint over the light gray edges of the blossom. Dark areas are not brightened in the process, so you can work without worry. You do not need to pay attention to the center of the blossom at this point.

Step 5: Darken shadow areas with the Burn tool
Now switch to the "Burn" tool to edit the shadows. Paint over the already dark areas of the background so that they become even darker. Take care not to touch the bright blossom areas. The deeper the background is on this layer, the clearer the transition between the blossom and its surroundings will be later. At the edge of the blossom, you should encounter a clean white and a clean black, and exactly this contrast is the goal.
Step 6: Fill the blossom area with Lasso and white
The lasso tool is suitable for the large areas. Select the gray areas inside the flower. To add further selections, hold down the Shift key. Make sure that white is set as the background color, and then choose "Edit", "Fill with Background Color". Afterwards, deselect the selection again. This makes the flower completely white in the mask.
Step 7: Fill the Background with Black
Now select the background with a large selection. You don't need to be overly careful, because the background is already darkened. Just make sure you stay within the dark areas. Fill the selection with the foreground color, which is set to black, and deselect the selection. Afterwards, check any spots where a gray haze still remains, and repeat the process there if necessary.

Step 8: Check the Gray Tones with Levels
So that no mid-gray remnants are left over, select the layer "Optimize Channel Mixer" and open "Colors", then "Values", then "Levels". Drag the black slider slightly to the right and the white slider slightly to the left. Very light gray tones will thereby become white, very dark ones black. Confirm with OK.

Step 9: Create the Black-and-White Layer
Duplicate the original layer and drag the copy all the way to the top in the layers palette. Name it "Black-and-White". Then choose "Colors", then "Desaturate" and in the dialog, for example, "Luminosity". This step is done quickly, but it does not replace an individual black-and-white conversion. If you want more control over the gray levels, a separate tutorial on this topic is worthwhile.

Step 10: Apply the Mask to the Colored Layer
Duplicate the original layer again, drag the copy to the top and name it "Flower". Right-click on this layer and choose "Add Layer Mask". In the dialog the selection doesn't matter, so just confirm with "Add". Now select the layer "Optimize Channel Mixer" and copy the content with Ctrl+C. Switch to the mask of the flower layer, meaning the mask itself and not the image layer. Paste the content with Ctrl+V. You can then delete the floating selection. The mask is now finished.

Step 11: Check the Result
Zoom in closer on the image and look at the edge of the flower. It should be cut out softly and cleanly, while the rest of the photo appears in black and white. If everything looks right, your image has the desired color key look.
Step 12: Edit the Second Photo with "Select by Color"
A faster way is suitable for the skier. Choose the "Select by Color" tool. It selects a clicked color and all similar colors in the entire image, whereas the magic wand only searches in the immediate vicinity. In the tool options, be sure to activate the "Antialiasing" option so that the selection gets soft edges and doesn't produce a stair-step effect. The threshold must be set individually for each image. The higher you set it, the more similar tones are selected as well. If it is too high, GIMP will end up selecting the entire image.

Step 13: Create a Selection Layer and Its Mask
Duplicate the original layer twice. Name the middle copy "BW" and convert it to black and white via "Colors", "Desaturate", "Luminosity". Name the top copy "Selection". On this layer, choose the "Select by Color" tool again and this time set "Hue" instead of "Composite". Set the threshold to about 40 and click on a red area in the image. Right-click on the selection layer and choose "Add Layer Mask" and then the option "Selection". Confirm with "Add". All selected areas are now white in the mask, the rest black. Afterwards, deselect the selection.

Step 14: Refine the Mask
The mask is usually already good, but often needs to be reworked. To see the mask, hold down the Alt key and click on the mask. With a black brush, you paint over areas that are supposed to remain colored but shouldn't belong to the color. In the video, the author decides to leave the skier's face colored because it fits well with the overall picture. If you want it gray, simply mask it as well. Decide according to your own taste.

Summary ??? Colorkey Effect in GIMP: A Colored Subject Against a Black-and-White Background
The Colorkey look is created in GIMP with a clean mask. For the blossom, you prepare it using the Channel Mixer, using the red channel as a base and refining it with Dodge, Burn, Lasso, and Levels. For subjects with clear colors like the skier, it is faster with the "Select by Color" tool, whose mask you then refine afterwards. In both cases, it is important that you readjust thresholds and sliders for each photo and repeatedly check the result while zoomed in.
FAQ
Why do you use the red channel and not the green channel?For the blossom, the red channel offers the highest contrast between the bright subject and the dark background, while green and the background are similarly bright.
Do I absolutely have to copy the layers?Yes, this is recommended because it lets you keep the original photo unchanged and go back at any time.
What is the difference between the Magic Wand and "Select by Color"?The Magic Wand selects similar colors only in the immediate vicinity, whereas "Select by Color" selects them across the entire image.
Can I always leave the channel sliders at the same values?No, the values depend on the respective image and must be adjusted individually.


