
An unsightly green cast can quickly ruin a photo, even if the subject and composition are right. The good news: GIMP comes with everything you need for this. Plugins or scripts are not necessary.
The video is only loaded from YouTube when you play it – data (including your IP address) is then transmitted to YouTube/Google. More in the privacy policy
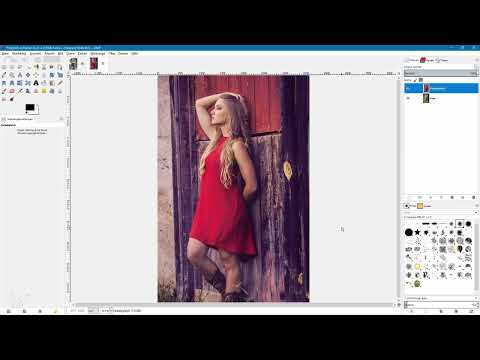
In this tutorial by video trainer Marco Kolditz, you will learn five ways to remove a color cast. You will work with two sample images: a photo with a slight, rather atmospheric green cast, and a photo with a clear green cast in the shadows, midtones, and highlights. All methods work non-destructively, so your original image is preserved at all times.
Key Takeaways
- A color cast affects every pixel of the image. Therefore, it can be determined via the average color of the image.
- With the "Pixelize" filter and a suitable size, you get a single average color that describes the color cast.
- The layer mode "Grain Extract" removes this color cast from the original layer.
- With "Color Balance", "Curves", and the "Levels" tool, you can correct shadows, midtones, and highlights specifically per color channel.
- With the gray eyedropper in the Levels tool, a quick correction is possible, provided that the image contains an area that should be neutral gray.
- Always work with duplicated layers and give them meaningful names. This way you keep an overview and can undo any step at any time.
Step-by-Step Guide
Step 1: Duplicate and Prepare the Original Layer
Before you even begin the correction, you should protect your original image. To do so, select the original layer in the Layers dialog and create a copy using the icon for a new layer. Give this copy a clear name, for example "Color Cast". All further changes will then end up on this copy, while the original layer remains untouched.

Step 2: Determine the Color of the Color Cast with the "Pixelize" Filter
A color cast affects every single pixel in the image. To determine it precisely, you therefore need the average color of all pixels. The "Pixelize" filter is not actually intended for this, but it can be repurposed. You'll find it under "Filters", "Blur", and "Pixelize".
In the dialog you see a preview, which you should leave activated if needed. For the width and height values, you need to look at a lock symbol: If it is active, both values remain proportional to each other.

Step 3: Set the Pixelize Size to the Image Dimensions
For the entire image to become a single pixel, you must choose the size appropriately. Look at the document dimensions in the title bar. Your image has, for example, a width of 3388 pixels and a height of 52 pixels. Remember the larger value, in this case the width, and enter a value for the pixelization that is higher than that. The value doesn't have to be exact. In the example, 6000 pixels is sufficient. Confirm the entry with the Tab key so that both fields are adjusted.
Don't be confused by the preview if it initially shows a skin color. This is because the preview only processes a section, in this case the face.

Step 4: Make the Average Color Tone Visible
Now click "OK". The entire image then becomes a single solid-colored area. This area shows you the average color of all pixels, i.e., exactly the color responsible for the color cast. You have thus isolated the color cast on a separate layer.

Step 5: Remove the Color Cast with the "Grain Extract" Layer Mode
With a simple levels correction using the mid-gray eyedropper, you would only edit your current layer, which doesn't help much here. Instead, you use the layer mode. Select the layer with the color cast, open the menu for layer modes, and set "Grain Extract". In the video the name is slightly garbled, but this mode is what is meant.
The image is now already much more neutral. Hide the color cast layer once and compare, and you will see the difference particularly clearly.

Step 6: Adjust opacity and merge layers
If the correction seems too strong to you, reduce the opacity of the color cast layer, for example to 90 percent. Afterwards, you can merge both layers into a single layer. To do this, use the "New from Visible" option in the "Layer" menu. This way the changes are preserved, and you have a clean starting point again.

Step 7: Fine-tune the contrast with Curves
Finally, you can improve the contrast with the tone curves. Raise the bright areas slightly and lower the dark areas a bit. Turn the preview on and off regularly to check the before-and-after effect. Then confirm with "OK".

Step 8: Use Color Balance for shadows, midtones, and highlights
The second method works with the "Color Balance" filter. To do this, duplicate the original layer again and name it, for example, "Color Balance". Then open the "Color Balance" dialog via "Colors".
Here you can shift the colors separately for shadows, midtones, and highlights. Each slider moves the colors toward an opposing color, such as red against green, blue against yellow, or cyan against magenta. Since your image has a green cast, you move the sliders toward magenta, red, and blue respectively. Specifically, this means in the example: In the shadows, you pull the middle slider to about -15 toward magenta and push red and blue slightly up, to about 20. In the midtones, you use a value around -15 for magenta and about 18 for blue. In the highlights, you increase red by about 13 and reduce green by about -10. A little blue helps make the highlights look more natural. Keep comparing with the preview.


Step 9: Correct individual channels with the tone curves
The third method also offers you tone curves, but now with a focus on the individual color channels. Duplicate the original layer, name it "Curves", and open "Colors" and "Curves". Beforehand, reset the curves to their initial state via "Reset".
In the "Channel" menu, first select the green channel. Pull the diagonal downward to take green out of the image. With an additional curve point in the lower area, you can further remove green from the shadows in a targeted way. Then you switch to the red channel and raise the curve slightly so that the shadows become somewhat warmer. In the blue channel, you can adjust the midtones carefully. Make sure you don't intervene too strongly, otherwise unnatural colors quickly appear. At the end, you switch to the green channel once more to fine-tune the highlights, and confirm with "OK".


Step 10: Work manually with the Levels color tool
The fourth variant uses the "Levels" color tool. Hide the previous layer and create a new copy, which you call "Levels", for example. Then open the "Levels" dialog via "Colors". Here too, the channels can be edited separately.
Start in the green channel and reduce the range for green. This removes particularly bright green from the image. Afterwards, you also reduce the green in the dark areas. Move the midtone slider slightly to the right so that the image looks more pleasing overall. In the red channel, you add some red in the midtones and take a little of it away again in the shadows. In the blue channel, you can make the highlights somewhat bluer, likewise enrich the midtones slightly, and remove some blue in the shadows. This procedure requires some experimentation, because every image reacts differently.


Step 11: Use the gray eyedropper for automatic correction
The fastest option is the gray eyedropper in the "Levels" color tool. Create a copy of the original layer again, name it, for example, "Levels Eyedropper", and open the dialog. Ignore the sliders this time and just click with the mid-gray eyedropper on an area that should appear neutral gray in the original.
A gray card that you can hold in the frame when taking photos is ideal for this. With it, the color cast can later be reliably neutralized across a whole series of images. In the example, you click on a wall that you judge to be gray. Feel free to try out several spots. A yellowish area may lead to a bluish result, and that would not be the goal.


If the image then looks flat, you can improve the contrast with the sliders in the dialog. Dark areas become somewhat darker, bright ones somewhat brighter. If individual areas look too blue again, you can make corrections per channel. Then confirm with "OK".


Summary ??? Removing a color cast in GIMP: Guide for more natural photos
You have seen that GIMP offers several ways to remove a color cast without additional tools. The "Pixelize" filter with the layer mode "Grain extract" delivers a quick, robust basic correction. Color Balance is suited to targeted adjustments in shadows, midtones, and highlights. Curves and the "Levels" color tool give you fine control over each channel, and with the gray eyedropper you achieve a result with one click, provided a neutral reference is present in the image. Always work with duplicated layers, use the preview regularly, and compare your result with the original. That way you will find the variant that suits your image.
FAQ
How can I tell whether my photo has a color cast?A color cast usually shows up in neutral areas such as walls, paper, or asphalt, which look clearly tinted depending on the color.
Do I have to choose a specific size for the pixelization?No, the value only has to be larger than the larger document dimension so that the entire image becomes a single pixel.
Why does the preview when pixelizing show a different color than expected?The preview only calculates a section of the image. Only after confirming with OK is the entire image taken into account.
Why is the layer mode "Grain extract" necessary?With this mode, the color cast is subtracted from the original layer, so that the basic colors appear more neutral again.
Can I adjust the result at any time?Yes, since you work with duplicated layers, you can hide layers, change the opacity, or remove layers.
Which method is best suited for beginners?The gray eyedropper in the "Levels" color tool is the fastest, but it requires a neutral gray area in the image.
What do I do if the image looks flat after the correction?Use the contrast tools such as Curves or the sliders in the "Levels" color tool to specifically strengthen the dark and bright areas.
Why use a gray card when taking photos?A gray card provides a neutral reference. With the gray eyedropper, it lets you determine the color cast precisely, even across a whole series of images.


