
A photo that you have reduced in size for the internet often looks softer than the original. This is exactly what subsequent sharpening is for. It does not bring back lost details, but it enhances the impression of sharpness, and GIMP offers you several ways to do it. In this tutorial, you will learn what technically happens during sharpening, how to set the Unsharp Mask filter correctly, how to sharpen only certain areas, and how to preserve the colors using the Lab color mode and the High Pass filter.
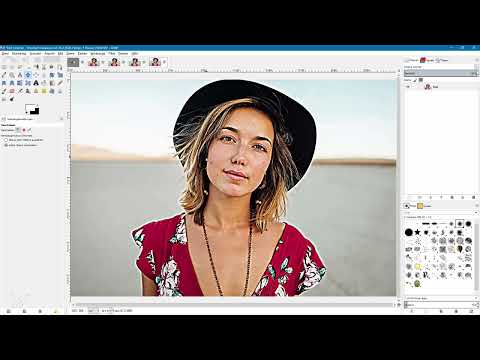
The video is only loaded from YouTube when you play it – data (including your IP address) is then transmitted to YouTube/Google. More in the privacy policy
Key Takeaways
Sharpening increases the contrast along contours. It does not create new image details. The radius determines how wide this contrast transition is, and the amount determines how strong it is. A radius that is too high leads to unpleasant artifacts, especially in portraits. With a layer copy and the Sharpen tool, you edit only the desired areas without destroying the original image. In Lab color mode, only the brightness can be sharpened, so the colors remain unchanged. The High Pass filter enables non-destructive sharpening via a layer mode.
Step-by-Step Guide
Step 1: Understanding the Theory Behind Sharpening
Before you move any sliders, you should know what the software actually does. An image editing program looks for contrasts and contours in the image and raises the contrast along these edges. A photo whose details were lost during saving or resizing does not get real structures back this way. The image only looks sharper because the transitions between light and dark areas become steeper. Keep this in mind, and you will be able to judge the results more realistically later on.

Step 2: Opening the Unsharp Mask Filter
First, select the layer you want to sharpen. Then go to Filters in the menu, choose Enhance, and then Unsharp Mask. A dialog box with a preview opens. Using the crosshair in the preview window, you can determine the image section you want to see as a preview. For portraits, an area with the eye is usually suitable, as the effect is particularly clear here.

Step 3: Setting the Amount Correctly
The Amount slider controls the strength of the sharpening, that is, how strongly the contrast along the contours is raised. For sharpening photos, a value of about 1 is recommended. With this value, you achieve a subtle improvement without immediately creating pure white or black at the edges. If you increase the value, the transitions become much harsher. So it is better to start low and slowly work your way up.
Step 4: Understanding and Dosing the Radius
The radius determines how wide the area along the contours is in which the contrast is raised. With a very small value like 0.1, the effect is only visible as a fine fringe at the edges. If you increase the value to about 20, a wide gradient from the dark tone to mid-gray is created. Radius and amount work together. Subjectively, the impression of sharpness increases, but objectively the image does not become sharper.
Step 5: Comparing Results in the Preview
Using the checkbox in the preview, you can view the image before and after editing. Alternatively, click into the image and hold down the mouse button, and you will see the original. As soon as you release it, the edited result appears again. This way you can easily see which contours have been enhanced. Pay attention to skin areas and fine structures, because exaggerations show up most easily here.

Step 6: Avoiding Typical Side Effects
A radius that is too high can create unpleasant effects in portraits. In the example, an eyebrow looks very dark and the skin at the edge is strongly lightened. For portraits, you should therefore keep the radius low. In addition, sharpening often affects color saturation, so that individual colors appear more intense than in the original. Depending on the image size and subject, you can play with the radius and amount until the result looks natural. Then confirm with OK, or cancel with Cancel if you do not like the result.

Step 7: Sharpen Only Specific Areas
If you only want to sharpen important areas such as the eyes, nose or mouth, it is best to work with a layer copy. To do this, duplicate your layer and name it, for example, "Sharpen Tool". If you are unhappy with the result later, you simply delete the copy, and the original image remains unchanged. You can find the Sharpen tool in the toolbox, or alternatively you can access it with the keyboard shortcut Shift and U.

Step 8: Using the Sharpen Tool
The tool behaves like a brush. In the tool options you choose the brush tip (a soft tip is pleasant for this purpose), as well as the size and the opacity. Under Convolve Type you set whether you want to blur or sharpen. The rate roughly corresponds to the amount in Unsharp Mask. A value of about 75 is a good starting point. Then paint several times over the eye, the eyebrows or the mouth. The more often you paint over an area, the more strongly it is sharpened. If you overdo it, artifacts appear, so it is worth using it sparingly.

Step 9: Compare the Result with the Original
Hide and show the sharpening layer again to directly compare the before and after images. This way you can see whether the targeted sharpening looks unobtrusive. With this approach, individual areas can be precisely emphasized without changing the rest of the photo.

Step 10: Use the Lab Color Mode for Color-Neutral Sharpening
With normal Unsharp Mask, the colors are often affected as well. In Lab color mode, on the other hand, you separate the brightness from the colors. The L layer stands for brightness, A for the colors from red to green, and B for the colors from blue to yellow. If you only sharpen the L layer, the colors in the image remain untouched. This is especially helpful if you want to avoid unwanted jumps in saturation.

Step 11: Decompose the Image into Lab Channels
GIMP does not allow you to put a photo directly into Lab mode via the Image menu. However, you can split the image into the channels of Lab mode via Colors, Components and Decompose. In the Color Model menu you select Lab and confirm with OK. After that, a new document tab opens with the three layers L, A and B.

Step 12: Sharpen Only the Brightness Layer
Select the L layer and open Filters, Enhance and Unsharp Mask again. Use the usual settings and confirm with OK. The brightness channel now has more contrast, while the color channels A and B remain unchanged.

Step 13: Recombine the Channels
In the Colors, Components menu you then select Compose. Here too, you choose the Lab color model and confirm with OK. The image is reassembled from the three channels. For comparison, you can use Ctrl and Shift and J to display the whole image and compare the result with your first edit. You will notice that the Lab result lacks the greenish or bluish fuzz that arose with conventional sharpening.

Step 14: Install the High-Pass Filter as a Script
GIMP does not come with a high-pass filter out of the box. For this you need a script, which you can find at the web address mentioned in the video. The file is also included with the video training. So that GIMP can use the script, you open Preferences under Edit and select the entry Scripts in the Folders section. There you will see the folder into which you drag the script file. Then, under Filters, Script-Fu, you open the option Refresh Scripts. After that, the script is loaded.

Step 15: Apply the High-Pass Filter to a Copy
Make sure to select the correct layer before you apply the filter. In the Filter menu, under Generic, you will find the entry Highpass, in German Hochpass. Since the filter offers no preview, you have to set the radius by feel. A value of 6 or 7 is a good starting point. In the Mode field, you can try out different modes; in the example, the Color option stays active. After confirming with OK, a new layer is created on which the contours become visible, while most of the image appears medium gray.

Step 16: Overlay the high-pass layer using the layer mode
For the active high-pass layer, choose the Overlay mode in the layer modes. This mode makes the middle gray disappear, while light and dark areas brighten or darken the layers below. The result is a sharp version of the entire image. If you hide the layer, you see the original; if you show it, you see the sharpened version. Since the original image remains untouched, you work completely non-destructively.

Step 17: Limit the sharpening to specific areas
If you want to limit the sharpening to individual spots only, you can add a layer mask to the high-pass layer. With it, you show or hide the effect precisely where you want. This way you combine the advantages of the high-pass filter with control over individual image areas.

Summary ??? Sharpening in GIMP: Unsharp Mask, Lab Mode and High-Pass Filter
Sharpening emphasizes contrasts at contours and does not add real details. With amount and radius, you control the strength and width of this effect, whereby a low radius is better suited for portraits. The Sharpen tool on a layer copy allows targeted edits without risk to the original. The Lab color mode preserves the colors because only the lightness layer L is sharpened. The high-pass filter with the Overlay layer mode offers a non-destructive alternative that you can refine with a layer mask.
FAQ
Why doesn't a sharpened image look truly more detailed?Sharpening only increases the contrast along contours; it cannot bring back lost image details.
What amount value makes sense when sharpening photos?For photos, a value of about 1 is recommended, which you carefully increase if needed.
What does the radius do in Unsharp Mask?The radius determines how wide the area along the contours is in which the contrast is raised.
Why should I choose a low radius for portraits?A high radius quickly leads to unpleasant effects, such as dark eyebrows or brightened skin areas.
How do I avoid changing the colors when sharpening?You can decompose the image in Lab color mode, sharpen only the L layer, and then recompose the channels.
Can I leave the original unchanged when sharpening selectively?Yes, work on a layer copy, then the edit can be deleted or hidden at any time.
What is the high-pass filter in GIMP used for?It makes contours visible, and together with the Overlay layer mode, it produces non-destructive sharpening.


