
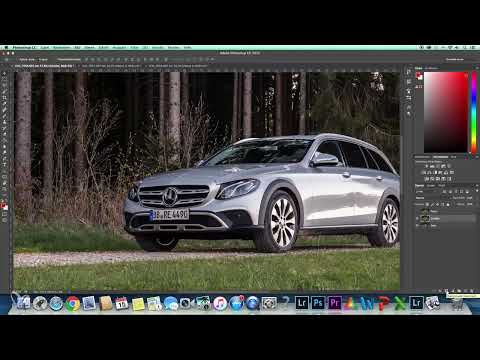
You took car photos on location and are wondering how to turn the three shots into an atmospheric final image? That's exactly what this tutorial is about. You'll learn how to enhance the mood of an evening image in Lightroom, how to synchronize settings across several photos, and how to layer the shots in Photoshop so that distracting reflections disappear.
The video is only loaded from YouTube when you play it – data (including your IP address) is then transmitted to YouTube/Google. More in the privacy policy
The three images were taken with different polarizing filter settings. Each of them contains different reflections: in the first image, the reflections were mainly removed from the side panel, in the second from the windshield and the hood, and in the third from the front. In the Photoshop part, you deliberately combine these areas into one overall image.
Key Takeaways
Key Takeaways
- In car photos, a slightly yellowish temperature creates an evening mood, especially for shots taken in the evening.
- Clarity emphasizes paint and surfaces, but should be applied carefully.
- The tone curve provides crispness with moderate contrast without swallowing the shadows.
- Synchronized settings save a lot of time when all images need the same base.
- Before layering in Photoshop, the layers must be automatically aligned so that the edges lie exactly on top of one another.
- Layer masks allow you to make visible only the areas from the other shots where the reflections are absent.
- Edges such as gaps and body edges are well suited as natural transitions between the images.
Step 1: Defining the Look in Lightroom
Start with the first image in Lightroom and work without presets. For an evening mood, it helps to deliberately shift the temperature toward yellow. A value around 7000 Kelvin is a good starting point. Then adjust the tint until the color tone of the car paint looks harmonious. Pay particular attention to the silver of the body, as it quickly shows whether the color tone is right.

Step 2: Balancing Exposure, Highlights, and Shadows
Raise the exposure by half a stop and then pull the highlights down a bit again. This way the paint doesn't become overexposed. With the shadows, you can bring out some detail without overdoing it. A moderate contrast value of about 20 and a highlights value of around minus 10 provide a balanced base.

Step 3: Using Clarity for Paint and Surface
Clarity is especially important for cars because paint, chrome, and glass gain structure from it. However, not every image tolerates the same value. In this example, you're working in the range of about 30. If you overdo it, edges quickly look harsh and unnatural.

Step 4: Using the Tone Curve for More Crispness
With the tone curve, you can specifically structure the image. First choose a preset for stronger contrast and then check the shape of the curve. Often the preset is a bit too strong, so you take the mid-tone contrast back a little. The dark areas, such as wooded sections, shouldn't sink completely into black. How strongly you use the curve is a matter of personal taste.

Step 5: Specifically Adjusting Hues, Saturation, and Luminance
In the Hue, Saturation, and Luminance section, you can further refine the mood. For an evening shot, it helps to shift the greens slightly toward yellow, by about 15 to 20. Then you reduce the saturation of the greens a little, because a strong grass green distracts the focus from the car. You also lower the luminance of the greens slightly.
For the orange tones, you increase the saturation moderately, to about 15 percent, so that the evening light comes across. Additionally, give the shadows a minimal blue tint, at most about 5. More quickly looks purple or blue and destroys the warm mood.

Step 6: Sharpening and Handling Noise
For sharpening, you'll usually be in the range of 60 to 80, with a small radius of around 0.6. For an ISO 200 shot, noise reduction is hardly necessary. However, a slight luminance value makes the image smoother and softer.

Step 7: Compare Before and After
Always compare your result with the original at the end. This is the only way to tell whether the changes actually improve the mood or whether you have overdone it. With this check, you are well prepared for the next step.

Step 8: Synchronize Settings Across All Images
So that all three shots have the same look, select the edited image and then select the other two while holding down the Command key (Mac) or Control key (Windows). Then click "Sync Settings" at the bottom right. Select only the areas you want to apply. You can deselect Local Adjustments, Transform, Spot Removal, and Crop if you have not used them. Then click "Synchronize".

Step 9: Open the Images from Lightroom in Photoshop
Keep all three images selected and open them in Adobe Photoshop by right-clicking and choosing "Edit In". This may take a moment. Make sure that all shots are opened as separate documents before you start merging them.

Step 10: Merge All Shots into One File
To do this, create a shared file in which all three images are layers. First, unlock each background layer by double-clicking the lock icon. Then drag the layer into the first image using Duplicate Layer. Repeat the process with the next image. Give the layers meaningful names, for example after the area that should be visible later: "Side", "Window", and "Front". This helps you keep track even with multiple layers.

Step 11: Auto-Align the Layers
Even if the camera was on a tripod, the ground can give way slightly. As a result, the layers do not lie perfectly on top of each other. Therefore, select all layers and choose the "Auto-Align Layers" function under "Edit". Photoshop analyzes the edges and shifts the images so that they line up exactly. A minimal offset may then be visible at the edge; this is normal and helps with overlaying.

Step 12: Set Up Layer Masks as a Foundation
The overlay works with layer masks. Click "Add Layer Mask" at the bottom of the Layers panel. White keeps the layer visible, black hides it, and shades of gray partially reveal it. So that the base image initially remains unchanged, fill the mask of the overlaying layer with black. Use the Fill tool with the color black and make sure you click in the mask and not in the image. After that, the layer is completely hidden. With a white brush, you paint the desired areas back in.

Step 13: Reveal the Window Precisely
To cleanly isolate the window, first create a selection. The Polygonal Lasso or the Pen tool are suitable for this. The Pen tool is especially worthwhile for the many curves of a car, since it allows you to work more precisely. Zoom far enough into the image, about 300 to 400 percent, so that you can work cleanly along the edges. Then, with a white brush inside the selection, paint the window free in the mask. You can set the opacity to 100 percent, and adjust the brush size to the areas.

Step 14: Check the Before-and-After Effect
After revealing the window, check whether the reflection has actually been reduced. A detail such as a tree against the sky in the reflection of the window shows well how big the difference is. If the effect is too weak, check your mask again.

Step 15: Edit the Hood with the Polarizing Filter Transitions
On the hood, the polarizing filter plays a special role. It filters out certain light waves, and depending on the angle, the exposure changes. As a result, different colors and brightness levels appear on the hood and on the side sill. You can use these differences deliberately during assembly. Edges such as gaps or body edges are ideal as natural boundaries. With a selection along this edge and a soft transition, the change between the images is hardly noticeable. Where the polarizing filter has only a weak effect, you take the area from the shot with the stronger anti-reflection effect.

Step 16: Finish Masking the Hood
Paint in the remaining areas of the hood with the white brush and check the result by comparing it. Make sure that no edge looks unnatural. An even transition looks the most believable.

Step 17: Insert the Front Using a Black Mask
For the front, you create a new layer mask and hold down the Alt key while clicking the mask icon. This gives you a black mask right away, which you don't have to fill in separately. Then you paint in the areas of the front with the brush. In narrow spots, you reduce the brush tip size so that the transitions fade out cleanly.

Step 18: Create Soft Transitions on the Front
Use a soft brush and lower the opacity to about 20 percent. This way you paint the transitions gradually until they are inconspicuous. A change between the shots must not look like a harsh composite. At the end, you can also selectively remove individual reflections, such as on the right headlight.

Summary ??? Automotive Photography: Editing Images in Lightroom and Overlaying Them in Photoshop
In this tutorial, you learned how to transform car photos in Lightroom into an atmospheric evening mood using temperature, tonal values, tone curve, and color tones. You also saw how to transfer the settings to all images via synchronization. In Photoshop, you aligned the layers automatically, worked with layer masks, and selectively removed the reflections on the window, hood, and front. By using edges as natural transitions and soft brush tips, you achieve a uniform final result.
FAQ
Why should I shift the temperature toward yellow for evening shots?A slightly yellowish temperature emphasizes the warm mood of the evening light and looks natural.
How much clarity can a car photo handle?Usually about 30; it works well for paint and surfaces, while too much clarity makes edges look harsh.
Why do I synchronize the settings in Lightroom?This way all shots get the same look, and you don't have to edit each image individually.
Why should I align the layers automatically in Photoshop?Even on a tripod, the image can shift minimally; automatic alignment ensures a perfectly matching overlay.
What does a black layer mask mean?The layer is completely hidden; with a white brush you make areas visible again.
Why are body edges suitable for transitions?Edges such as panel gaps are natural boundaries where a switch between the images is hardly noticeable.
What do I need to keep in mind with the polarizing filter?The polarizing filter has a different strength depending on the angle and changes the exposure, so transitions there should be placed deliberately.
Why should I lower the brush opacity?With a low opacity of about 20 percent, soft transitions are created that don't look like a harsh composite.


