
Dynamic shots thrive on movement and speed. That makes it all the more important not to overload them in post-processing. With car photos with panning shots, you usually only need to intervene gently, because the subject already brings the effect with it. That is exactly what this tutorial is about: You develop a RAW image in Lightroom, crop it appropriately, and give it a coherent look without destroying the dynamics.
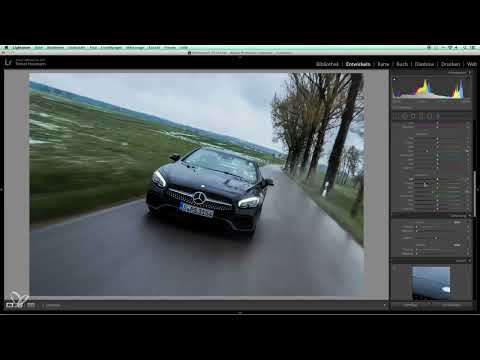
The video is only loaded from YouTube when you play it – data (including your IP address) is then transmitted to YouTube/Google. More in the privacy policy
Key Takeaways
With dynamic shots, the effect is the priority, so editing should remain restrained. Just a few targeted adjustments to exposure, contrast, color, and cropping have the greatest impact. A vignette draws the eye to the car, and the settings of a successful image can be transferred to the other shots.
Step 1: Making the Selection
Before you even begin developing, you should review your images. With panning shots, the yield is almost always low, because not every shot comes out sharp. So it is better to shoot a bit more than you need and then choose the best subjects. In the video, a small preselection was already made, which you can use as a starting point.

Step 2: Defining the Crop
First crop the image so that the car moves into the center. You do lose some resolution, but high-resolution cameras can generally handle this loss without problems. Use the Crop tool for this and make sure that the lines of the road support the visual flow.

Step 3: Defining the Image Look with White Balance
The weather was not ideal during this shoot, so a slightly cooler look can help create the mood. To do this, shift the temperature slightly toward blue in the White Balance section. Make sure the colors don't look artificial. Even a subtle shift is enough.

Step 4: Adjusting the Exposure
First check the overall exposure. In the example, it was already quite good. Then you increase the contrast to about 20 so the image gains depth. You reduce the highlights slightly so that the sky in the background shows detail again.
Step 5: Brightening Shadows and Setting Clarity
If details are lost at the front of the car, bring them back with the shadows. Keep the sliders moderate and pay attention to the transition between light and dark areas. For car photos, you can set the clarity to about 35. This makes the metal and the bodywork look crisper without making the image harsh.

Step 6: Using the Tone Curve
With the tone curve, you control contrast more precisely than with the simple slider. Pull the curve into an S-shape, which creates strong but controlled contrast. A car image can generally handle this well, and it looks dynamic.

Step 7: Toning Down the Greens
In some shots, the green in the background looks too intense and distracts from the subject. Open the color settings and reduce the saturation of the greens. Also darken the greens a little. This brings the car more into the foreground.

Step 8: Sharpening and Reducing Noise
Especially with moving subjects, targeted sharpening is worthwhile. To do this, increase Amount and Detail in the sharpening settings until the car stands out clearly. At the same time, you can slightly increase the luminance of the noise reduction so the image doesn't look grainy. Don't overdo it, otherwise the image loses its natural look.

Step 9: Adding a Vignette
A vignette darkens the edges of the image and ensures that the eye focuses on the center of the picture. Adjust the vignette in the effects so that the transition stays soft. For dynamic shots in which the car is placed centrally, this effect works especially well.

Step 10: Deliberately use the tilt
If the car is positioned slightly at an angle in the picture, this enhances the dynamics. An angle of 45 degrees is not absolutely necessary for this. A slight tilt is enough to suggest movement. Make sure that the lines of the road lead toward the back and the car appears to be driving forward.

Step 11: Check the result
Regularly compare your edited image with the original. In the video, a clear difference between the two versions is visible. Use the before-and-after view to check whether you have gone too far. If the result looks coherent, you are on the right track.

Step 12: Transfer the look to other images
If you liked one image, you don't have to edit every shot from scratch. Copy the develop settings and paste them onto the other images. Afterwards, adjust each photo individually once more, because exposure and weather vary from shot to shot.

Step 13: Sharpen and crop individual images
Next, you go through the images one by one. With cropping, you decide how much of the surroundings you want to show. If you crop tighter, distracting elements at the edge disappear. If necessary, a distracting corner can be stamped out later in Photoshop.

Step 14: Brighten or darken panning shots
Not every panning shot needs the same treatment. Some shots look too dark and need brightening via the exposure. Others are already too bright and benefit from slight darkening. Compare the images with each other so that the series as a whole looks coherent.

Step 15: Place the car in the right third of the image
When cropping, you can orient yourself by the rule of thirds. If you place the car in the right third, space is created in front of the vehicle, and this looks more dynamic. Whether you zoom in closer or include more of the surroundings is a matter of taste.

Step 16: Select your favorite image
Finally, you choose your personal favorite image. Often it only becomes apparent when comparing the entire series which shot has the strongest impact. You can use this image as a reference for future shoots.

Summary ??? Developing dynamic shots in Lightroom
For dynamic shots, the rule is: restraint brings impact. Select the best images, crop them appropriately, and use white balance, exposure, shadows, clarity, and tone curve purposefully. Color, sharpness, and vignette round off the result. Once you have found a look, you transfer it to the series and adjust each image individually.
FAQ
How many pictures should I take during a panning shoot?Plan for more shots than you will need later, because only a small portion of the images will actually be sharp.
Why does a cooler look often seem more fitting for car photos?A cooler look emphasizes a cool environment or bad weather and can give the image its own mood.
Can I set the clarity the same for every image?You can use the value as a starting point, but you should readjust it depending on the image, because subject and light differ.
What do I do if a corner in the image is distracting?Crop the image tighter or remove the distracting element later in Photoshop with the clone stamp tool.
Do I have to edit every image in a series completely from scratch?No, you can copy the settings of a successful image and apply them to the other shots. Fine adjustments are usually still necessary, though.


