
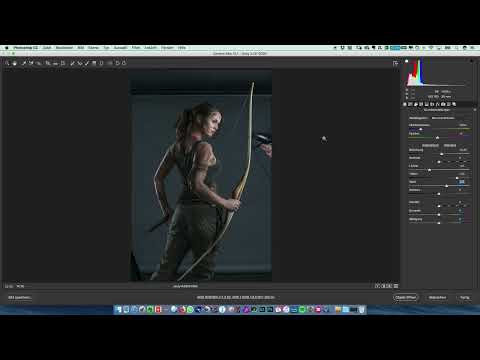
A portrait only looks truly alive when skin tones, wrinkles, and contours are visible. Raw development in Photoshop Camera Raw lays the foundation for this. In this tutorial, you follow the development of a shoot subject step by step, from color temperature to sharpening. At the end, you will have a file that shows plenty of detail and strong contrast in the contours and is well suited for further retouching.
The video is only loaded from YouTube when you play it – data (including your IP address) is then transmitted to YouTube/Google. More in the privacy policy
Key Takeaways
- The color temperature determines the basic mood of the image. In an outdoor scene with an overcast sky, the image may look slightly warmer than in the first version.
- Highlights and shadows control the brightness distribution. With the highlights, you take brightness away from areas of the face; with the shadows, you bring detail back into dark areas.
- The Clarity slider strengthens contours and wrinkles. Use it carefully, because at 100 percent the image quickly looks overdone.
- Vibrance increases color information selectively, while saturation is then deliberately reduced so that the image does not look garish.
- You should check the sharpening while zoomed in on the eyes. A radius of about 0.5 produces fine edges without emphasizing noise.
- A duplicate as a Smart Object allows you to compare the original state of the raw development at any time during retouching.
Step 1: Select the subject and open it in Camera Raw
Start with the subject that appeals to you most. In the tutorial, the choice fell on a shot with an expressive pose in which the body shape comes across well. When making your selection, make sure that no distracting elements in the foreground draw attention away. Then open the raw file in Camera Raw. There you will see all the sliders on the right-hand side, with which you develop the image step by step.

Step 2: Adjust the color temperature
The first adjustment concerns the color temperature. The original image looks bluish and cool, which may be realistic for an outdoor shot under an overcast sky, but makes the portrait appear distant. Therefore, move the Temperature slider slightly to the right until the skin tones look more natural and warmer. Keep in mind that the scene should still look like a dull day. Warming too much takes away the desired atmosphere of the image.
Step 3: Raise the exposure slightly
Next, you raise the exposure minimally to make the subject a bit brighter. In the example, a very subtle value of about +0.5 was enough. Look closely at the face while doing this, because it is quickly blown out. In the example, this was also due to the model's heavy makeup, which was meant to be emphasized well without the skin looking overexposed. Handling the exposure carefully protects you from unnecessary corrections later on.

Step 4: Control highlights and shadows selectively
Now comes the fine-tuning of the brightness distribution. Pull the Highlights slider slightly to the left until the face no longer looks blown out. A value of about -30 proved to be a good starting point in the example. Afterwards, you raise the shadows significantly to gain more detail in the dark areas. A value of around +60 brings structure into fabric and shadows without making the scene look flat. Test both sliders alternately until the relationship between bright and dark areas feels balanced.

Step 5: Balance whites and blacks for specular highlights
With the Whites and Blacks sliders, you emphasize shiny spots, for example on the skin or on glossy surfaces. In the tutorial, the Whites slider was raised to bring out the highlights. The downside: the face becomes somewhat brighter and paler. This problem can be handled well afterwards in retouching. With the Blacks slider, make sure that the deepest shadows do not get crushed but still show detail.
Step 6: Use Clarity for more contours
The Clarity slider strengthens micro-contrast and makes contours clearly visible. Especially for subjects with many wrinkles and shapes, it is an important tool. If you set it to the maximum value of 100, the image quickly looks overdone and unnatural. In the example, a value of about 40 proved to be a good compromise. It emphasizes the structure but preserves the softness of the skin. It is best to compare your result in the before/after view in order to judge the effect objectively.

Step 7: Increase Vibrance and Reduce Saturation
Vibrance selectively increases color intensity in less saturated areas without strongly boosting colors that are already saturated. In the example, it was set to about 35. Since vibrance has already revealed a lot of color information, you then reduce the saturation slightly. This keeps the image powerful without looking garish. While adjusting, pay particular attention to the skin tones, as they react especially sensitively to changes.
Step 8: Sharpen and Check Details
In the Details section, you activate sharpening. The Amount determines the strength, while the Radius determines the width of the edges that are emphasized. A radius of 0.5 is suitable for fine structures such as hair or skin pores. For the Amount, a range between 50 and 80 is recommended. Be sure to zoom in on the eyes, as the effect is most clearly visible there. Without sharpening, the image quickly looks soft, while a value that is too high creates unattractive edges. In the example, the Amount was finally set to 80.

Step 9: Refine Skin Tones Selectively with HSL
With the HSL section, you can edit individual hues selectively. For skin, the orange channel is especially interesting. Select the orange color there, raise the luminance subtly, and increase the saturation slightly. This makes the skin look fresher without appearing artificial. Also check the result in areas with makeup so that the color effect in the face is not exaggerated.

Step 10: Secure the Raw Development as a Smart Object
Before you begin retouching, you should secure the development state. To do this, open the image in Photoshop as a Smart Object. Duplicate the layer so that you have two separate Raw versions. You keep the upper layer as a reference and continue working with the lower one. Double-clicking the Smart Object reopens the Camera Raw settings at any time. This way, during retouching you can always check which settings you made and undo adjustments.

Check the Result
At the end, compare the original version with your development. Make sure the face does not look overexposed, the contours stand out clearly, and the skin remains natural. Feel free to take your time with this check, because small corrections to exposure or clarity can noticeably improve the effect. Only when you are satisfied with the result is it worth moving on to retouching.
Summary – Raw Development in Camera Raw: Step by Step to a High-Contrast Portrait
Raw development is the step in which you shape a shot into an expressive portrait. You have seen how to adjust color temperature and exposure carefully, balance highlights and shadows, and bring out contours and details with clarity, vibrance, and sharpening. You use the HSL section to refine the skin tones. The Smart Object secures your development state, so you can fall back on it at any time during the subsequent retouching.
FAQ
Why shouldn't I change the color temperature too much?Too strong an adjustment takes away the natural mood of the image and distorts the skin tones.
How can I tell if the clarity is set too high?If wrinkles look harsh and artificial or the skin takes on a coarse texture, the value is too high.
Why does the face get brighter through Whites and Highlights?The sliders boost bright areas, so the skin quickly looks paler with stronger highlights.
Which radius is suitable for sharpening?For fine structures such as hair or skin pores, a radius of about 0.5 is a good starting point.
What is the Smart Object duplicate for?It preserves the development state as a reference, so you can trace back settings at any time during retouching.


