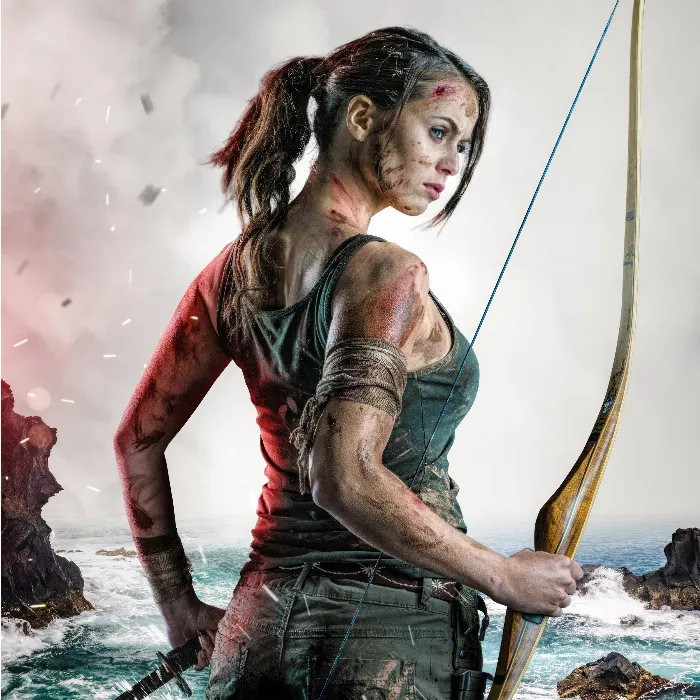
If you are interested in creating impressive posters in the style of popular video games like Tomb Raider, then you are exactly right here. In this tutorial, you will learn how to bring color and light to your model using Photoshop to create a dynamic and captivating image montage. Your goal is to design an explosive scene that enhances your poster with that final touch.
Main Insights
- Color your model with a targeted light reflection.
- Use Photoshop to influence colors and create a realistic atmosphere.
- Use layer groups for better organization of your work.
- Experiment with different hue and saturation settings.
Step-by-Step Guide
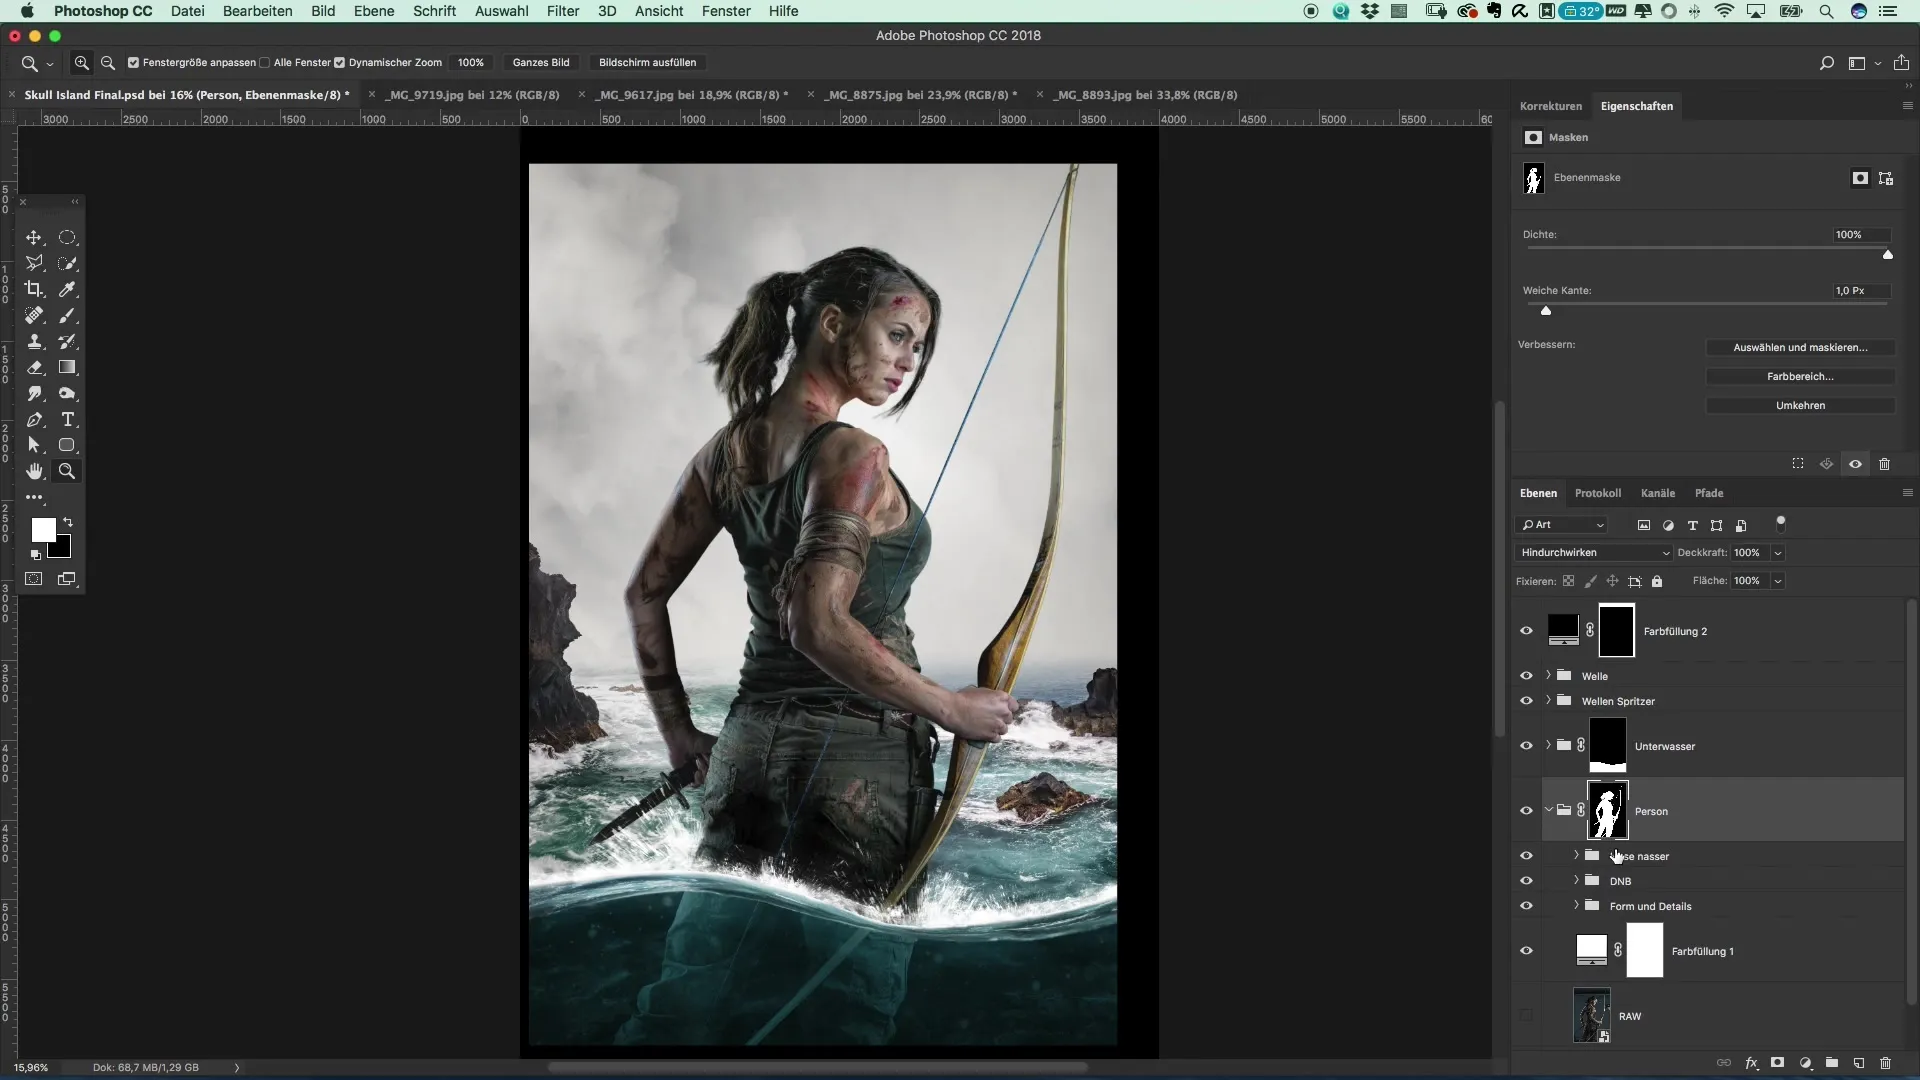
Create Color Group
First, it is important to organize your workspace. You start by creating a new group for color. Open the "People" group and create a new group that you simply name "Color".
Add Color Area
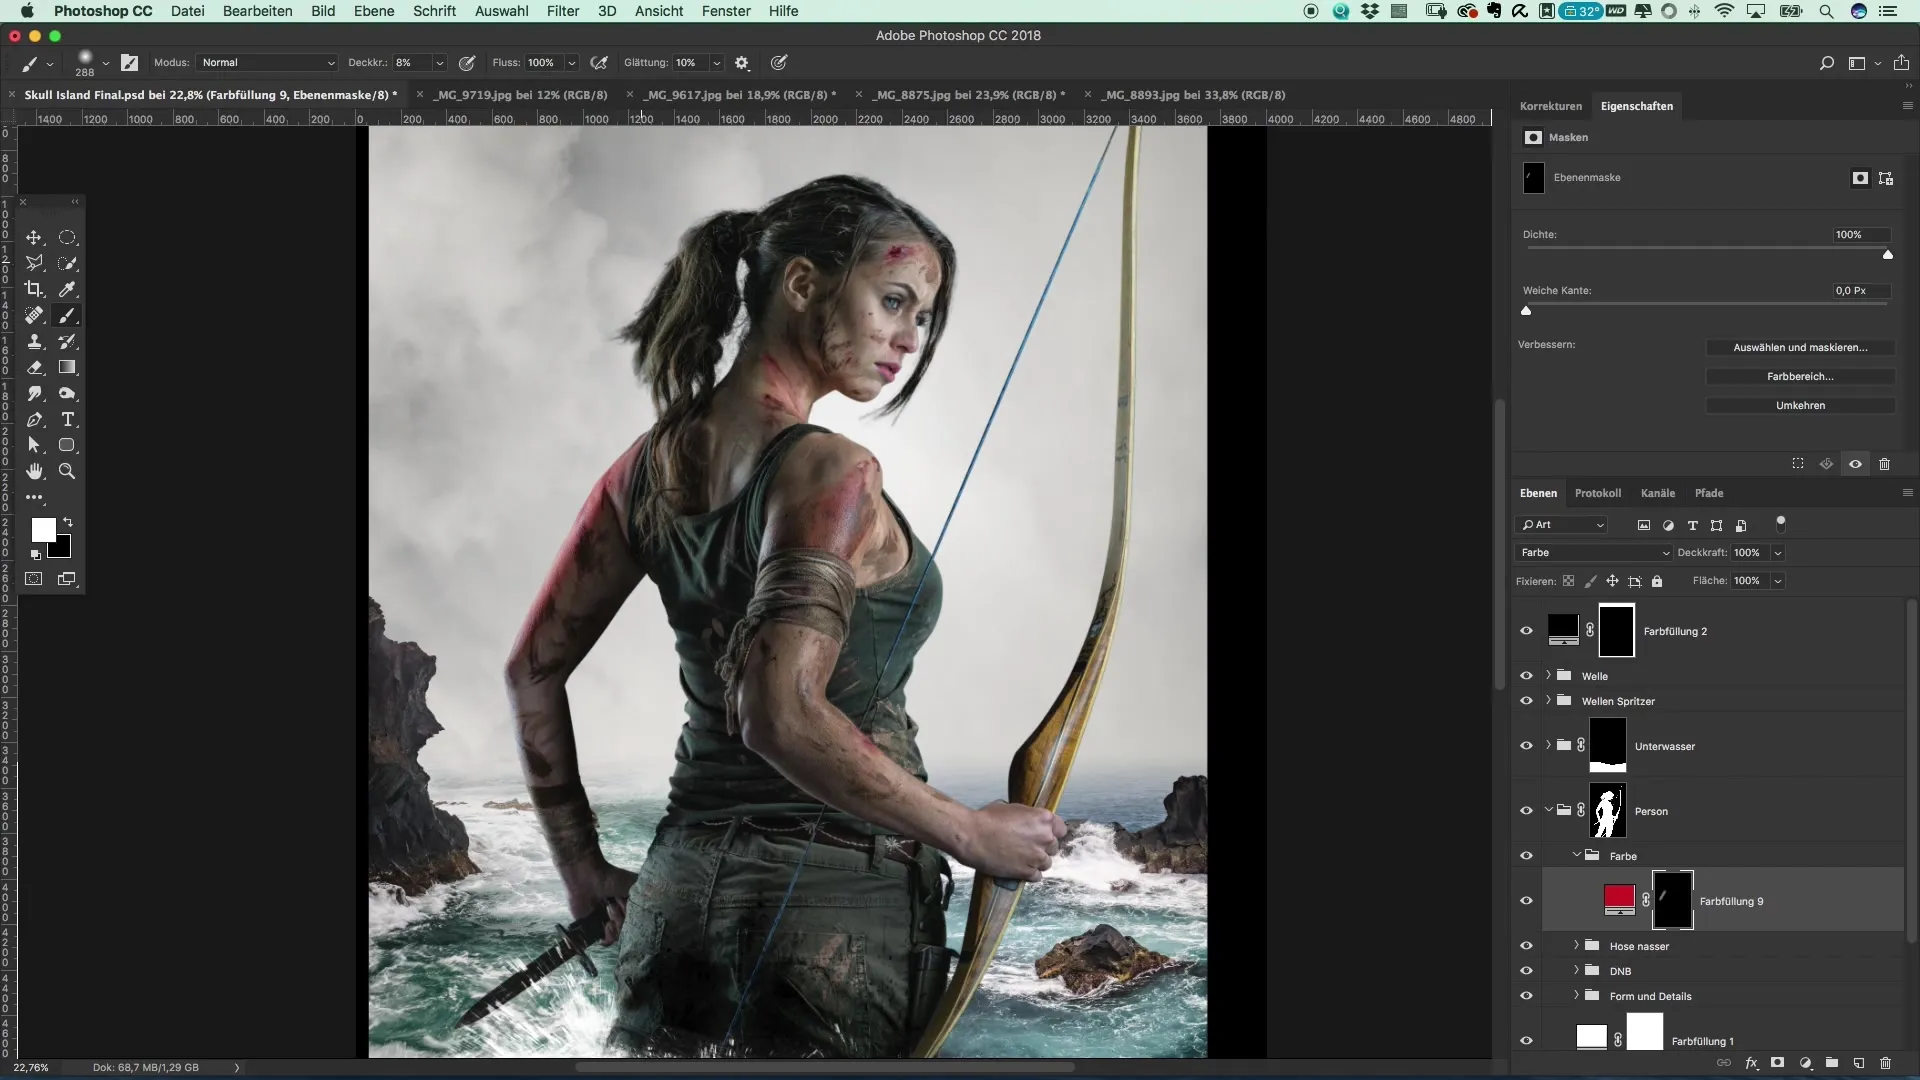
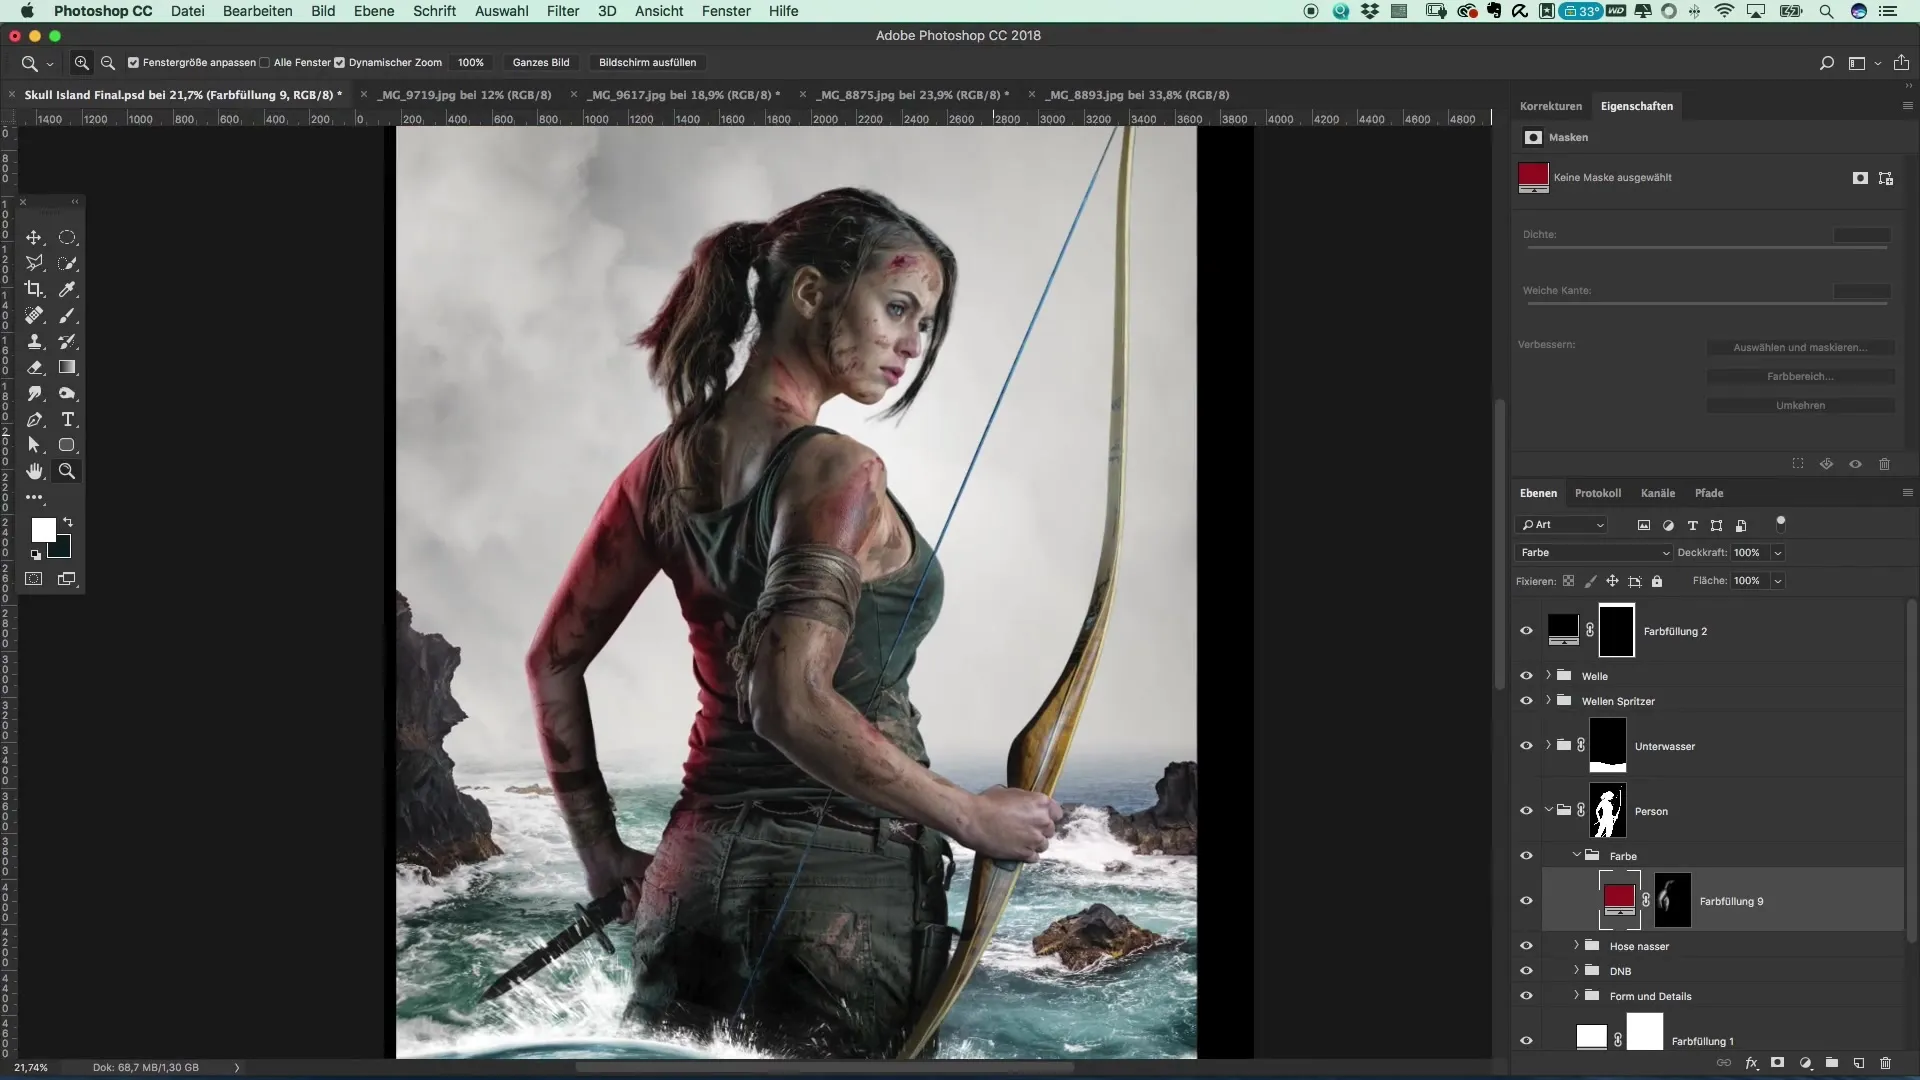
Now it's time to bring a color area into play. Choose a darker red - it shouldn't be too bright, but rather appear like a fiery red. Set the blending mode to "Color" to achieve the desired effect.
Invert Mask
To adjust the intensity of the color change, you now invert the mask. This will make the color area visible only when you paint with a brush. Make sure to choose a brush with an opacity of about 8%.
Apply Red Light Reflection
Start applying the red light stripe to your model. Focus first on the contours, such as the shoulder and hair. Be careful to color the outer areas gently to create a harmonious and transparent color effect.
Refine Color
If you find that the first application of color is too intense, you can reduce the overly strong areas with the eraser. Take the opportunity to try different brushes to create the optimal light mood.
Further Adjustments
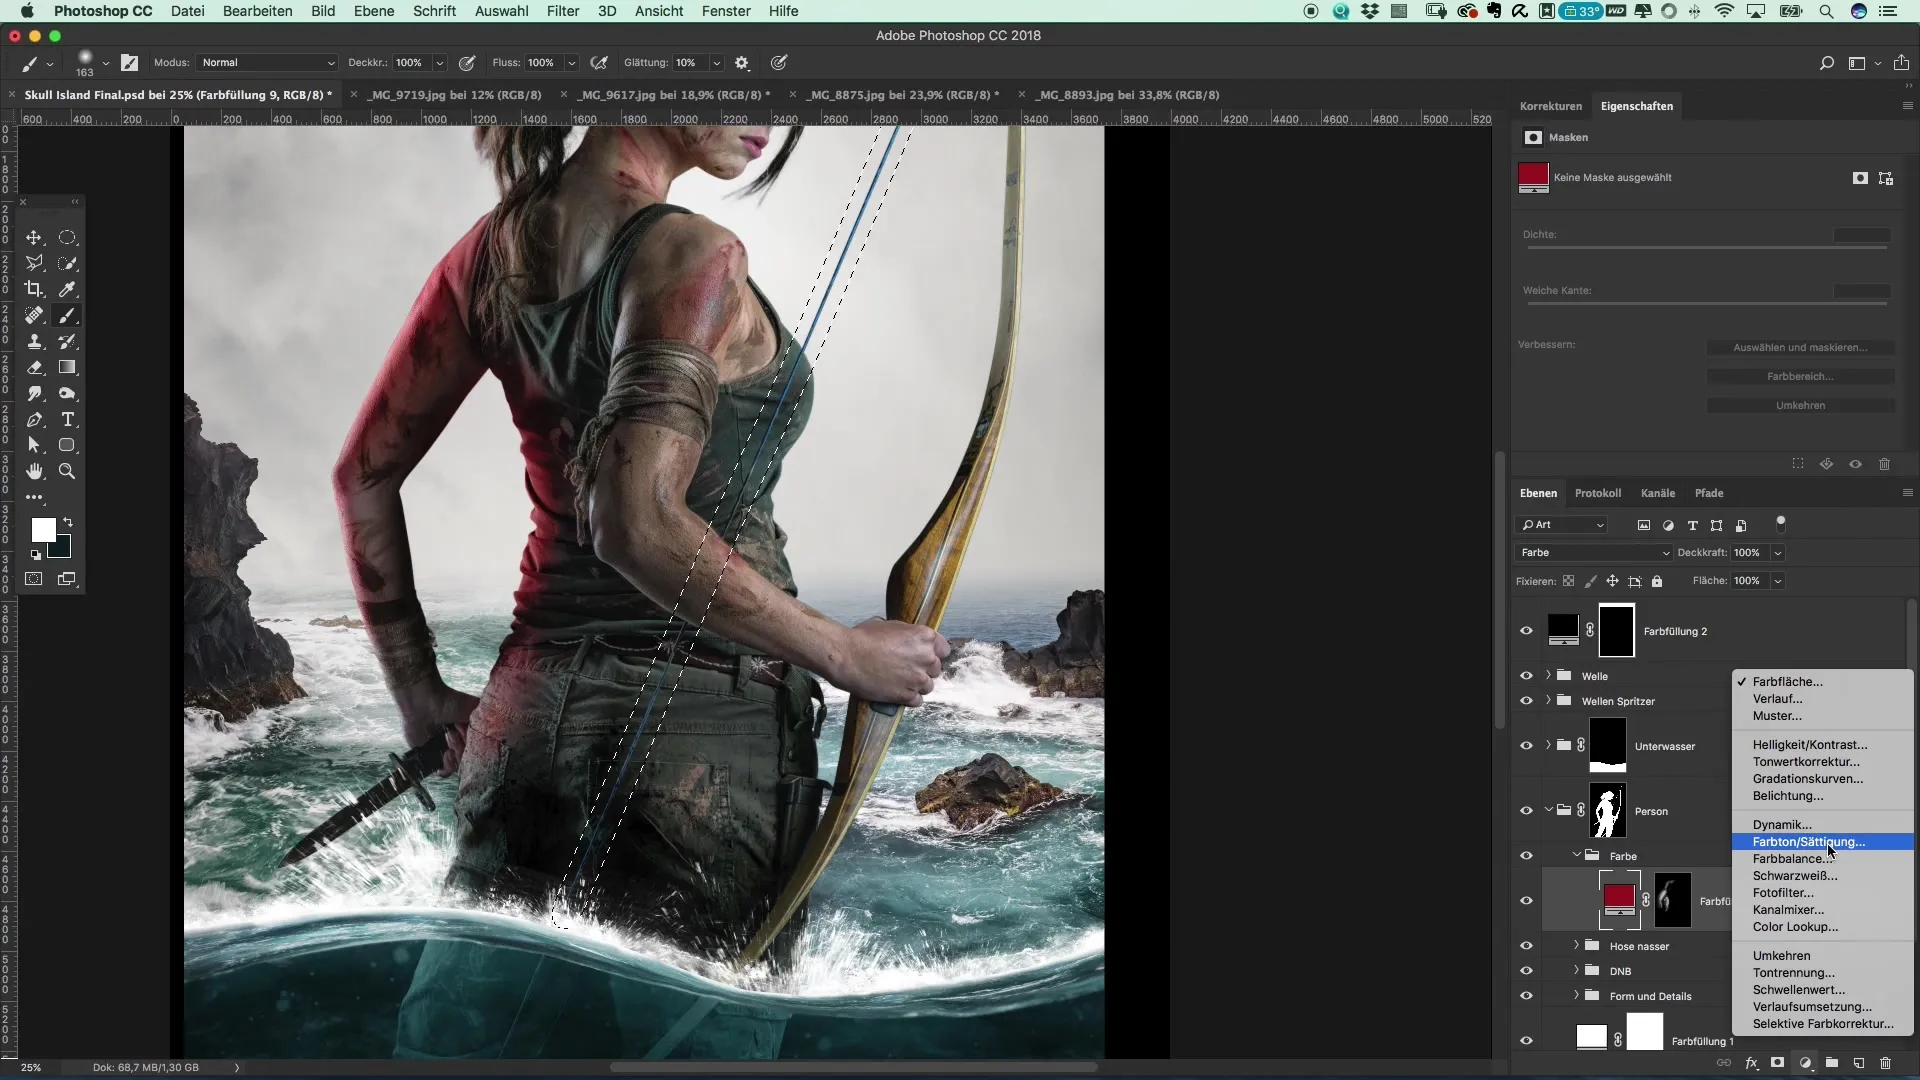
To achieve a realistic effect, it is important to consider other elements in your image as well. For example, the string of your bow, which is currently blue and appears somewhat too modern. Make a selection, activate mask mode, and paint in a line. However, this will not be red later.
Adjust Hue and Saturation
After applying the color, create a hue/saturation adjustment layer. Lower the saturation of the blue tone and darken the colors. This will create an even more stylish look and prevent the colors from appearing too bright.
Completion of the Color Theme
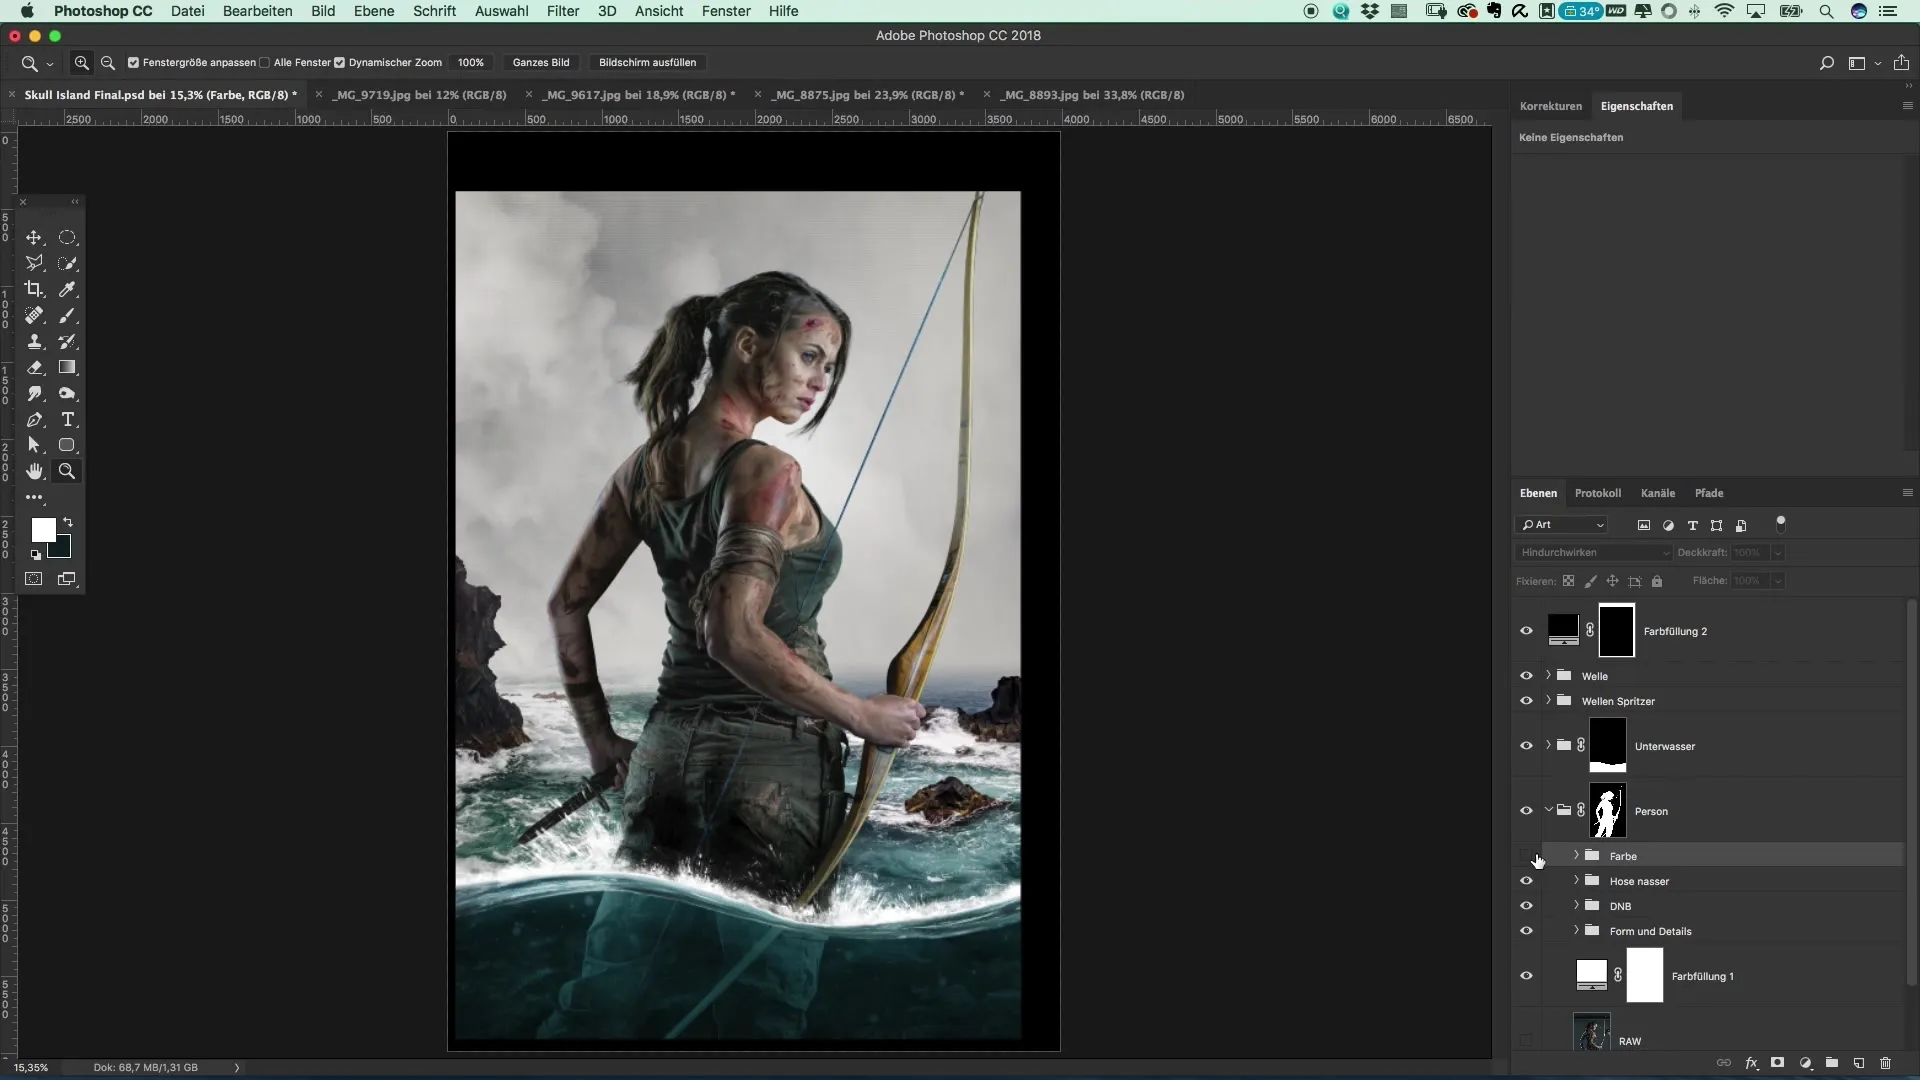
Once you are happy with the colors, finalize the "Color" group. Make sure to save your work to preserve the effects that you have quickly adjusted.
Summary - Create Poster in the Style of Tomb Raider
In this guide, you have learned how to create impressive posters in the style of Tomb Raider with simple colors and light reflections. A well-thought-out use of Photoshop tools can make all the difference in transforming your creative ideas into a visual masterpiece.
Frequently Asked Questions
How long does it take to create such a poster?The duration depends on your skill level and the details you want to add.
Do I need special knowledge in Photoshop?A basic understanding of layers and color corrections is helpful but not mandatory.
Can I use other colors or light sources?Yes, experiment with different colors and light sources for personalized results.
