Your goal is to focus on your model through targeted lighting directionand create an appealing vignette. In this tutorial, you will learn how to optimize the lighting conditions using Photoshop and set a vignette to draw the viewer’s attention to your subject.
Key Insights
- To highlight the model, targeted brightening and a well-placed vignette are crucial.
- Applying tonal corrections and masks can effectively adjust the lighting conditions.
- By experimenting with different blending methods and color adjustments, you can achieve dramatic effects that enhance the overall impact of your photography.
Step-by-Step Guide
Step 1: Analyze the Starting Situation
Begin by examining the image and noticing that the focus on your model, here Jessica, is lost and the composition appears too flat. You realize that you want to deliberately direct the focus onto Jessica's face to dynamize the image.
Step 2: Group Background
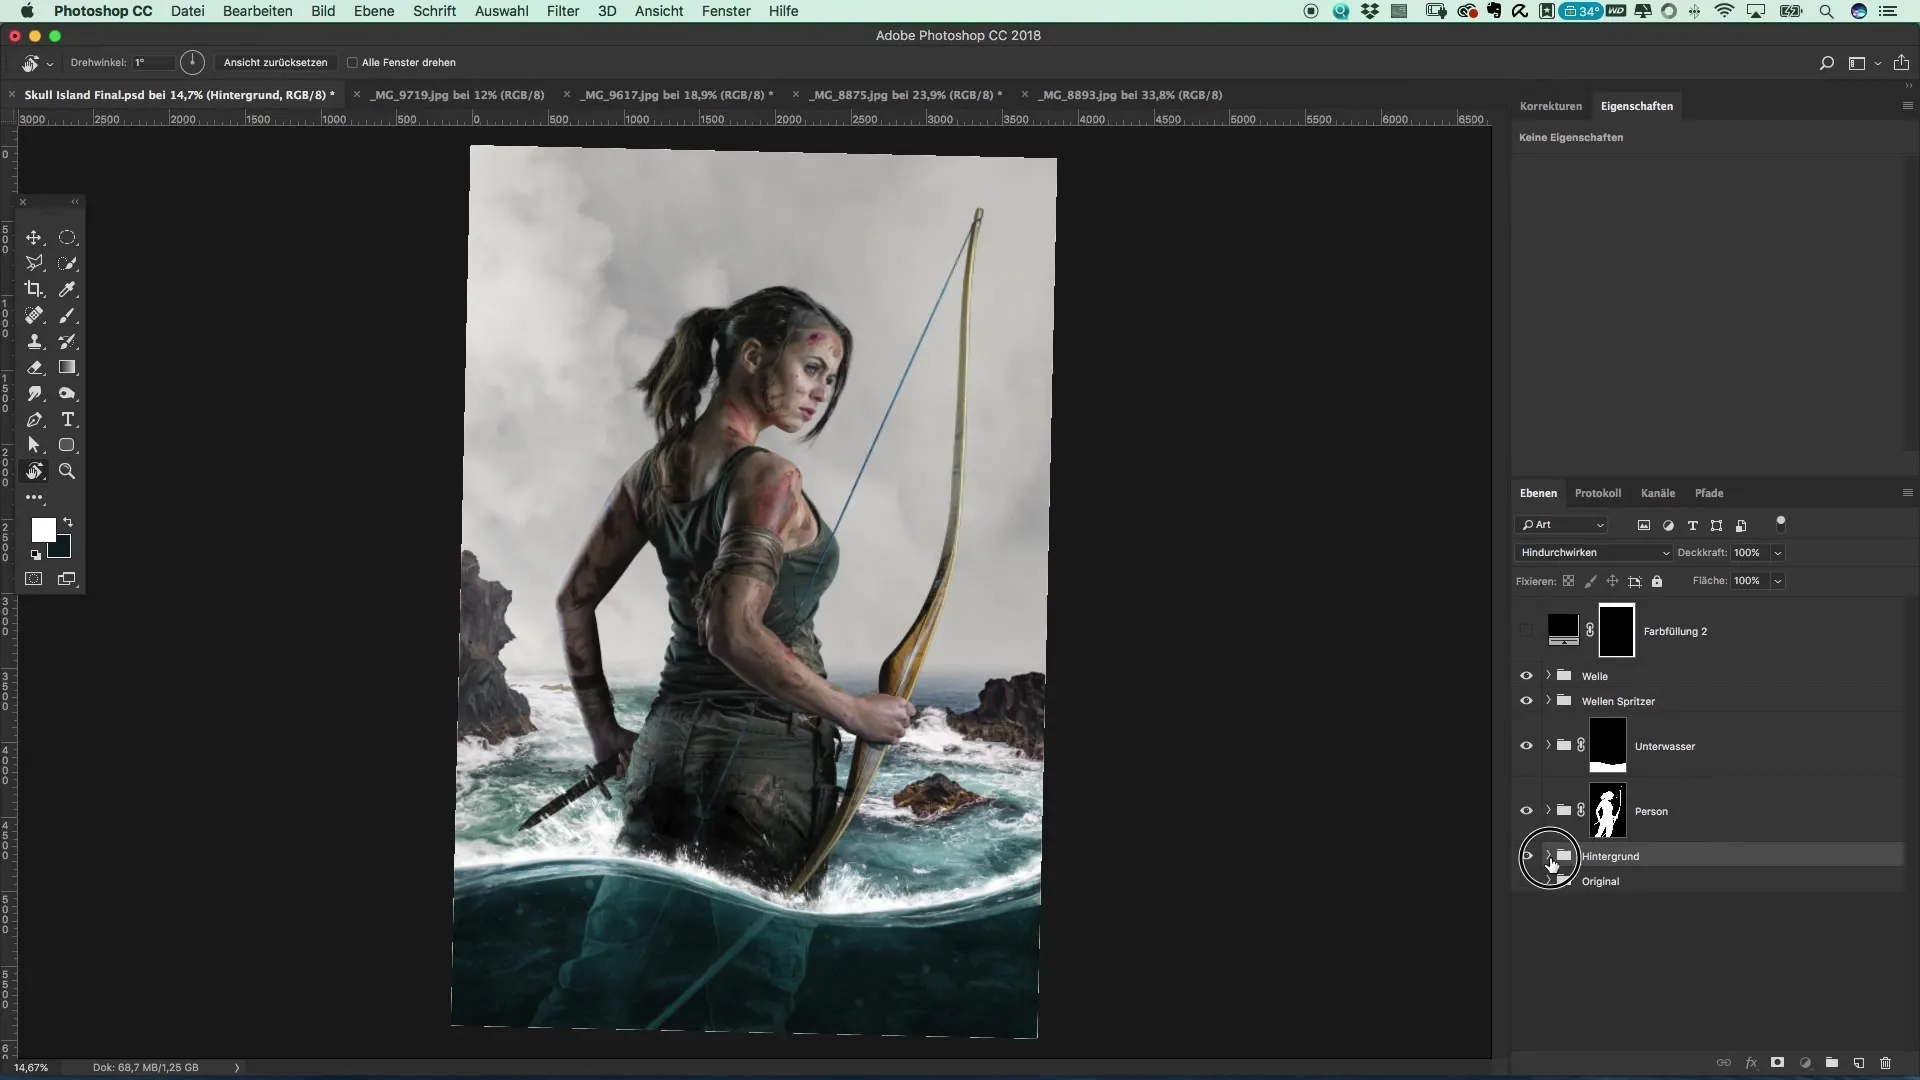
First, go to the "Background" group. If you create a new group here, name it "Vignette & Light Spot" to keep your work steps organized and easily accessible.
Step 3: Create the Light Spot
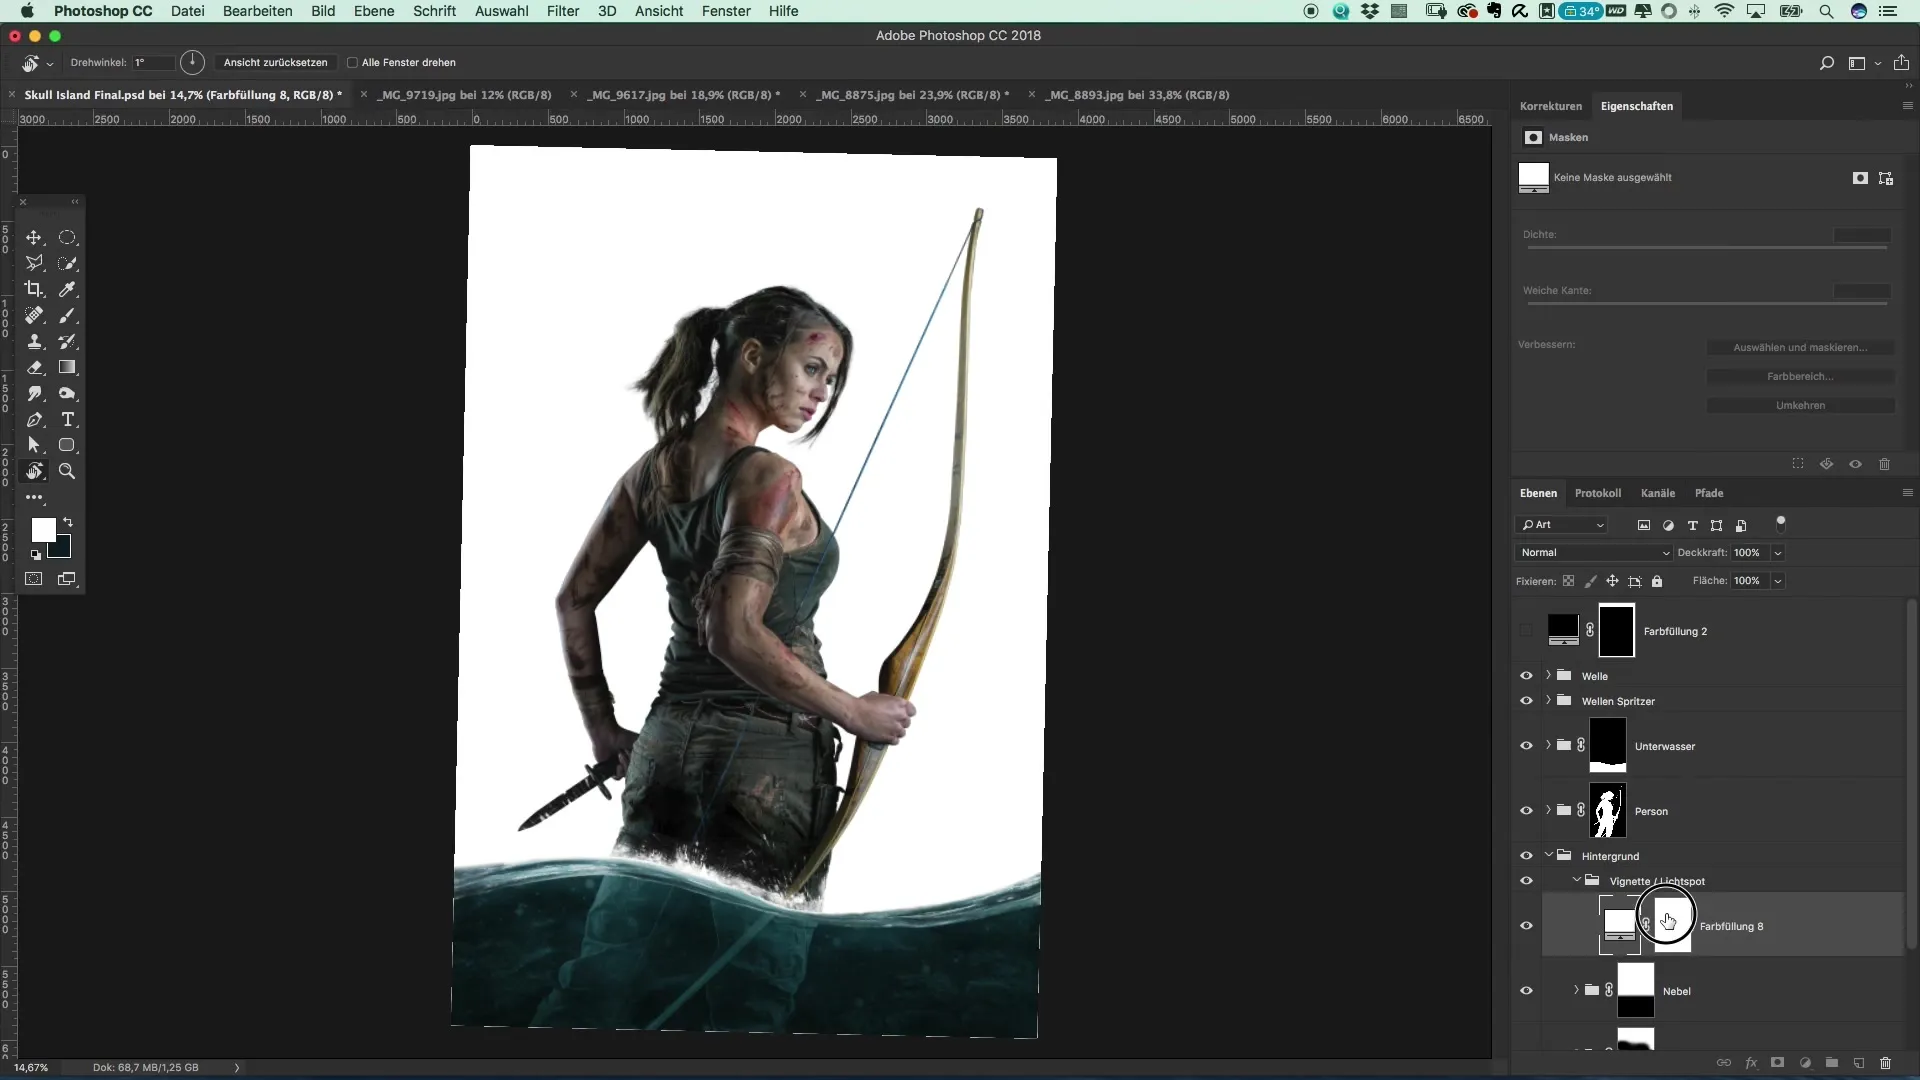
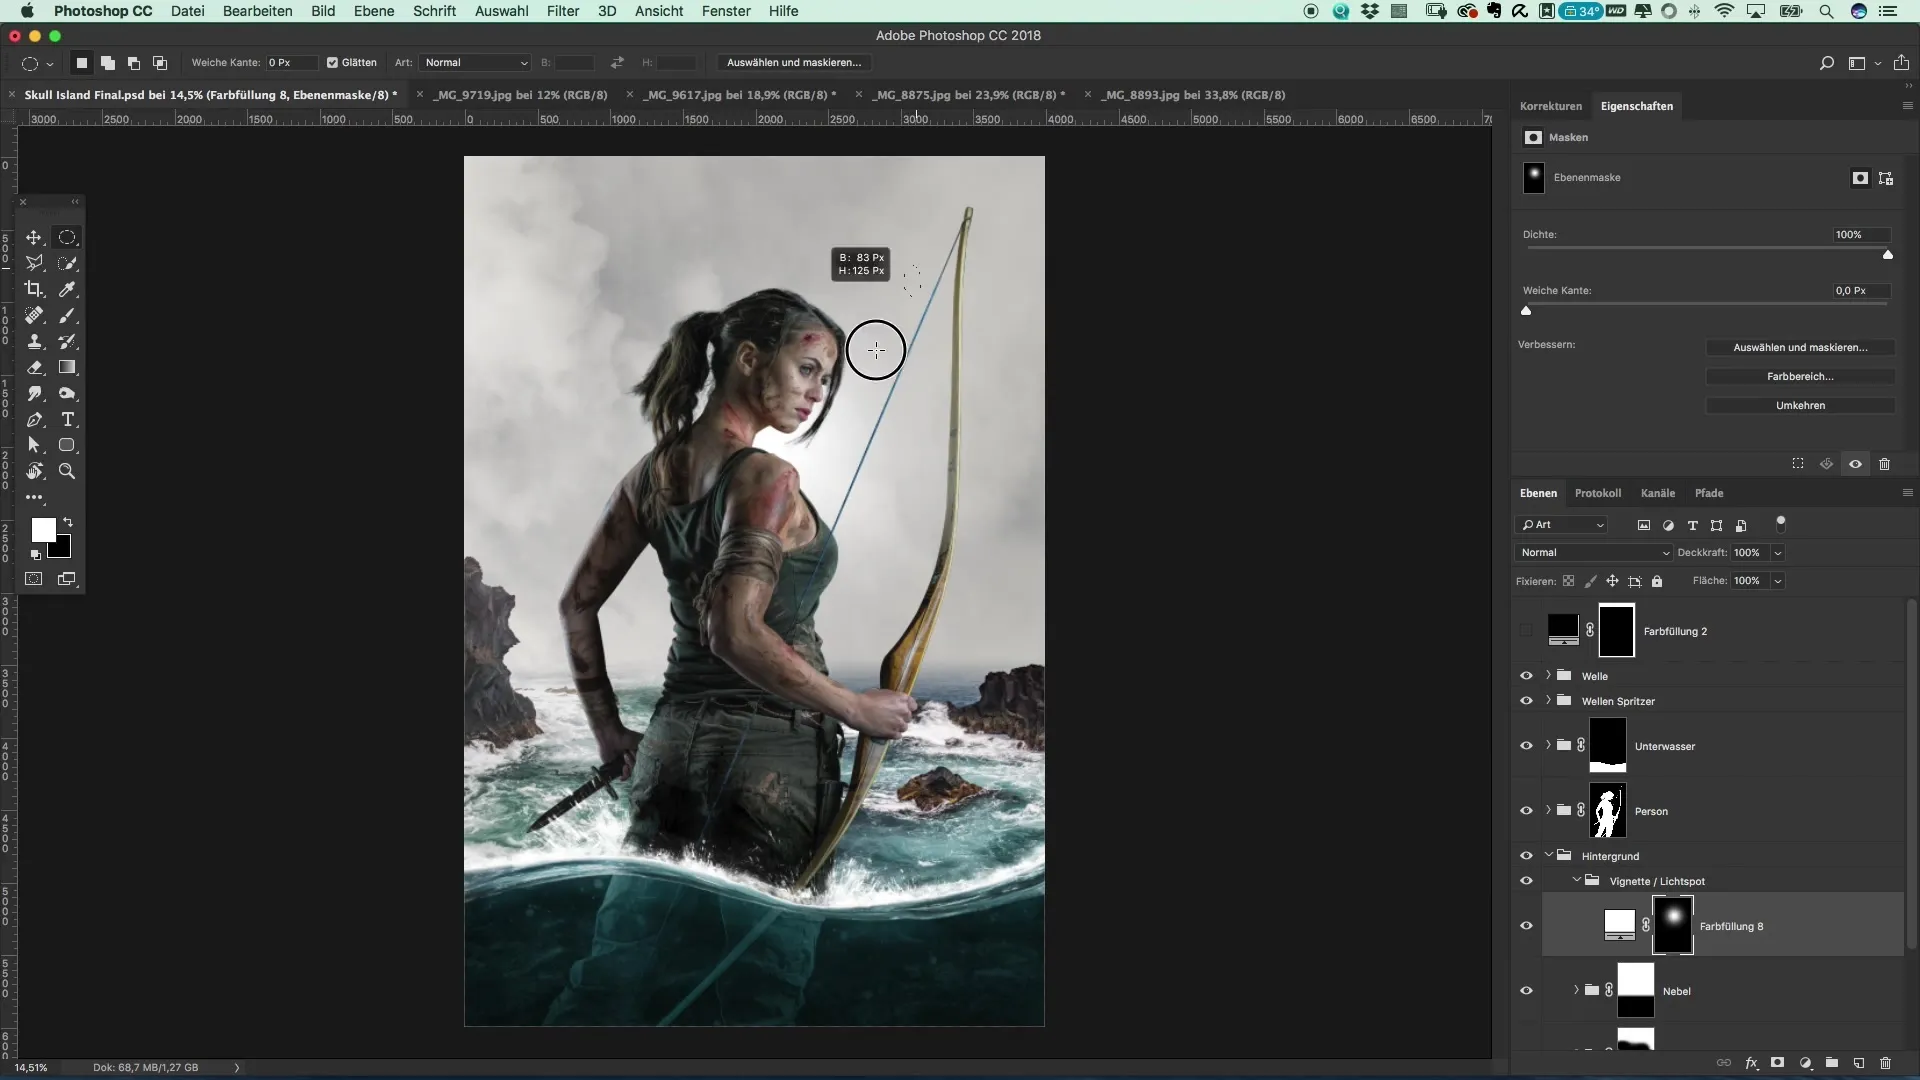
Start with a white surface, which you will invert. Select the brush with 100% opacity and a hardness of zero. The size of the brush is initially irrelevant. It is important to paint in a white dot into the image to create the light spot.
Step 4: Enlarge the Light Spot
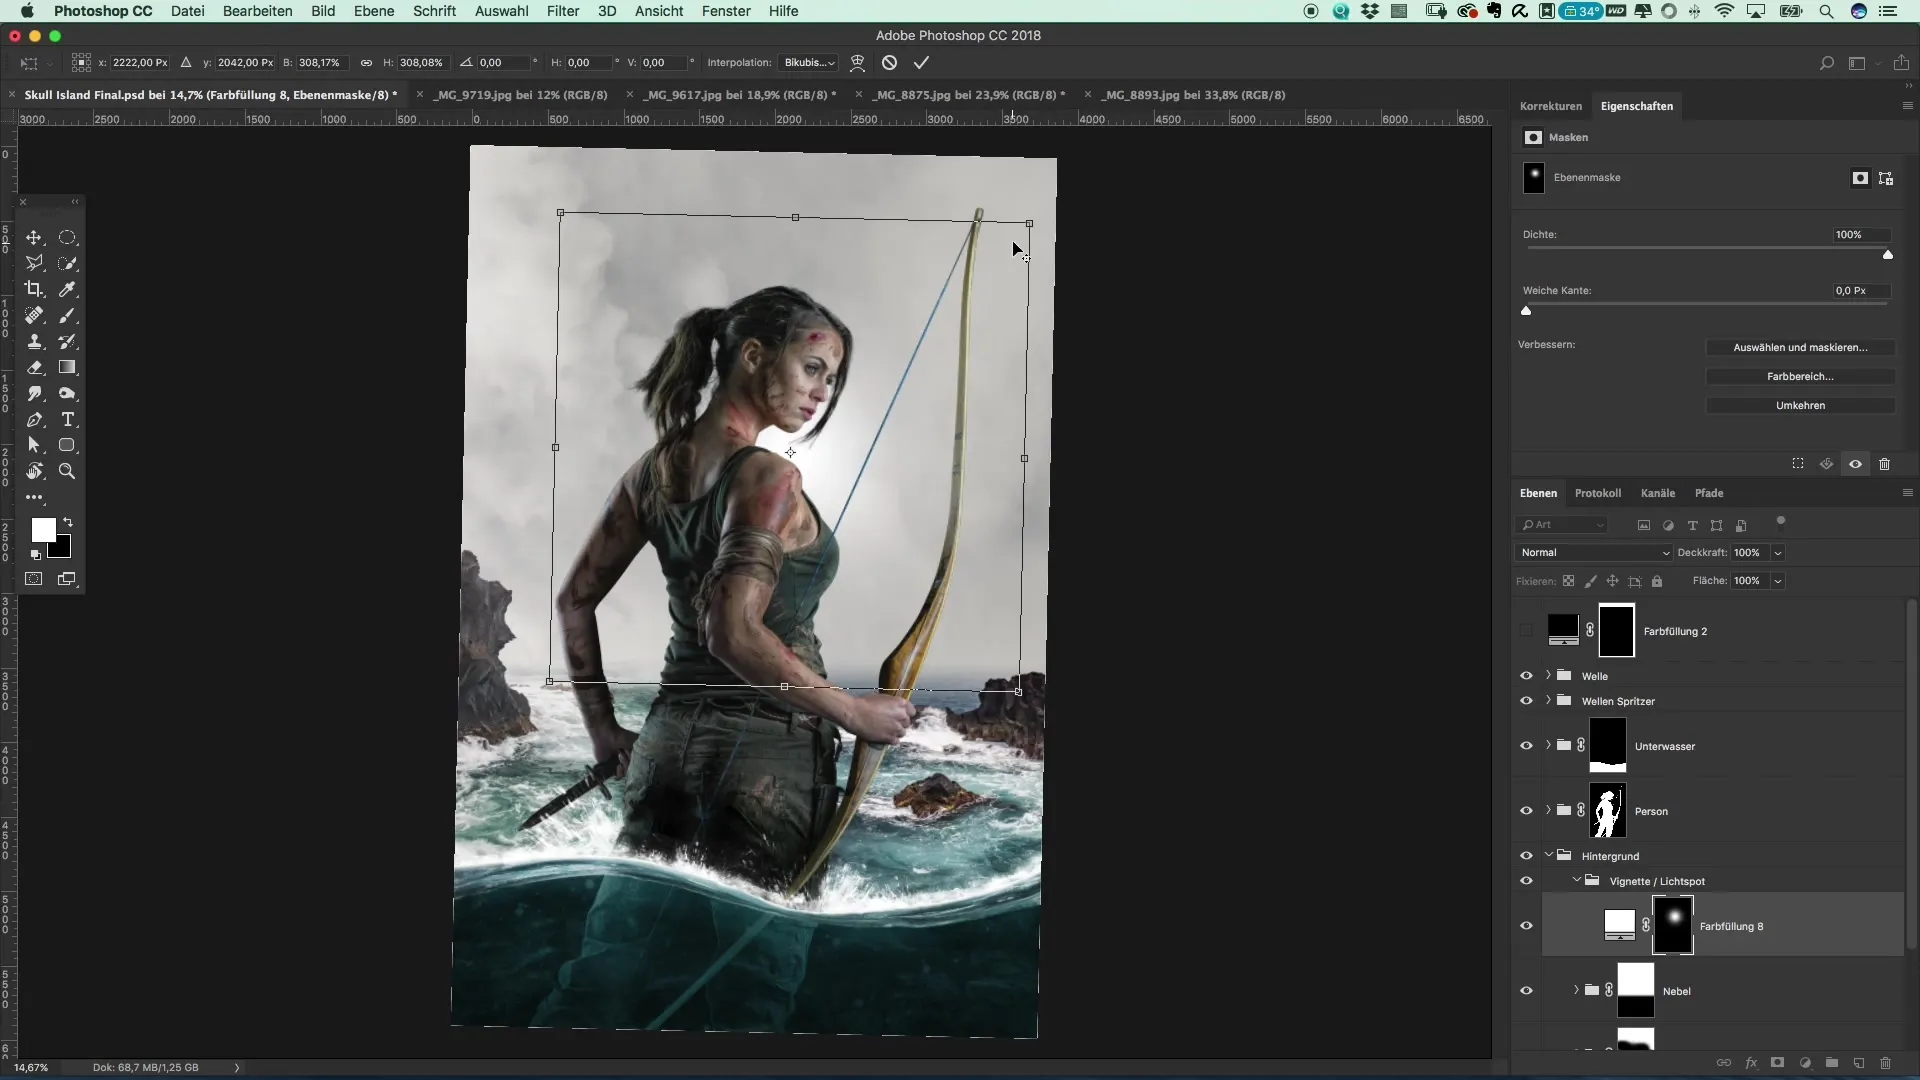
The goal is to place the brightest point in the image, apart from small water splashes, near Jessica's head. This brighter area should direct focus to her face and distract from the visual complexity of the scene.
Step 5: Create the Vignette
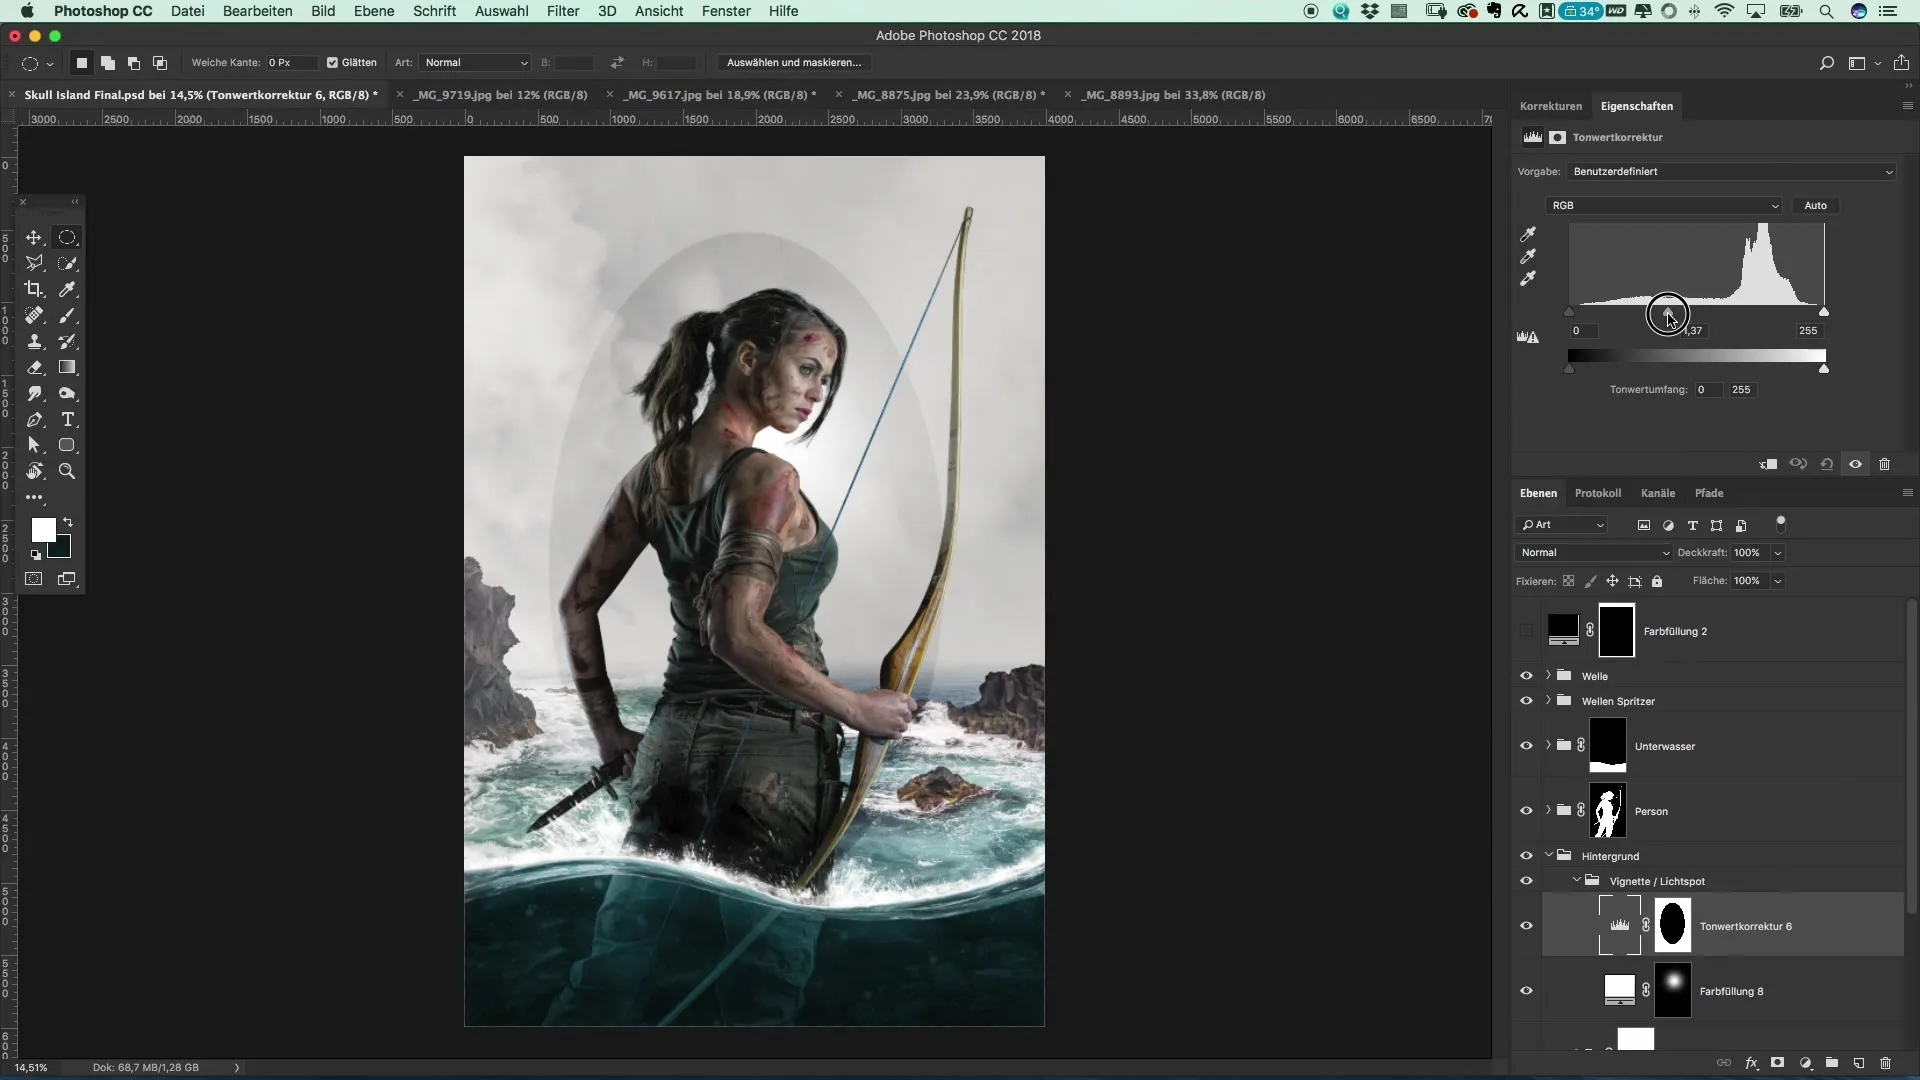
Now you create a vignette using the elliptical selection tool. Draw an ellipse and create a tonal correction. Invert the correction so that it only affects the outside and darken the edges to soften the edges of the ellipse.
Step 6: Shift the Focus
The edge of the mask set to a softness of about 500 pixels ensures that the focus falls more on Jessica and less on the background details. This correction only affects the surface, so anything underwater remains unchanged.
Step 7: Increase Contrast
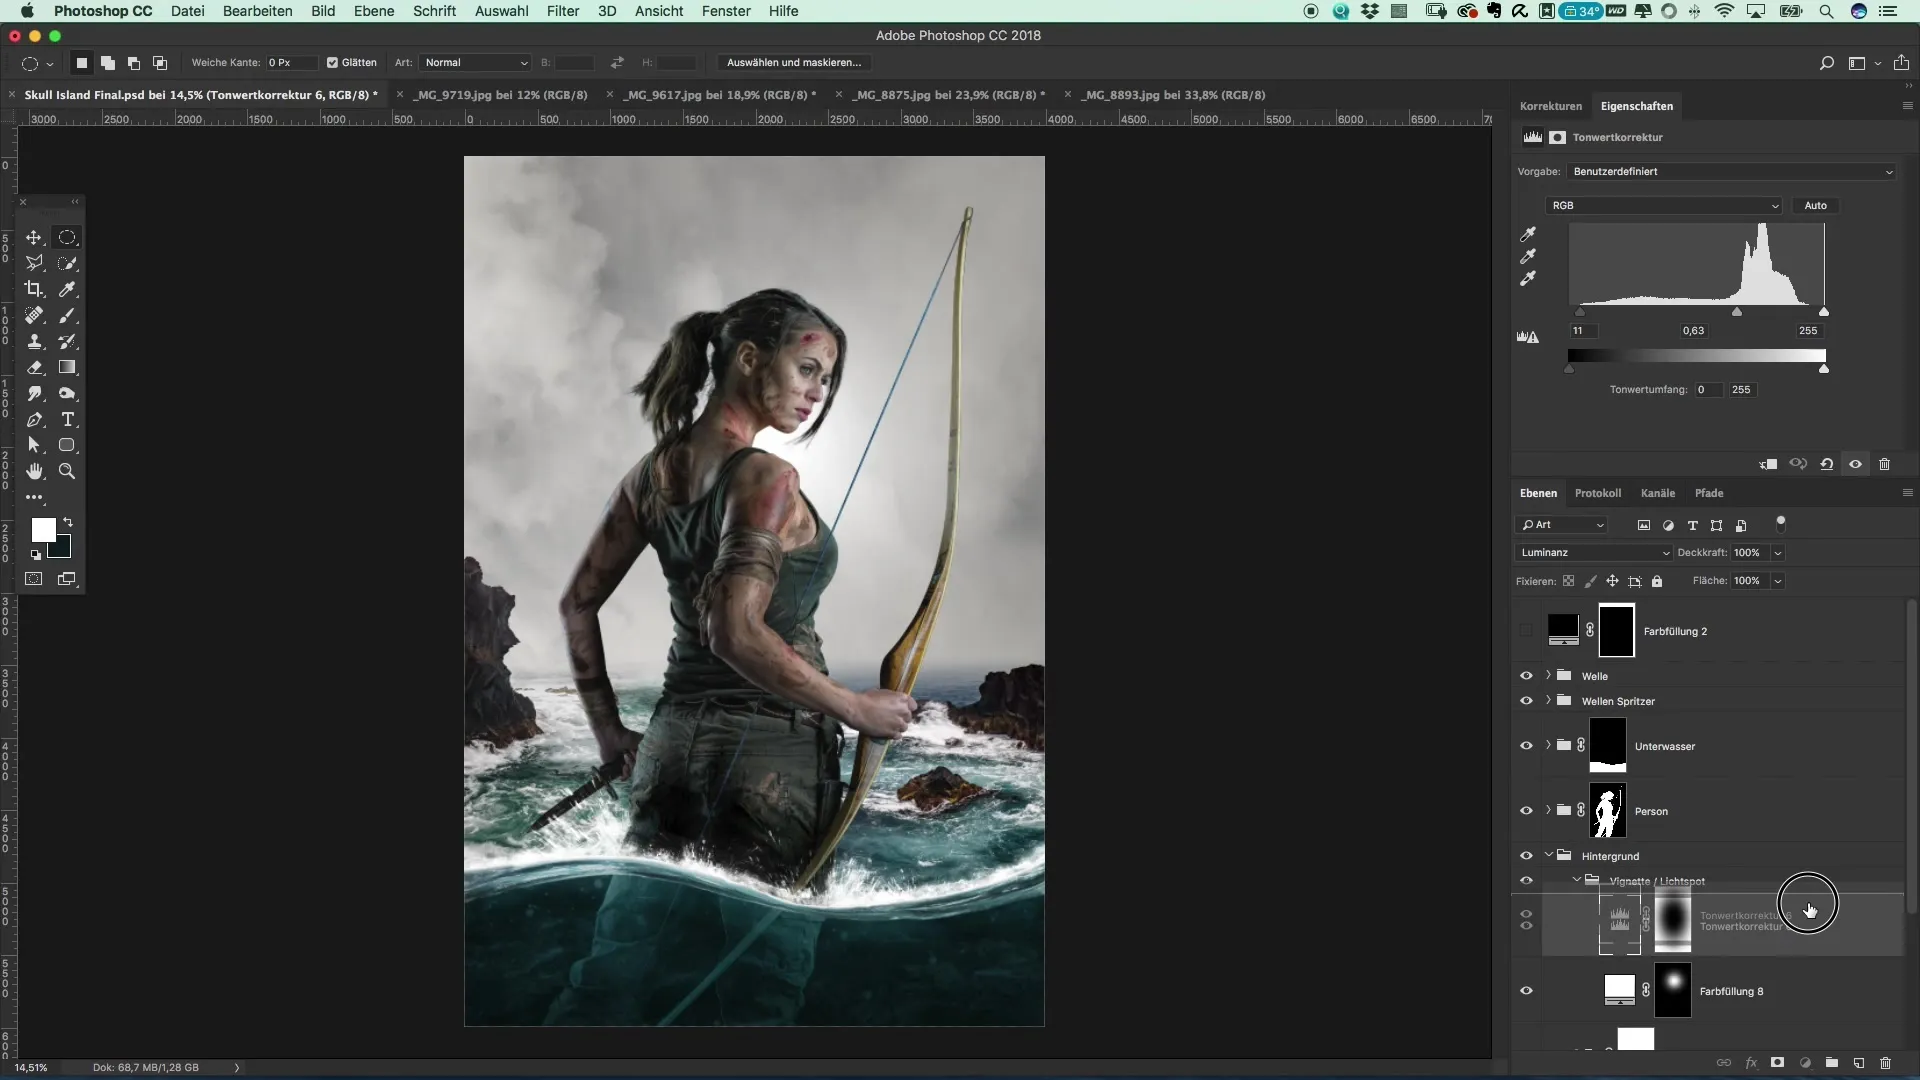
To further enhance the image crop, slightly darken the shadows. This will make the stones appear darker and thus create more contrast. It is important to keep the blending mode set to luminosity so that the colors of the stones do not stand out too much.
Step 8: Duplicate the Tonal Correction
Create a copy of the settings in the vignette by inverting the mask. Now you want to brighten this edited area. The right side of the subject should be brightened more while the left area remains darker to enhance the dramatic effect.
Step 9: Fine Tuning
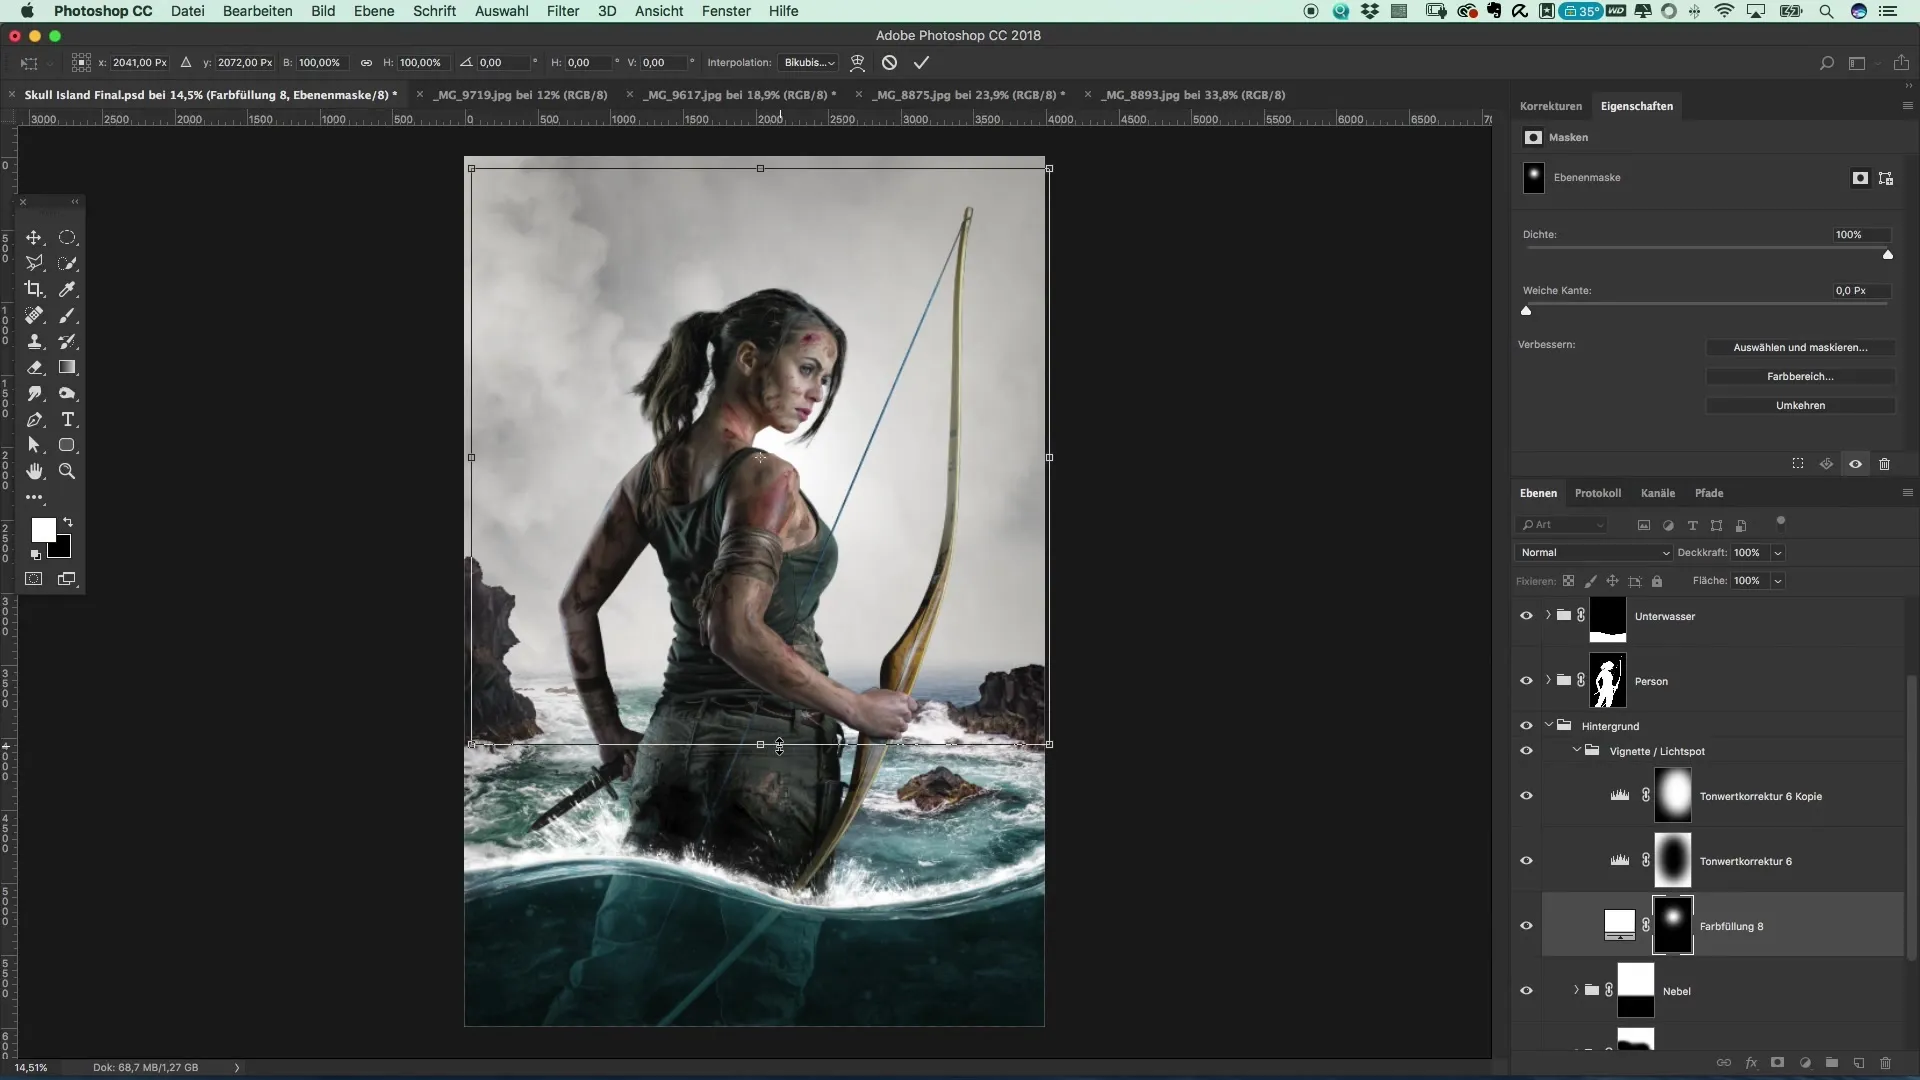
Reduce the area of the light spot if it appears too intense. By reducing this area, the desired effect becomes clearly visible.
Step 10: Finalize the Corrections
Integrate the "Vignette and Light" group into the cut and observe how these adjustments significantly change the scene. The small corrections already make a considerable difference in the overall impact of the image.
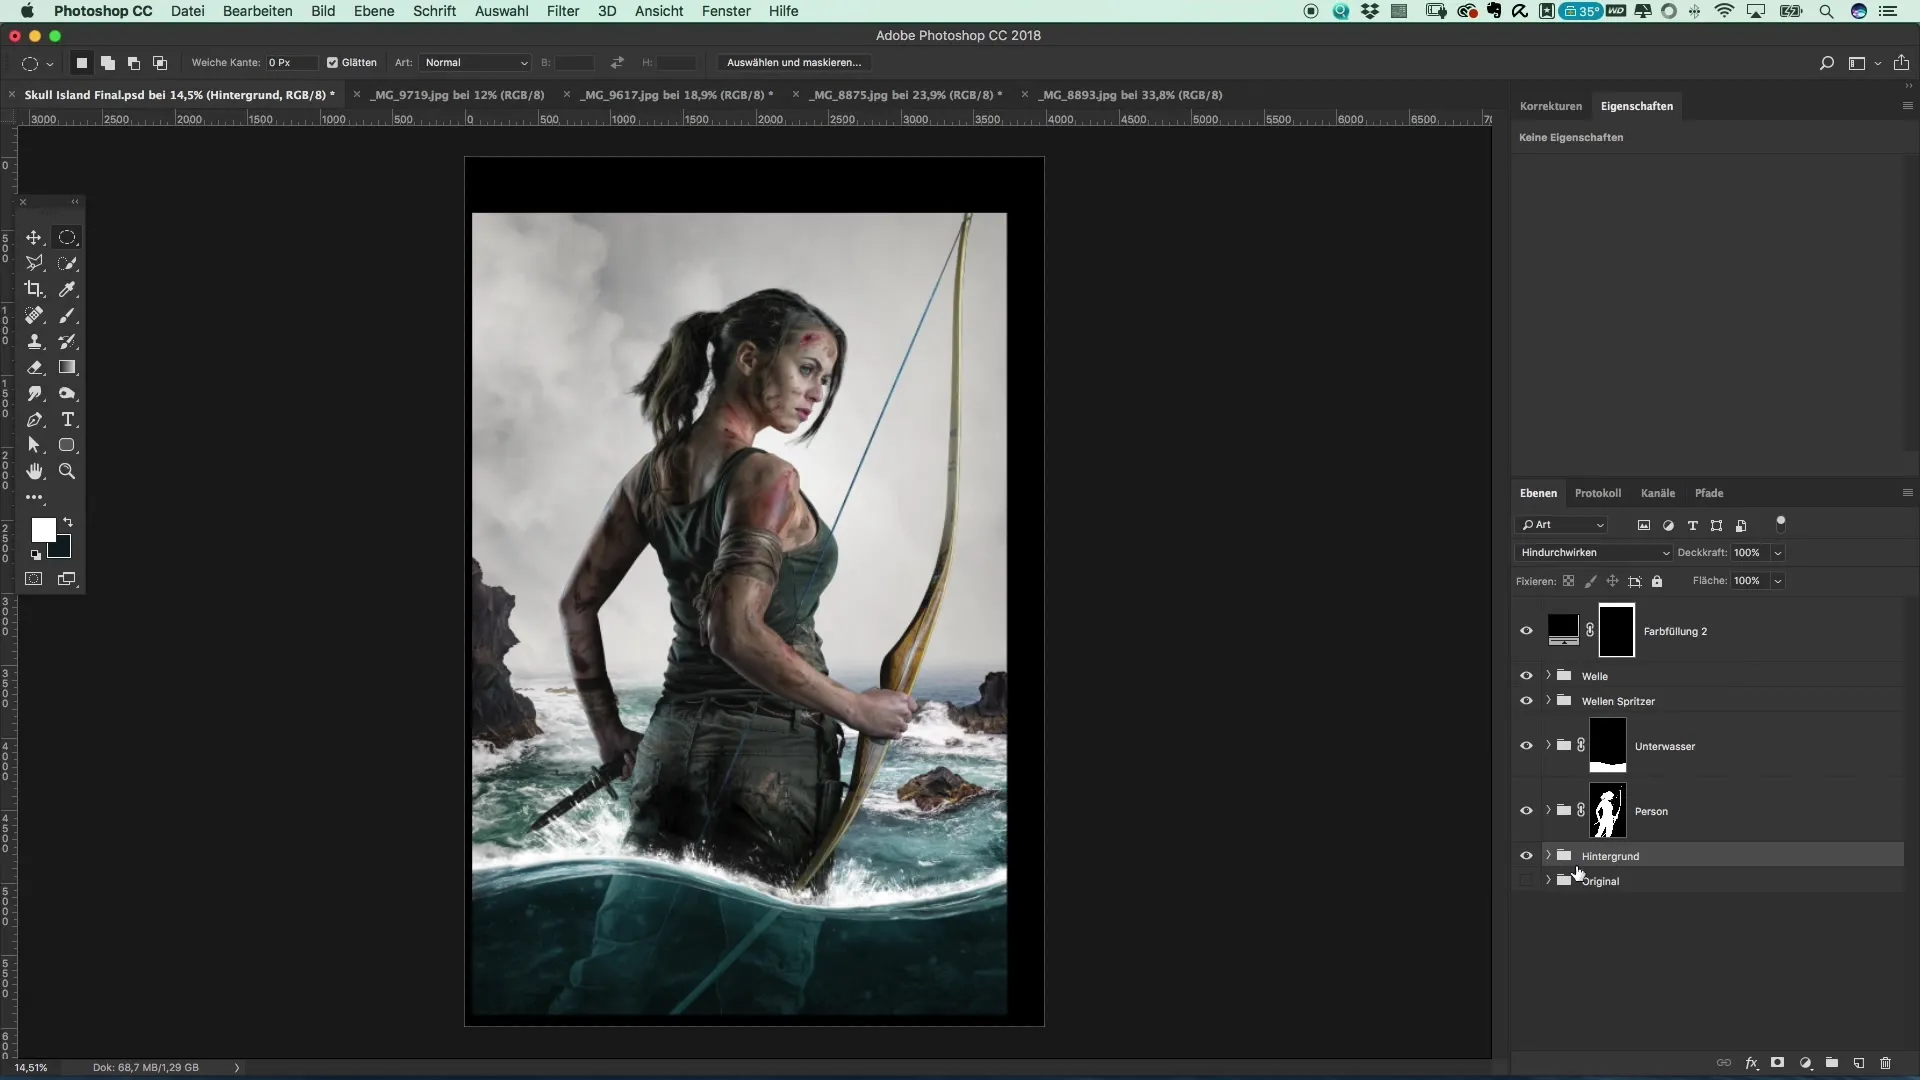
Summary – Create Posters in the Style of Tomb Raider: Step-by-Step Tutorial on Lighting Direction
In this guide, you learned to control the lighting in your image so that the focus is on the model and an appealing vignette is created. Every detail and technique leads to a impressivefinal result that tells stories and transports the viewer into your visual cosmos.
FAQ
How do I put more focus on my model?By strategically placing light spots and vignettes that dim the ambient light, you bring the focus to the model.
Which software do I need for this editing?You need Adobe Photoshop or a comparable image editing program.
Can I apply these techniques to other photography styles as well?Yes, the techniques are versatile and can be applied in various photography styles to modify the focus.


