
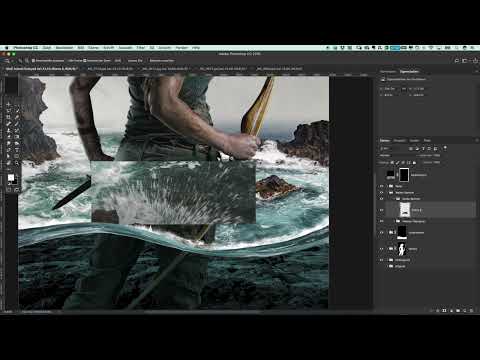
A Tomb Raider poster thrives on movement, and in water a single detail often decides how dramatic it looks. This is exactly where this tutorial comes in. You will learn how to montage water splashes and fine waves from photo material into a composition, blend them with the background using the Screen blend mode, and adjust them with Puppet Warp, masks, and layer groups so that the transition between wave and water surface looks believable. The wave section is considered the most demanding part of the project. However, once you have solved this transition cleanly, the rest comes much more easily.
The video is only loaded from YouTube when you play it – data (including your IP address) is then transmitted to YouTube/Google. More in the privacy policy
Key Takeaways
- Splashes and waves are desaturated before you blend them in using the Screen blend mode.
- A Levels adjustment as a clipping mask controls brightness and contrast without changing the original layer.
- Puppet Warp deforms waves so that they nestle organically into the transition.
- You remove hard edges with layer masks, and you create softness through gradients and opacity.
- Flipping, rotating, and scaling down prevent splashes from visibly repeating.
Step-by-Step Guide
Select a reference section for the transition
First, open your photo material with the wave that hits the shore directly. This section serves as your reference for the transition. Select the relevant area with the selection tool and copy it with Command + C (on Windows Ctrl + C). Then switch to your poster document and create a new layer group. Give it a sensible name, for example "Splashes", so that you keep track later. Paste the section into this group.


Remove saturation and set the blend mode
The pasted image material contains color information that has no place in your composition. Therefore, go to Image > Adjustments > Hue/Saturation and drag the saturation slider all the way to the left. Then you blend the layer with the background. To do this, select the Screen blend mode in the Layers panel. Dark areas of the wave remain visible, while bright areas disappear into the composition. This very effect makes the montage so uncomplicated.


Refine the transition with a Levels adjustment
After blending, the transition is usually not clean yet. Therefore, place a Levels adjustment above it and activate the option Use as clipping mask so that it affects only the wave. Alternatively, you can apply the adjustment directly to the layer. This saves you layers in the panel but permanently changes the original image. Move the midtone slider to the right so that the dark areas of the wave recede. Then drag the white slider to the left to get more white. This step alone brings a significant improvement.


Convert the wave into a Smart Object and deform it
Convert the wave into a Smart Object. This way you can deform it without losing image quality and can go back at any time. Place the layer roughly at the position where the transition should appear. Then choose Edit > Transform > Puppet Warp. Puppet Warp is excellent for locally bending and stretching the wave. Move the mesh points so that the transition flows smoothly into the water. Confirm the transformation as soon as the shape is right.


Mask unattractive areas
After Puppet Warp, there are often areas in the way that do not belong in the image, for example at the bottom edge or in the upper area. Add a layer mask for this and paint out the unwanted parts with a soft black brush. Make sure to reduce the brush opacity so that the transitions stay soft. Once the mask is set, you can duplicate the wave and adjust it again with a second Puppet Warp. The additional layer provides more depth. If necessary, you remove the mask supplied with the Puppet Warp if it disturbs the display and you do not need it.


Repeat this process once more if needed to place additional waves. Each repetition becomes more routine, and you will more quickly recognize which parts you need to mask out. The same principle also works with a lighter transition: move the layers up or down and adjust the opacity until the gradient looks natural.


Grouping fine waves and preparing transitions
Once you have placed several fine waves, put them into their own group. In this kind of work, a great many layers quickly accumulate, and a clean group structure prevents chaos. Give the group a fitting name, such as "Wave splash white transition". Small irregularities or structures can safely remain, because in the final version they often will no longer be noticeable.

Using large splashes
Now the large splashes come into play. Copy them from the reference material as before, create a new group, and paste them there. Desaturate the layer again via Image > Adjustments > Hue/Saturation and set the blending mode to Screen. The splashes often look too soft or too flat at first. Therefore, use a Levels adjustment again, brighten the splashes slightly, and emphasize the hard edges. At the transition, you can additionally use a mask to remove sharp edges that are distracting at the top or bottom of the image.


Distributing, flipping, and scaling down splashes
So that the splashes do not repeat, duplicate them and vary them deliberately. Flip a copy via Edit > Transform > Flip Horizontal and rotate it slightly. Also scale it down so that they appear to be different sizes. Place the first splash where it creates the impression that the wave breaks against the figure, and let it spray away from there. Hide parts that do not fit with a mask. If you have deflected the first splash sideways, the whole thing looks significantly more authentic.


If you do not like a splash, simply replace it with another one from the photo material. Desaturate, blend, and flip it until it fits into the overall picture. Sometimes it is worth looking at the entire poster before you determine the final position.


Soft blending with a white color fill
For the final large transition, first close the group of splashes and switch to the wave. Via Layer > New Fill Layer > Solid Color, create a color fill in pure white. Set it as a clipping mask on the wave so that it only affects its shape. Then use a soft gradient to determine where the white transitions into the wave. Change the opacity of the color fill until the transition looks harmonious. An opacity of about 80 percent often produces a nice, soft gradient that blends the wave with the upper area.


Conclusion and Overall Review
At the end, toggle off all the visibility options once and look at the result as a whole. The hard edge has disappeared, the splashes and the wave appear connected to each other, and the image gains dynamism. You can add smaller refinements such as additional gradients or contrasts later. With this result, the most difficult part of the project should now be done.


Summary ??? Designing a Tomb Raider Poster with Water Splashes in Photoshop
You have learned how to composite water splashes and waves from photo material into a poster. Three steps are crucial: desaturation and the blend mode Screen, warping the wave with the Puppet Warp, and masking hard edges. With Levels adjustments, reflections, and a white color fill as a clipping mask, you bring everything together harmoniously. If you group your layers neatly, you keep an overview even with many splashes.
FAQ
Why does the saturation have to be removed before blending?Without desaturation, the color information of the splashes introduces unwanted color casts into your image. After removing it, only brightness differences remain, which blend cleanly with the background.
What does the blend mode Screen do?It makes bright areas of the layer disappear and keeps dark areas visible. As a result, splashes and waves look as if they were drawn in, without covering the background.
Why should I work with Smart Objects?A Smart Object stays lossless during transformations. You can warp the wave and return to the original shape at any time later.
When is a clipping mask useful?A clipping mask limits the effect of an adjustment layer to the layer beneath it. This way, a Levels adjustment changes only the wave and not the entire image.
How do I avoid visible repetitions in splashes?Flip, rotate, and scale the copies differently and place them in different spots. In addition, you hide parts with masks so that no identical patterns appear.


