When you dive into the world of image editing, tools like Adobe Camera Raw are indispensable. With the latest update to version 12.3, Adobe has significantly improved the user interface and features. In this tutorial, I will show you step by step how to effectively use the new capabilities of Camera Raw to optimize your images. You will learn how to elevate the mood of your photos with simple adjustments and save time during editing in Photoshop.
Key Insights
- The user interface of Camera Raw 12.3 is optimized and cleaner.
- New tools significantly ease the image editing process.
- Targeted adjustments can significantly enhance the quality of your images.
Step-by-Step Guide
1. First Impressions of Camera Raw 12.3
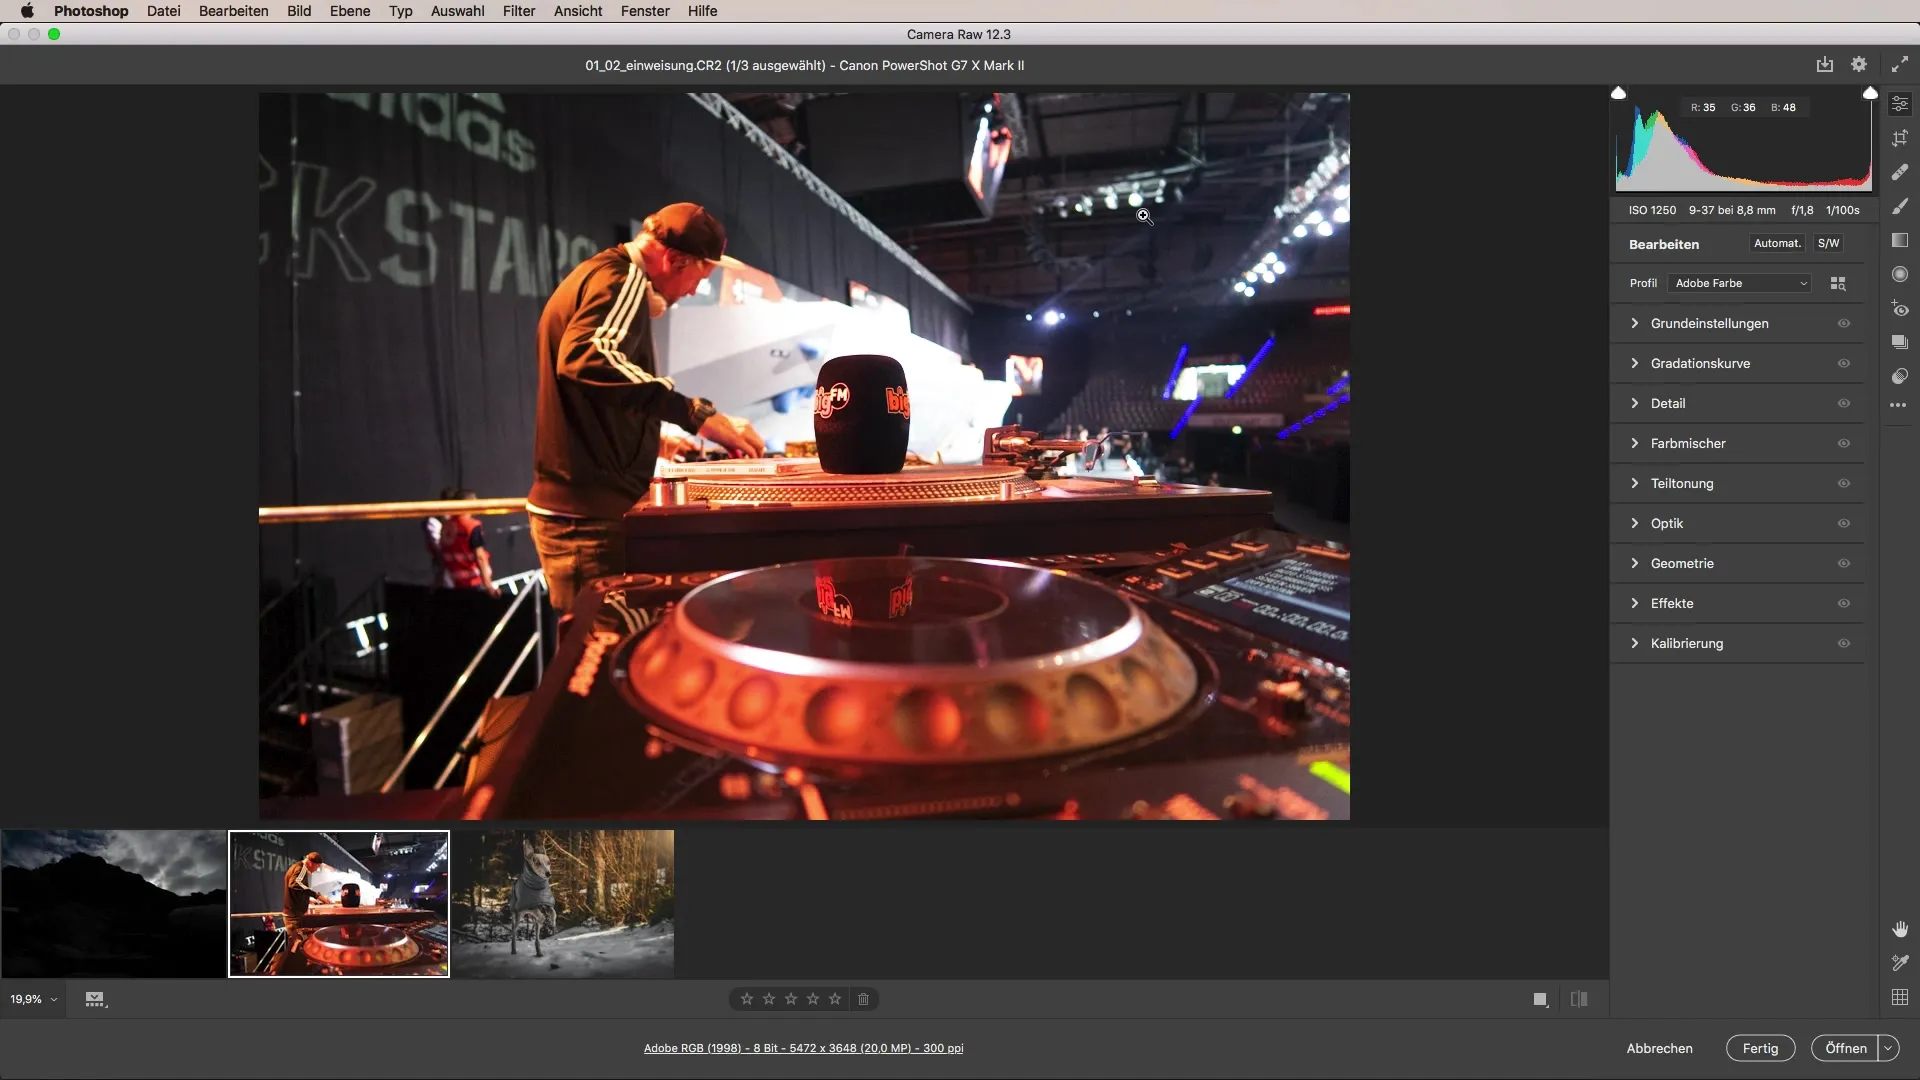
First of all, you will notice that the entire user interface now feels much more cohesive. The arrangement of tools has been made in clear tabs. A click on the upper menu reveals the most important tools, and you are no longer disturbed by a chaotic arrangement. This new organization makes it easier to work purposefully on your images.
2. Using the Film Preview
Another highlight of the new version is the film preview. You can toggle this on or off at any time to get a better overview of the image composition. This helps you assess the overall effect of your image and make adjustments if necessary.
3. Basic Settings for Image Optimization
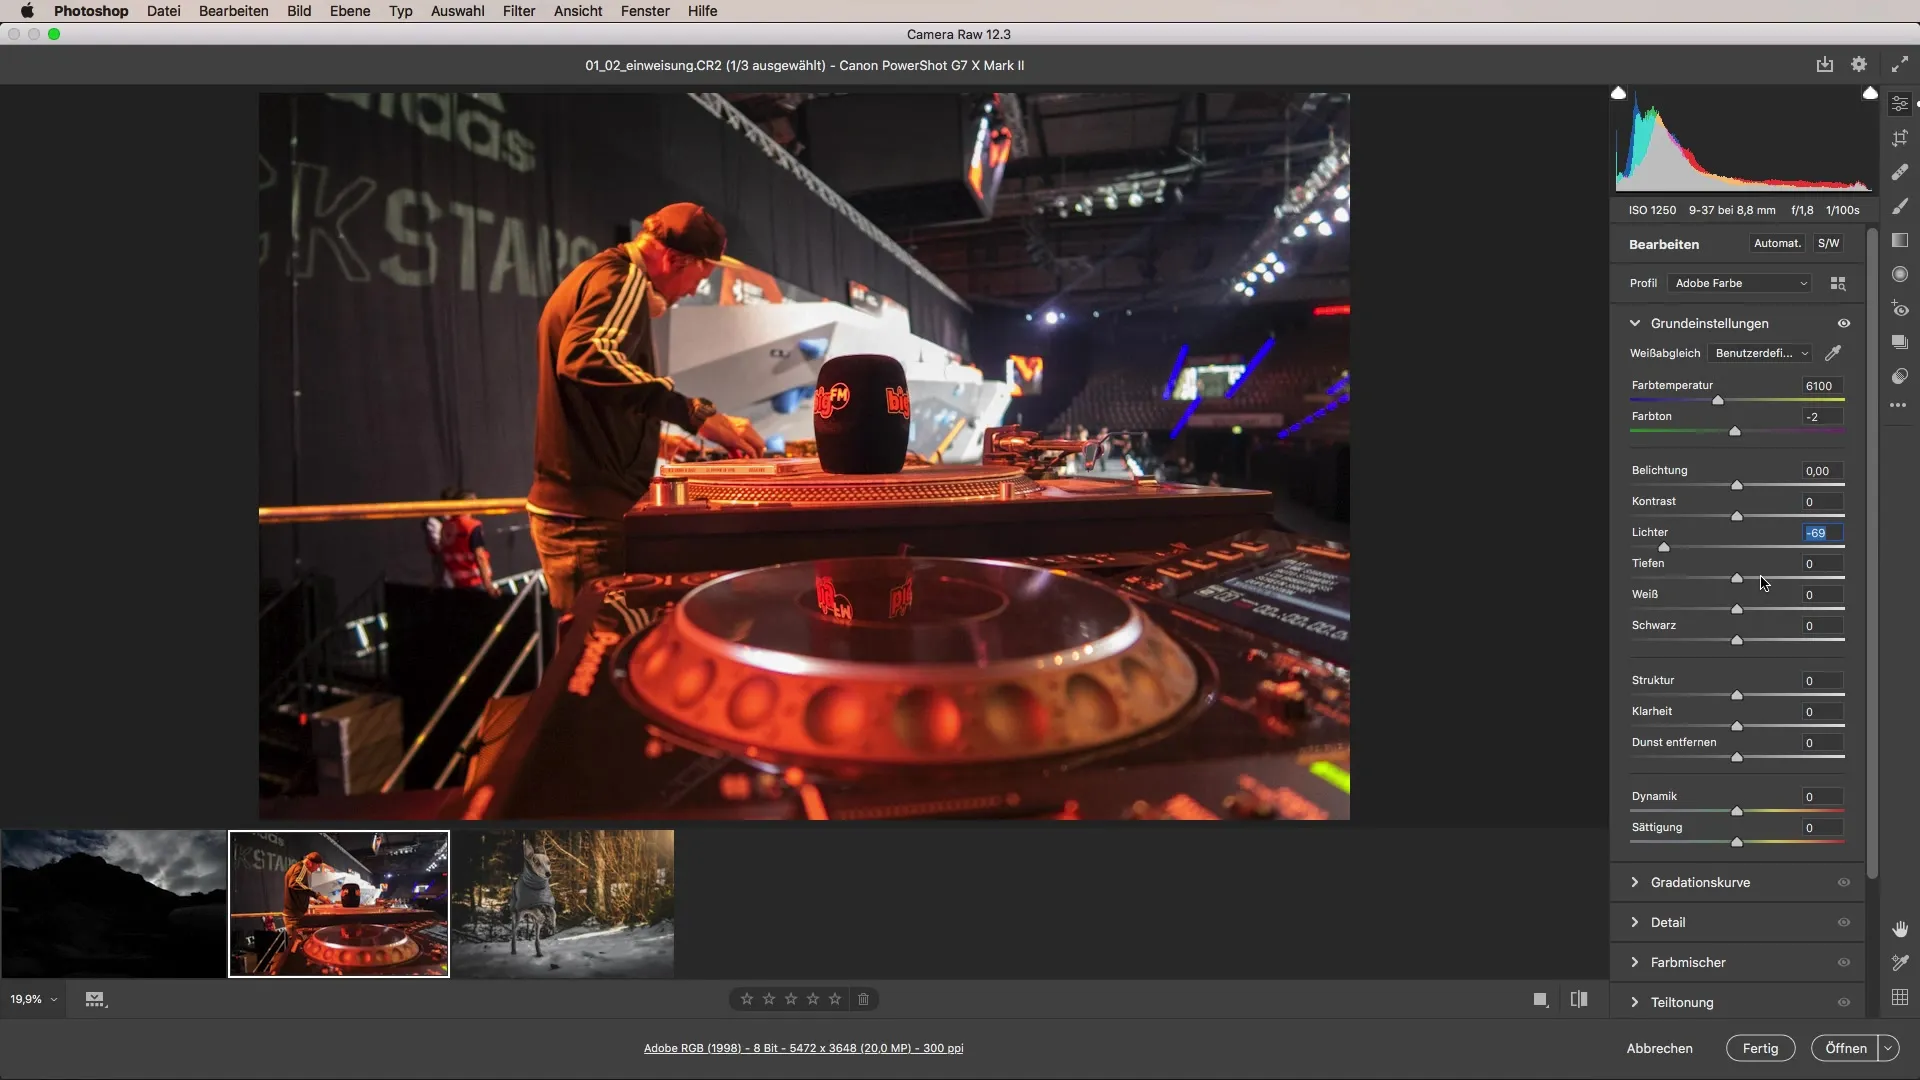
Now we come to the practical part, where it’s about how you can specifically approach image editing. Let’s take an event photo as an example. Here, you can increase the color temperature to improve the mood. At the same time, you should reduce the brightness of the highlights to capture more details in the shadows.
4. Enhance Image Sharpness with Filters
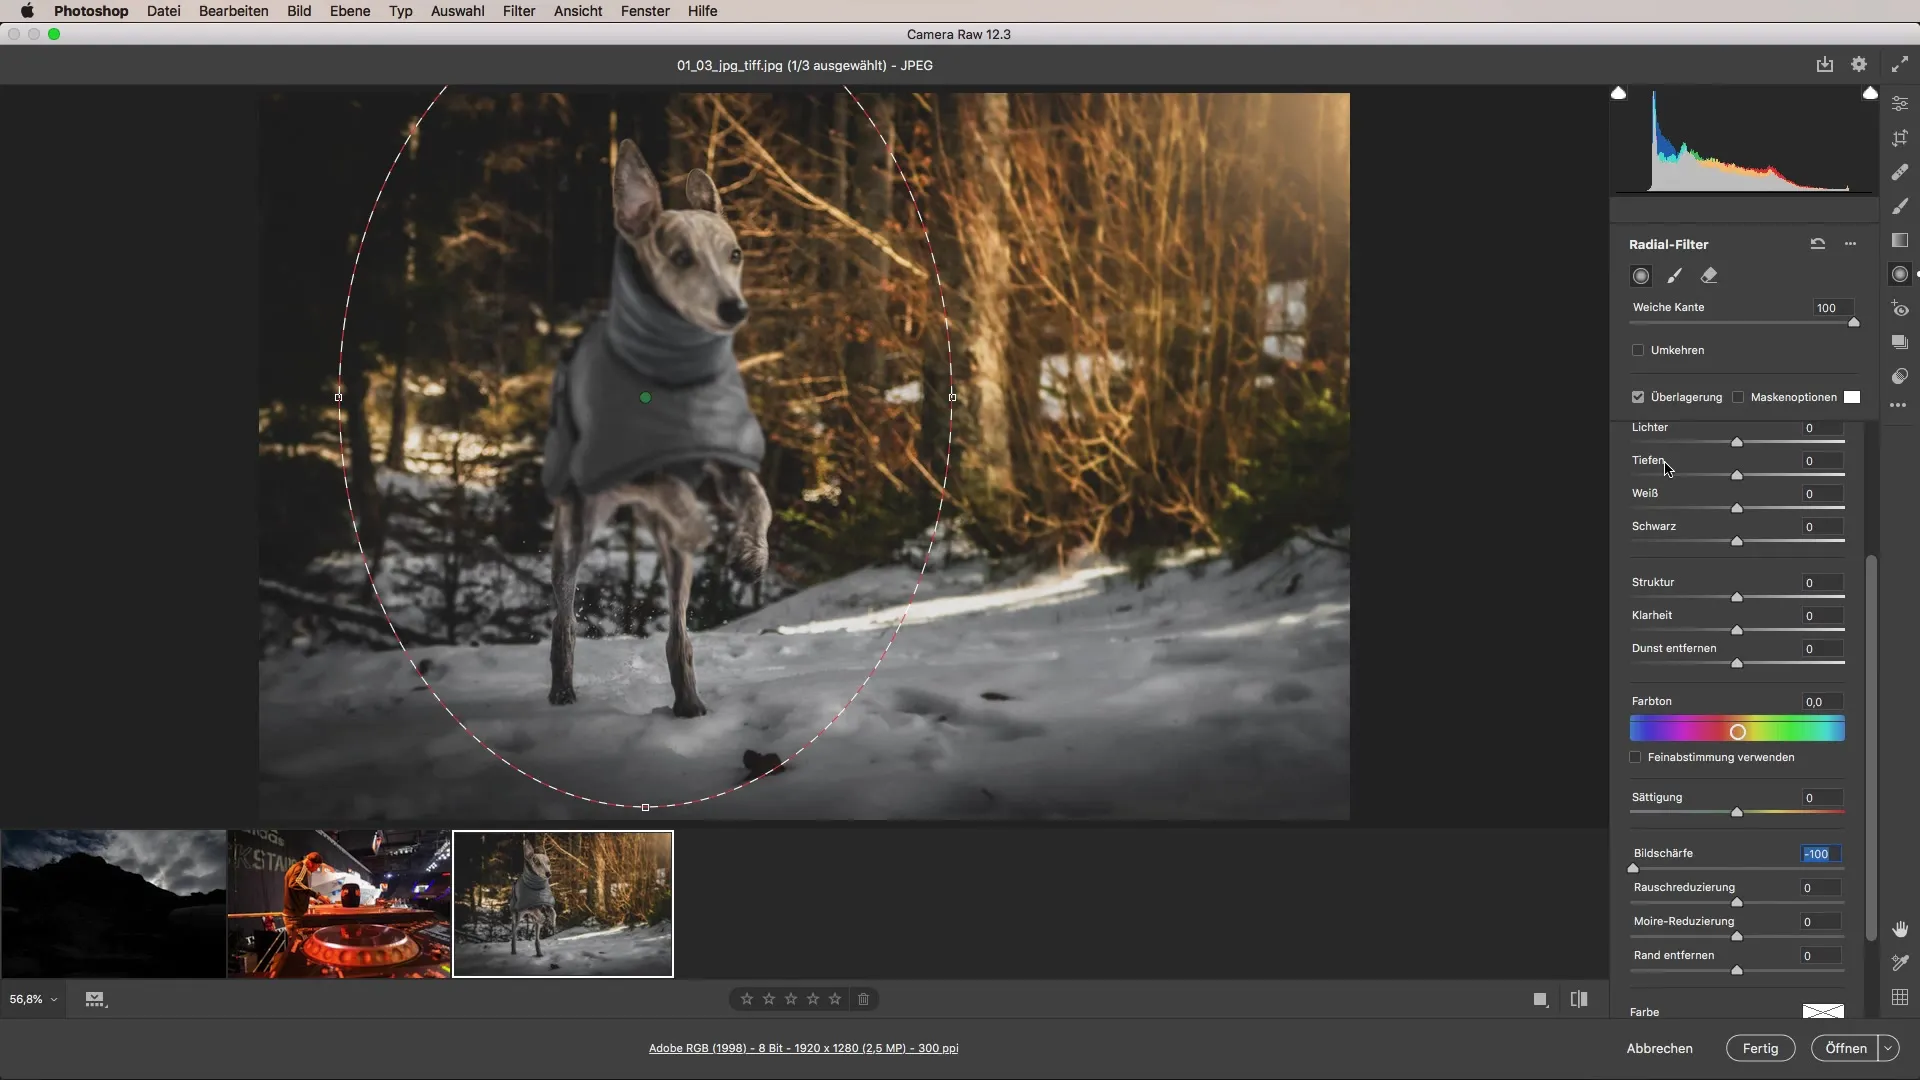
A small further example could be an image of your dog. You can use the radial filter to make targeted adjustments. First, set the sharpness of the dog to zero. To bring the focus back, apply the invert command. With these new functions, it looks like your dog was taken with a wide-open aperture, which gives it a certain majesty.
5. Adjust Shadows and Exposure
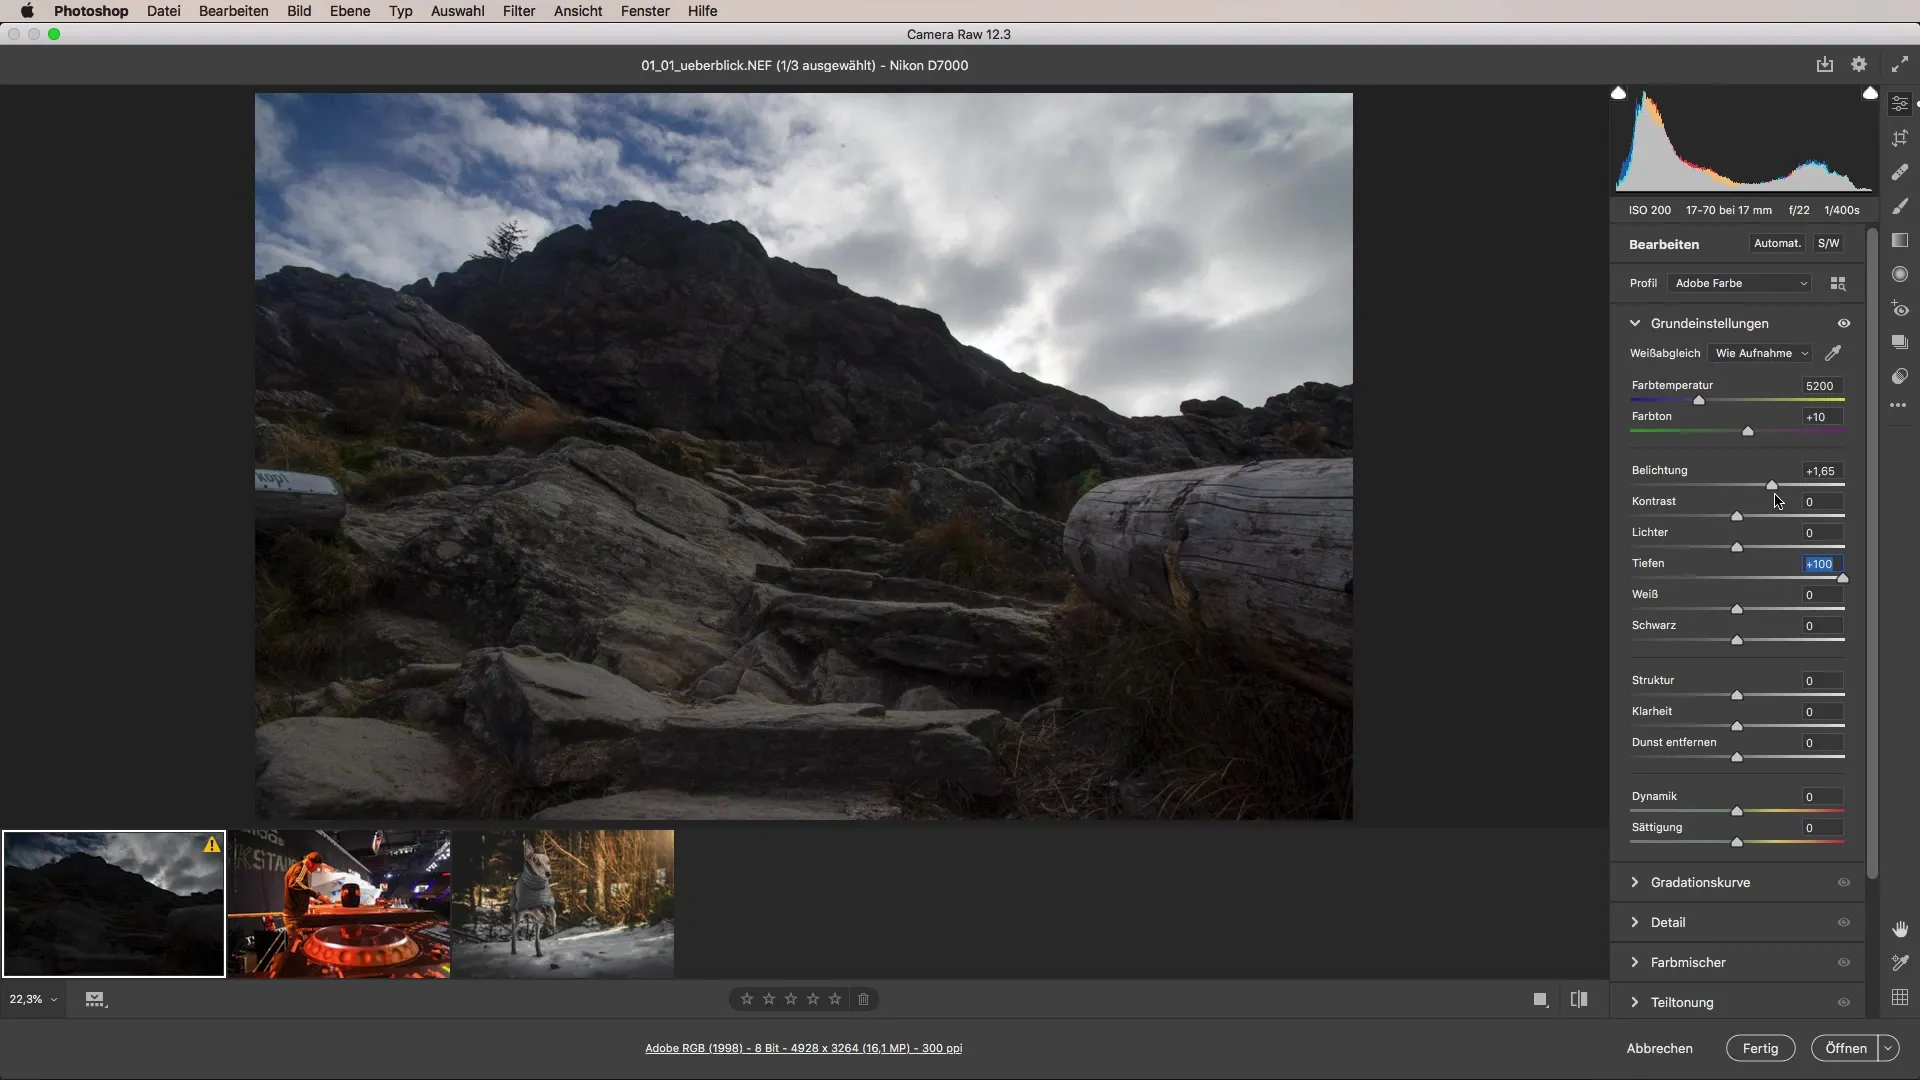
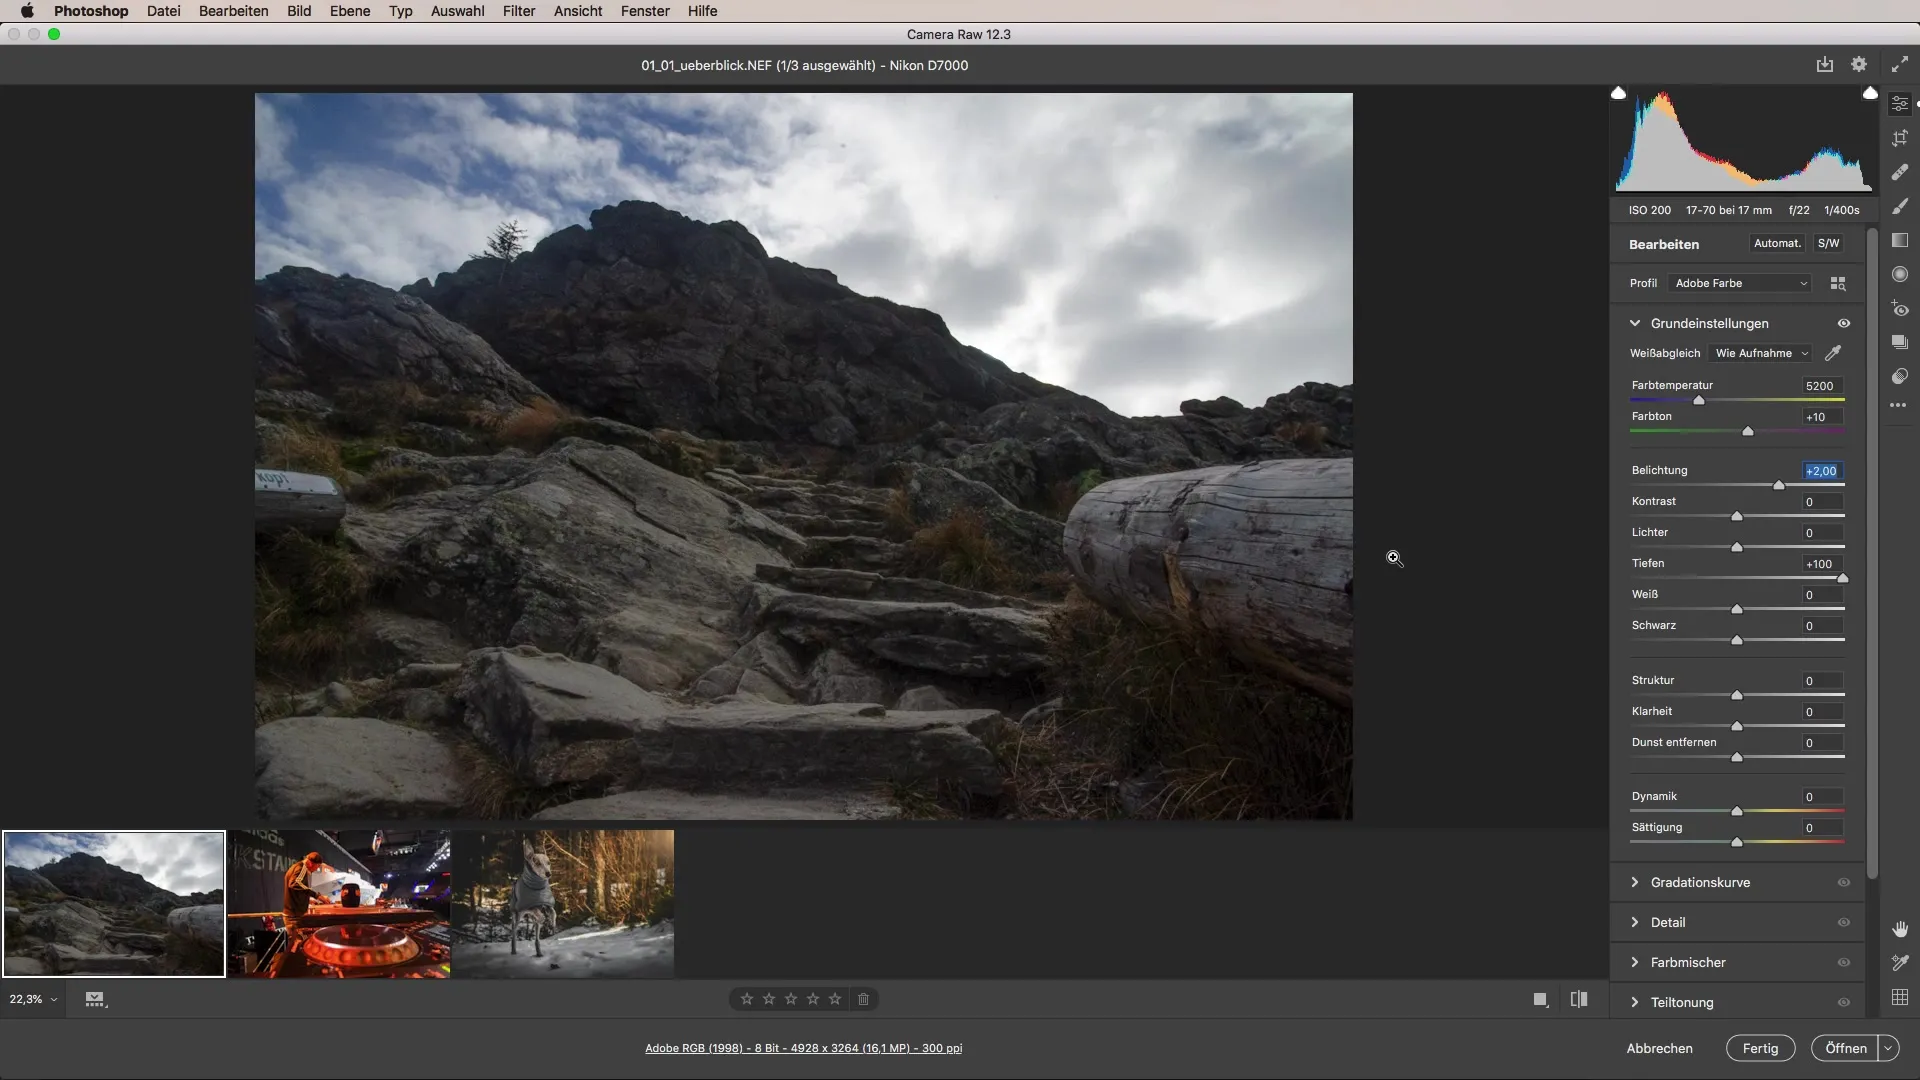
Another great example is a landscape image where the exposure is focused on the sky. You can increase the shadows, which helps preserve details in the sky while adjusting the exposure of the mountain to create a harmonious overall image. This can significantly enhance the narrative of your picture.
6. Exploit the Technical Capabilities of Camera Raw
The possibilities that Camera Raw offers you are impressive. You will be amazed at what technical nuances are hidden in your images, even if they come from older cameras. Often you have more control than you think. Trust in the strengths of the tool to get the most out of your shots.
Summary - Camera Raw Tutorial: Tips for Image Optimization and Innovations
In summary, the latest version of Camera Raw offers you numerous possibilities to quickly and effectively optimize your images. The user interface is more intuitive, and the new features allow for more precise adjustments that can give your images new quality.
Frequently Asked Questions
How can I toggle the film preview on or off?You can activate or deactivate the film preview through the menu.
What can I achieve with the radial filter?The radial filter allows you to specifically edit certain areas of an image.
How can I adjust shadows and highlights?In the “Exposure” section, you can easily adjust the sliders for shadows and highlights.

