If the horizon in your images is tilted, it can affect the overall impact of the image. A straight horizon line not only provides an aesthetic appearance but also improves photographic composition. In this guide, you will learn how to easily straighten an image using Adobe Camera Raw to achieve a harmonious overall impression.
Key Insights
Straightening a tilted horizon with Adobe Camera Raw is a quick and efficient process. You can use the crop tool and the rotate tool to level the image. A double-click on the rotate tool often results in a perfect outcome. You also have the option to make manual adjustments to shape the final image exactly as you wish.
Step-by-Step Guide
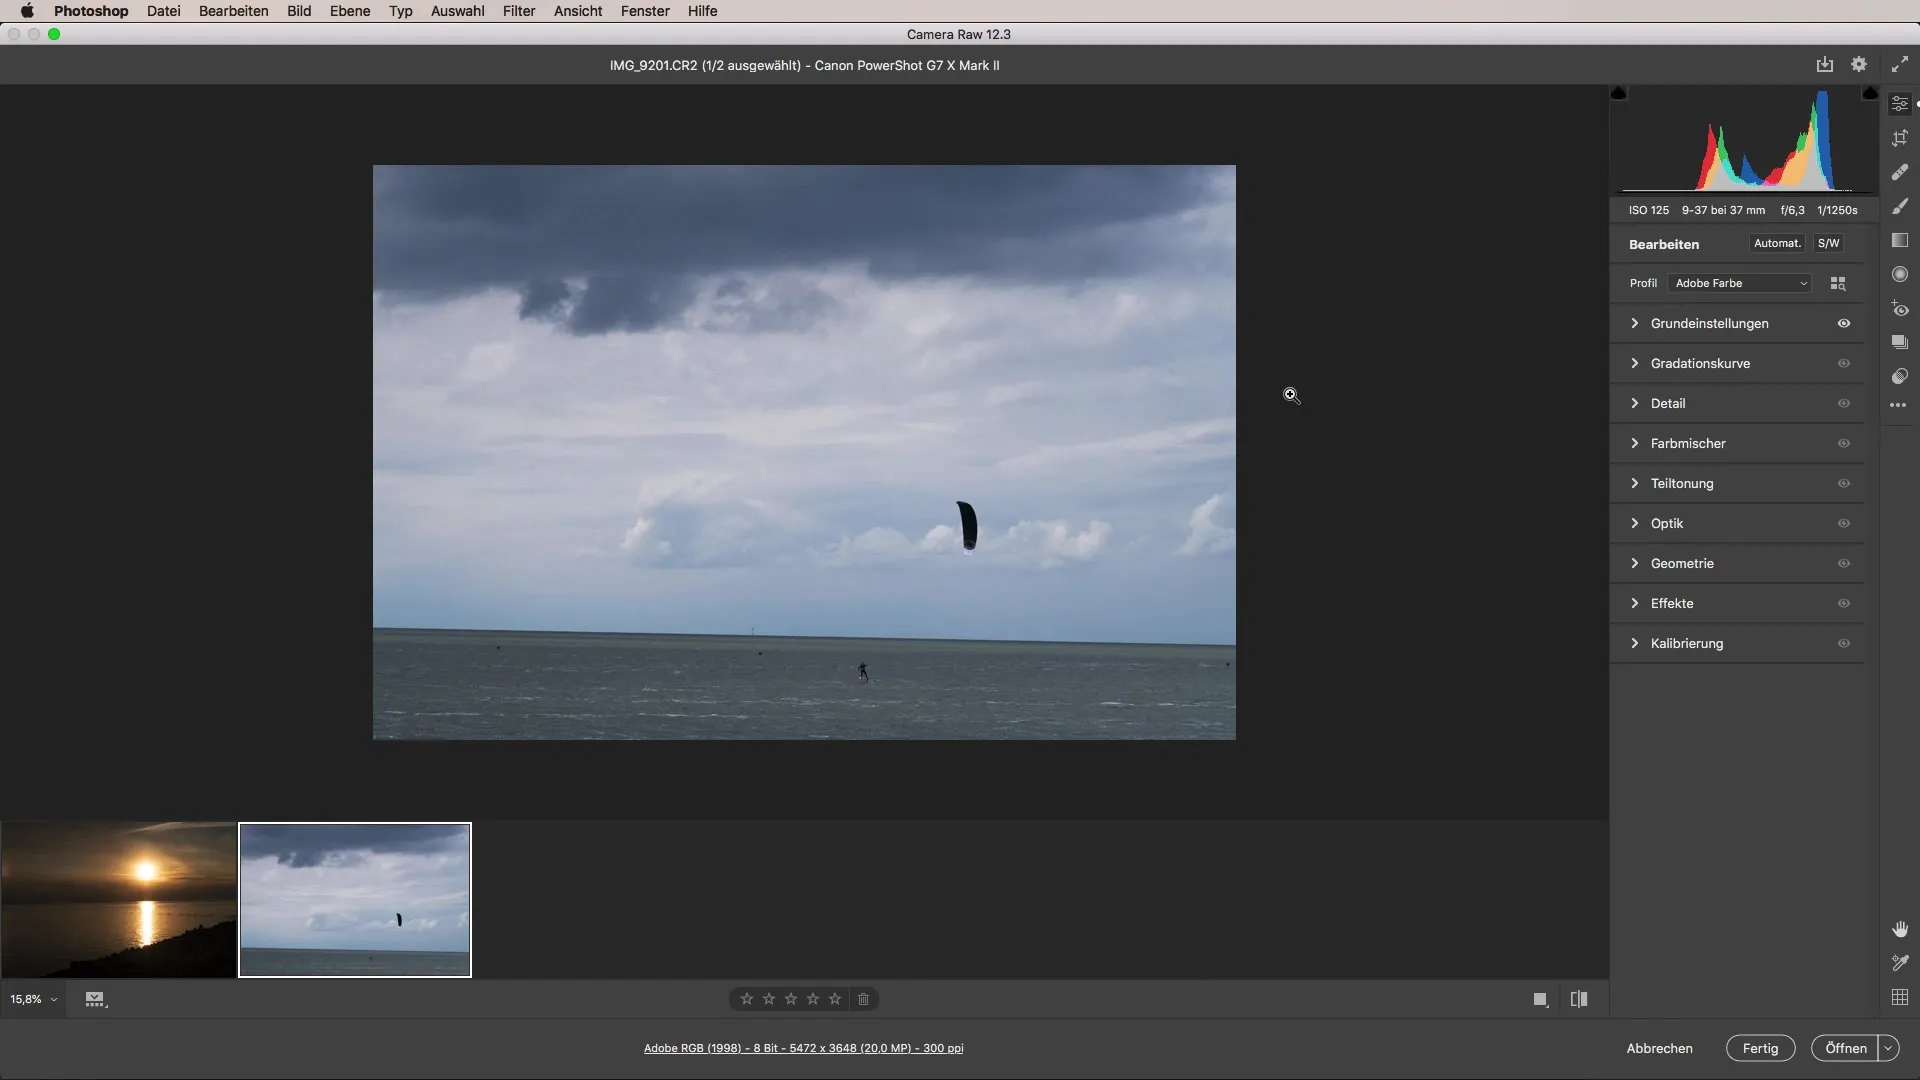
First, open your image in Adobe Camera Raw. To do this, click on the corresponding image in the Adobe software.

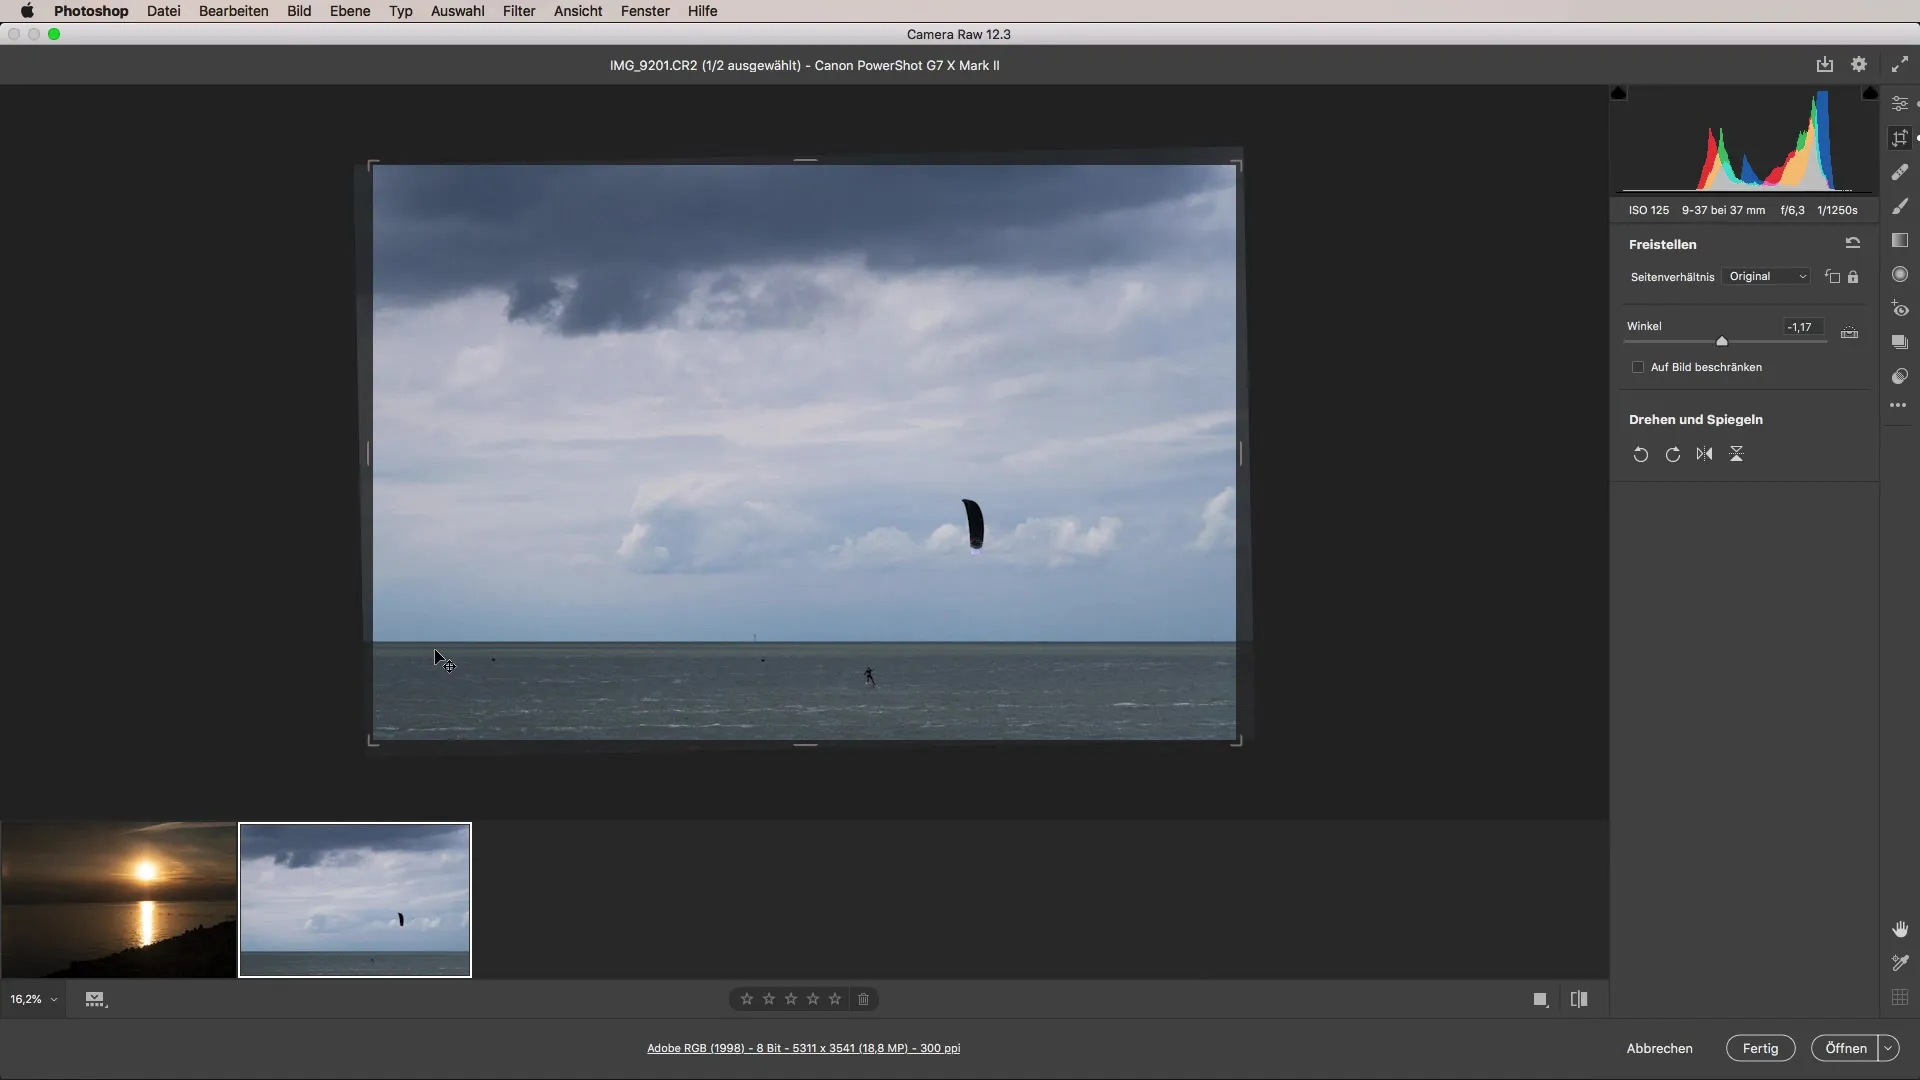
In the upper area, you will find the crop tool, which you should now select. Click on it.
Now you see the rotate tool. Next to it, there is the "Straighten" function that you need to activate.
To start the automatic straightening, simply double-click the rotate tool. Adobe Photoshop will now correct the horizon for you.
It takes a moment for Photoshop to process your benefits. After a short while, you will see that the horizon line is now straightened and the image has been rotated and cropped automatically.

Now you have the option to move the image crop and adjust the aspect ratio according to your preferences. This way, your horizon will be perfectly aligned.
Note that this method works best when there is a clear horizon line visible in the image. In cases where the horizon line is less distinct, the automatic alignment may have difficulties.
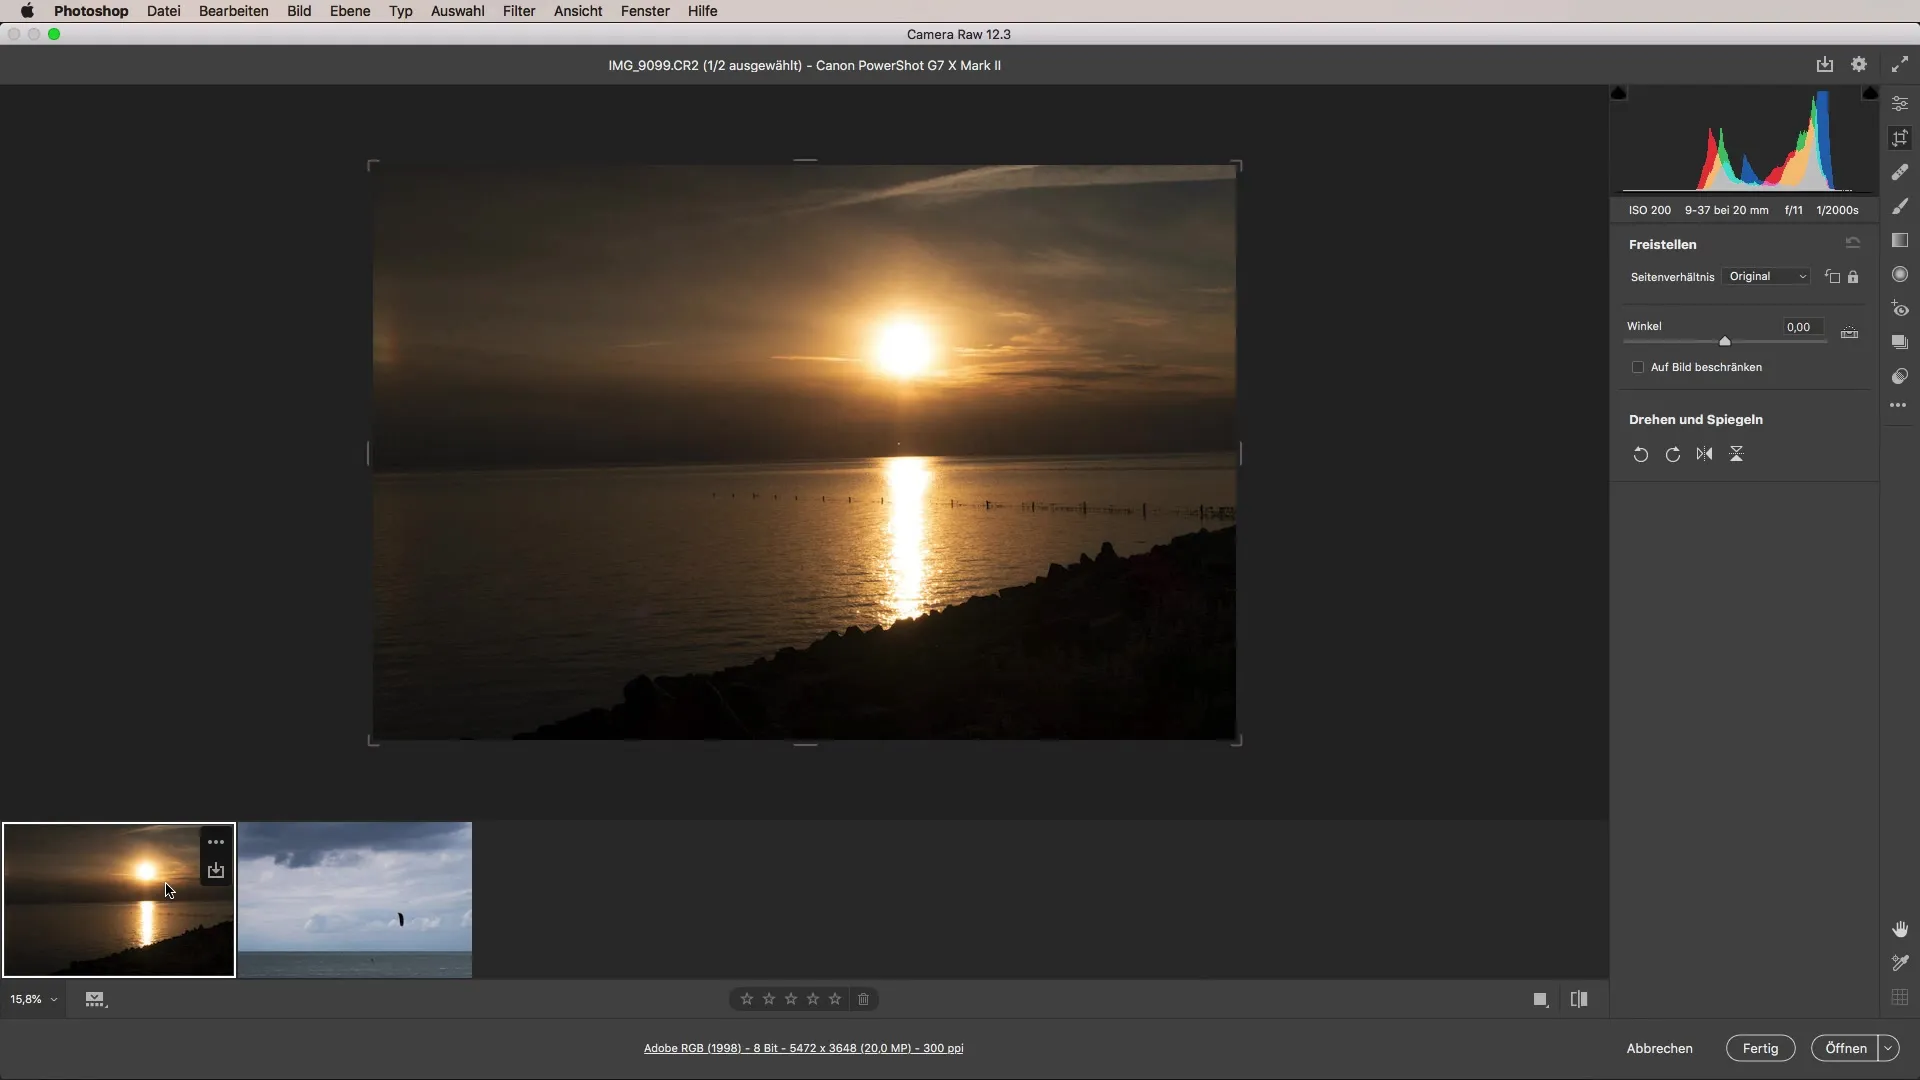
If the image appears very chaotic, it may be that Adobe's algorithm has trouble aligning the straight line. In such cases, an error message may occur.
To demonstrate this, let's look at another example. Let's take a sunset where the horizon line is not as clear.

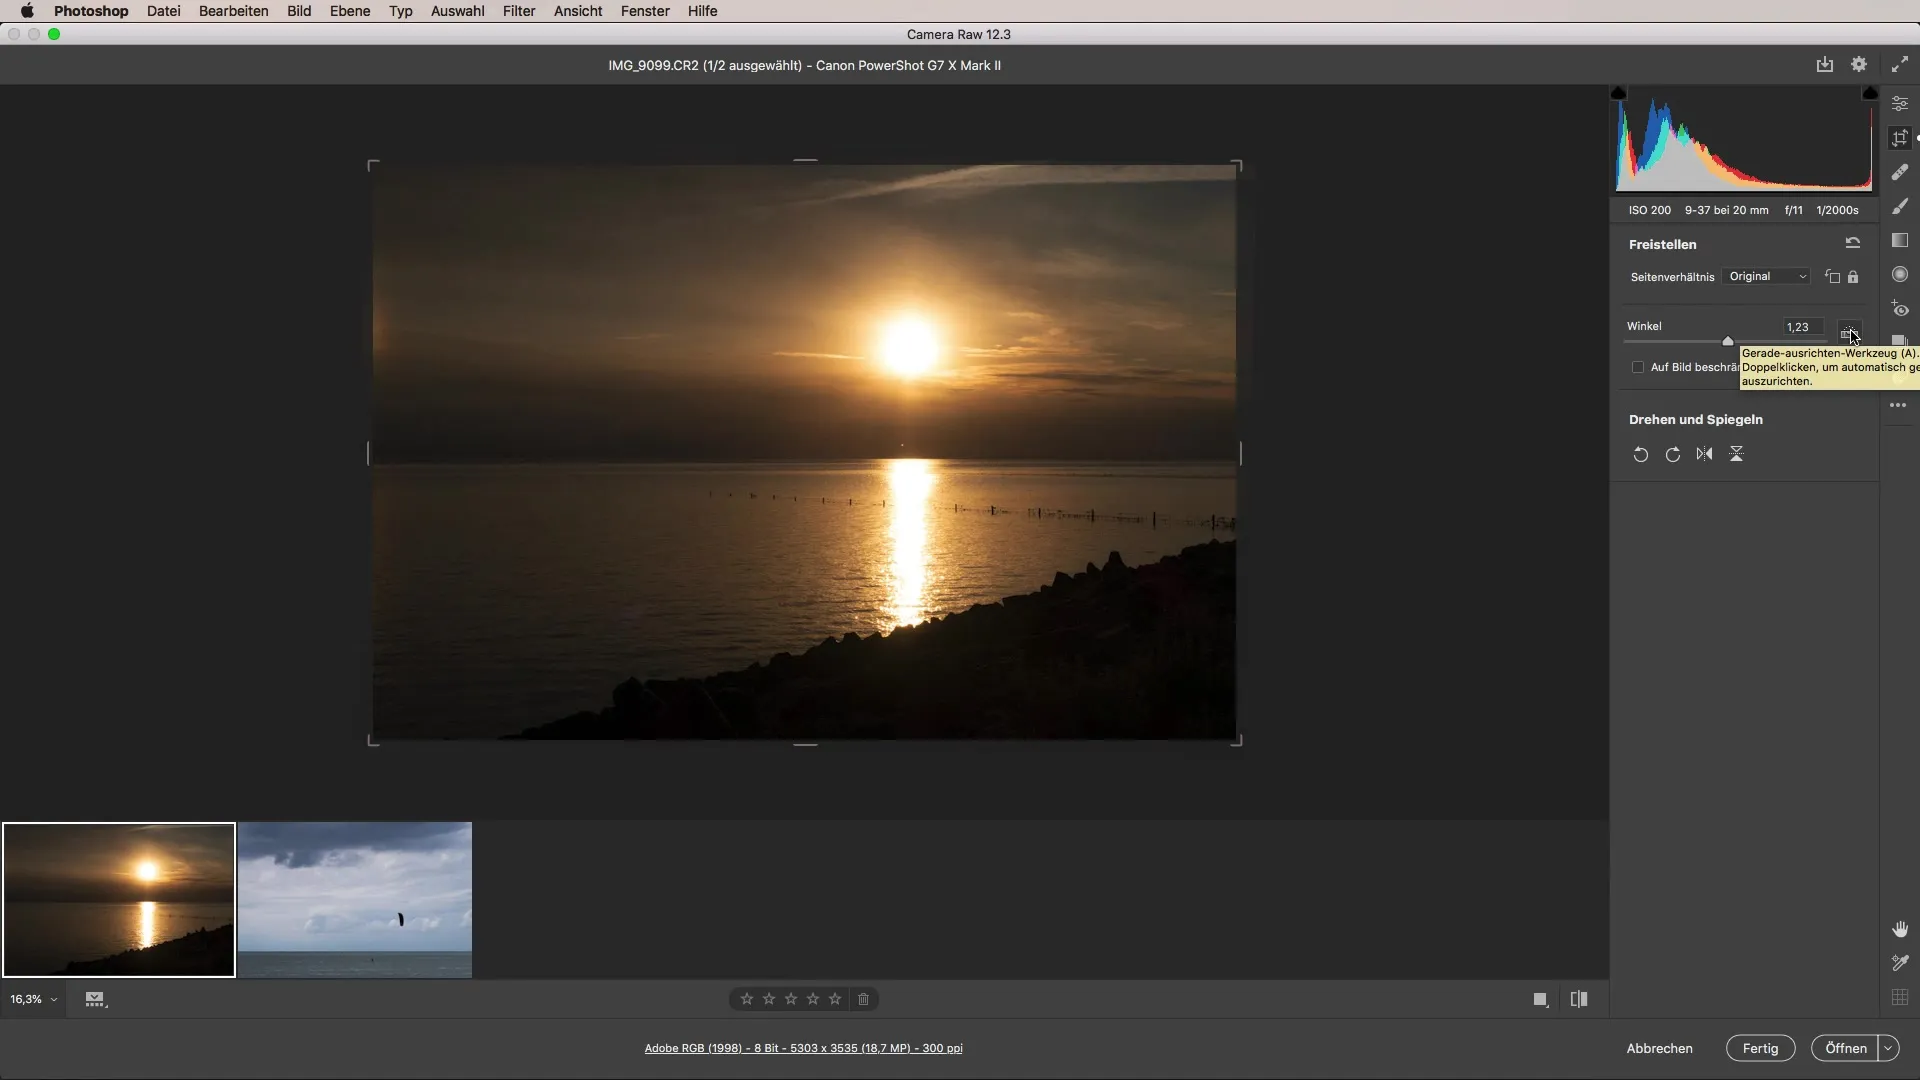
If you click on the automatic alignment again, you will see how well Adobe manages to adjust the image.

You might want to adjust a few degrees. You can do this using the angle slider to tilt the image further according to your preferences.
This way, you can manually adjust the straightening. This function allows you to adjust the image by up to 2° or more to meet your aesthetic requirements before moving on to the next step of the editing process.
Straightening an image in Adobe Camera Raw can be very efficient and easy to accomplish. With the tools and techniques presented, you will be able to take your images to the next level.
Summary – Straightening Images – Achieving the Perfect Horizon Line with Camera Raw
Straightening the horizon is an essential step in image editing to make your photographs visually appealing. With just a few clicks in Adobe Camera Raw, you can easily and quickly adjust your images and ensure that the horizon looks straight and harmonious.
Frequently Asked Questions
How do I open an image in Adobe Camera Raw?You can open your image by clicking on the corresponding file in Adobe.
What do I do if the horizon line is not clear?In such cases, the automatic straightening function may have difficulties and display an error message.
Can I make manual adjustments after the automatic straightening?Yes, you have the option to make manual corrections using the angle slider.
Can I adjust not only the horizon but also other parts of the image?Primarily, the function focuses on the horizon, but you can readjust the entire image.
Does this method work with any image size?Yes, the methods are flexible enough to work with different image sizes.


