Sharpening an image is one of the most crucial steps in image editing to highlight details and improve the overall appearance. Adobe Camera Raw offers powerful tools that allow you to adjust the sharpness of your images according to your preferences. In this guide, you will learn step by step how to effectively use the sharpening functions of Camera Raw to optimize your photos for both print and web.
Main insights
- To use the sharpening functions in Camera Raw, go to the "Details" tab.
- Sharpness can be adjusted using the parameters Radius, Detail, and Masking.
- A resolution of 300 dpi is ideal for print images, while 72 dpi is sufficient for web applications.
- Make sure to set the image view to 100% to assess the sharpness correctly.
Step-by-step guide
First, open your image in Adobe Camera Raw. To find the sharpening functions, navigate to the "Details" tab. There you will find different sliders: Sharpen, Radius, Detail, and Masking.
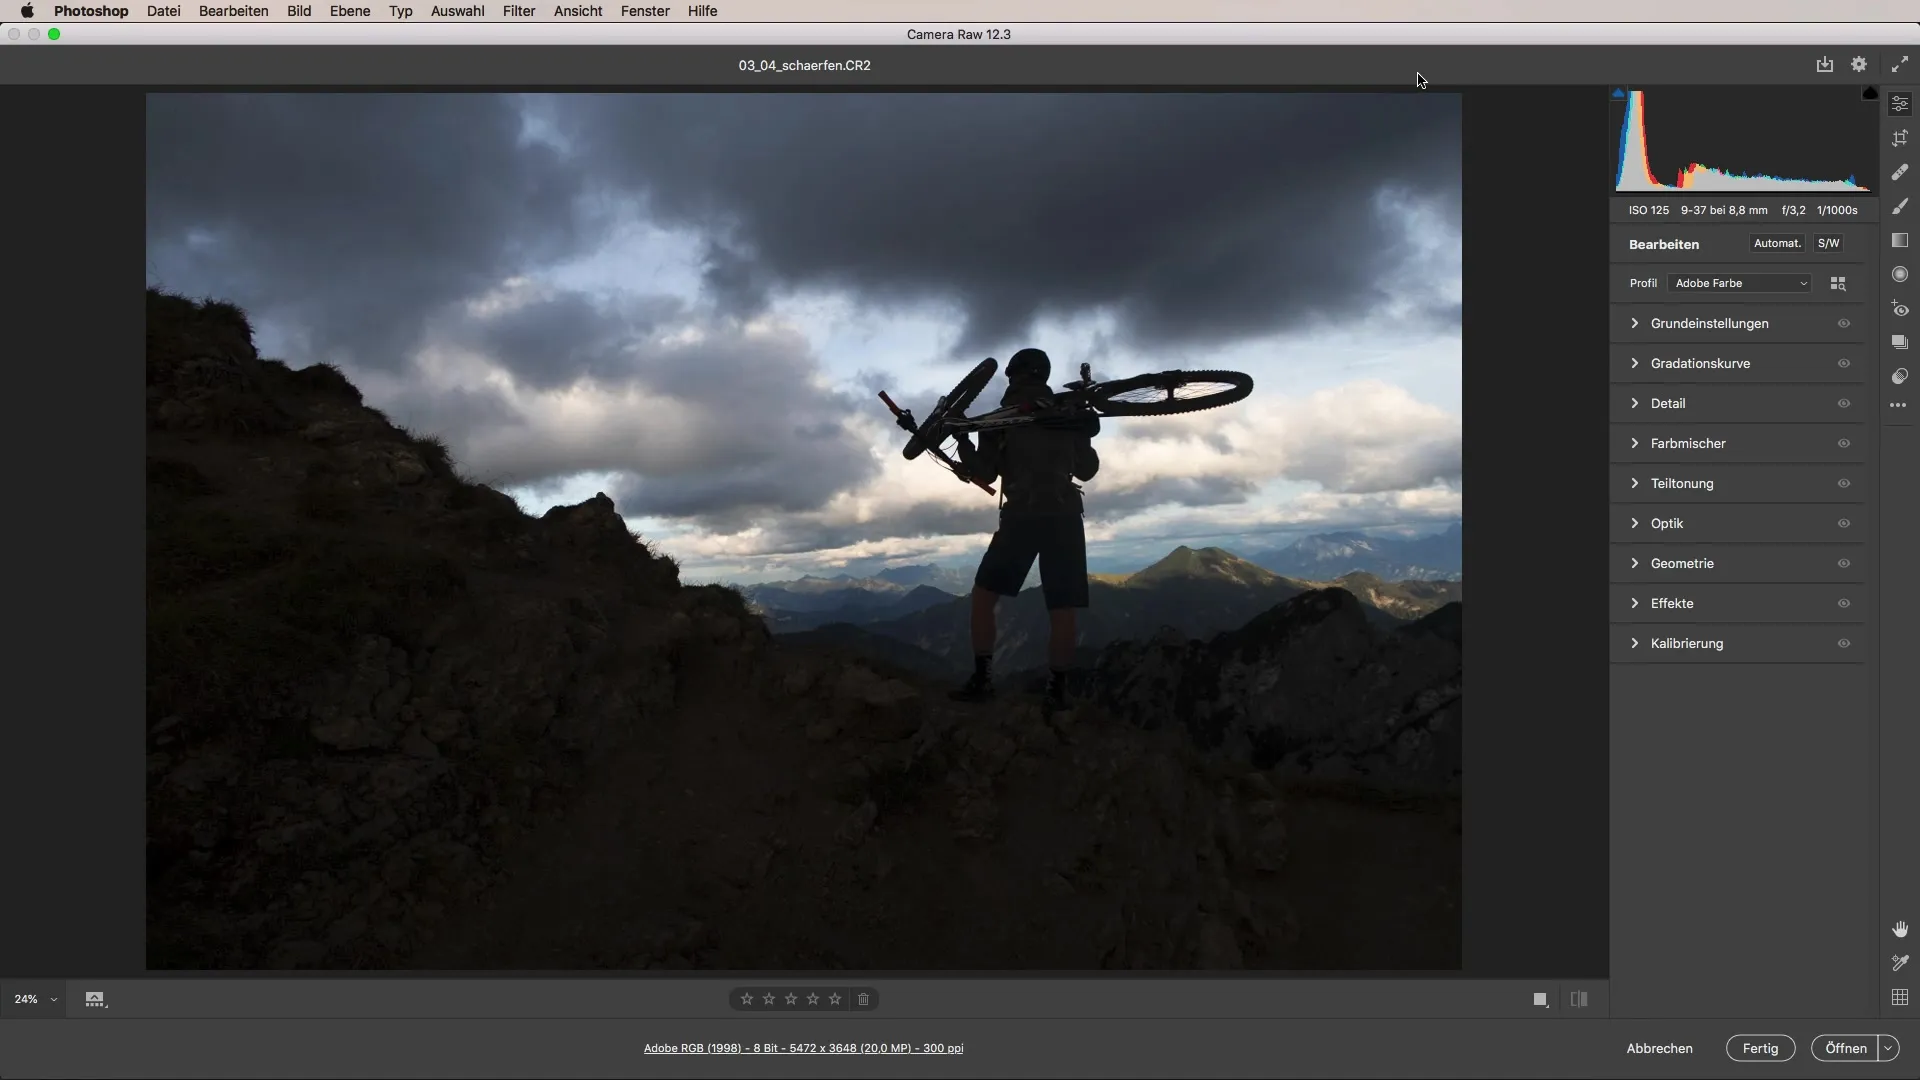
Additionally, there are also options for noise reduction. Often the sharpening slider is set to a default value upon initial viewing. First, you should try to zoom in to 100% to accurately see the effects of your adjustments.
To effectively use the sharpening sliders, it is important to first reset the image back to a value of zero and then begin sharpening. The noise reduction options should also be considered, and you should initially disable noise reduction to avoid unnecessarily masking the sharpness.
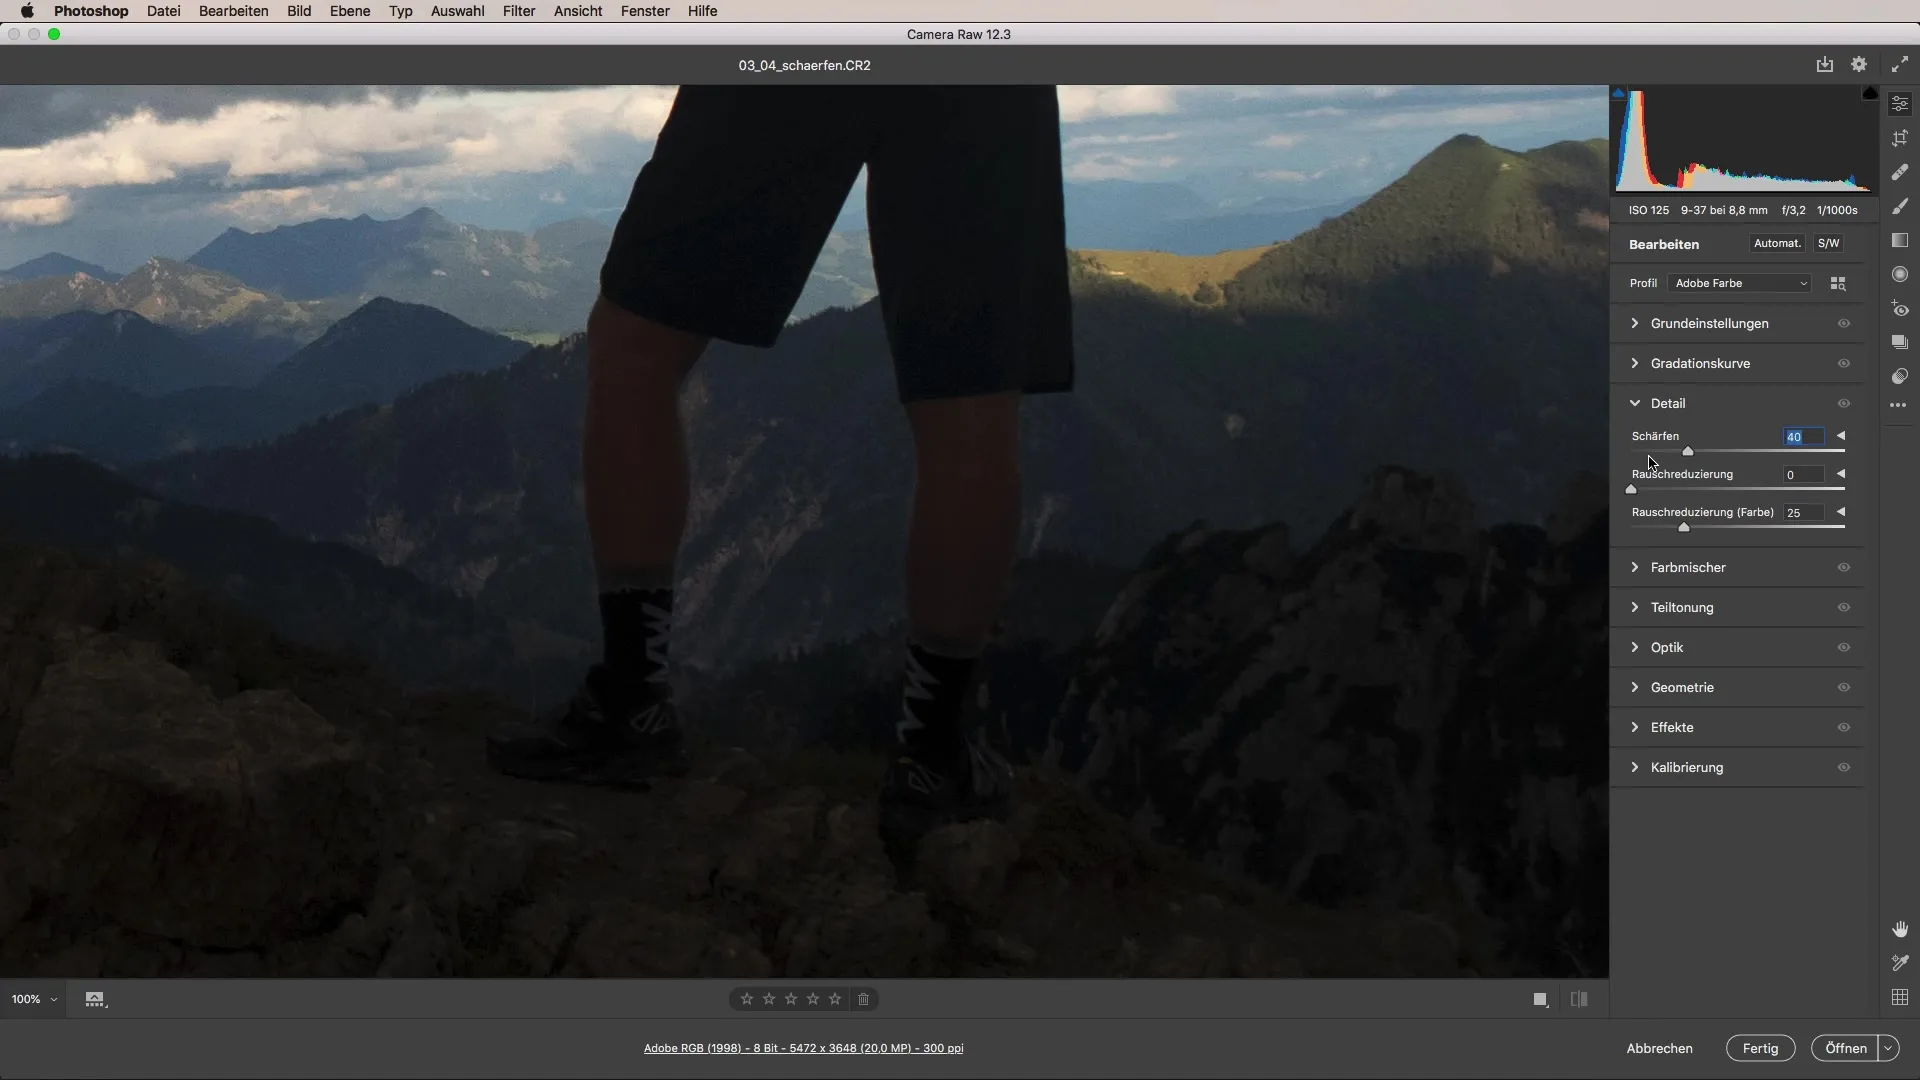
Now you can start moving the sharpening slider to the right. Keep in mind that excessive adjustments can quickly lead to a gritty or grainy texture. A moderate increase is key here.
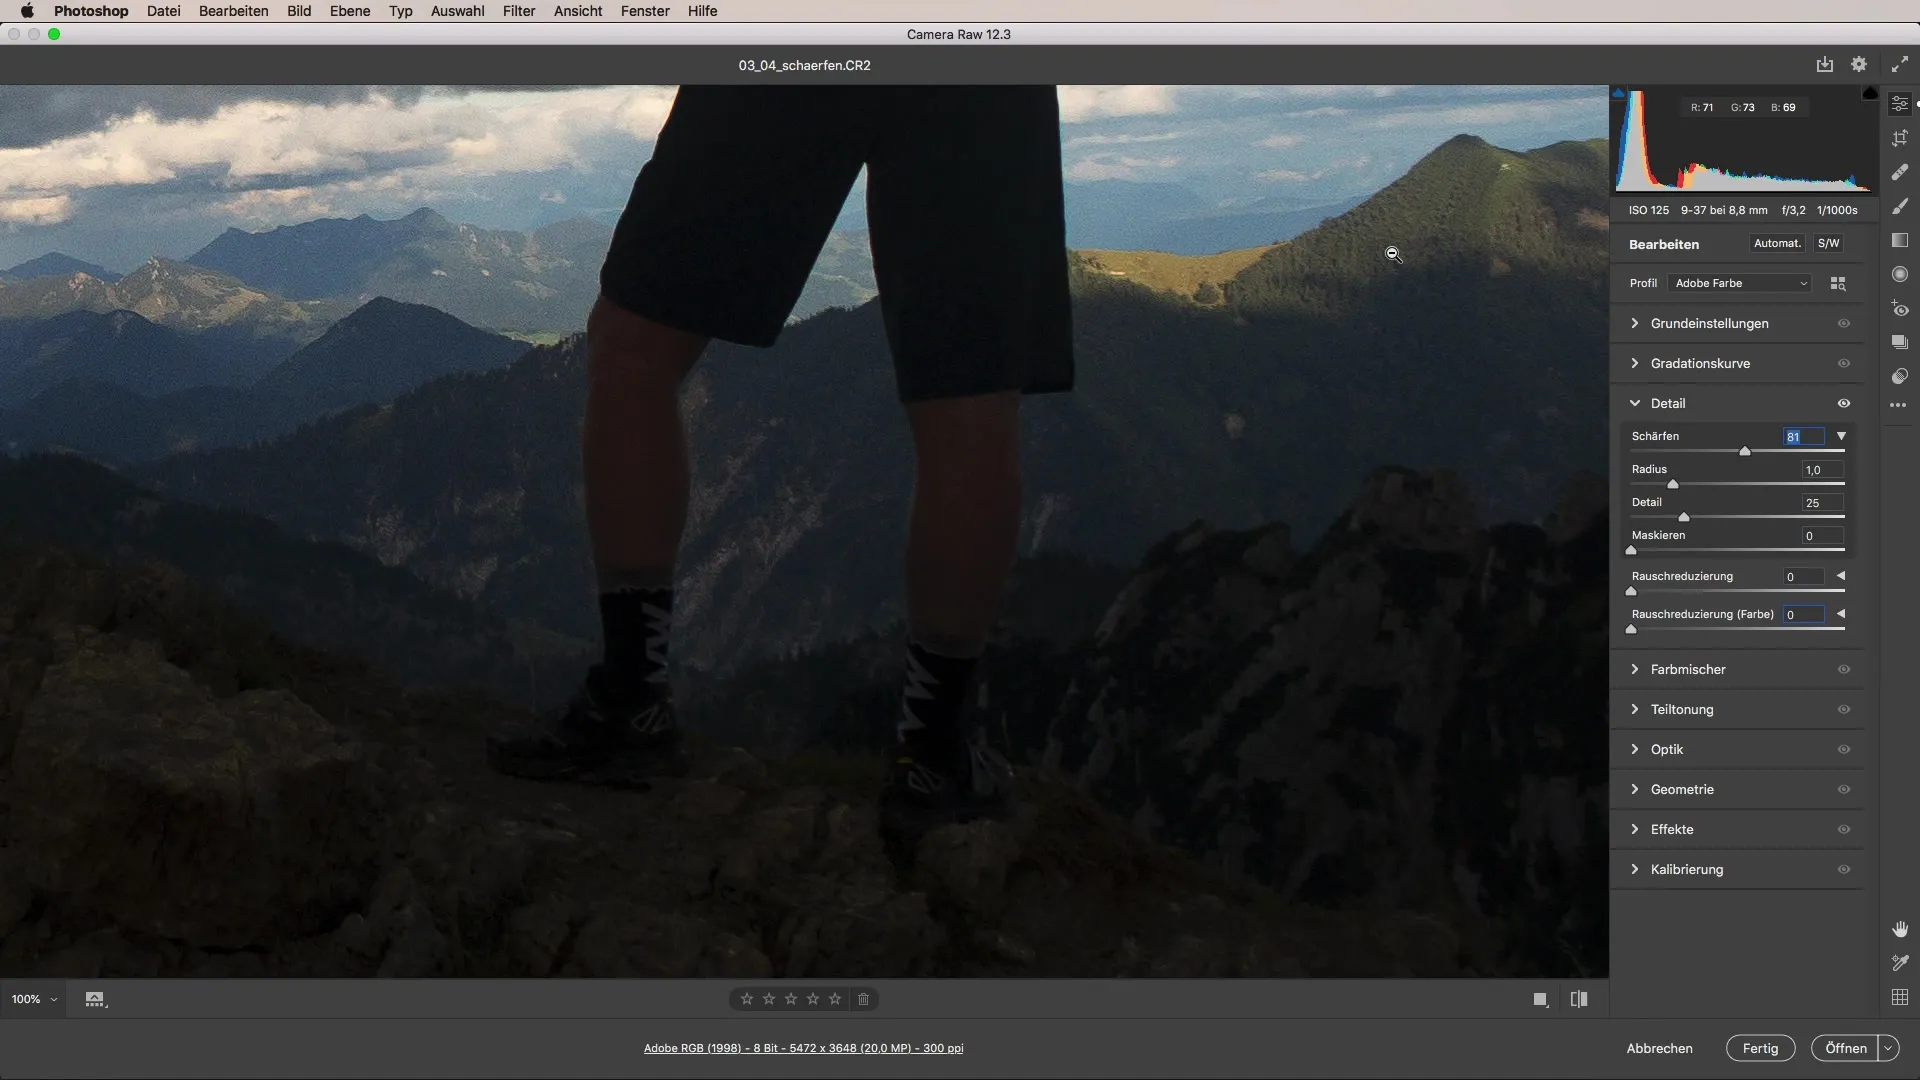
Experiment with the values here. You should be interested in where the transition between adequate sharpness and overemphasis of edges occurs. Pay special attention to the image details, such as the edges of branches or other structured areas of your image.
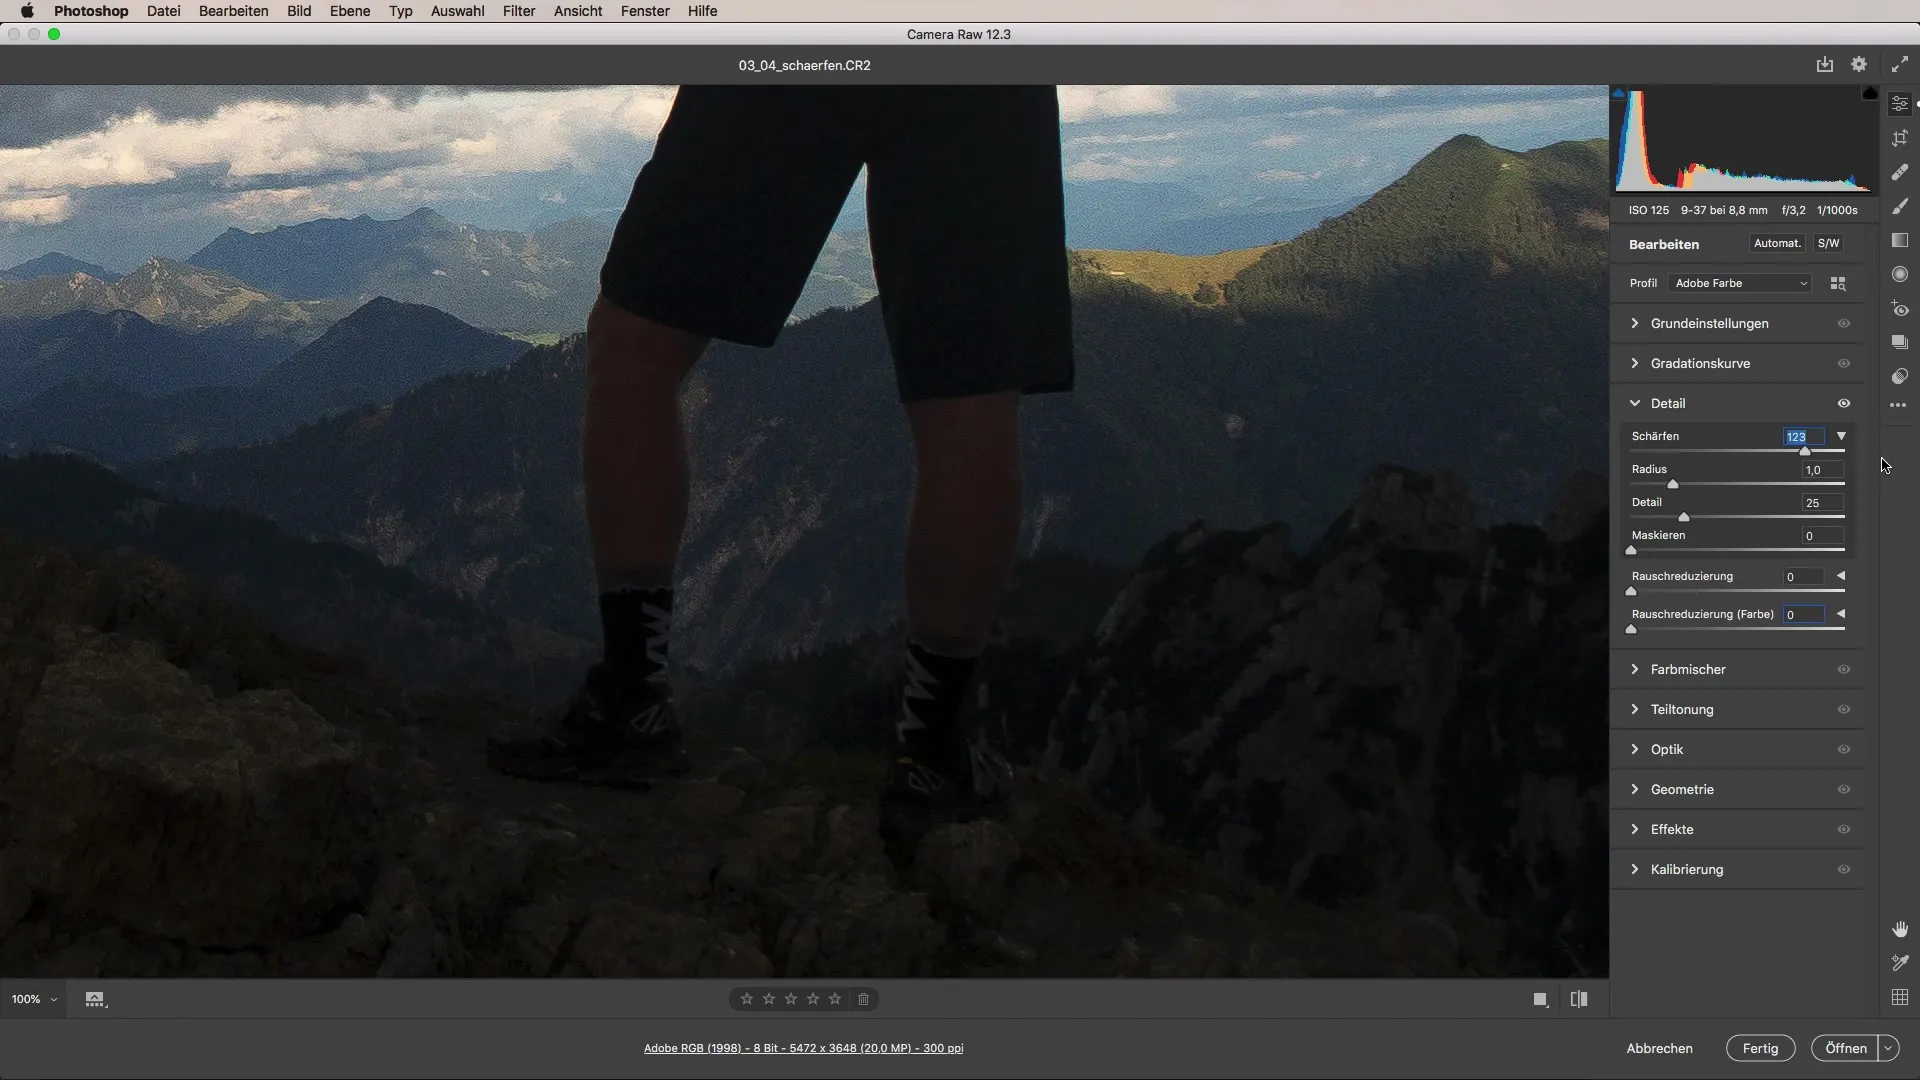
The radius also has a significant impact on sharpness. A value of about one pixel is often a good starting point. You can increase the radius to further enhance sharpness, but be careful that the edges are not overemphasized and an unpleasant effect occurs.
The Detail slider allows you to focus sharpness on finer details. A value around 20 should serve as a good starting point. However, too high values can make the image look unnatural.
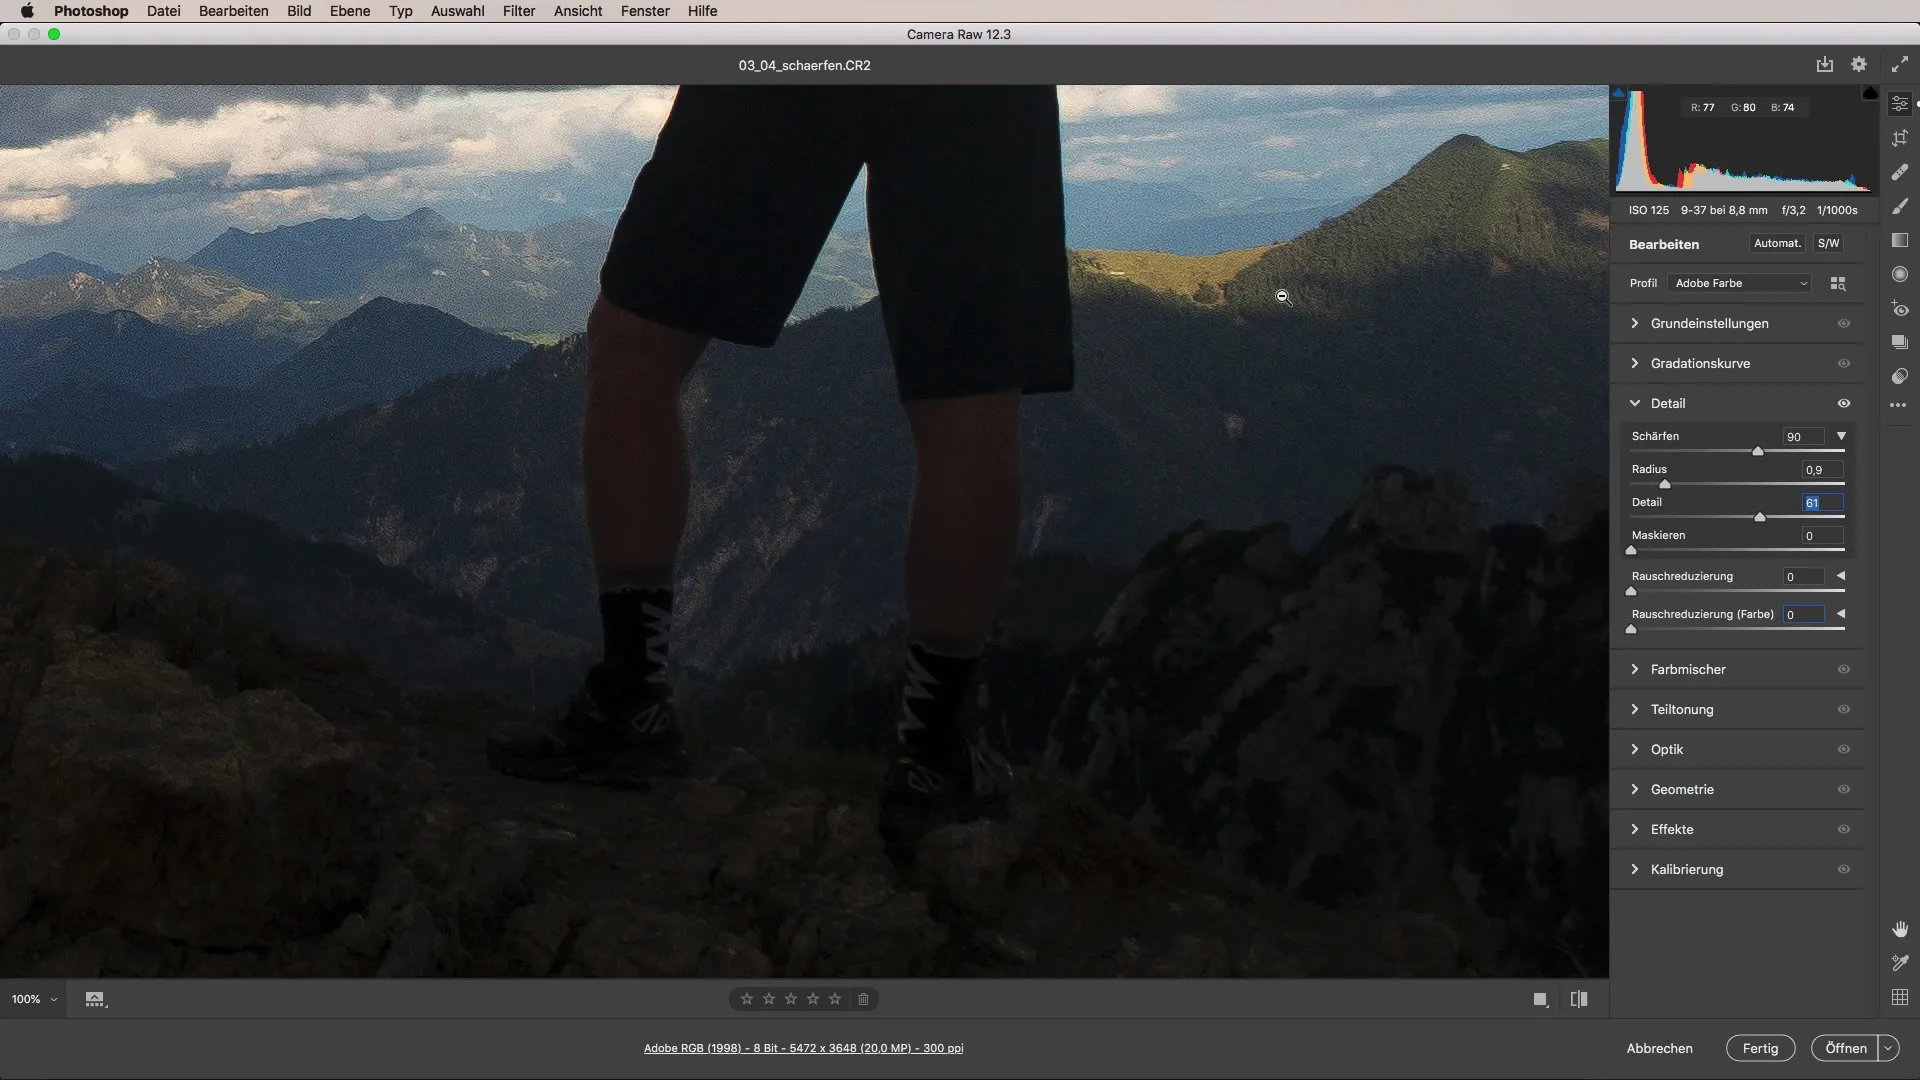
Finally, masking is an important function to apply sharpness only to specific areas of the image. This allows you to retain sharpness while blending out distracting textures.
On the picture, assess the impact of your adjustments at 100% zoom to ensure the accentuations are visually appealing and not overstated. A perfect balance between fluffiness and sharpness is crucial.
If you want to prepare an image for print, it's important to consider the resolution. A size of 300 dpi is an optimal foundation for print creation and ensures that the image remains sharp when physically printed.
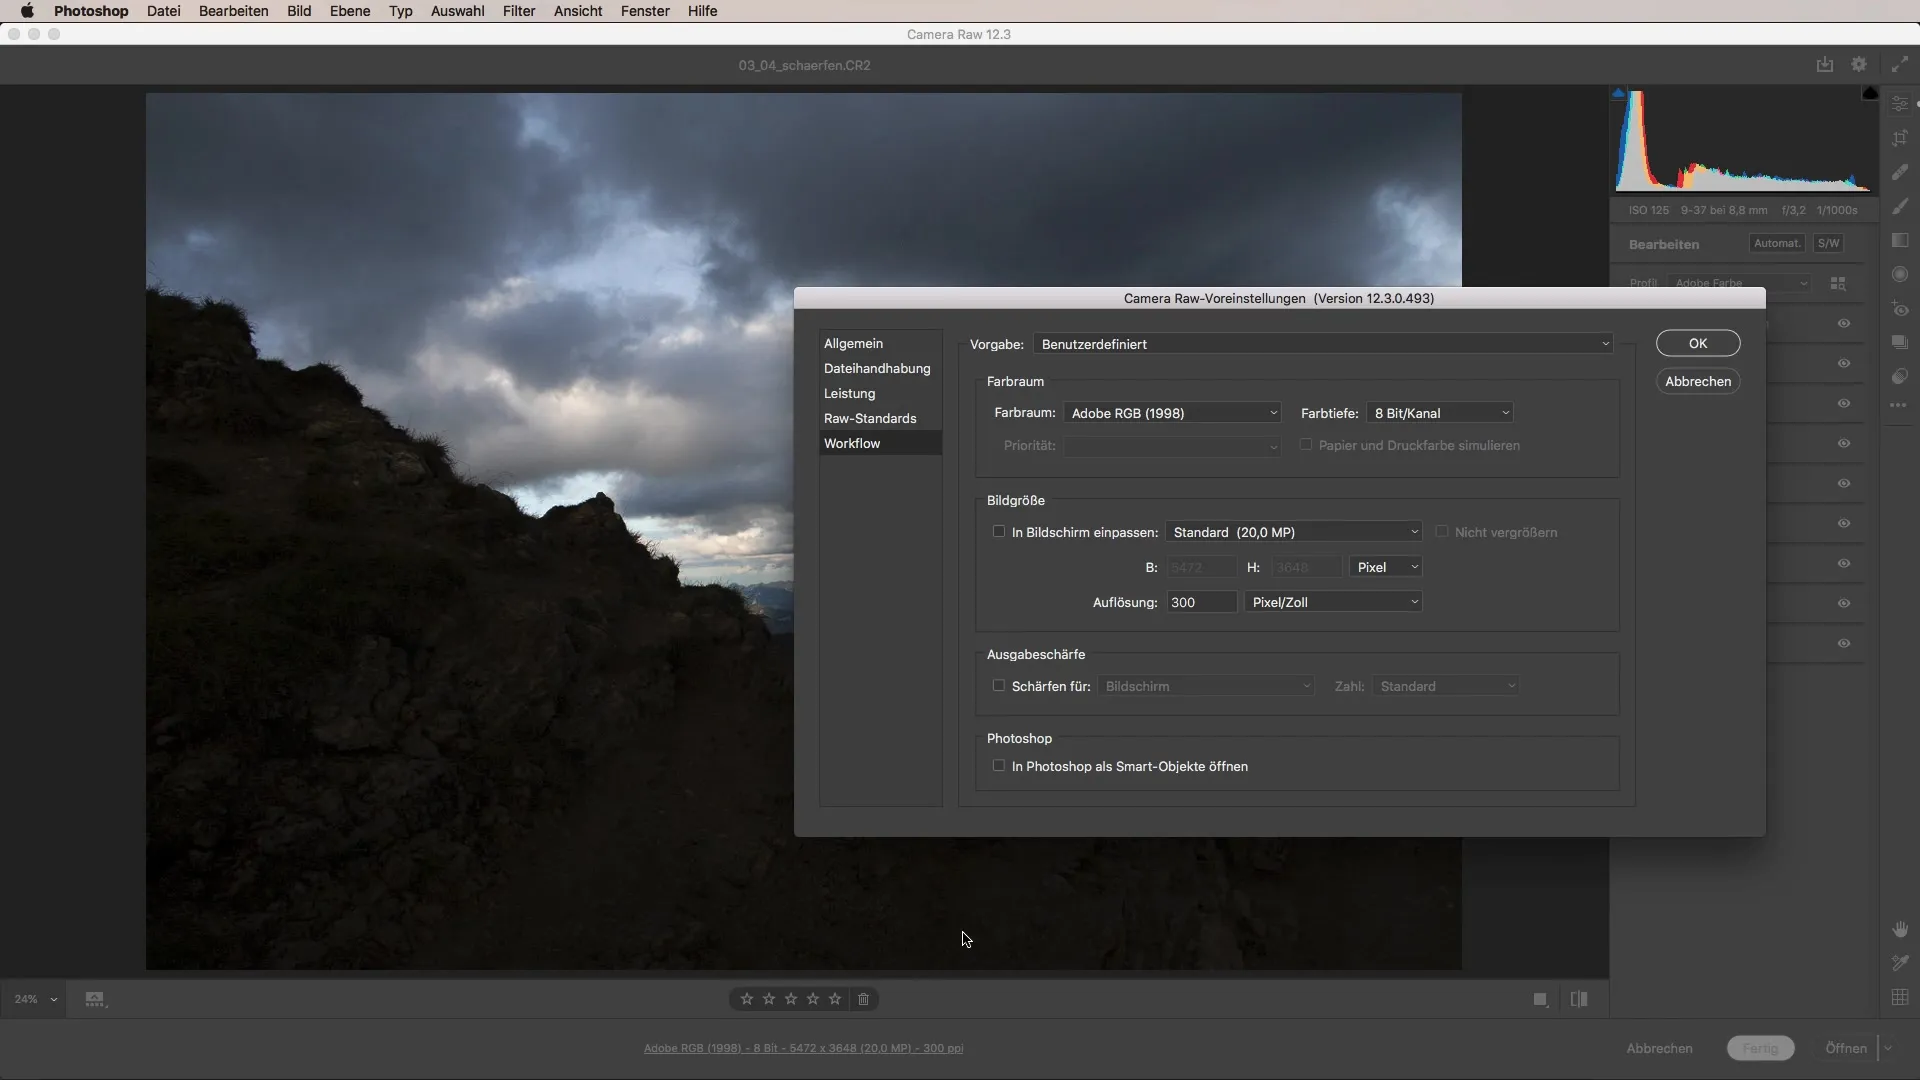
For web applications, however, a resolution of 72 dpi is generally sufficient. Make sure to adjust the image size accordingly, especially when publishing images on social platforms or websites.
Consider what maximum dimensions your images should have before saving them. Most platforms have specific requirements for file sizes that you should take into account.
Summary – Sharpening with Camera Raw: A Comprehensive Guide
Sharpening images in Adobe Camera Raw offers many possibilities for targeted improvement of image quality, whether for print or web. By understanding the various sharpening sliders and their optimal settings, you can ensure that your photos look professional.
Frequently Asked Questions
How can I improve the sharpness of my image?Use the sharpening sliders in the "Details" tab in Camera Raw to adjust Radius, Detail, and Masking.
Can I zoom the image to 100% in advance?Yes, to see the exact effects of sharpening, set your view to 100%.
What value should I use for the radius?A radius of about one pixel is a good starting point.
What is the optimal dpi setting for print?For print images, the resolution should be at 300 dpi.
How high should the dpi setting be for web images?For web applications, you generally only need 72 dpi.


