When editing portrait photos, skin retouching plays a crucial role in making the final result appealing. You don't always have to rely on extensive software like Photoshop. Adobe Camera Raw offers many useful tools for skin retouching that you can use effectively. In this guide, I will show you how to optimize your subjects' skin using Camera Raw – including important techniques and tricks.
Main Insights
- Skin retouching in Camera Raw is easy and efficient.
- Coarse blemishes can be easily removed with the correction brush.
- The color mixer and HSL adjustment help to fine-tune skin tones.
- Radial tools can be used to brighten the eyes.
- Subtle softening of skin texture is possible without losing naturalness.
Step 1: Remove Coarse Blemishes
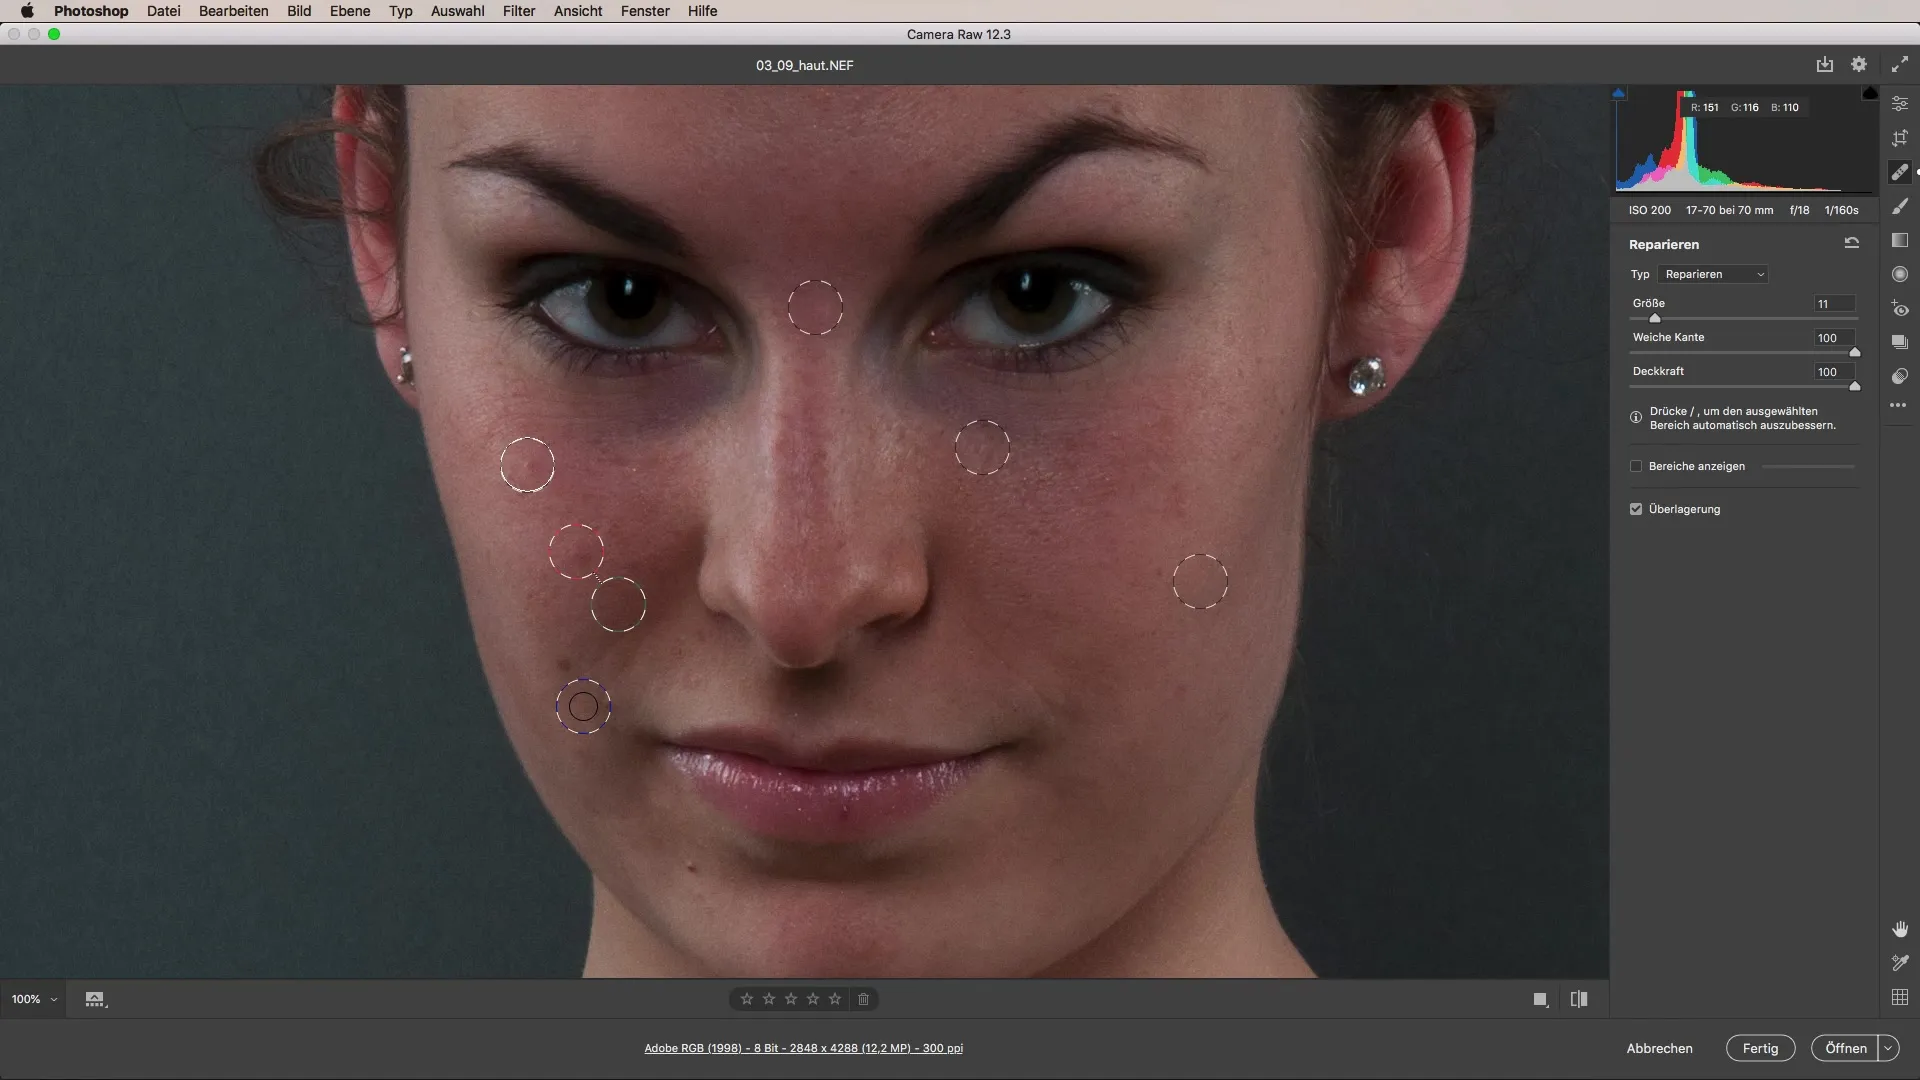
To start the retouching process, first open your image in Adobe Camera Raw. It's advisable to work at a 100% zoom to see the details clearly. As the first step, select the correction brush, which allows you to target blemishes on the skin for removal. Adjust the brush size to fit the areas you want to edit. Begin by clicking on the largest blemishes and then remove them.
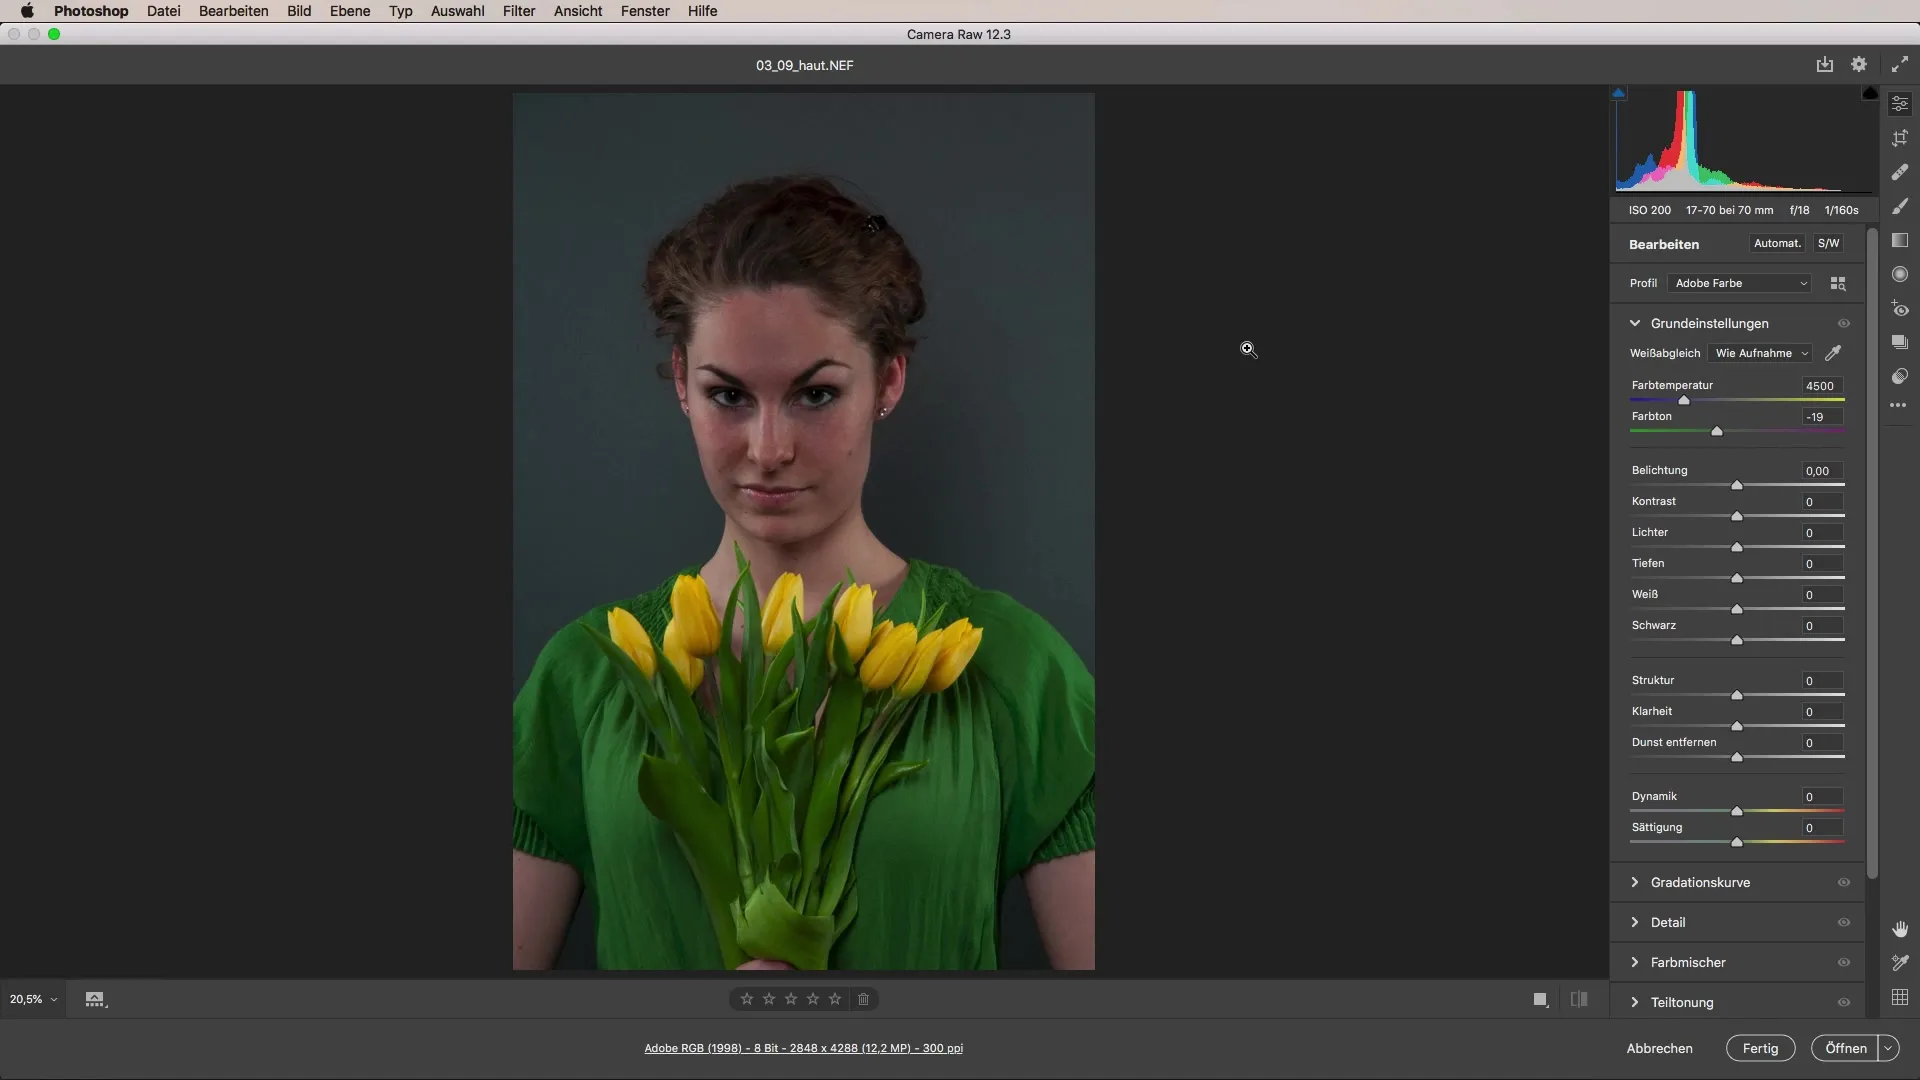
The brush automatically searches for healthy skin areas to replace the blemish with similar textures. This way, you can efficiently eliminate larger flaws and save yourself a lot of time-consuming post-processing in Photoshop.
Step 2: Adjust Skin Color
Once you have removed the coarse blemishes, it's important to adjust the skin tones. Often, the white balance is not correct, which can lead to unrealistic skin colors. To correct this, use the eyedropper tool and select a neutral gray field in the background to set the right colors.
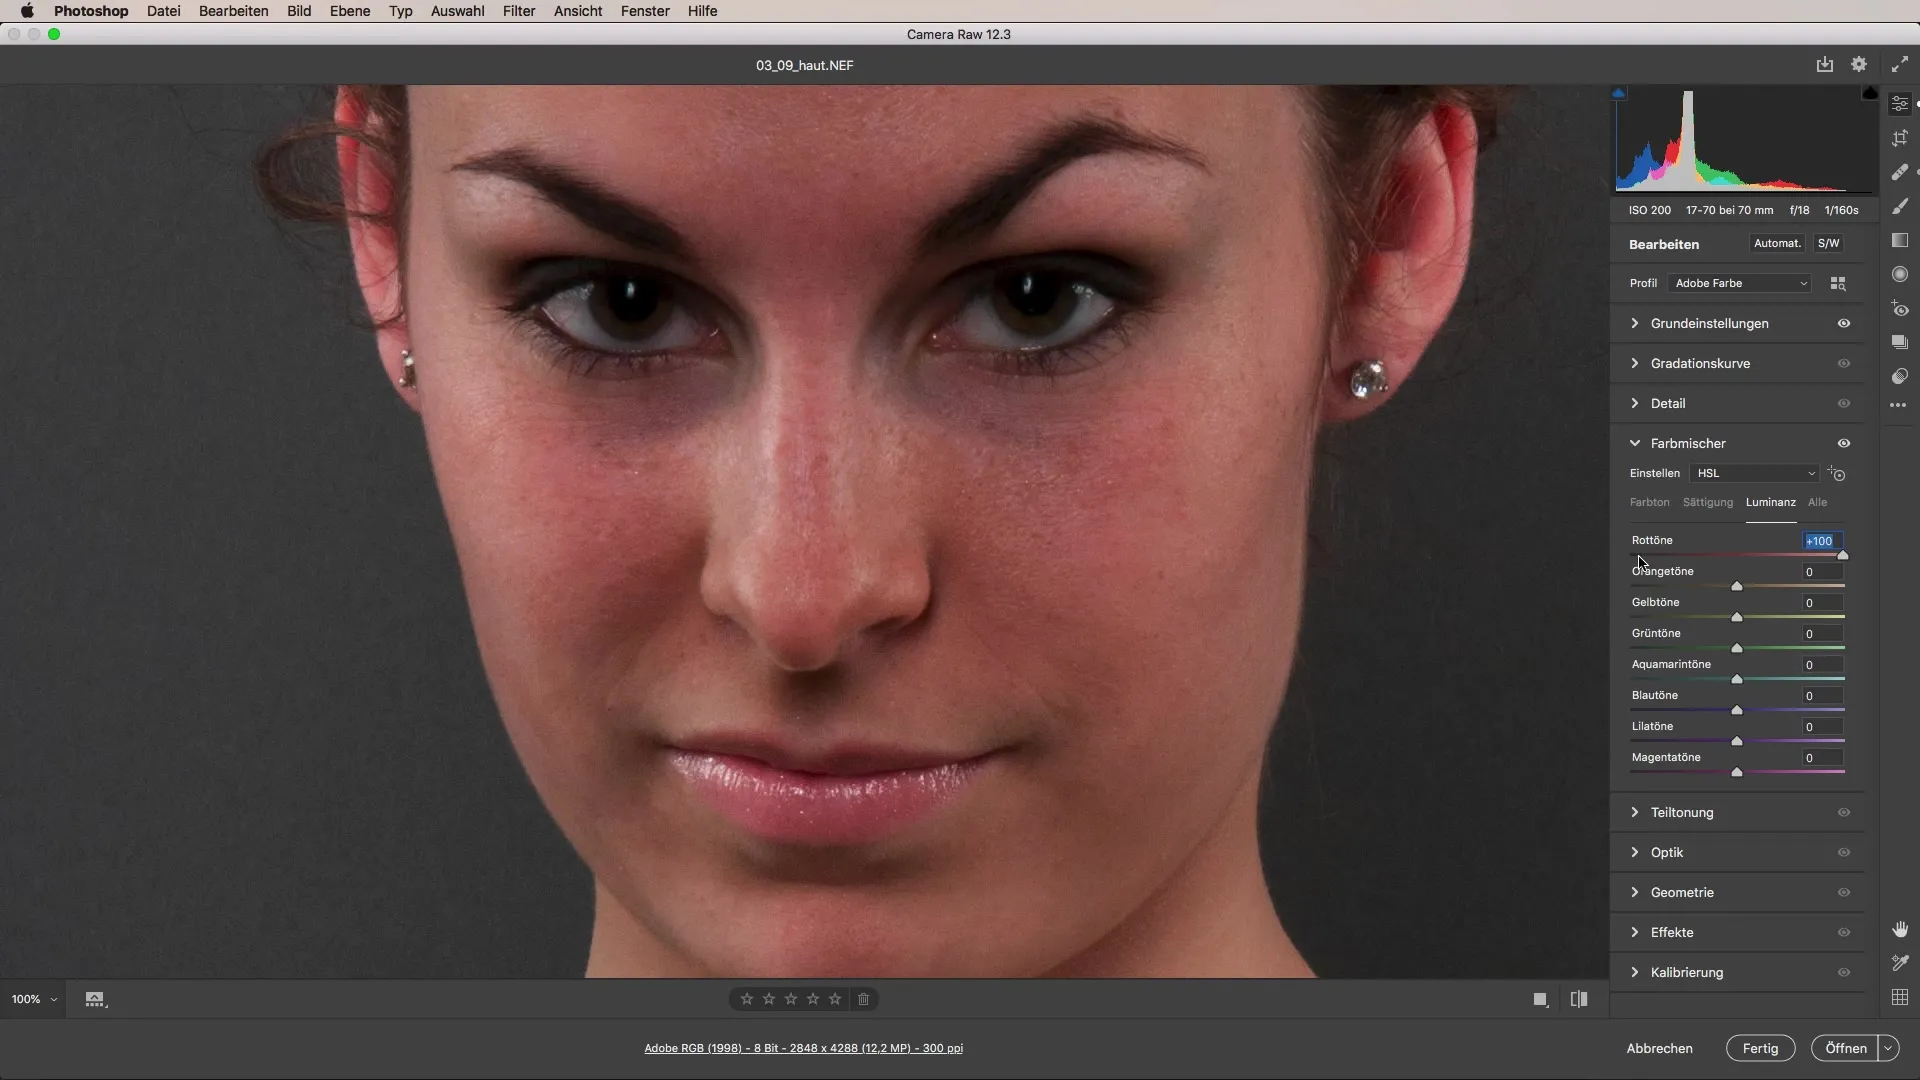
After identifying the gray, you should adjust the hue, saturation, and luminance settings for the skin. Use the color mixer to specifically edit the reds in the image. Lower the saturation of the red tones to achieve a more natural skin color without completely removing the red hues. Make sure not to remove too much saturation, or the lips may appear unnatural.
Step 3: Optimize Brightness and Luminance
Another important step in skin retouching is optimizing the brightness of the skin tones. Increase the brightness for the red areas of the face to give them more radiance and life. You can achieve this through adjustments in the luminance section. There you will find the option to influence the intensity of the red and orange tones.
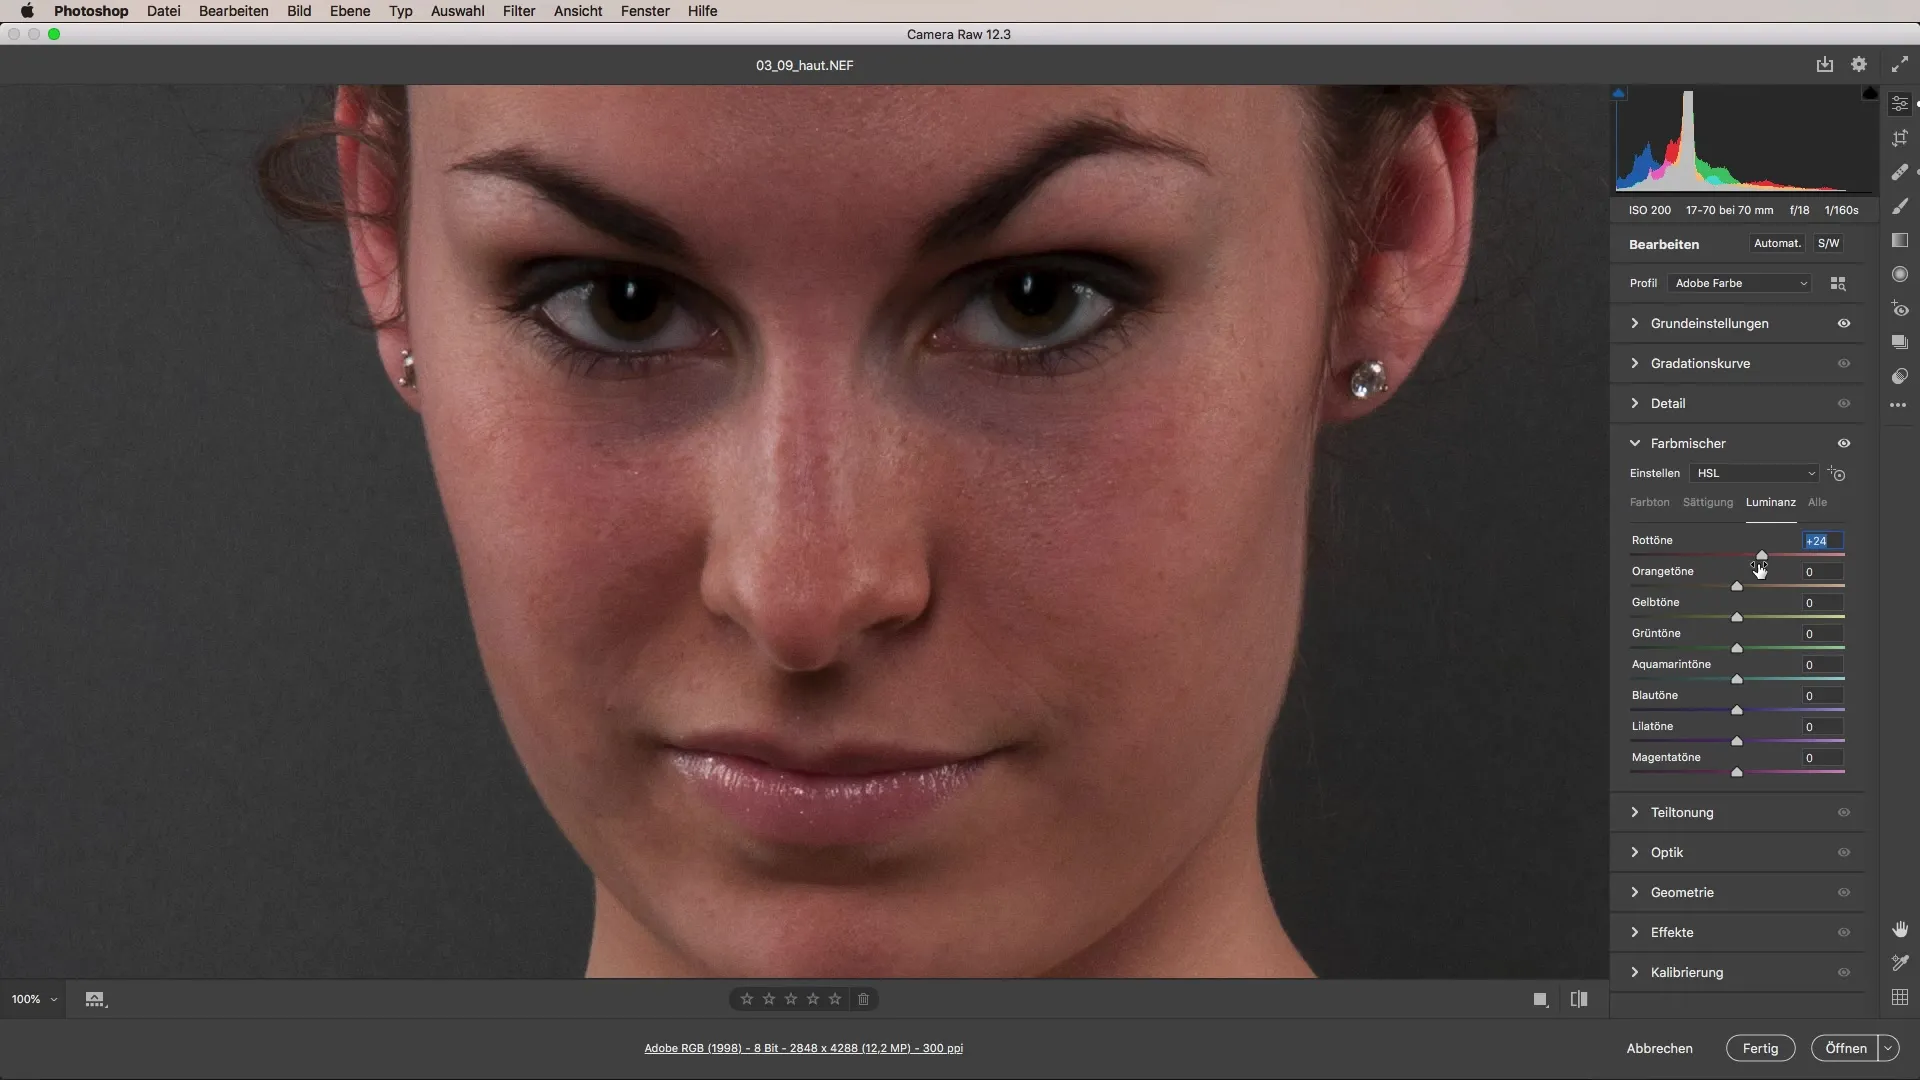
A well-balanced skin image considers brightness in context, helping you create a harmonious overall picture.
Step 4: Highlight the Eyes
The eyes are a central element of any portrait. To give them more expression, you can use the radial tool. Draw an elliptical area around each eye to achieve targeted brightening. Be sure to do this subtly to avoid creating the "alien eyes" effect.
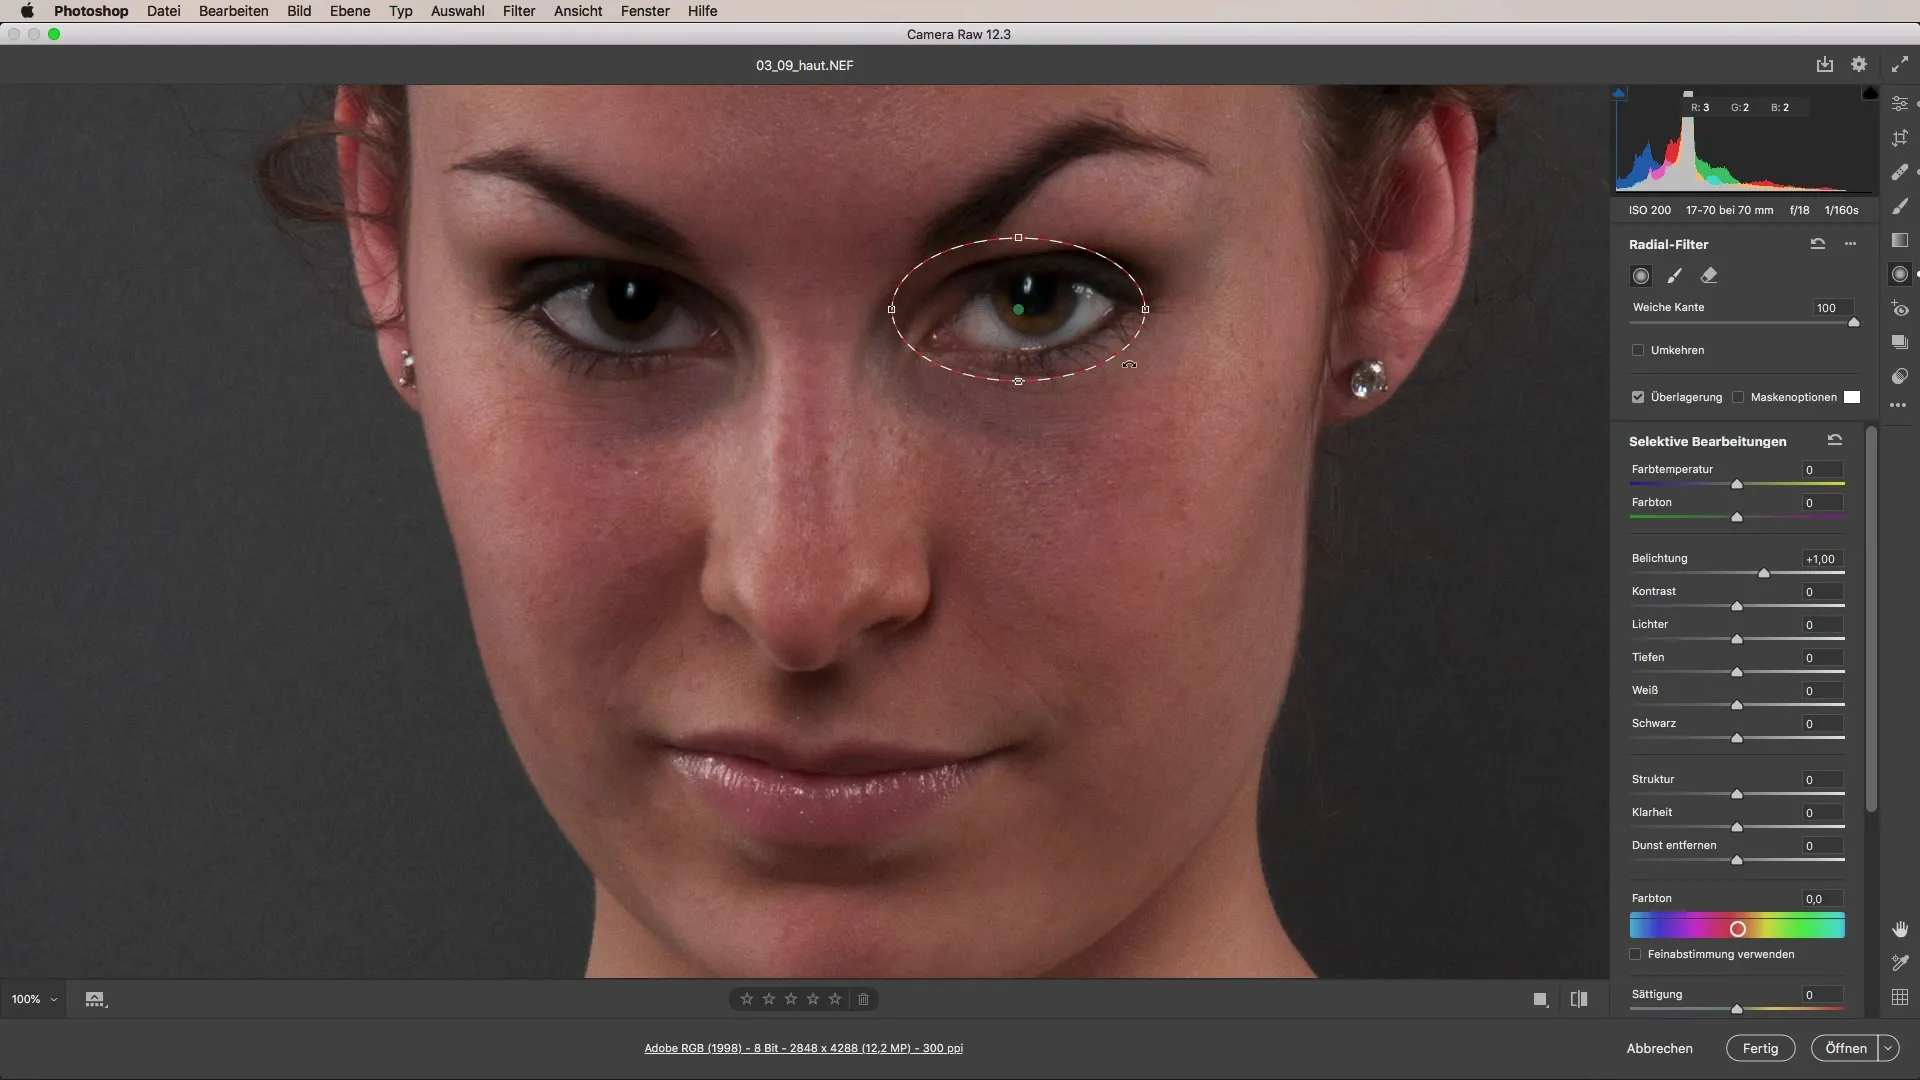
Apply this technique to both eyes to achieve a consistent look. You can also play with brightness to address the natural shadow and light distribution of the face.
Step 5: Adjust Skin Texture
If you want to make the skin texture a bit softer overall, again use the correction brush. Here, apply negative clarity and structure. However, be careful not to smooth the skin too much so that it still looks realistic. You can now gently brush over the skin areas to achieve this soft effect.
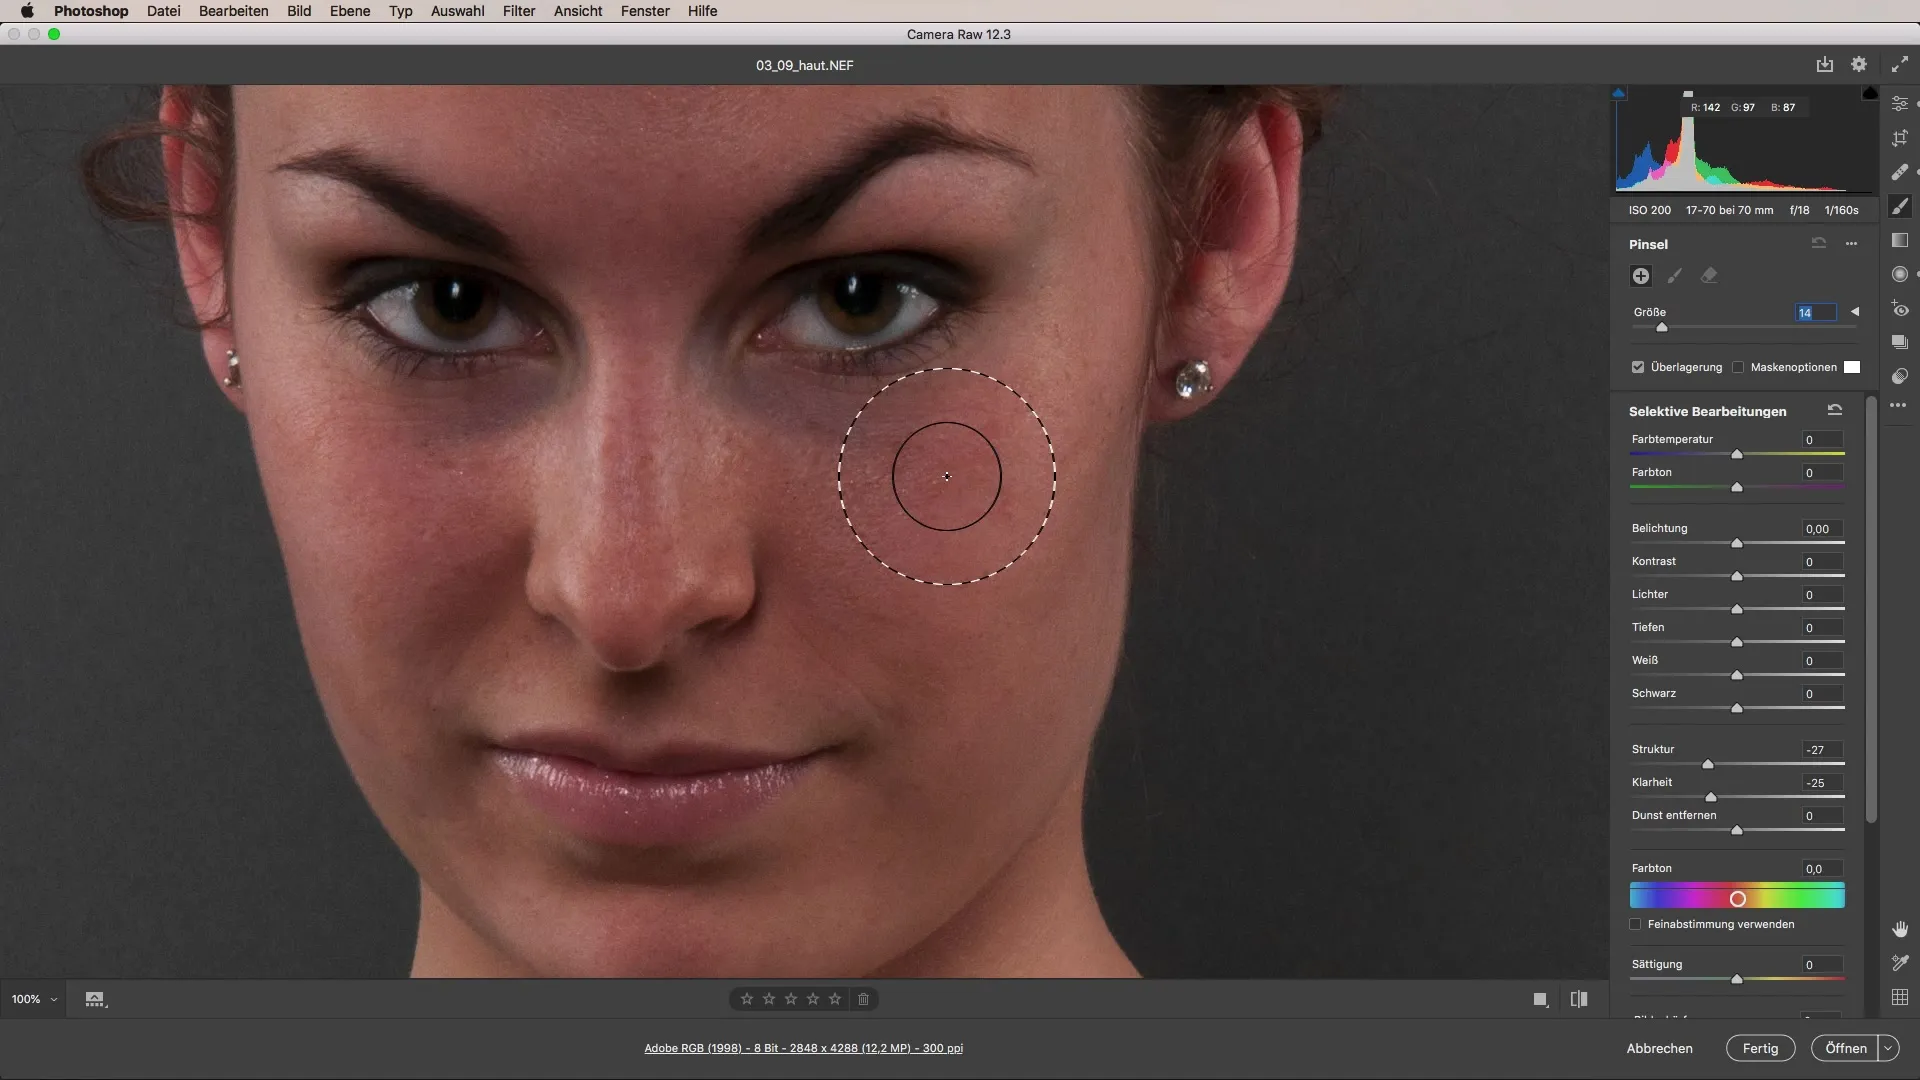
It is crucial to find a balance: The skin should look soft while retaining its natural structure. Test different settings and find out what works best for your image.
Step 6: Fine-Tuning and Final Edits
Before finalizing the image, review the edited areas once more. Use the correction brush to eliminate any remaining small blemishes. Pay special attention to the areas you edited for structural clarity, ensuring they appear uniform and homogeneous.
Create a harmonious final result that looks both professional and appealing. Adobe Camera Raw allows you to do much more than just basic adjustments; it gives you the tools to realize your creative visions.
Summary - Skin Retouching with Adobe Camera Raw
Skin retouching in Adobe Camera Raw provides you with all the important tools to significantly enhance portraits. From removing coarse blemishes to adjusting skin color and gentle softening – with these techniques, you will improve your images while saving time in post-processing.
Frequently Asked Questions
How do I remove coarse blemishes in Camera Raw?Use the correction brush to click on blemishes.
How can I adjust skin color?Use the eyedropper for white balance and then adjust the hue and saturation settings.
How do I highlight the eyes?Use the radial tool and draw an ellipse around the eyes to brighten them.
How do I soften the skin?Use the correction brush with negative clarity and structure.
How do I check my edits?Zoom in on the image and closely examine the edited areas to ensure they appear uniform.


