Photoshop offers powerful tools to remove unwanted blemishes from your images. If you want to gain knowledge about how the blemish removal tool works, I have summarized the most important steps for you. Whether you're dealing with distracting objects, small flaws or larger-scale retouching, the right techniques can significantly improve your images.
Key findings
- Blemishes can be removed efficiently with the Remove Marker tool.
- Adjusting the brush size is crucial for precise work.
- Photoshop automatically adjusts the surrounding pixels to create seamless transitions.
Step-by-step instructions
First, lay the foundation for your retouching with the right preparation. I recommend optimizing the basic settings of your image before removing distracting elements.
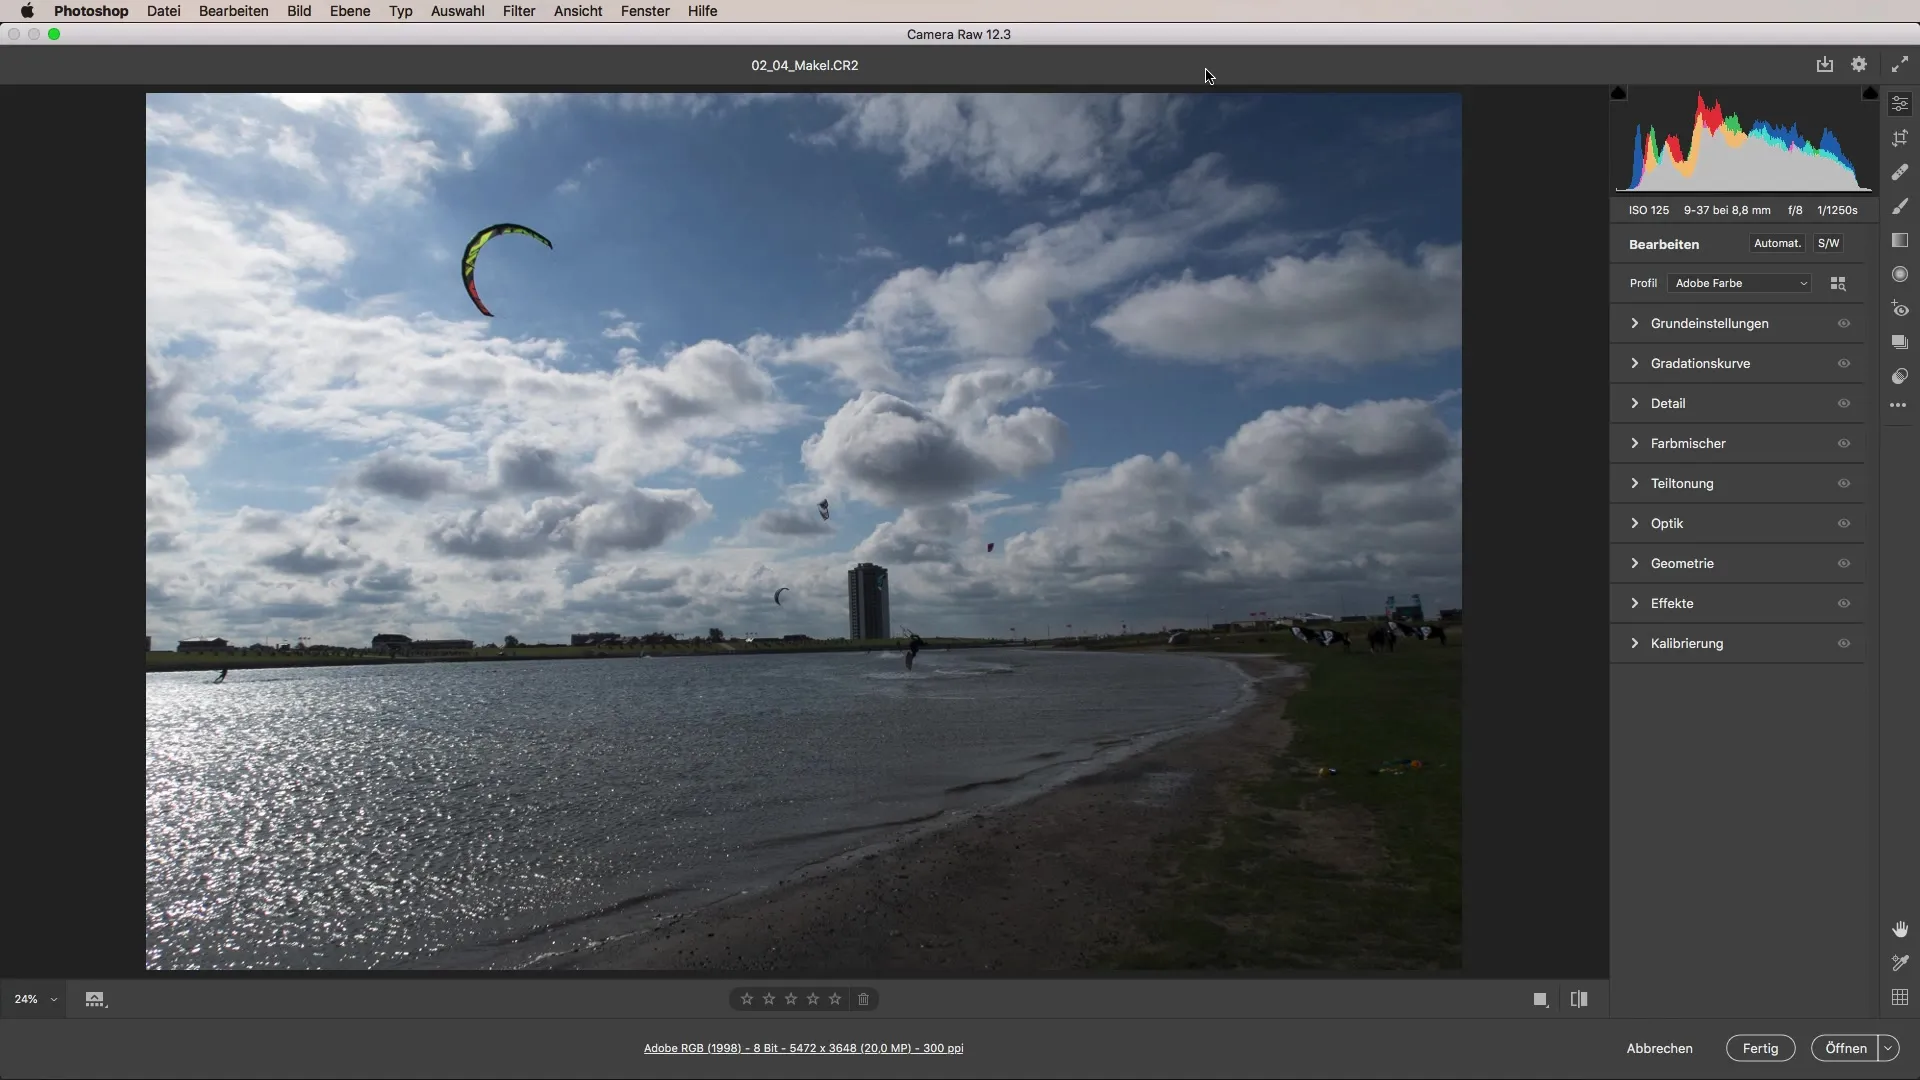
In this particular example, we'll use an image of kite surfers. Start by adjusting the exposure. Reduce the highlights and increase the shadows to bring out more details in the image. You can also increase the clarity and dynamic range to make the colors look more vibrant.

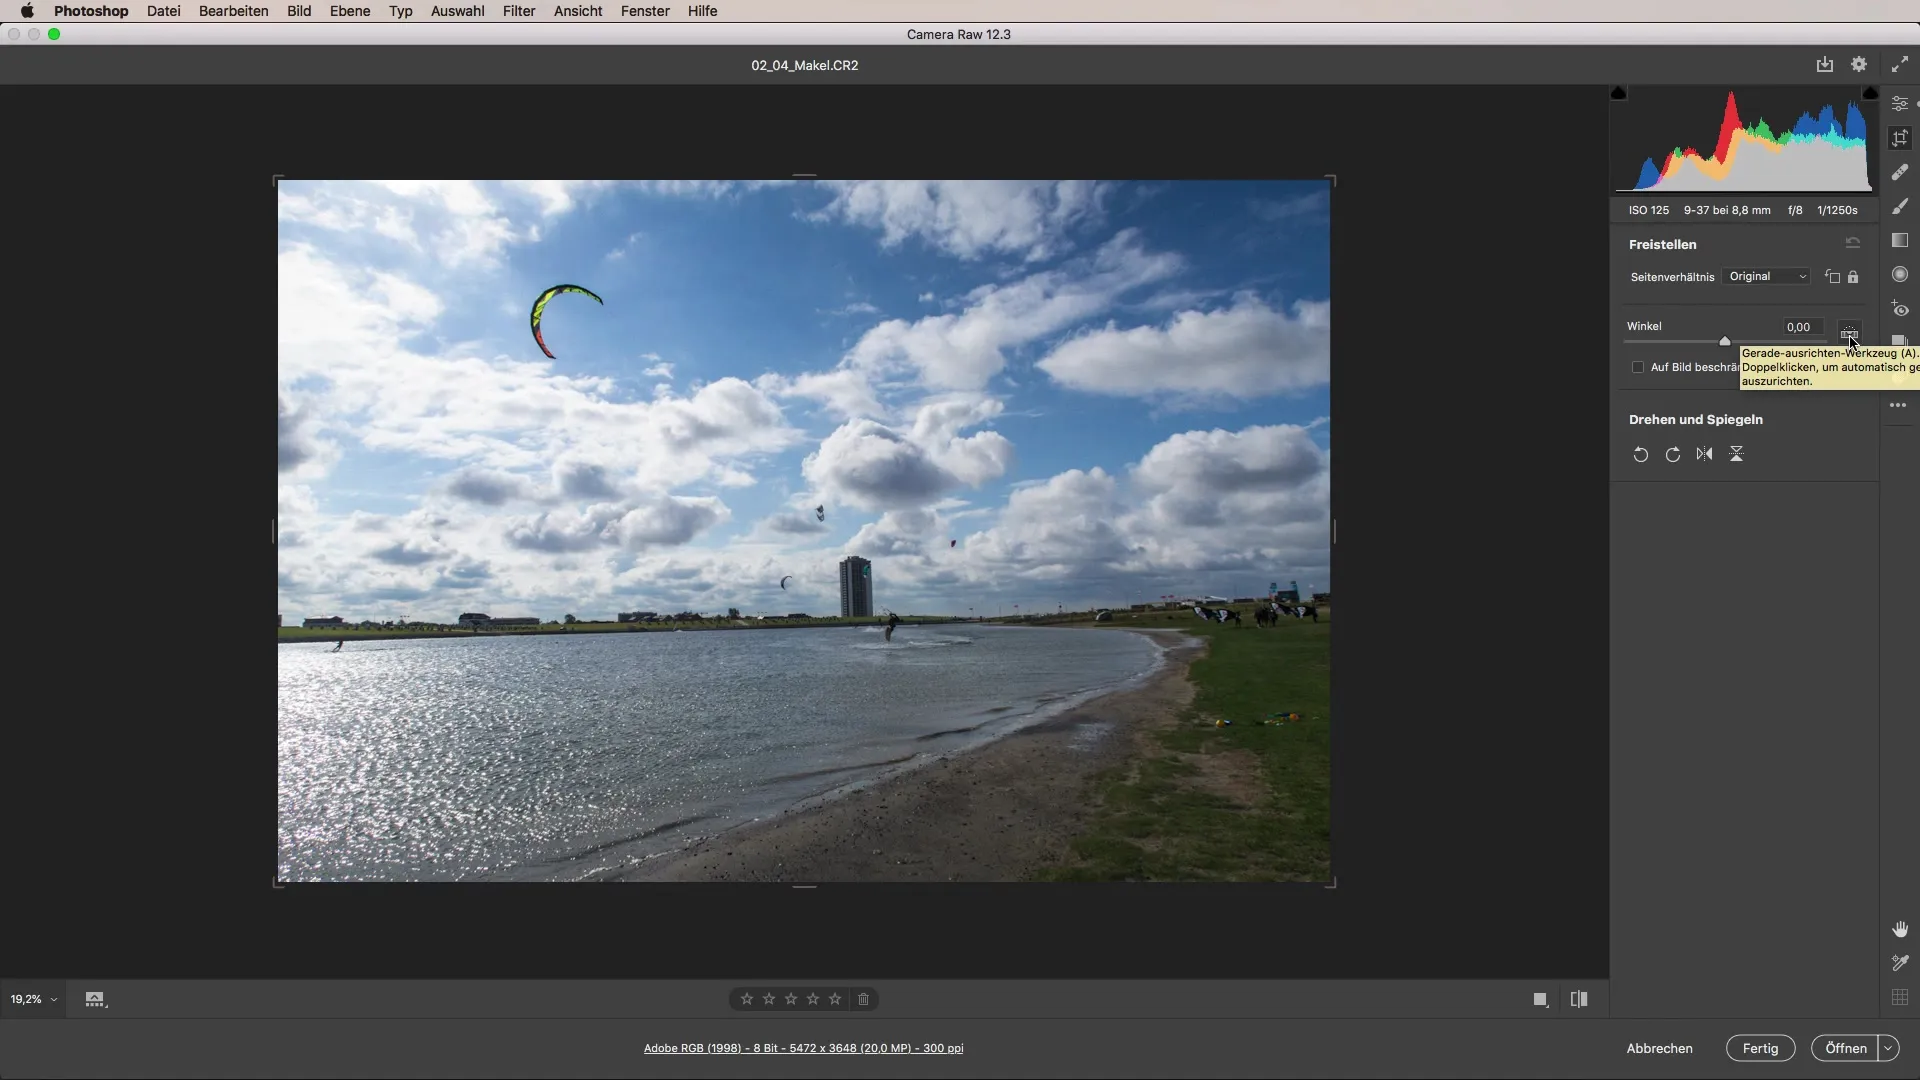
Another step is to improve the alignment if the horizon is skewed. Use the cropping tool to quickly correct the horizon line. Double-click on the straight alignment tool and Photoshop will automatically adjust the incorrect areas.

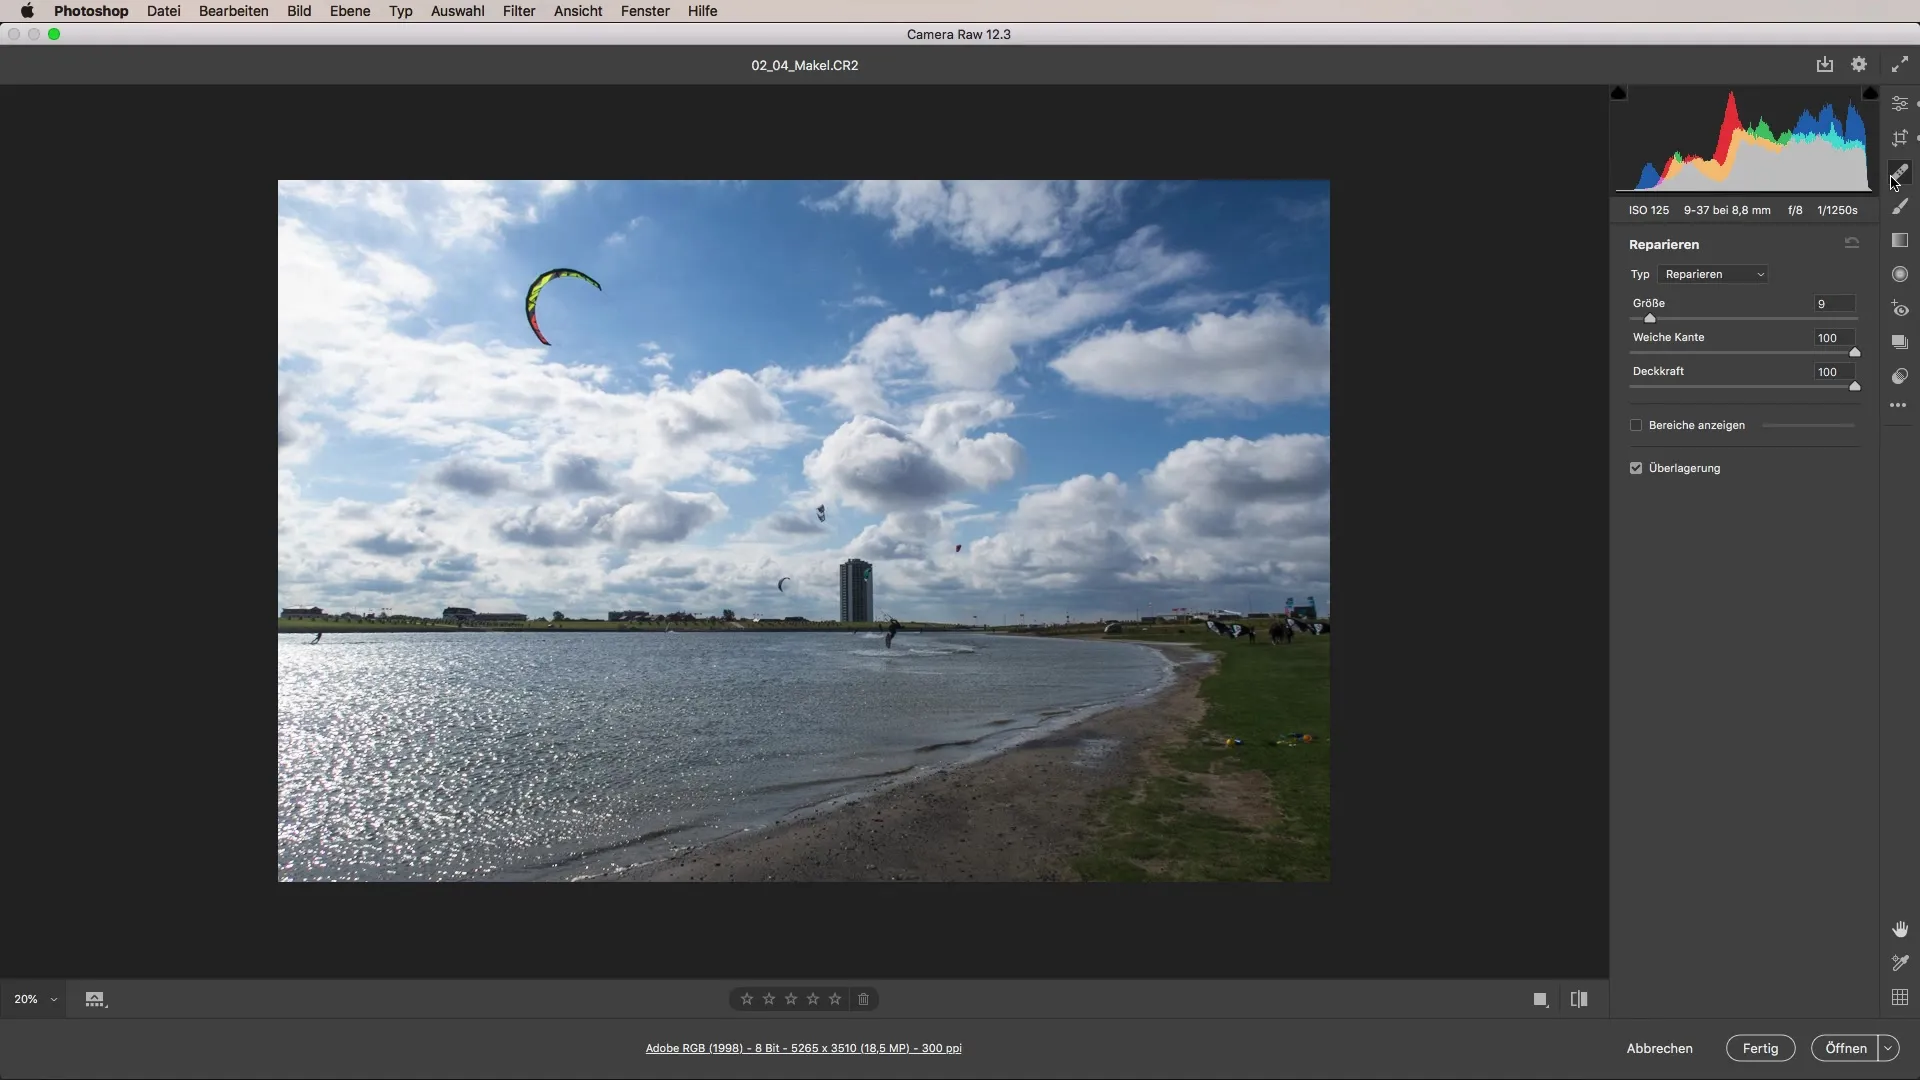
Then call up the "Remove blemishes" tool. Here you will see a brush with blue and white edges that you can adjust. It is important to define the brush size and the hardness of your tool. Set the opacity to 100% so that the blemishes are completely removed and select a soft edge to create smooth transitions.

Now you're ready to remove distracting objects. In our picture, for example, the three kites are distracting. So adjust the brush size so that it fits well in the area you are removing. Then click on the relevant area and Photoshop will start to remove the blemishes. Be patient while the program analyzes the environment.
If the result is not to your liking, you can always move the small selection circle to select a more suitable area. This step is crucial to ensure that the retouching looks natural. You will usually find a suitable replacement in the environment.
Continue with the next kite and proceed in the same way again. Be sure to adjust the size of the brush if necessary to ensure better opacity and proportionality.
For other disturbances such as the toy in the grass, follow the same principle. Adjust the size of the brush to the glitch, click on it, and let Photoshop do the work.
Once you're happy with the retouching, you can adjust other smaller details in the center or around the world. Photoshop has made remarkable progress in the latest version. You will be amazed at how well the program handles even difficult tasks and ensures a harmonious image composition.
Summary - Remove blemishes with our step-by-step guide in Camera Raw
Removing blemishes in Photoshop can be easy and effective if you use the right settings and tools. With the Remove Blemishes tool and a little patience, you can achieve impressive results that will enhance your images.
Frequently asked questions
How can I adjust the size of the Remove Marker brush?You can adjust the brush size via the settings in the tool menu.
What happens if the blemish removal doesn't look good?You can move the selection circle to adjust the source to get a better result.
Is there a way to undo the effect?Yes, depending on the version of Photoshop, you can simply undo the last step or selectively remove the change in the log.
Does Photoshop offer alternative tools for removing unwanted objects?Yes, in addition to the Remove Marker tool, the Repair Brush and Clone tools are also useful.


