
A polished classic car in the parking lot, low evening sun, and the question of what you actually need for it. The good news up front: to get started, you can get by with surprisingly little equipment. In this part, you'll learn which equipment Florian uses for his automotive photography, what to look out for with later purchases, and why a studio flash offers so many advantages when shooting vehicles. The guide follows the video step by step.
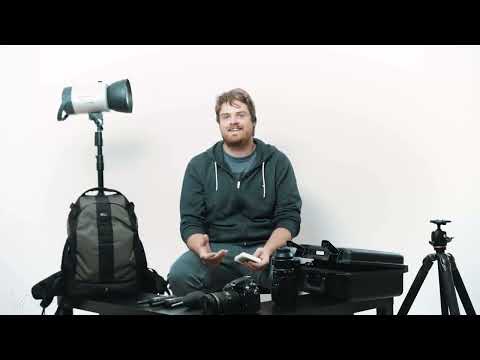
The video is only loaded from YouTube when you play it – data (including your IP address) is then transmitted to YouTube/Google. More in the privacy policy
Key Takeaways
- To start, a camera, a standard zoom, a tripod with a stable ball head, and a polarizing filter are enough.
- The camera must offer a manual mode; full frame is not strictly necessary.
- With cars, you usually work at around aperture 8 so that the entire vehicle is in focus.
- A tripod from the budget segment is a risk, both for image quality and for your gear.
- Studio flashes deliver enough power, even when it is brighter outside.
Step-by-Step Guide
Step 1: Choose the Right Camera
The camera comes first. Florian works with a full-frame camera, a Nikon D800. It is no longer the latest model, but it is ideal for this task. You don't necessarily have to commit to full frame, because APS-C or Micro Four Thirds cameras are also well suited. What matters is that you can not only shoot in automatic mode but can also make settings yourself in manual mode.

Step 2: Start with the Standard Zoom
For most images, Florian uses a standard zoom lens with 24 to 70 millimeters. It is his bread-and-butter lens. In automotive photography, you don't need a fast open aperture of f/1.4. Instead, you usually work at around aperture 8. This way the entire vehicle is rendered sharp, and the background remains recognizable too.

Step 3: The Zoom When Space Is Limited
Unlike portraits with models, with a car you can't walk around the subject as you please. Often only a fixed spot is available, and your position is restricted. A 50 millimeter prime lens would force you too close to the vehicle because you can't step back any further. With a zoom, you simply zoom out a bit and find the right framing. If you use an APS-C camera, a standard zoom with 18 to 55 millimeters is a good starting point. Florian estimates that over 90 percent of his images are made with this lens.

Step 4: The Telephoto Zoom for Variety
In addition, Florian owns a telephoto zoom with 70 to 200 millimeters and aperture 2.8. It is used in special situations, such as panning shots. In these, a car drives past you and you follow it from a greater distance. At 200 millimeters, a completely different image look emerges than at 35 millimeters. Use the focal length deliberately: move farther away, climb a staircase or a hill, and photograph the vehicle from above.

Step 5: Don't Forget the Blower Bulb
A simple blower bulb also belongs in your bag. With it, you remove dust from the camera and lenses before you shoot. It also helps with detail shots and interior photos when small dust particles are still on the paint or surfaces.

Step 6: Plan for Cleaning Supplies
Your equipment includes a cleaning bucket, cloths, and some glass cleaner. Even after thorough preparation, a car will never be one hundred percent clean. Therefore, wipe it down roughly once more at the final location. You can then polish away tiny dust residues and small stains directly. This saves you a lot of post-processing on the computer.

Step 7: Walkie-Talkies for Dynamic Shots
For dynamic shots, walkie-talkies are almost indispensable, especially for panning shots and car-to-car shoots. Via radio, you give the driver clear instructions: faster, slower, or a bit closer. A smartphone can serve as an alternative, but with a walkie-talkie you just press the button briefly and pass on the message without detours.

Step 8: Using the Polarizing Filter
The polarizing filter reduces reflections on smooth surfaces. Landscape photographers use it, for example, to reduce the reflection of the sun on a lake. It is also valuable for cars, because metallic paint and glossy surfaces reflect strongly. Depending on how you position the camera and the sun relative to each other and how you rotate the filter, many reflections can be significantly reduced.

Step 9: Transporting Your Gear Safely
To keep your equipment protected on the go, you shouldn't just throw it in the trunk. A backpack stores everything safely and comfortably, so you always have your equipment within reach.

Step 10: Don't Skimp on the Tripod
The tripod is a central part of your equipment. A cheap 30- or 40-euro model from an online retailer is often not enough. Florian experienced firsthand how a tripod along with the camera toppled over in strong wind, and on a slope at that. So it's better to invest in one size bigger and sturdier. Only then will your camera stand securely, and you avoid damage to expensive technology.

Step 11: The Ball Head Makes the Difference
Just as important as the tripod is the ball head on it. Here too, a higher investment is worthwhile, because it saves you a lot of time later. Many ball heads have a small bubble level, that is, an integrated spirit level. With it, you align the camera exactly in just a few steps, even if the tripod is standing on a sloping hillside. That way, your image framing matches exactly what you envisioned.

Step 12: Studio Flash for Artificial Light
For artificial light, Florian works with a classic studio flash that is operated via cable. These flashes are also available as a Porty with a battery generator, which is especially convenient for on-location shoots when there is no power outlet nearby. With an extension cable, normal studio flashes naturally work as well. Small system flashes, on the other hand, quickly reach their limits as soon as it gets brighter outside. The advantage of a studio flash lies in its power: even in daylight, you retain sufficient reserves of artificial light.

Step 13: The Gyro Against Camera Shake
A special device in the training is the gyro. It originally comes from military technology, where it stabilized optics such as binoculars. Two metal discs are accelerated to a rotation speed of over 20,000 revolutions per minute. As a result, it absorbs vibrations and small movements from the hand. With a bit of practice, you can achieve shake-free shots at exposure times of up to half a second, and with a lot of practice even a full second. The gyro is used mainly in car-to-car shootings, when you photograph from a moving car and need long exposure times to bring dynamism into the picture.

Step 14: The Right Order When Purchasing
To conclude, Florian ranks the equipment by importance. Tripod, lenses, camera, and polarizing filter are among the most important components, and cleaning supplies are just as indispensable. If you don't own everything yet, proceed step by step and think carefully about what you need for your pictures. With a camera, lens, tripod, and polarizing filter, you can already achieve a lot. You add the rest of the equipment bit by bit. Then the technical prerequisites for strong automotive photos are within your reach.

Summary ??? Automotive Photography Equipment: Camera, Lens, Tripod & Co.
To get started in automotive photography, you don't need a complete studio. A camera with a manual mode, a standard zoom, and a telephoto zoom for panning shots form the foundation. In addition, you need a polarizing filter against reflections and a stable tripod with a good ball head. If you also want to accentuate the vehicle with artificial light, a studio flash with a battery generator offers a powerful solution. Cleaning supplies, a blower bulb, walkie-talkies, and a backpack round out the equipment. Invest in the tripod and ball head first, because that is where you save the least later on.
FAQ
Do I absolutely need a full-frame camera?No. APS-C or Micro Four Thirds cameras are also well suited. What matters is that you can shoot in manual mode.
Which lens is suitable for getting started?A standard zoom is ideal, such as 24 to 70 millimeters for full-frame or 18 to 55 millimeters for APS-C.
Why are cars usually photographed at aperture f/8?This way the entire vehicle is rendered sharp, and the background remains recognizable.
What do I need a polarizing filter for?It reduces reflections on glossy surfaces such as metallic paint or windows.
Why shouldn't I skimp on the tripod?A cheap tripod can tip over in wind or on slopes and thereby endanger your camera.
When is a studio flash worthwhile?When it is brighter outside, studio flashes deliver significantly more power than small system flashes.


