Imagine you're photographing in front of a white background and want it to appear deep black in the image, while your subject stays brightly and cleanly lit. This only works if you treat the camera and flash as a coordinated team rather than as two separate devices. In this guide, you'll learn how ISO, aperture, and shutter speed work together with your flash setup. You'll also find out why the shutter speed usually hits a limit in flash mode and how to control the brightness of the background and the subject separately.
The video is only loaded from YouTube when you play it – data (including your IP address) is then transmitted to YouTube/Google. More in the privacy policy
Key Takeaways
- The background is controlled via the camera settings, the subject via the flash.
- The flash sync speed limits the shortest usable shutter speed, usually to around 1/200 to 1/250 of a second.
- With the aperture, you can dampen the ambient light without lengthening or shortening the shutter speed beyond the sync speed.
- In the studio, you shoot in single-frame mode so that the flash fires reliably with every shot.
- A test shot at the beginning saves you a lot of time because you can see right away whether the background is dark enough.
Step-by-Step Guide
Step 1: Define the goal for the background
Before you turn any dial, think about how bright you want the background to be in the end. Should it look deep black or only be slightly darkened? This decision determines all further settings. In the example, the photographer is standing in front of a white wall that should appear black later. He therefore first shoots completely without flash in order to specifically check the exposure of the ambient light.

Step 2: Turn on the hot-shoe flash for preparation
For the preparation, it is enough to turn on the hot-shoe flash. A cable, re-pairing, or a specific flash type are not necessary for this. The flash simply fires along as soon as the camera triggers. Test this once beforehand so that you know the connection works. Afterwards, you turn the flash off again so that it doesn't distort the test shot without flash light.

Step 3: Set the starting values
Set the camera to manual mode, i.e. M. In the example, the photographer starts with a shutter speed of 1/60 of a second, an aperture of f/2.8, and ISO 100. These values are only starting points that you can adapt to your subject and your lighting situation. With these settings, the image will probably be too dark, which is exactly right for the next step, however.

Step 4: Activate single-frame mode
Set the camera to single frame and not to continuous shooting. In the studio, burst shooting doesn't work reliably, because the flash often can't keep up with fast consecutive shots. The result is images that are only half black. With single-frame mode, you avoid accidentally unusable series and keep full control over every single shot.

Step 5: Keep an eye on the flash sync speed
Every camera has a flash sync speed. This is the shortest shutter speed at which the entire sensor is exposed at the same time and the flash illuminates the whole image. For the camera in the example, it is 1/250 of a second; for many other models, it is similar. If the shutter speed goes beyond that, the image is only partially captured by the flash. That's why you don't go beyond this value and instead regulate the brightness via the aperture.

Step 6: Darken the background with the aperture
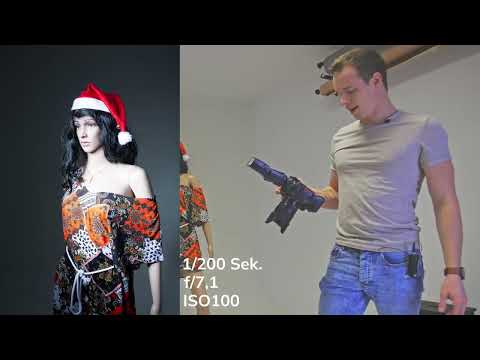
Now take a test shot. In the example, the image is still too bright, and the background is not black enough. Close the aperture further, i.e. to f/7.1, and shorten the shutter speed to 1/200 of a second. The shorter shutter speed is important here because it stays below the sync speed. With these values, the background becomes almost black, and a small remainder of light is still visible.

The next test shot then shows the desired result: a deep black background.

Step 7: Switch on the flash for the subject
Now the flash comes into play. It illuminates your subject while the background stays dark thanks to the camera settings. Make sure to aim the flash so that its light does not fall on the background. In the example, the flash is positioned slightly offset to the side, and its alignment ensures that the light passes by the background. In the example, the flash initially works at full power of 400 watt-seconds.

Step 8: Evaluate the first test photo with flash
Take a test photo with the current settings. In the example, the subject is far too bright, and a slight glow of light is visible on the background. This is a typical result at the beginning and no cause for concern. You now have two adjustment options that you can use independently of each other.

Step 9: Use the aperture for fine-tuning
To get rid of the last glow of light on the background, you can close the aperture further, for example to f/11. This makes the background darker, and the subject is also exposed less brightly. Pay attention to the result on the display at each step until both are right.

Step 10: Weigh up camera versus flash
You can also achieve the brightness in a different way. The camera then stays at 1/200 second and f/7.1 while you reduce the power of the flash. In the example, this results in a slightly crisper image, but that is a matter of taste. Both ways lead to the goal. What matters is that you first set the background with the camera and then adjust the flash to the subject.

So the camera provides the foundation for the background. As long as the background is dark enough and no more light falls on it, it hardly matters whether you fine-tune the flash or the camera. Make sure you still have some leeway in both areas.

Step 11: Final check with the model
A test photo with a mannequin or an assistant helps you a lot at the beginning. For the final image, however, you should always work with the real model or client. Height, skin tone, or clothing can influence the result. Then you will have to readjust once more. Also keep in mind that the background can change due to light from the side or through additional flashes.

Step 12: Deliberately exceed the sync speed to understand the effect
Try it out so you can experience the limit yourself. Set a shutter speed that is shorter than the sync speed, and then choose a time that is too short beyond that. The camera then often won't even let you go further or displays a warning. With a hot-shoe flash, the camera usually prevents this setting completely.

What happens if you exceed the limit anyway? The flash only burns for a short time. The shutter, however, opens line by line from top to bottom. The result is an image that is bright at the top and black at the bottom, because the flash has already gone out before the sensor is completely exposed.

Step 13: Internalize the settings through practice
Experiment until you get a feel for how everything connects. A tripod helps you keep the camera firmly in position so that you only change the flash and the exposure. Over time, you will quickly recognize which aperture, which ISO, and which flash power suit your subject.

Summary ??? Flash photography in the studio: Manually synchronizing the camera
Flash photography in the studio becomes straightforward as soon as you separate the tasks. The camera controls the ambient light, and therefore the background, through shutter speed, aperture, and ISO. The flash specifically illuminates your subject. The shutter speed should not exceed the flash sync speed, which is usually 1/200 to 1/250 of a second. The aperture is your most important tool for making fine adjustments. Use single-shot mode, take test photos, and ideally check the result together with your model.
FAQ
Why shouldn't I make the shutter speed shorter than the flash sync speed?The flash fires only briefly, and if the shutter speed is shorter than the sync speed, only part of the image is captured by the flash light, resulting in a half-bright and half-dark image.
Should I use continuous shooting or single-shot mode in the studio?Use single-shot mode, because continuous shooting often does not work reliably with the flash in the studio.
How do I make the background dark?Set the camera without flash so that the background turns black, and then brighten the subject with the flash.
Should I adjust the flash or the camera if the image is too bright?Both work. What matters is that the background is set first via the camera and that you then adjust the flash to suit the subject.
Do I need to use a cable with an on-camera flash?For initial setup, it is often enough to turn on the flash so that it fires with the camera. For reliable control, however, you can also use a cable or a wireless trigger.
Why is the aperture so important for the result?The aperture affects how much light reaches the sensor. This allows you to darken the background and at the same time adjust the brightness of the flash on your subject.


