
Imagine a car zooming past you at 60 km/h. The vehicle stays sharp, while the asphalt, trees and meadows blur into soft streaks. This exact effect is called panning, and it looks especially dynamic with automotive subjects. In the video, Florian shows how he sets up his camera for it, which locations are suitable, and why even experienced photographers need many attempts when panning.
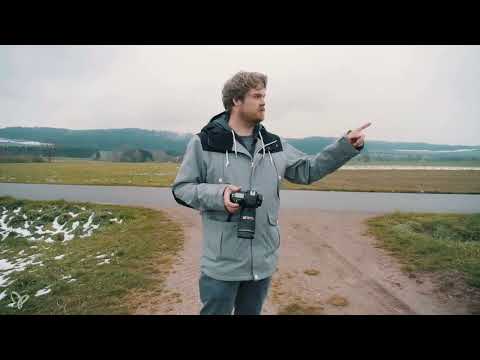
The video is only loaded from YouTube when you play it – data (including your IP address) is then transmitted to YouTube/Google. More in the privacy policy
The following guide takes you step by step through the preparation: camera mode, shutter speed, ISO, aperture, autofocus and camera posture. You will also learn what to look out for when choosing your location and how to evaluate the shots afterwards.
Key Takeaways
- Panning works best in manual mode (M), because you deliberately set the shutter speed and aperture.
- The starting value for the shutter speed is the reciprocal of the speed: at 60 km/h you start with 1/60 of a second.
- The ISO value stays low, 100 in the video, so that the image quality stays high.
- Continuous autofocus (AF-C) tracks the car while it is moving, as long as you keep the AF button pressed.
- The focus point belongs in the third of the image from which the car comes or into which it is driving.
- Smooth camera movement is crucial: switch on the stabilizer, stand firmly, and keep the camera close to your body.
- Panning takes practice. Even Florian discards several attempts before he gets a good result.
- Secure the location and agree with the driver on speed and the start signal.
Step-by-Step Guide
Step 1: Choose the Right Camera Mode
Set your camera to manual mode (M). Shutter priority mode (S or Tv) is also possible, because there you specify the shutter speed and the camera adjusts the aperture automatically. However, in the video Florian deliberately works in M mode, since the light stays constant on this overcast spring day. This way you can set the exposure and aperture calmly and don't have to worry about the automatic mode intervening unexpectedly.

Step 2: Determine the Shutter Speed Based on the Speed
As a rule of thumb, you take the reciprocal of the vehicle's speed. If the car is driving 60 km/h, you start with a shutter speed of 1/60 of a second. This value is not a final result, but a starting point that you can adjust later. Write down the time so that you can quickly come back to it in the next runs.

Step 3: Keep the ISO Value Low
Set the ISO value to 100. A low ISO value ensures little image noise and thus the best possible image quality. Since you work with a relatively long shutter speed when panning, you generally don't need a higher ISO value as long as there is enough ambient light.

Step 4: Find the Aperture Through Test Shots
Point the camera at the landscape or the later subject spot and watch the exposure meter in the viewfinder or on the display. Florian starts at aperture 8, but finds the image too bright. He then stops down to aperture 14, but it becomes too dark there. Only after a few test shots does he open the aperture up a little again and find a suitable value. So take several test shots and check them on the display until the brightness is right.

Step 5: Activate Continuous Autofocus
Set the autofocus to continuous mode (AF-C or, depending on the manufacturer, AI Servo or Continuous AF). With this setting, the camera continuously adjusts the focus as long as the distance to the subject changes. Florian also assigns an autofocus button that he holds pressed during the entire shot. As soon as the car comes closer, the focus follows automatically. The camera therefore doesn't just stay at a once-set distance, but follows the vehicle throughout the entire pass-by area.

Step 6: Position the Focus Point Skillfully
Think in advance about which direction the car will come from. In the video, the vehicle initially comes from the left, and Florian places his focus point in the right third of the image. The logic behind this: the car takes up more space in the image on the side it comes from, and you thus have more room for the composition. Move the focus point accordingly before the car appears. This step is worthwhile because you hardly have time to reset the point while the car is driving.

Step 7: Hold the camera calmly and steadily
Steady hands are especially important when panning. Turn on the image stabilizer on your lens or camera body, if available. Stand with a firm stance and hold the camera with both hands. Bring it as close to your body as possible, so that it almost merges with you. This reduces camera shake, which would be immediately visible with the long exposure times.

Step 8: Choose the location and observe safety
Florian chooses a small dirt track leading away from the road. There are lay-bys there where the vehicle can turn around, and the road runs straight, so you can see both directions well. When making your choice, also pay attention to visibility so that you notice approaching vehicles in time. Keep radio contact with the driver during the shots, as Florian does with a walkie-talkie. That way you can stop immediately if there is danger and give the start signal clearly.

Step 9: Take the first shots and evaluate them
Give the driver the signal to set off and photograph the car as it drives past you. In Florian's first attempt, the rear of the car is sharp, but the front area is blurry. Such results are normal. Look at the shot directly on the display and check where the focus point is. In the next pass, you can then readjust specifically.

Step 10: Refine the technique with repetitions
Panning is a matter of practice. Florian emphasizes that even he doesn't achieve a perfect result with every attempt. Repeat the shots from both directions and make sure that the focus point lies in the correct third each time. If necessary, ask the driver to drive more slowly or more evenly. A constant speed makes it considerably easier for you to follow the car.

Step 11: Evaluate the result and recognize the finer points
On the fourth attempt, the car drives at a constant speed of about 60 km/h, and Florian exposes at 1/60 of a second. The vehicle is relatively sharp at the front, and the sharpness decreases towards the rear. This is completely normal for panning shots from close range and doesn't spoil the effect. Florian rates this solution as a good foundation and is satisfied with the result. Decide for yourself whether the image meets your requirements or whether you need further attempts.

Step 12: Working with a telephoto lens
For a second approach, Florian switches to a large telephoto lens and photographs from a greater distance. He moves his position about 100 meters further into the track. This time the vehicle drives at about 90 to 100 km/h. With telephoto focal lengths, the effect changes noticeably: the background looks more compressed, and even small deviations when following the subject are noticeable. Therefore, pay even more attention to a stable posture, since the weight of the lens puts additional strain on the camera.

Step 13: Coordinate the speed and timing
Before you start shooting, agree on the desired speed with the driver. In the video, 90 to 100 km/h is mentioned. Turn on the image stabilizers, hold the camera close to your body, and first follow the vehicle through the viewfinder before you press the shutter release. Take your time with the timing. If an attempt doesn't work out, stop and start over instead of continuing with a sloppy shot.

Step 14: Evaluate the telephoto shots
The first telephoto attempt already delivers a solid result, even though the car is not one hundred percent sharp. Florian repeats the pass two to three more times at the same speed and thus achieves a convincing image. Document your attempts and compare them. That way you quickly recognize which settings and movements work best.

Step 15: Plan the Shoot and Take the Weather into Account
Finally, Florian points out that cold and darkness can make the work more difficult. In better weather, shoots can be carried out more relaxed because you manage more attempts. Therefore, for outdoor shots, plan a date with good light and pleasant temperatures.

Summary ??? Panning Shots: Camera Settings for Sharp Images
Panning shots are one of the most appealing techniques in automotive photography, but they require preparation and patience. Set your camera to M mode, start with 1/60 second at 60 km/h, and keep the ISO value at 100. You find the aperture through test shots. Activate continuous autofocus, position the focus point in the appropriate third, and hold the camera as steady as possible. Choose a safe location, coordinate with the driver, and repeat your attempts until the result is right. With each pass, you become more confident in tracking the vehicle.
FAQ
Which shutter speed is suitable for panning shots?As a starting value, use the reciprocal of the speed. At 60 km/h, that would be 1/60 second. You then adjust the value based on the result.
Why should I shoot in manual mode?In M mode, you set the shutter speed and aperture yourself. The camera does not intervene on its own, which allows for consistent results under constant light.
Which ISO value should I choose?A low value like ISO 100 ensures the best image quality with little noise. Only increase the value if the ambient light requires it.
What does continuous autofocus mean?Continuous autofocus continually adjusts the focus as long as the subject is moving. With panning shots, the car thus stays sharp even while driving past.
Why do I have to keep the autofocus button pressed?If you keep the button pressed, the camera stays in focus mode and tracks the vehicle, instead of locking the focus once when you press the shutter button.
Where should I place the focus point?Place it in the third of the frame from which the car is coming or into which it is driving. In the video, Florian uses the right third for this.
How do I hold the camera correctly?Hold the camera with both hands, stand firmly, and keep it close to your body. Also turn on the image stabilizer, if available.
Is the location important for panning shots?Yes. Choose a straight road with good visibility, escape options such as lay-bys, and a safe distance from traffic. Stay in contact with the driver so you can abort at any time.
Why isn't every attempt sharp?Panning requires practice and timing. Even experienced photographers need several passes until the result is right.
What speed should the vehicle drive?A constant speed makes tracking easier. Florian works with about 60 km/h for close-up shots and with 90 to 100 km/h with the telephoto lens.


