
If a photo looks too soft in one spot, such as the eyes, or if you want to emphasize skin details, the Sharpen tool and the Blur tool in Affinity Photo can help. Both tools do not work across the entire image, but with a brush. So you decide for yourself where and how strongly to intervene. This guide shows you the basic functions, the two editing modes, and the typical pitfalls.
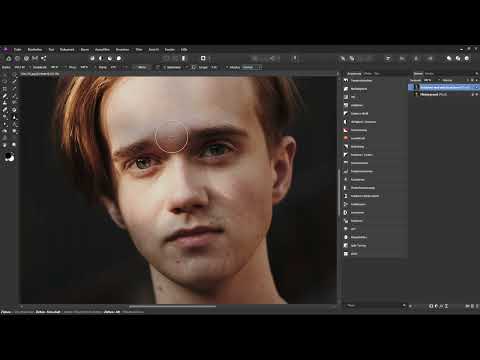
The video is only loaded from YouTube when you play it – data (including your IP address) is then transmitted to YouTube/Google. More in the privacy policy
Key Takeaways
The Sharpen tool and the Blur tool are brush tools with which you edit individual areas in a targeted way. Working on a copy of the background layer protects your original image. The "Clarity" mode is the default setting, while "Unsharp Mask" has a stronger effect. A brush hardness of 0% ensures soft transitions. With reduced opacity and small brush tips, you avoid artifacts. You can reach the Blur tool via the tool group, or permanently via the Alt key while using the Sharpen tool.
Step 1: Finding the Right Tool
You can find the Sharpen tool in the toolbar. It belongs to a tool group that you open by holding down the left mouse button. The Blur tool is also in this group. So you don't have to search for a separate icon, but simply switch to the desired tool within the group.

Step 2: Creating a Copy of the Background Layer
Before you get started, you should not work directly on the background layer. Select the background layer and press Ctrl + J to create a copy. Then give the layer a meaningful name, for example "Sharpen" or "Blur". If you don't like the result later, you can simply delete or hide the layer without losing the original image.
Step 3: Setting Up the Brush
Select the tool and set the brush width in the context toolbar at the top. As with the paint brushes, you can also adjust opacity, flow, and hardness. In most cases, you should set the hardness to 0%. This creates a soft transition between the edited and unedited areas, and the correction is barely noticeable. When working, feel free to zoom in a bit closer on the subject.

Step 4: Choosing Between the "Clarity" and "Unsharp Mask" Modes
At the top of the toolbar you will find the mode selection. "Clarity" is active by default. This mode increases local contrast and thereby creates the impression of sharpness. The "Unsharp Mask" mode works similarly to the filter of the same name, but increases the fundamental contrast at pixel edges and contrast boundaries. As a result, it has a stronger effect. Try both variants on your image and decide which result you like better.
Step 5: Sharpening Eyes and Details in a Targeted Way
In a portrait shot with a wide-open aperture, the focus is often only on the eyebrows, while the eyelashes and the iris already lie in the out-of-focus area. In such a case, you can use the brush to paint specifically over the iris. Reduce the brush tip size so that you only edit the desired spot. With small brush sizes, you can also bring out eyelashes or wrinkles. In portraits of men, this is often used to emphasize contours, whereas in portraits of women it is often handled with restraint.

Step 6: Avoiding Artifacts
The Sharpen tool can quickly produce unpleasant artifacts, especially with heavily compressed files such as JPEGs. These image flaws are often already present in the original image and become visible through sharpening. So work carefully. Reduce the brush opacity if the effect is too strong, and adjust the brush size. If you work with high-quality images, for example straight from the camera in RAW or a high-resolution format, these problems occur significantly less often.

Step 7: Checking the Effect of Both Modes in a Direct Comparison
The "Unsharp Mask" mode is significantly stronger than "Clarity". When you work with it, you should reduce the opacity further and proceed more gently. Regularly compare the result with the previous state. This way you can quickly tell whether the effect still looks natural or is already overdone.

Step 8: Using the Sharpen Tool in Practice
In practice, the Sharpen Tool is often used only at the end of a workflow. When you edit an image, resize it, and publish it for the web, you usually don't re-sharpen the entire image. Instead, you work selectively on areas such as the eyes, nose, or lips, which need a little sharpness in the smaller format. With the brush, you determine exactly where the effect should be visible.

Step 9: Switching to the Blur Tool
The Blur Tool does exactly the opposite: it softens areas in the image. You can reach it in two ways. Either you have already placed the tool in your toolbar, or you open the Sharpen Tool's tool group by holding down the left mouse button and select the Blur Tool there.
A faster method is holding the Alt key. Stay with the Sharpen Tool and hold down the Alt key while painting. Affinity Photo then automatically switches to Blur mode, while the icon in the toolbar remains unchanged.
Step 10: Blurring Areas and Adjusting the Opacity
When blurring, the tool quickly becomes very strong. If the effect turns out too intense, you can undo it with Ctrl + Z and reduce the opacity. Then paint carefully over the desired areas until the transition looks harmonious. This way you work in a controlled manner and avoid losing details unnecessarily.

The instructor of this tutorial hardly uses the Blur Tool in his own workflow and relies mostly on the Sharpen Tool. You don't have to adopt this, but you should know both tools in order to stay flexible.
Summary – Affinity Photo: Using the Sharpen and Blur Tools Selectively
The Sharpen and Blur Tools in Affinity Photo are brush tools for targeted adjustments. You find both in the same tool group, switch between them using the Alt key, and it is best to work on a copy of the background layer. A hardness of 0% creates soft transitions. The "Clarity" mode is gentler, while "Unsharp Mask" is more powerful. Reduce the opacity and work with small brush tips to avoid artifacts. Especially for portraits and smaller web versions, the Sharpen Tool is well suited to selectively emphasize eyes, nose, or lips.
FAQ
How do I find the Blur Tool in Affinity Photo?You find it in the Sharpen Tool's tool group. To do this, hold down the left mouse button and select the Blur Tool. Alternatively, hold down the Alt key while using the Sharpen Tool.
Why should I work on a copy of the background layer?The copy protects your original image. If you don't like the result, you can delete or hide the layer without having to undo the editing.
Which mode should I choose for the Sharpen Tool?The "Clarity" mode is the default setting and is gentler. "Unsharp Mask" works more strongly. Try both and decide based on the result.
Why should the hardness be set to 0%?A hardness of 0% creates soft transitions between edited and unedited areas. This makes the correction look more natural.
Why do artifacts appear when sharpening?Heavy editing makes existing image flaws visible, especially in heavily compressed JPEG files. Reduce the opacity, make the brush tip smaller, and work carefully.
What do I use the Sharpen Tool for in practice?It is well suited for smaller web versions where you want to selectively emphasize eyes, nose, or lips instead of re-sharpening the entire image.


