Whether you are a beginner or an experienced user of Affinity Photo, adjustment layers are among the most important tools to give your images the finishing touch. These special layers allow you to precisely control the color and tonal values of your images without altering the original image data. Let’s dive deep into the features and possibilities of adjustment layers.
Key Insights
- Adjustment layers help to manipulate colors and tonal values without changing the original image.
- Access to adjustment layers is through the layers palette or the adjustments panel.
- Settings can be saved as presets and reused when needed.
- Adjustment layers behave like copies of the underlying layer, especially concerning blending modes.
Step-by-Step Guide
Basics of Adjustment Layers
Adjustment layers in Affinity Photo are an excellent way to perform targeted and non-destructive image editing. They allow you to make specific adjustments without altering the original data of your image. This opens up many creative possibilities.
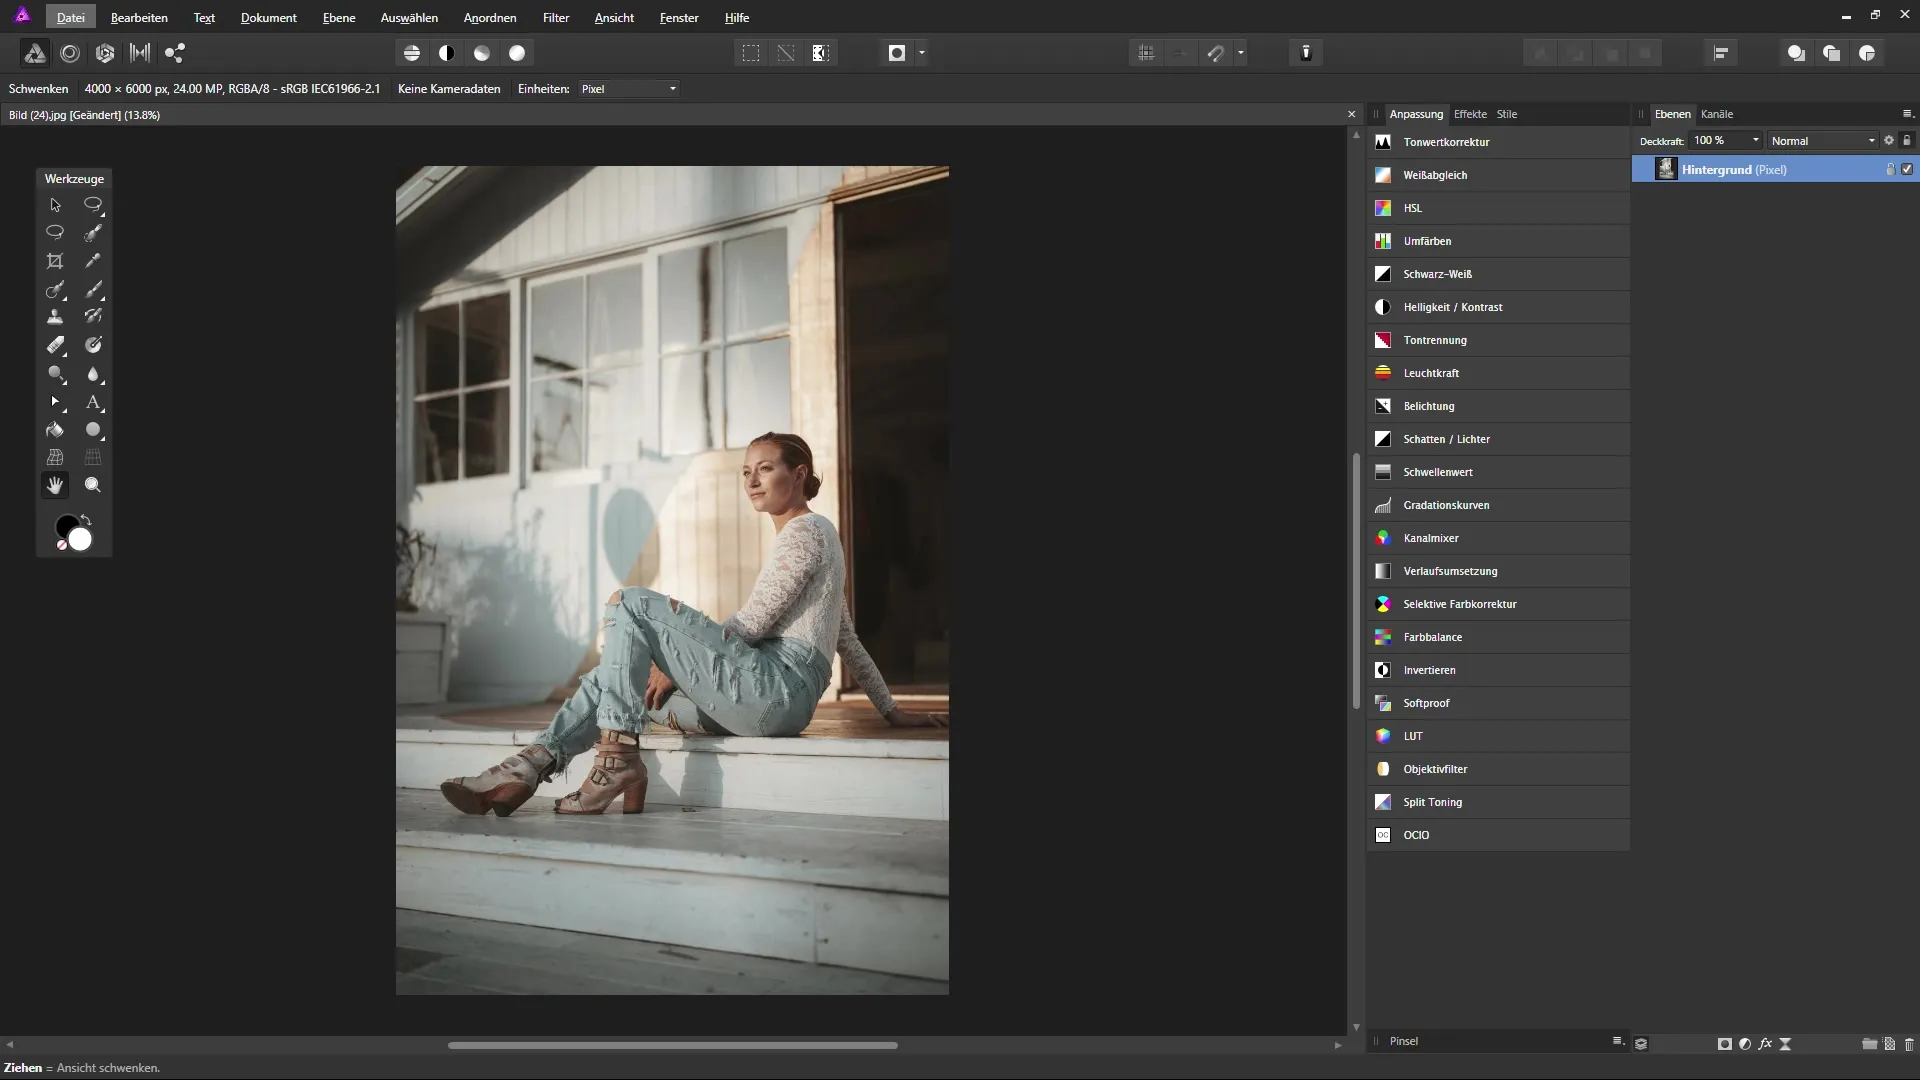
Accessing Adjustment Layers
To use an adjustment layer, first go to the layers palette in Affinity Photo. There you will find an icon at the bottom representing adjustment layers. When you click on it, a menu opens that offers you various adjustment options. You can also use the adjustments panel, which presents you with several options at once.
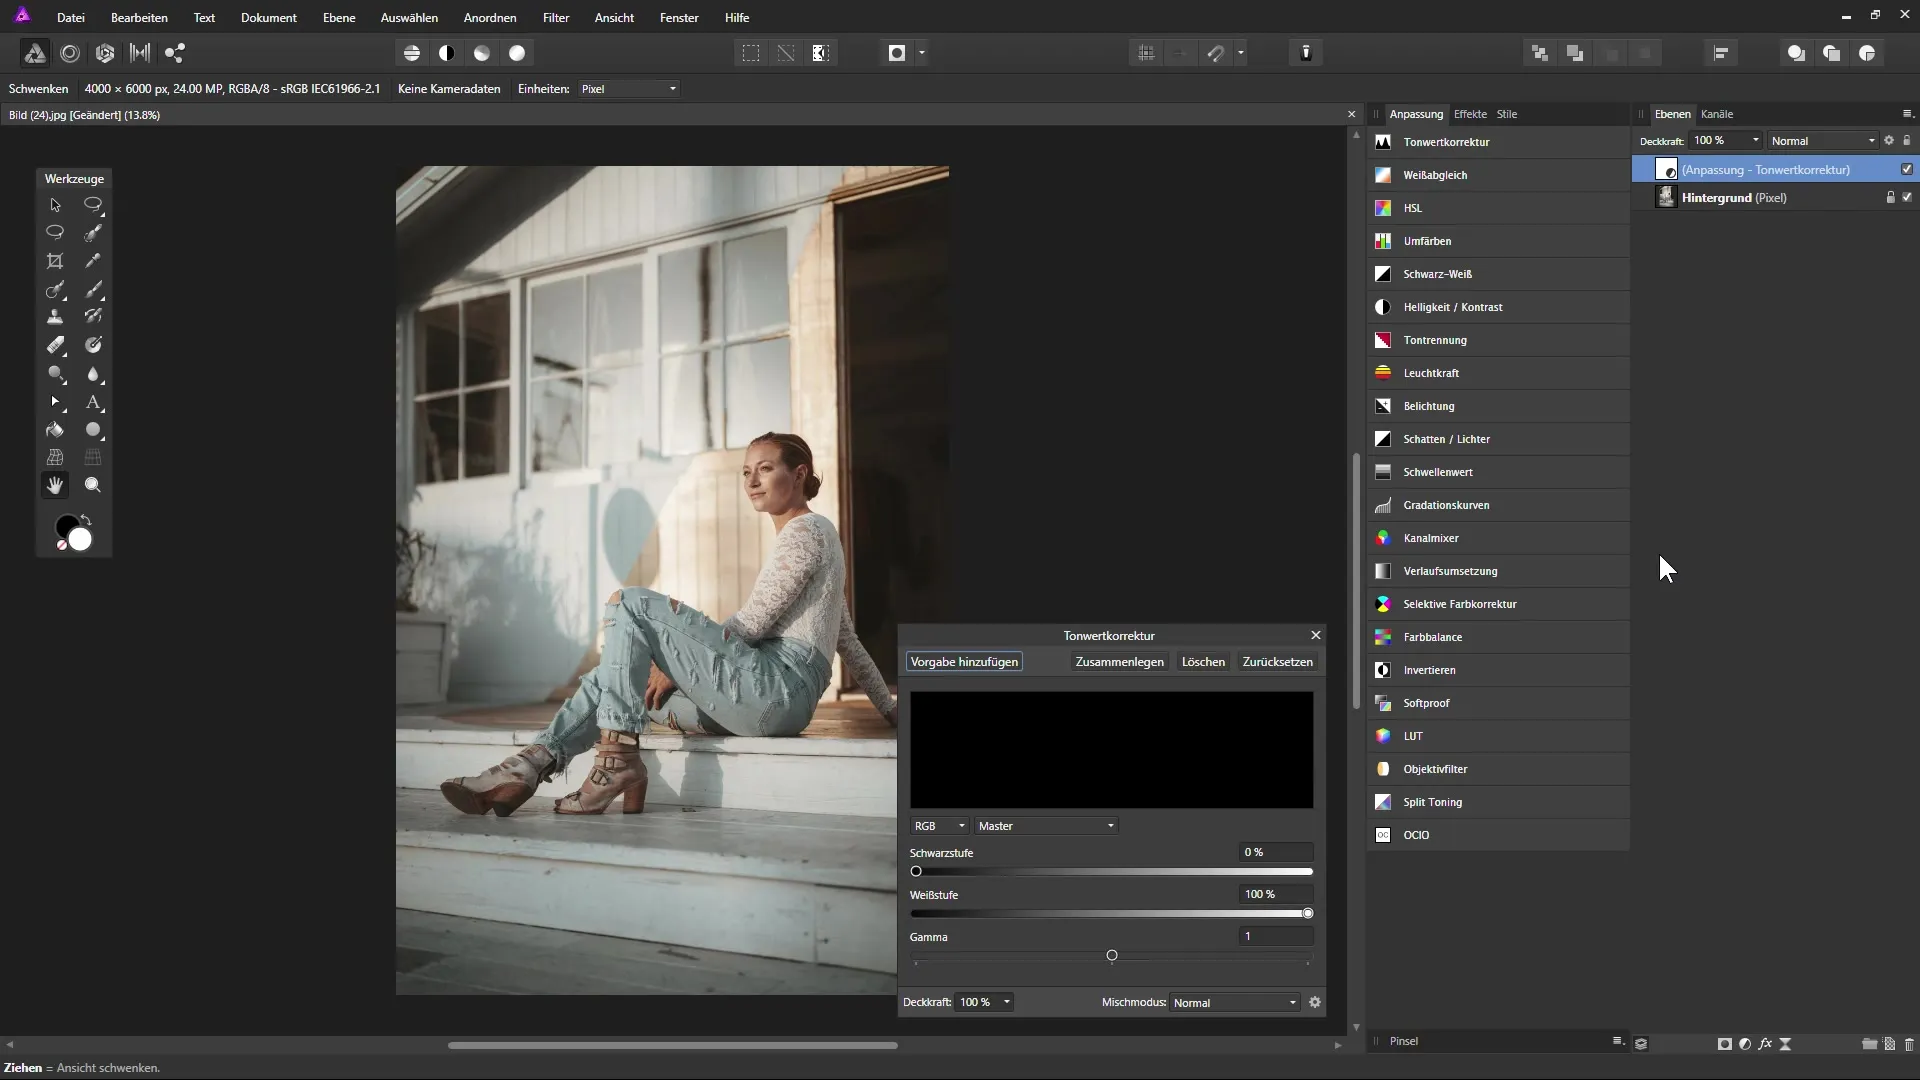
Creating a Levels Adjustment
If you want to add a levels adjustment, click on the corresponding option in the menu. This adjustment layer will be created above the last selected layer. At the same time, a dialog box opens where you can make your settings. This is particularly useful if you need specific adjustments for your image.
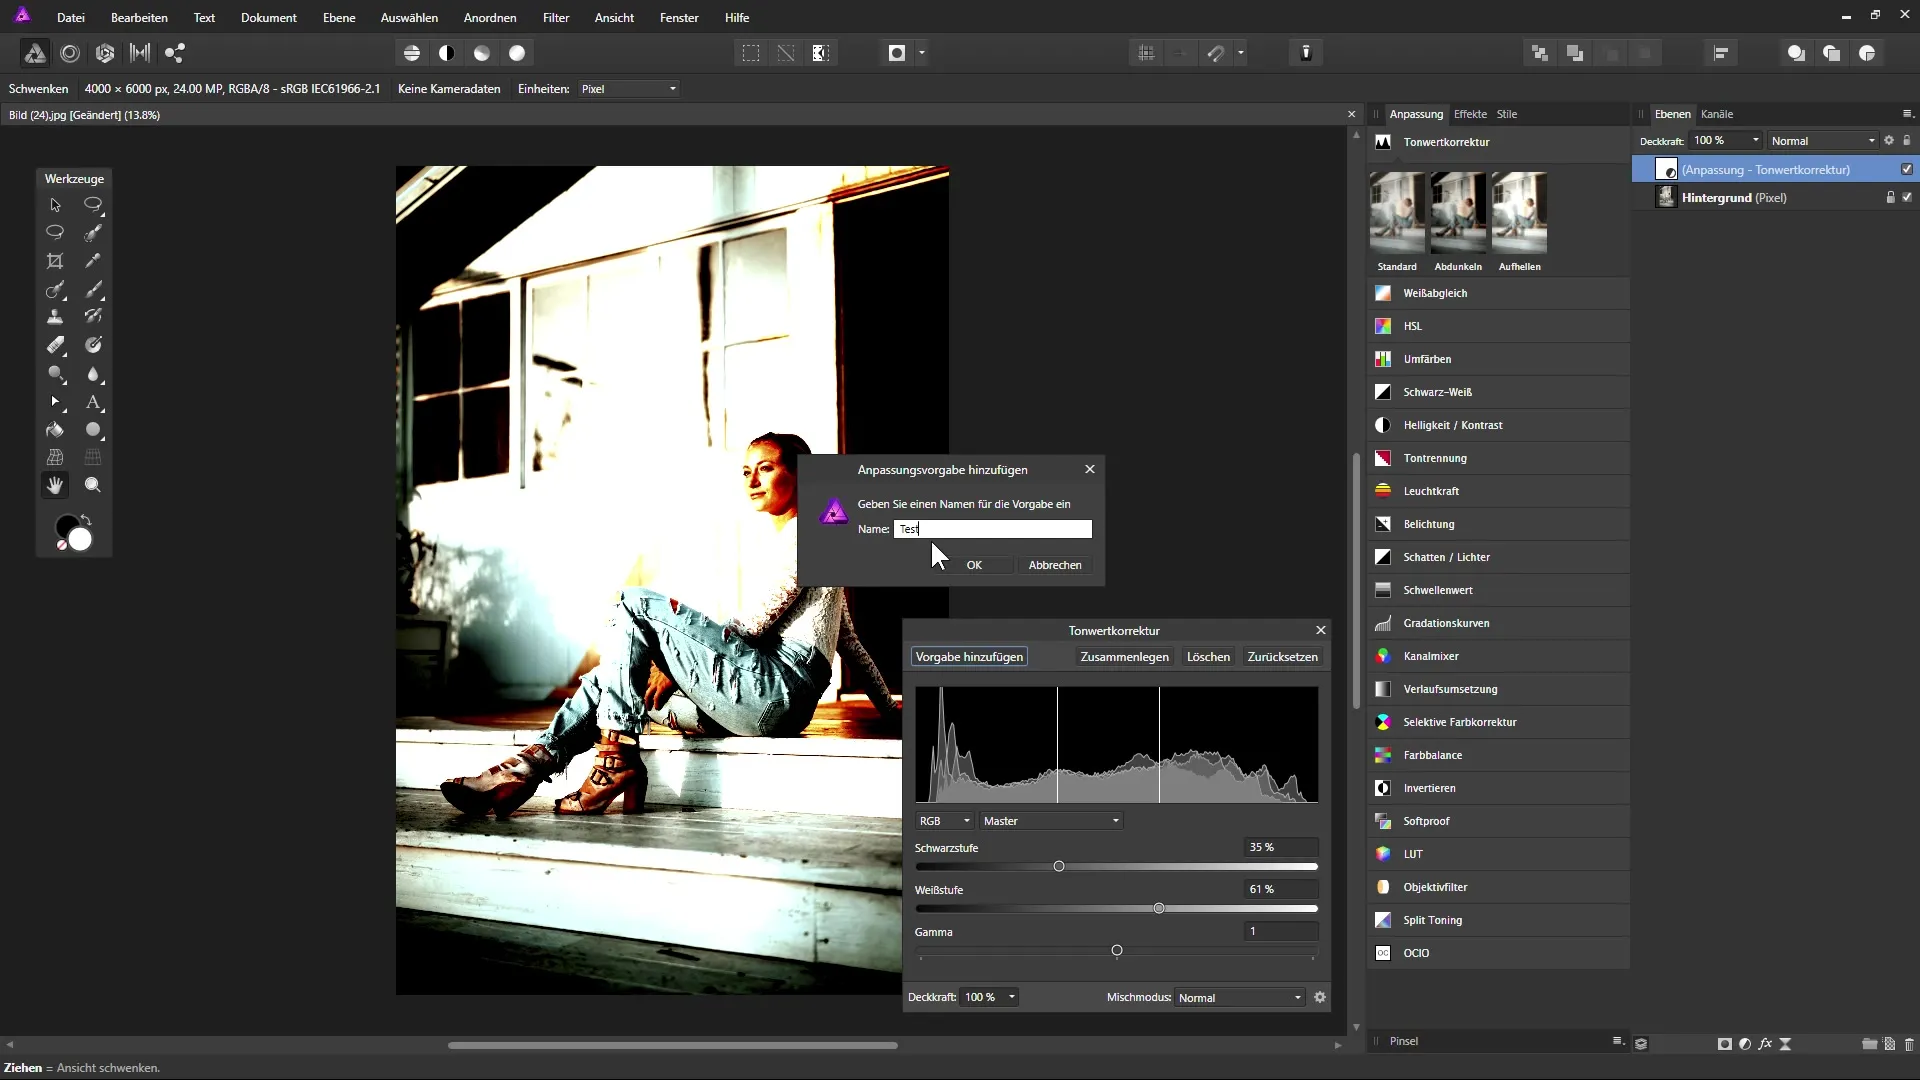
Using Presets
Once you have made settings on an adjustment layer, you can save them as a preset. This is very practical if you want to use similar adjustments on multiple images. To add a preset, simply select the corresponding option and give it a name. This way, you have the ability to quickly reproduce frequently used settings.
Adjusting Opacity and Blending Modes
In the dialog box for adjustment layers, you also have the option to adjust the opacity or choose blending modes. By using the gear icon, you can access additional blending options. This means that you can make all important settings in one place instead of switching back and forth between different menus.
Benefits of Adjustment Layers and Their Blending Modes
One of the most exciting elements of adjustment layers is that they behave like a copy of the underlying layer. You can create a copy of a layer and set it to a different blending mode, such as “Overlay.” This can lead to adjustments appearing significantly different while retaining the original image quality.
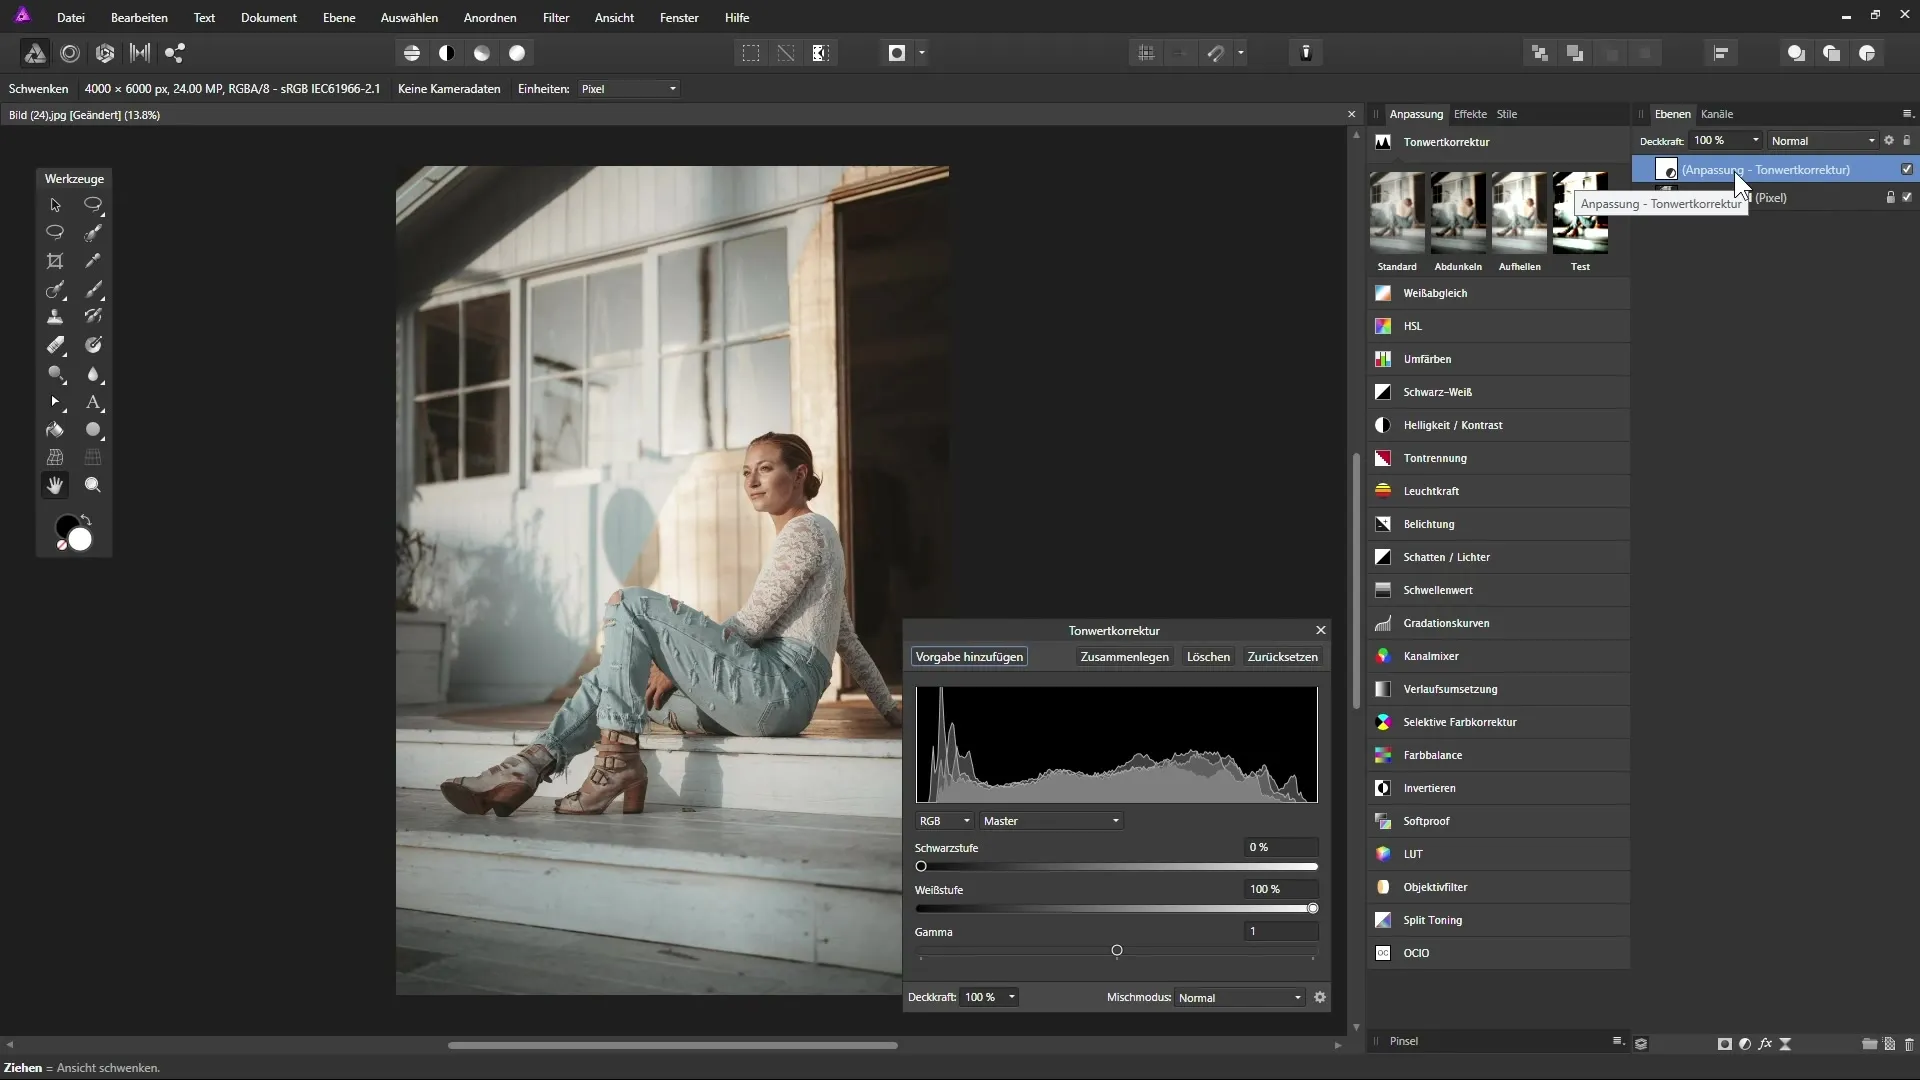
Managing and Modifying Presets
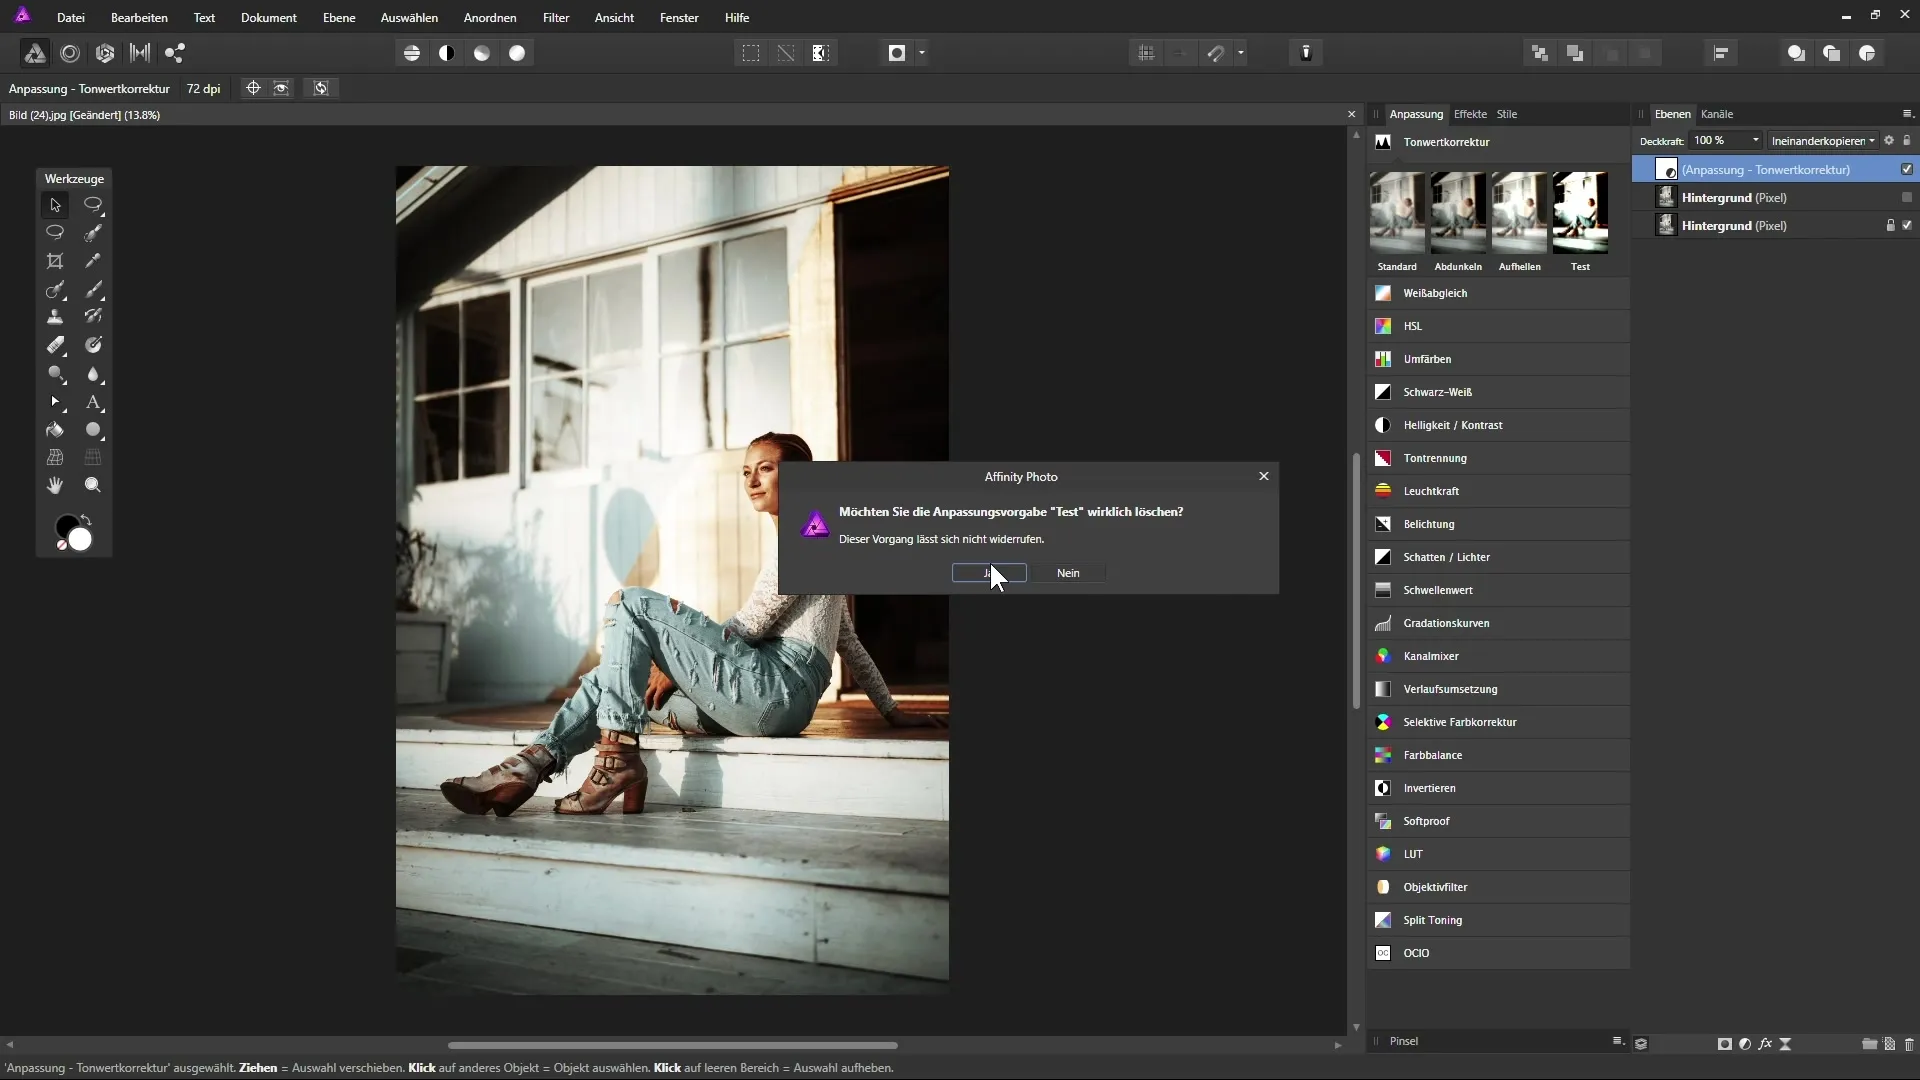
You have the option to manage presets by right-clicking on a created preset. Here you can rename or delete it if it is no longer needed. Assigning keyboard shortcuts for frequently used adjustment layers also shows how time-saving this feature is.
Setting Keyboard Shortcuts
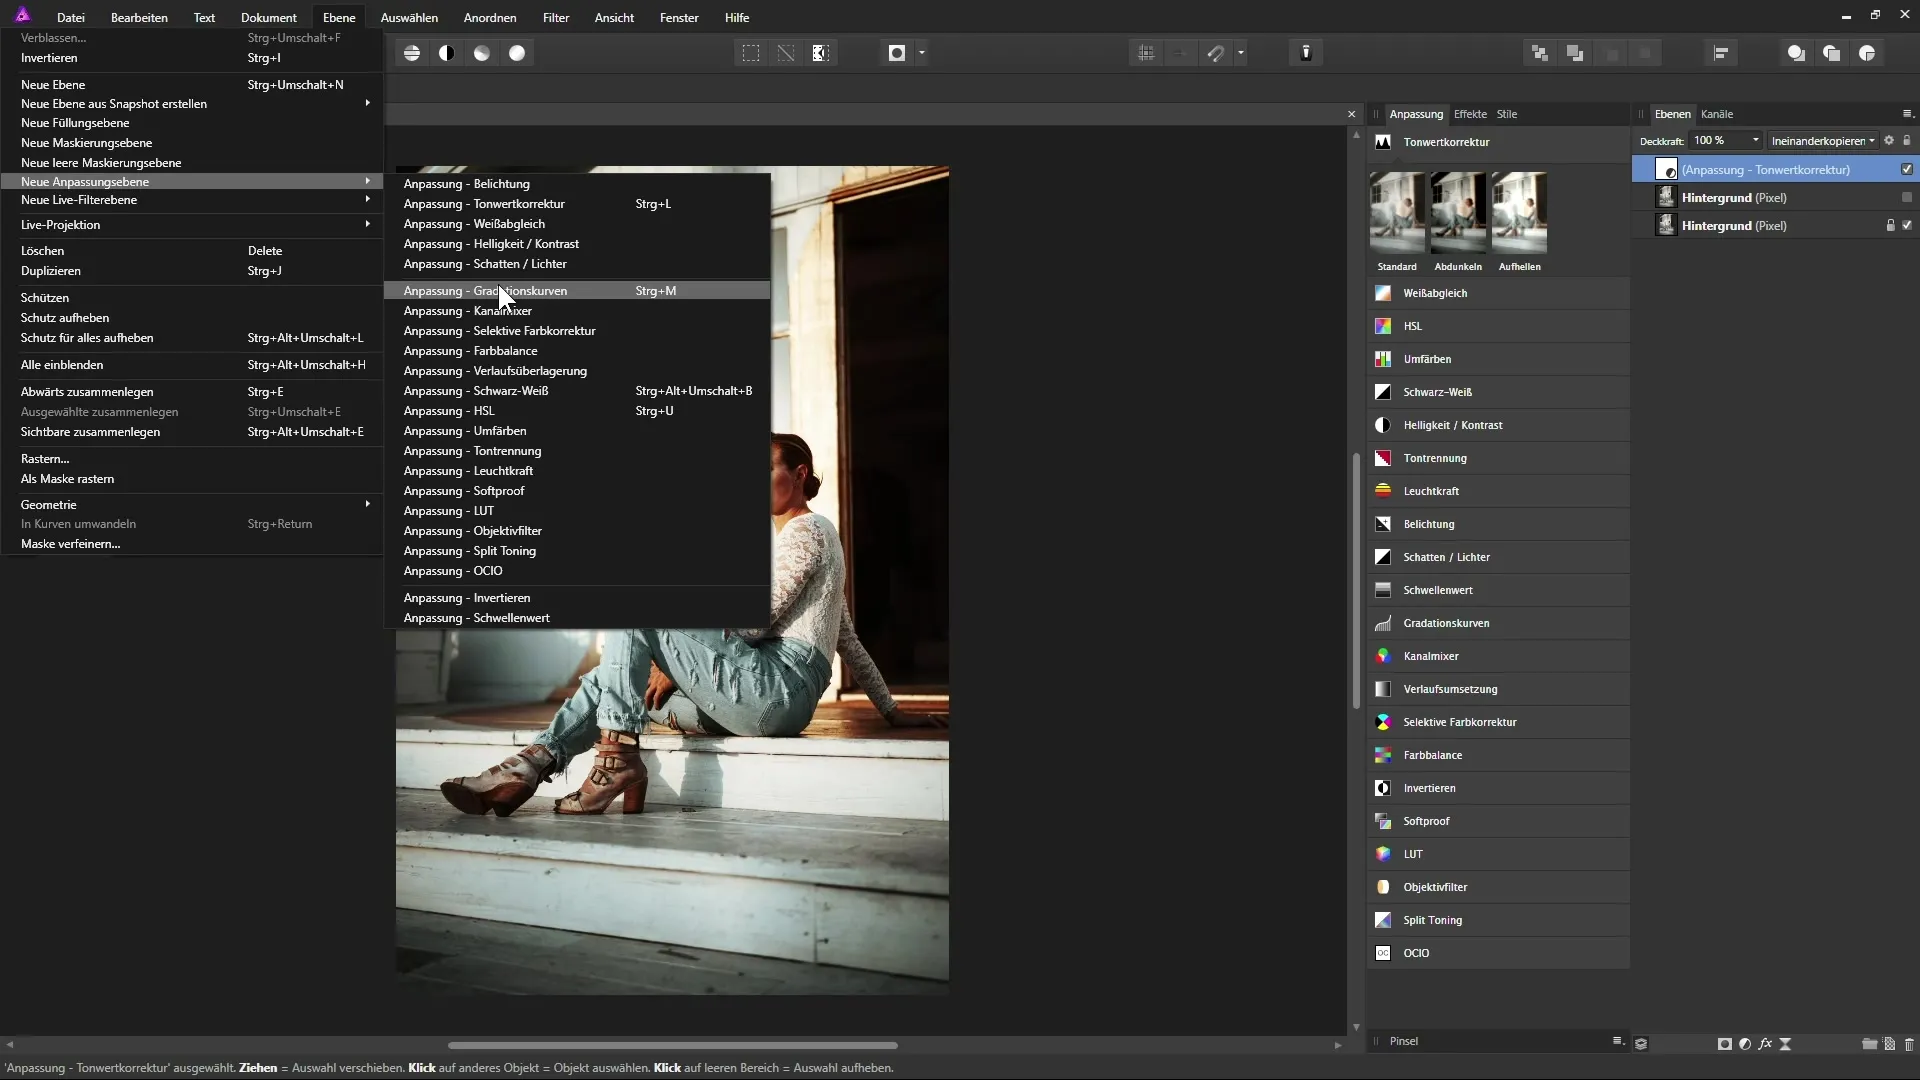
If you have a specific workflow or often make the same adjustments, you can set your own keyboard combination for this adjustment layer. In the “Layer” menu, you can then select “New Adjustment Layer” and find predefined shortcuts for options like “Levels Adjustment.”
Summary – Using Adjustment Layers in Affinity Photo for Creative Image Editing
The numerous possibilities of adjustment layers in Affinity Photo allow for targeted and flexible image editing that is not only effective but also space-saving. You can save presets, adjust blending modes, and have direct access to frequently used functions. This optimizes your workflow and gives you full control over the final result of your edits.
Frequently Asked Questions
How do I add an adjustment layer?Click on the adjustment layers icon in the layers palette and select the desired option.
Can I save the settings of the adjustment layer?Yes, you can save your settings as a preset and use them for future projects.
How can I adjust the opacity of an adjustment layer?You can do this directly in the dialog box of the adjustment layer or through the layers palette.
Are there keyboard shortcuts for adjustment layers?Yes, you can set your own keyboard shortcut for frequently used adjustment layers.
What happens if I delete an adjustment layer?The underlying layer remains untouched, and only the adjustments are removed.


