Creating black-and-white images can be a fantastic way to highlight the emotions and textures in your photos. With the “Black and White” adjustment layer in Affinity Photo, you have the necessary tools to transform color images into impressive black and white representations while precisely controlling the nuances of the image. Here’s how you can efficiently use this feature.
Key Insights
- The “Black and White” adjustment layer offers precise control over the conversion of color images to black and white.
- With sliders for different hues, you can control the lightness or darkness of various areas of the image.
- The eyedropper function allows for intuitive adjustments of image areas with minimal effort.
- Changing the layer mode can significantly enhance visual effects.
Step 1: Adjusting Color Values
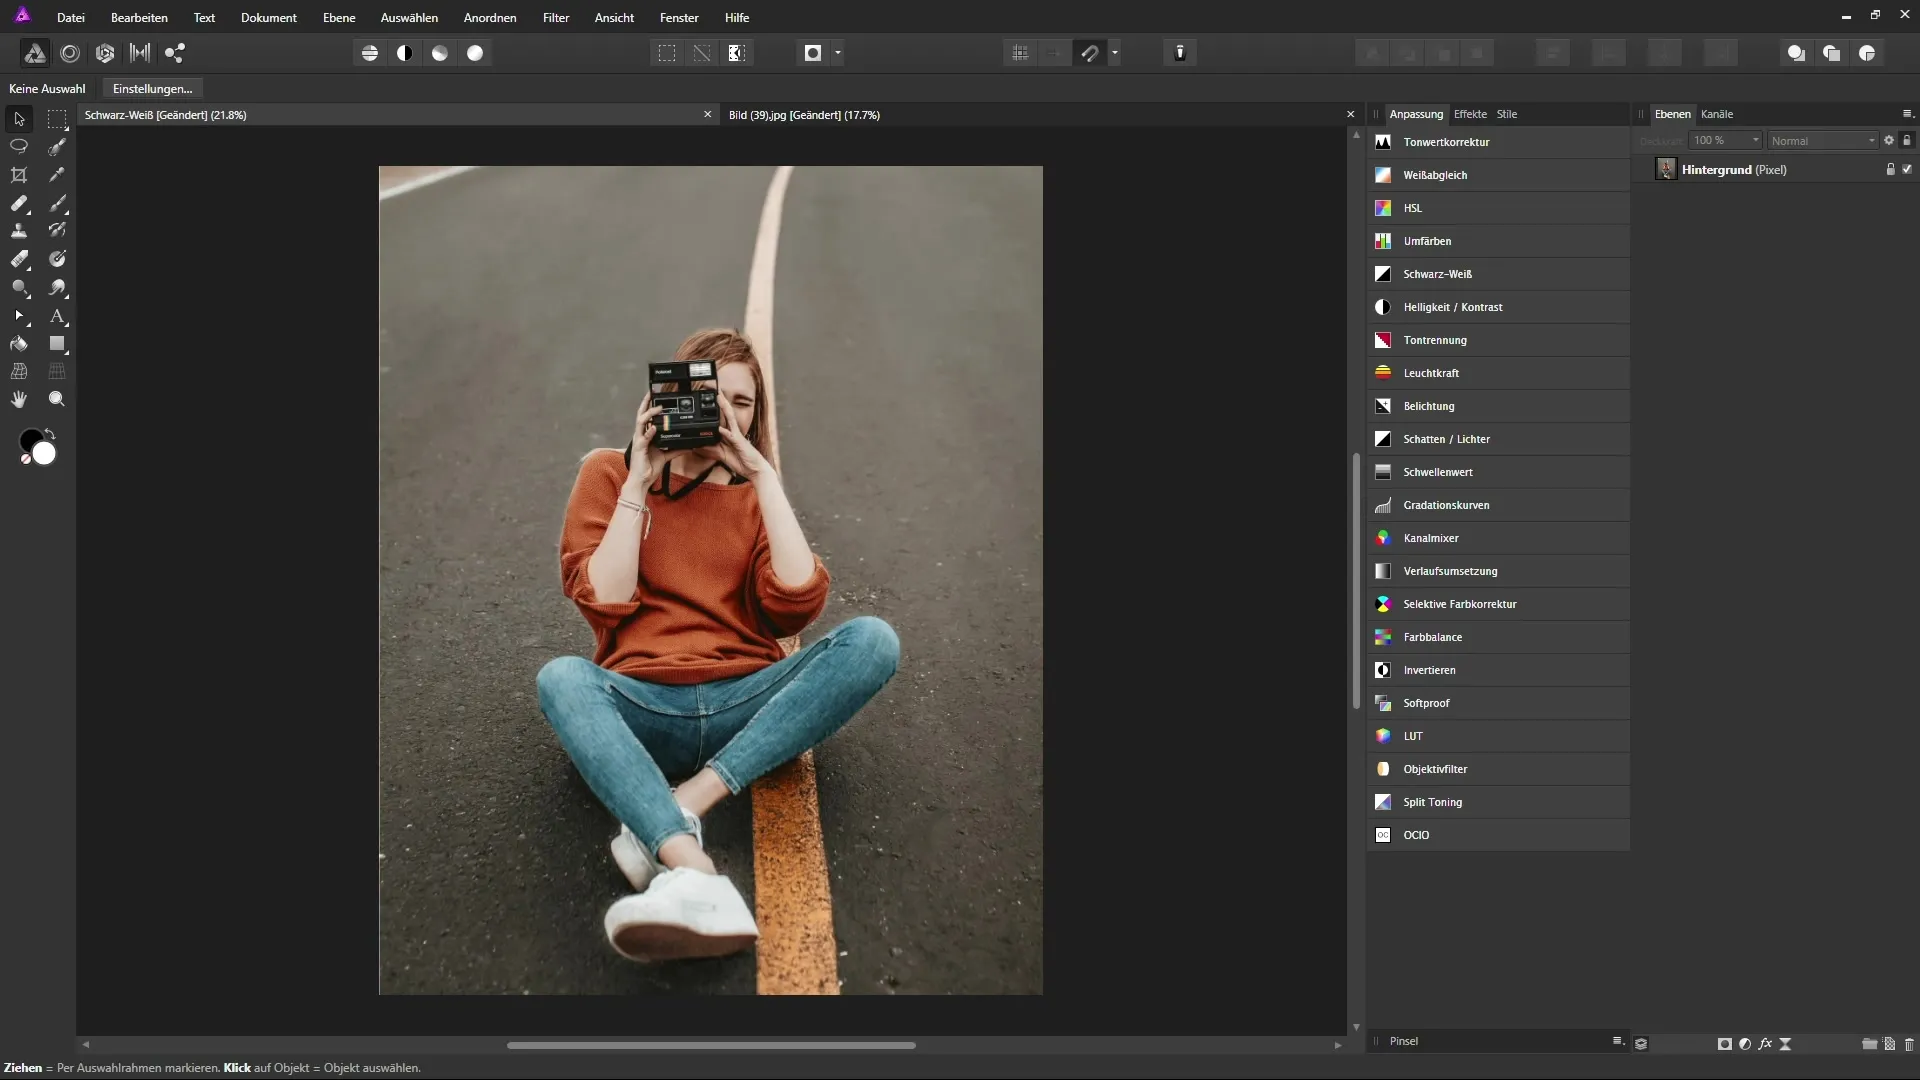
First, you need to create the “Black and White” adjustment layer. Click the corresponding icon at the bottom to add the layer. You will immediately see that your color image has been transformed into a black and white image that looks distinctly different from an HSL adjustment. It is important to note that the color information for the black and white conversion is based on different hues.
Step 2: Understanding Hues
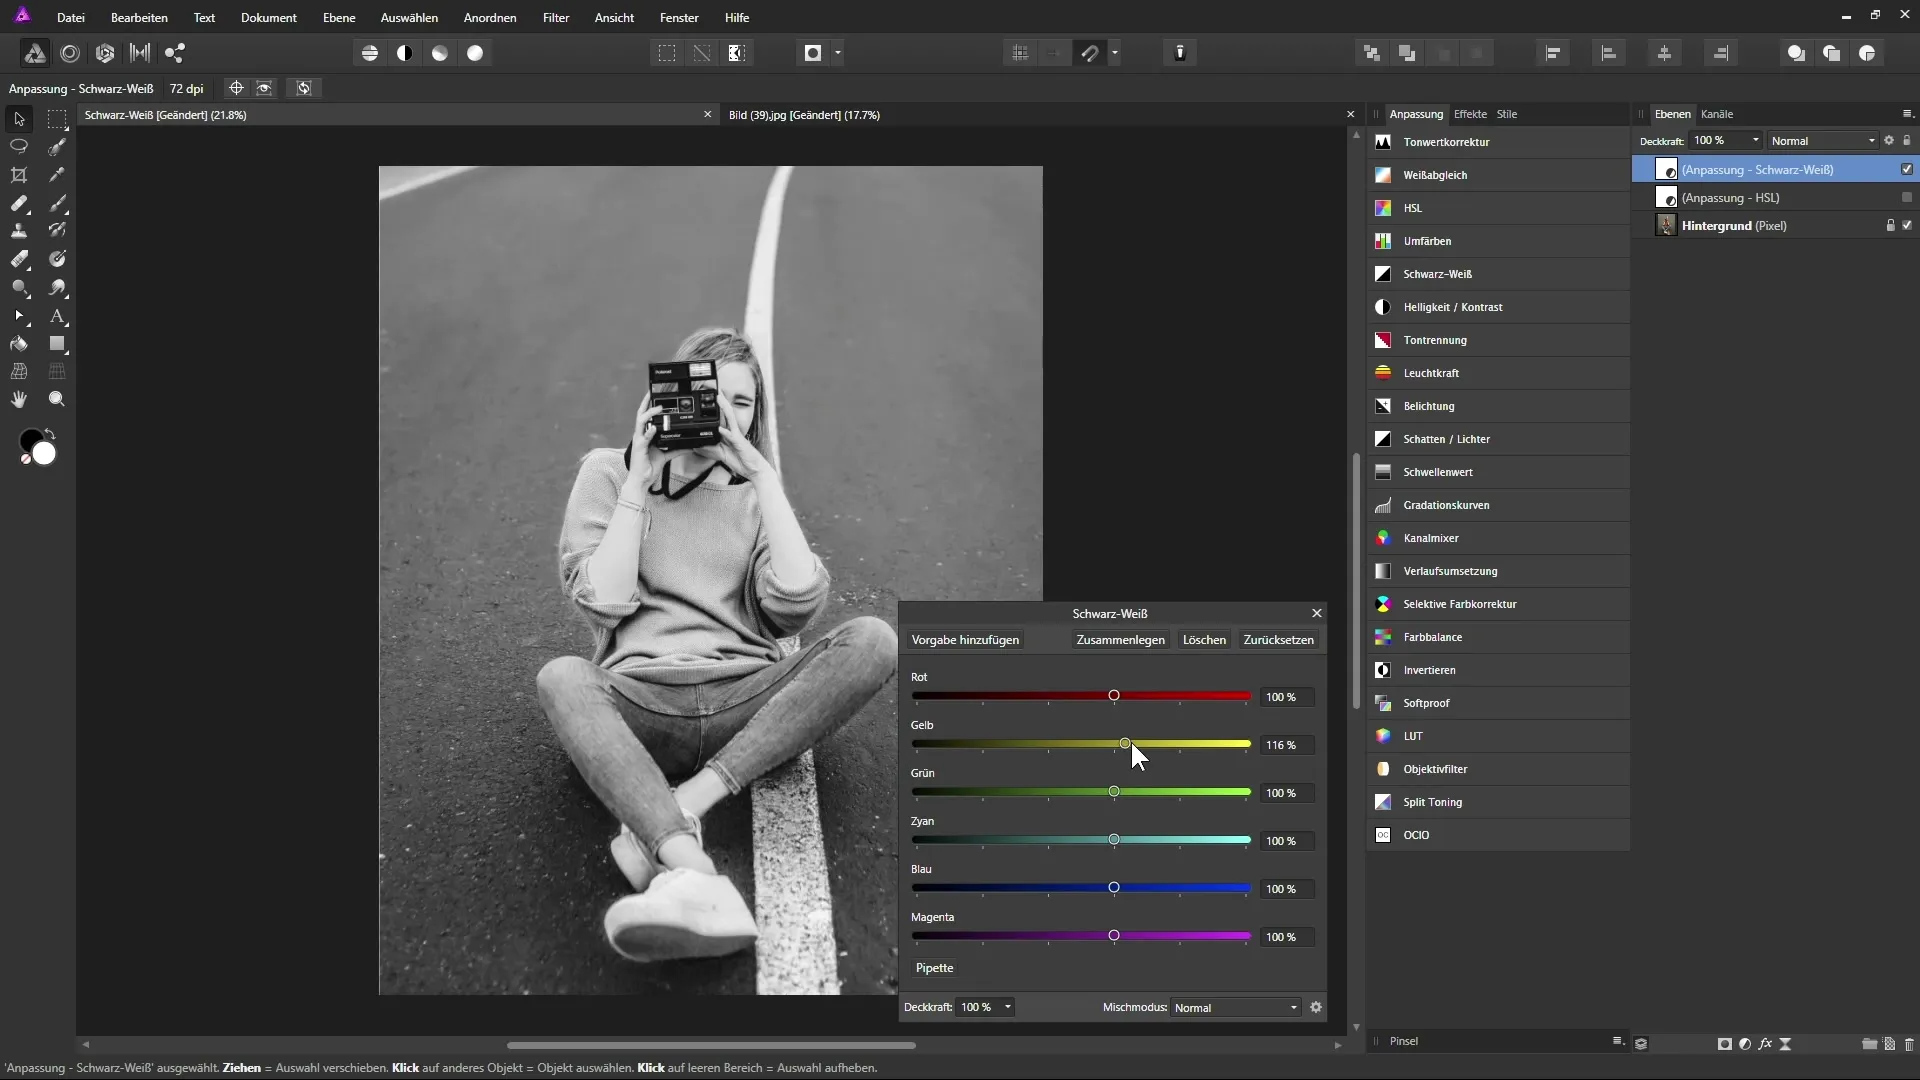
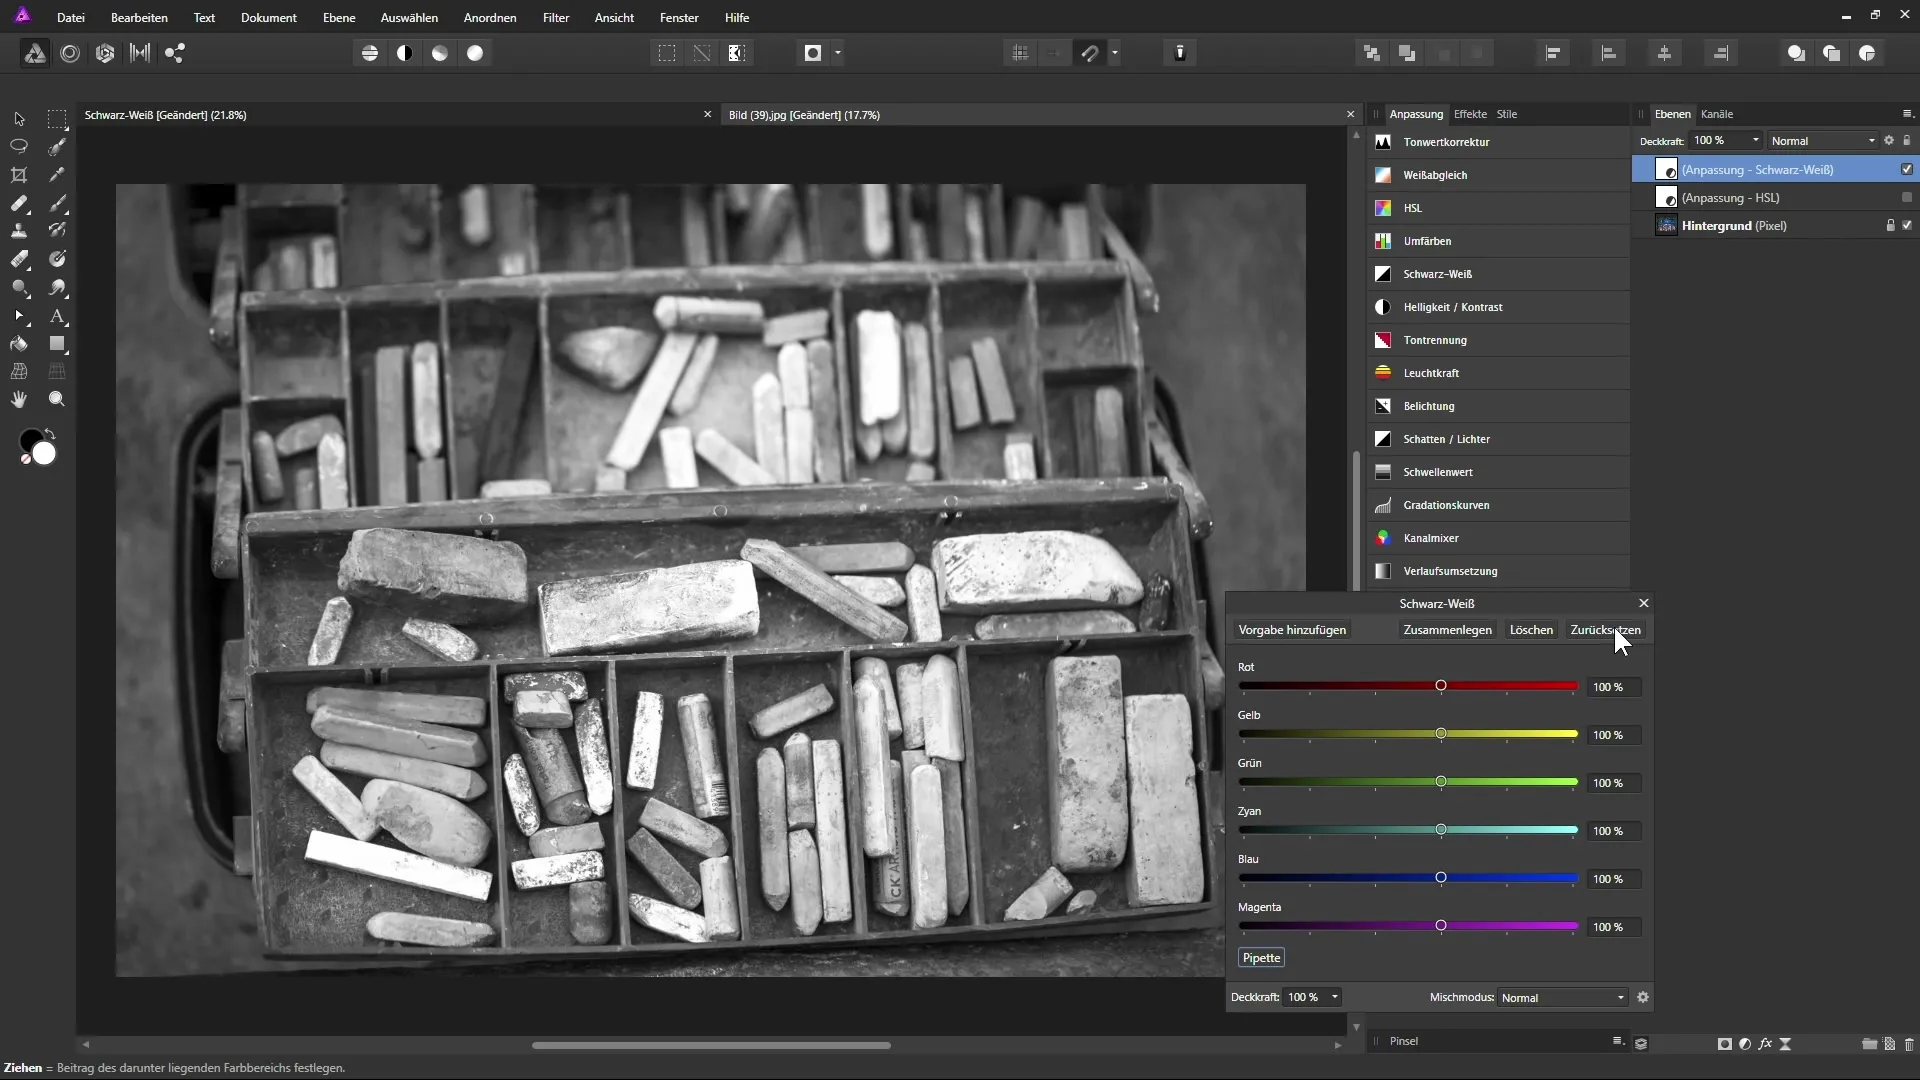
Once the “Black and White” adjustment layer is active, you can see the various color sliders, which are set to 100% by default. These sliders represent the hues red, yellow, green, cyan, blue, and magenta. You have the option to move the sliders to influence the brightness or darkness of the corresponding colors in the image.
Step 3: Targeting Contrast Adjustments
As you experiment with different sliders for your image, you will notice that the image areas behave differently. For example, you can slide the red slider to the left to darken the sweater. You also have the option to use the yellow slider to affect the color values of the road, enhancing the contrast.
Step 4: Intuitive Changes with the Eyedropper
To refine your adjustments, you can use the eyedropper. Click on the eyedropper icon to select this function. Now click on the area of the image you want to adjust, and move the mouse either to the left to darken the area or to the right to lighten it. The tool automatically detects the corresponding hue and adjusts the sliders accordingly.
Step 5: Switching Layer Modes
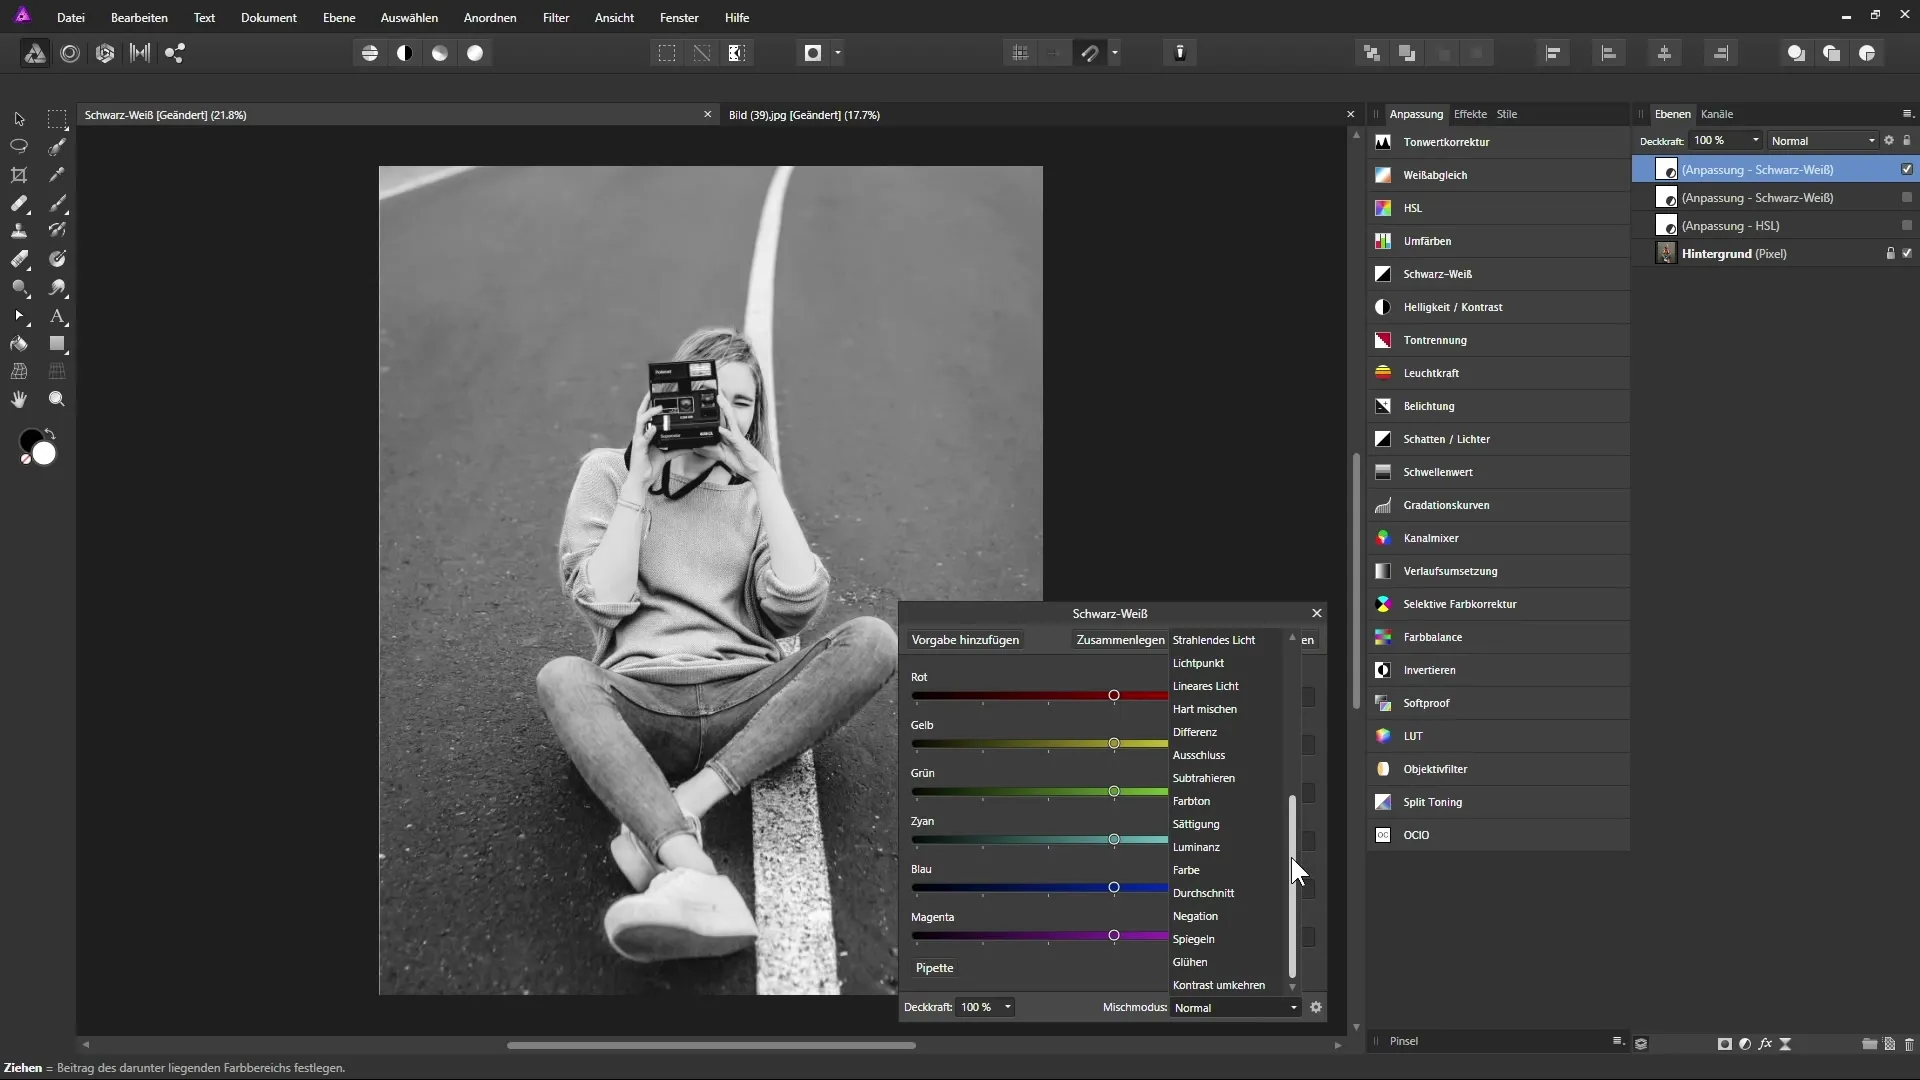
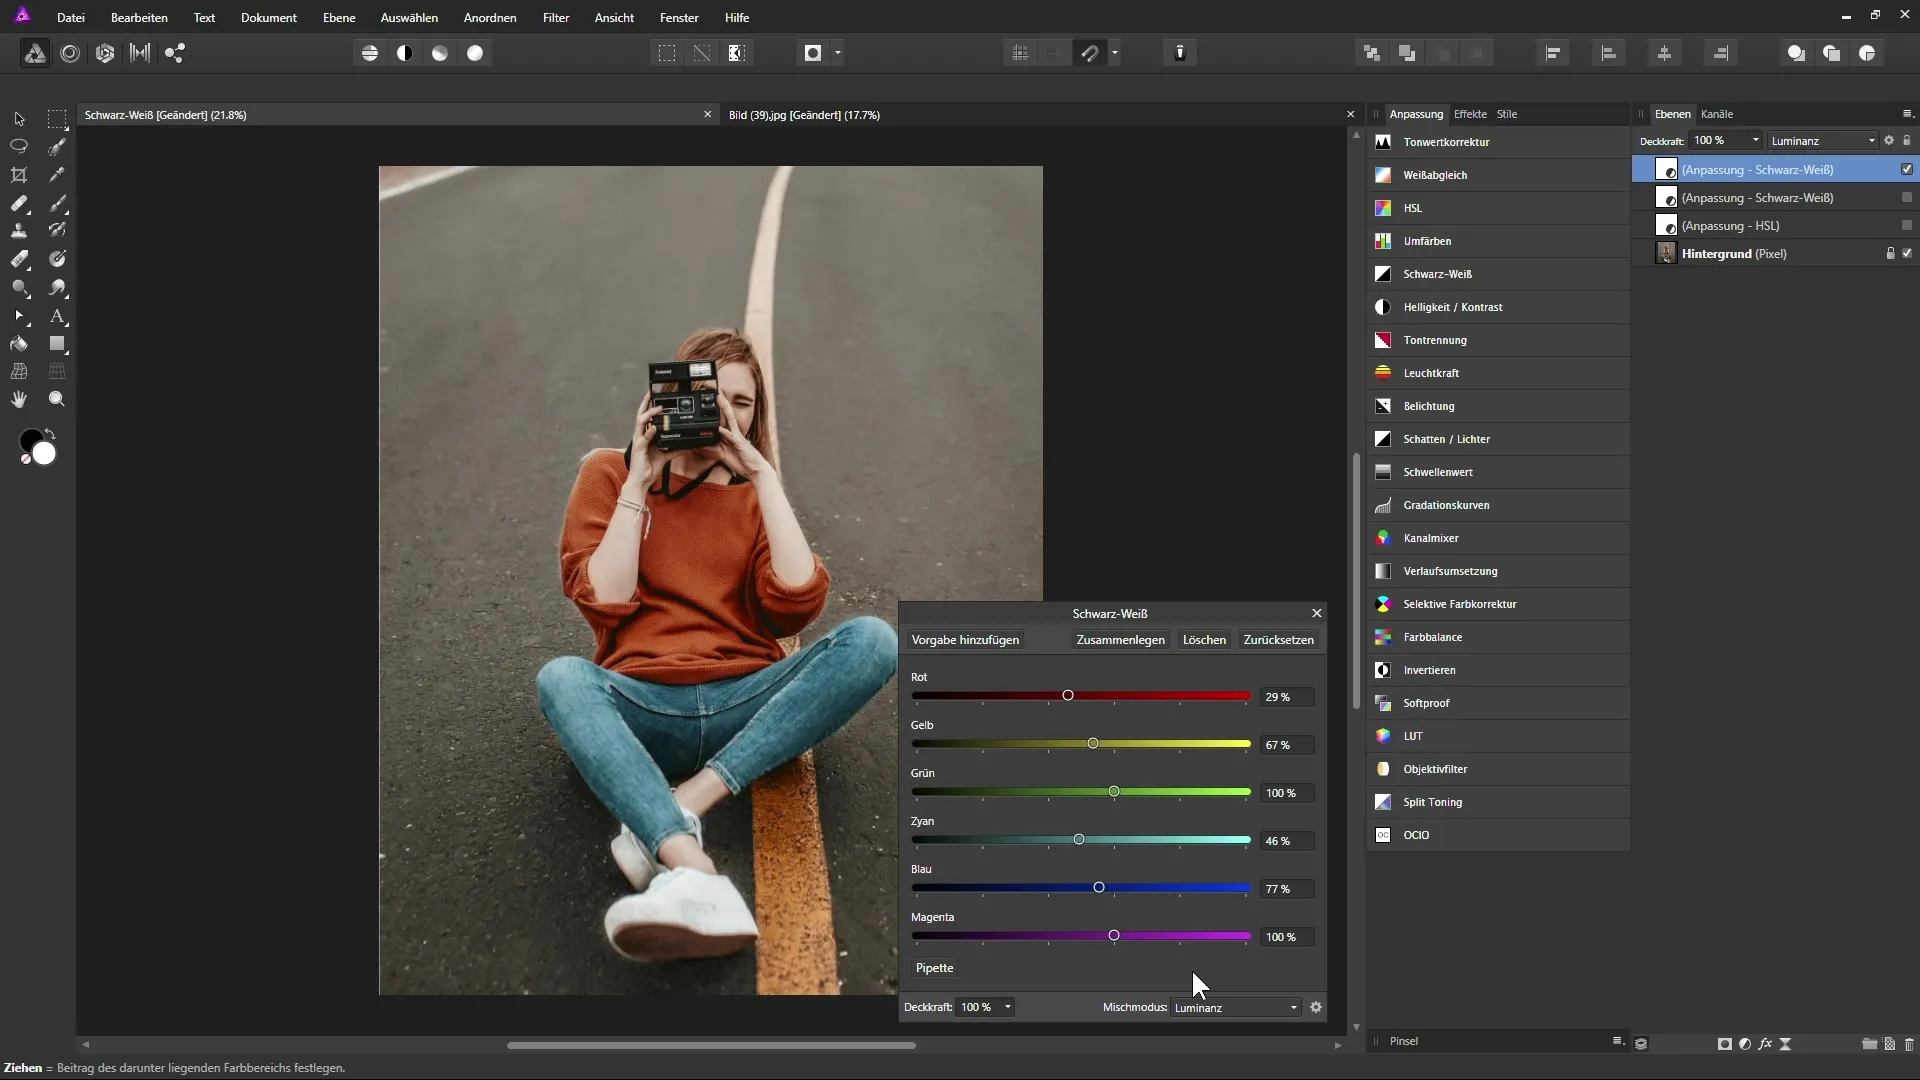
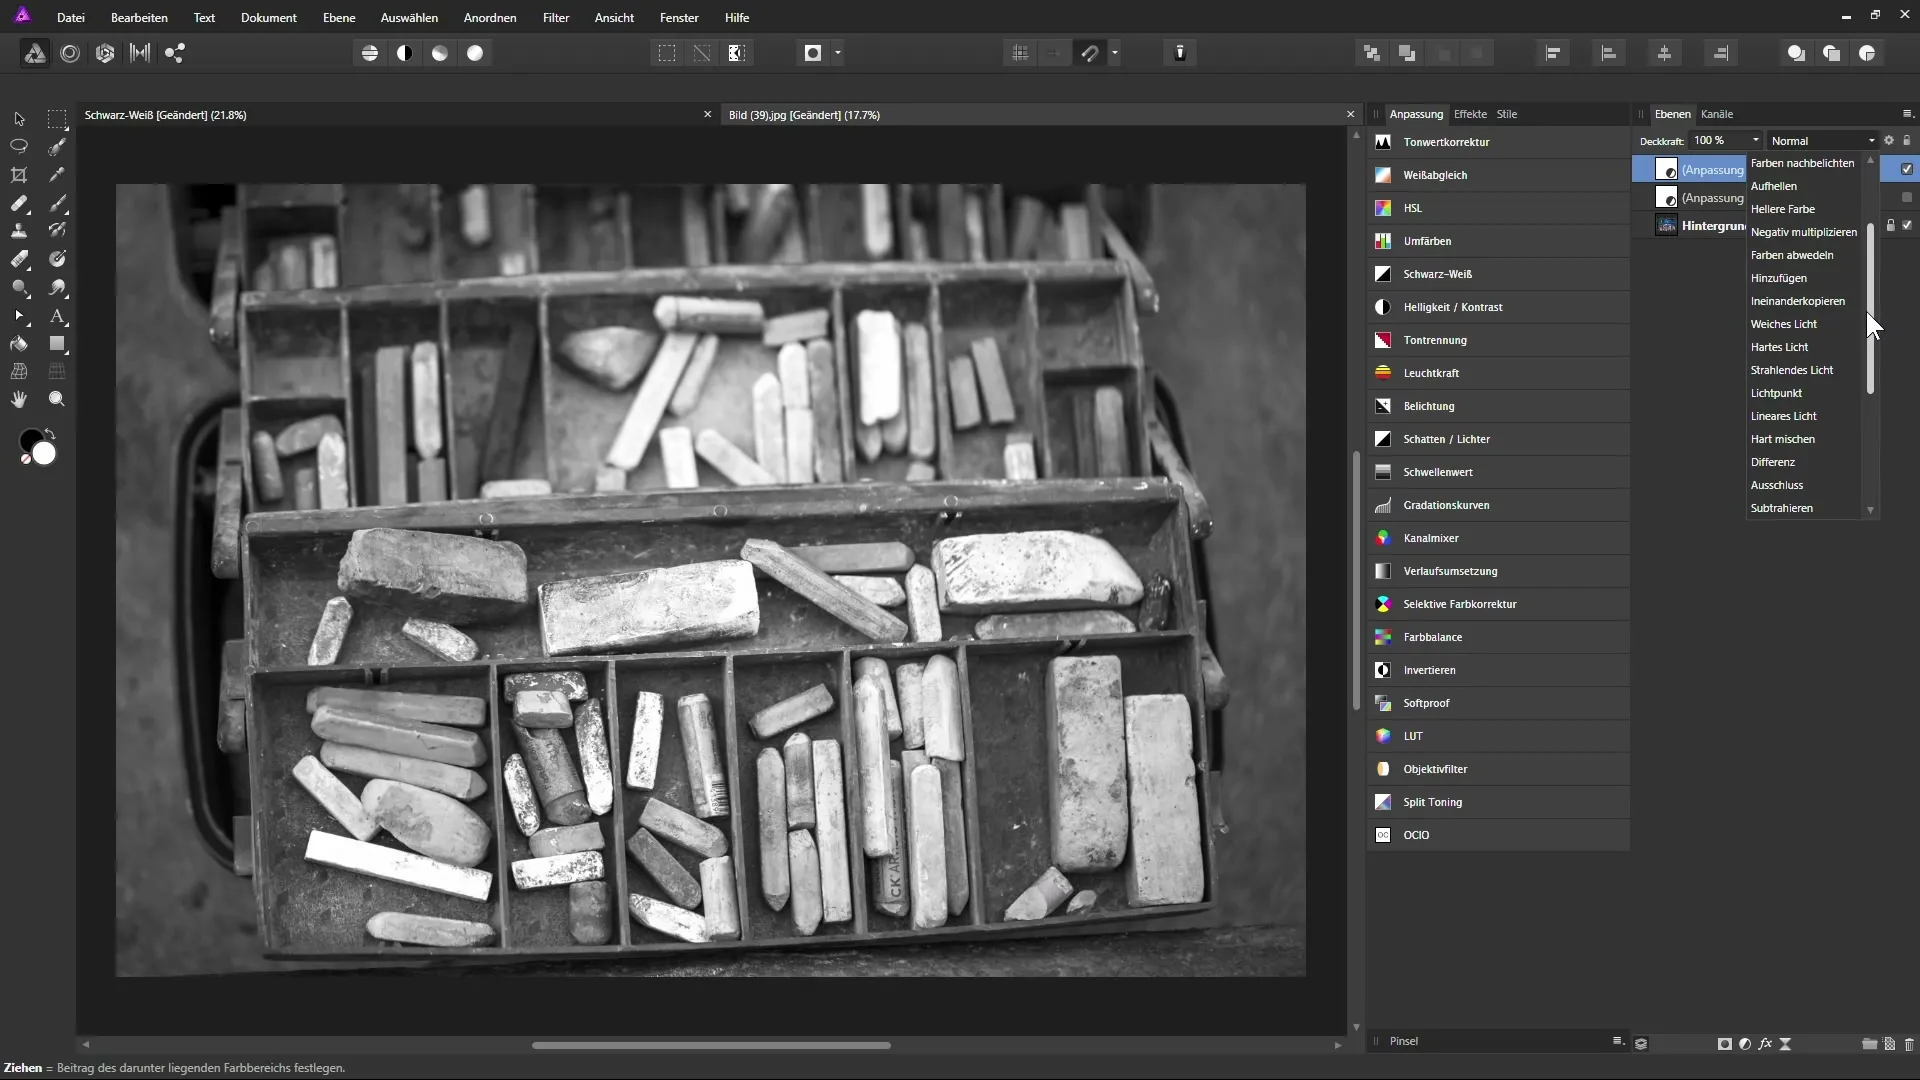
An essential technique you should have in your toolkit is switching between layer modes. For example, if you set the blending mode to “Luminosity,” you can better influence the brightness of the underlying layers. This allows for an interesting combination of black and white conversion and color adjustments in the image.
Step 6: Visualizing Adjustments
You should always consider the adjustments you make to the sliders in the context of the entire image. Changing contrasts or brightness values can significantly alter the entire picture. Ensure that your adjustments remain realistic and appealing.
Step 7: Finalizing the Image
Once you are satisfied with the adjustments, you can change the layer mode to “Soft Light” for an even more contrasting image. By reducing the opacity of the layer, you can further adjust and control the desired effect.
Step 8: Comparison Before and After
It is always helpful to compare the original image to the edited one. You can do this by quickly toggling the layer on and off or resetting the state. Pay attention to what techniques you have used and which results provide the best outcomes.
Summary - Black and White with Affinity Photo: A Step-by-Step Guide
By making targeted adjustments with the “Black and White” adjustment layer in Affinity Photo, you can significantly influence the moods and contrasts in your images. Use the eyedropper to make precise adjustments and switch layer modes to represent complementary colors to achieve exciting visual effects.
Frequently Asked Questions
What is the “Black and White” adjustment layer?The adjustment layer allows you to convert color images to black and white while specifically influencing hues.
How does the eyedropper work in Affinity Photo?With the eyedropper, you can directly click in the image to adjust certain color values – dragging the mouse modifies the corresponding color slider.
How can I increase the contrast in my image?You can adjust the sliders for the respective hues to specifically enhance or reduce the contrast.
How do I maintain realism in my adjustments?Be sure to move the sliders only moderately to avoid unnatural effects.
What are layer modes in Affinity Photo?Layer modes determine how different layers interact with each other. They allow you to combine and refine effects based on the mode.


