With the White BalanceAdjustment Layerin AffinityPhoto, you can specifically control the color temperature of your images. Whether you want to brighten, warm up, or cool down an image – this tool helps you achieve the desired atmosphere and color representation. In this guide, I will show you step by step how to apply the White Balance Adjustment Layer and which techniques will help you achieve the optimal result.
Key Insights
- With the White Balance Adjustment Layer, you can adjust images in various ways.
- You can use predefined presets as well as create your own.
- The use of sliders allows for fine-tuning of the color temperature.
- The eyedropper function allows you to automatically neutralize colors by selecting a specific area.
- By selecting the layer blending mode, you can optimize the contrast of your images.
Step-by-Step Guide
To effectively incorporate white balance into your photo editing, follow these simple steps:
Step 1: Creating the Adjustment Layer
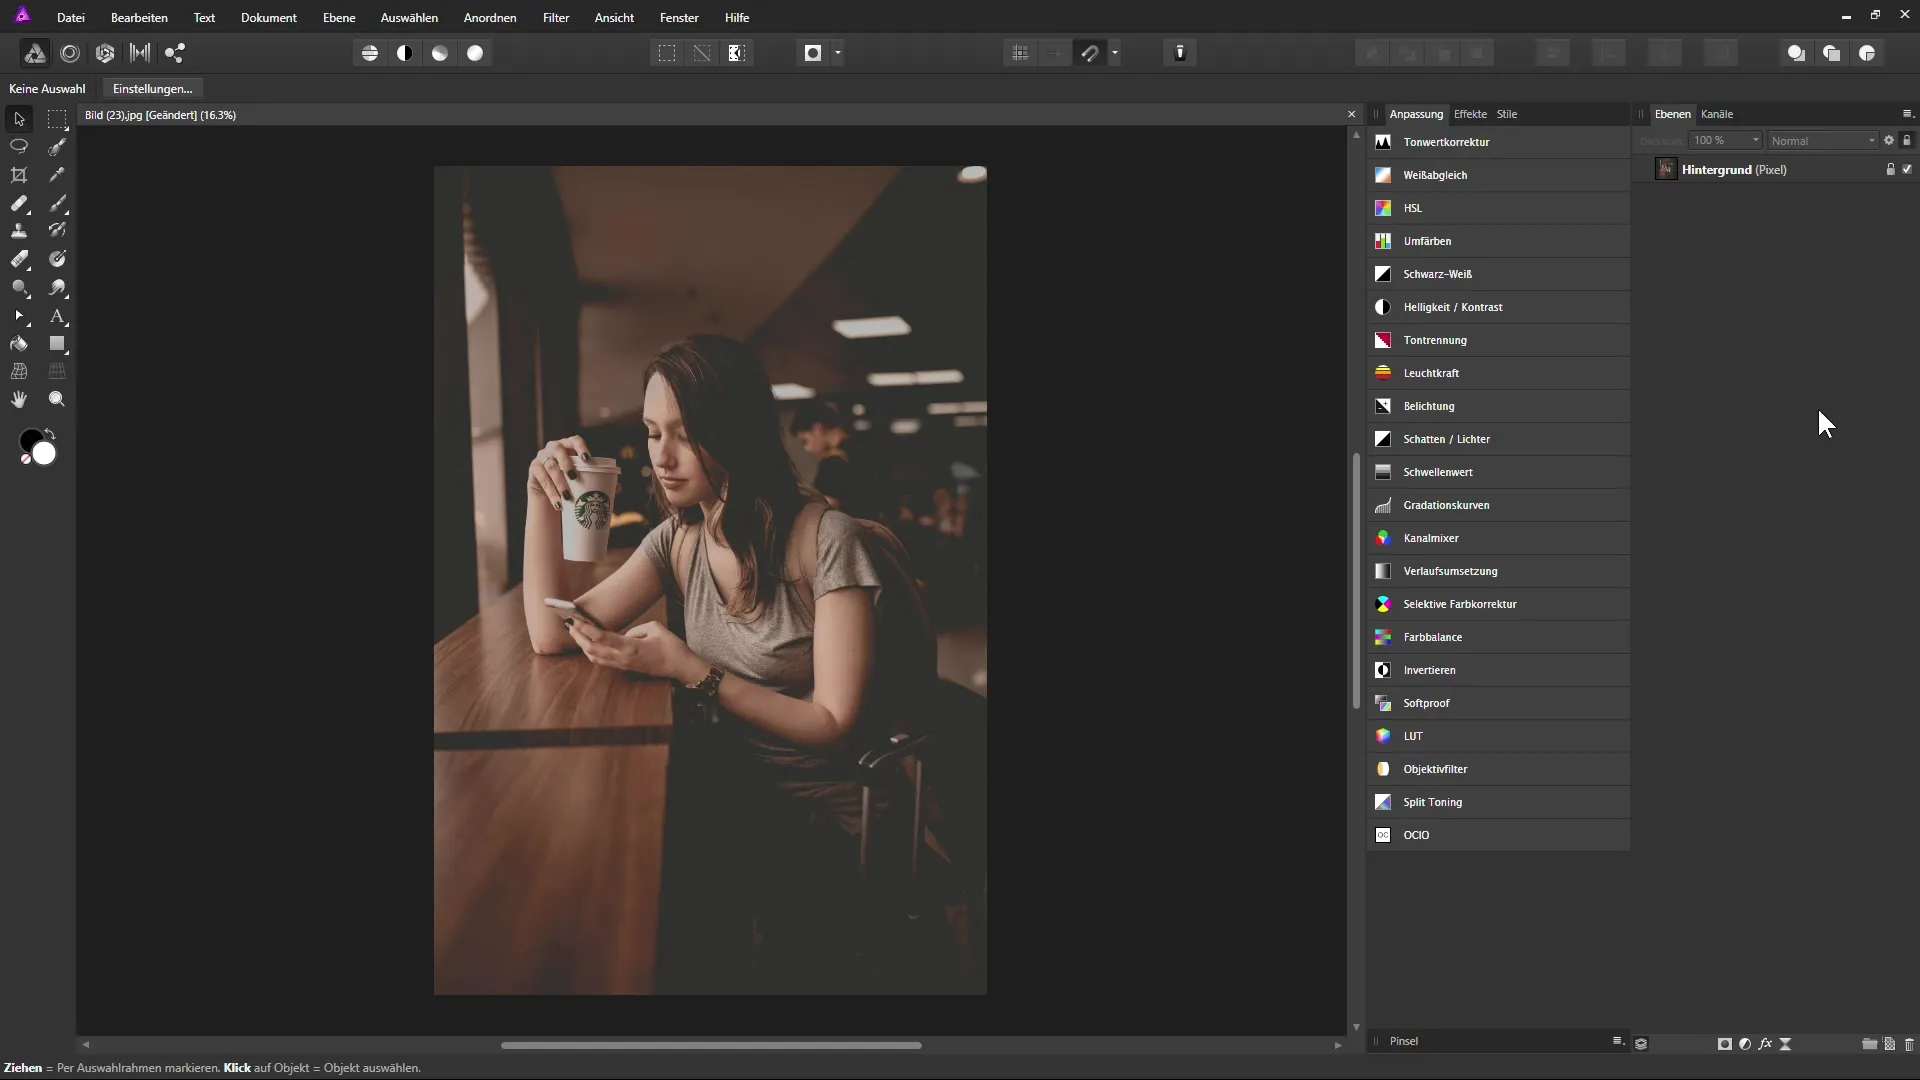
First, you need to create the White Balance Adjustment Layer. You can find it in the Layers palette. Click on the small icon for adjustment layers at the bottom of the palette. Then select "White Balance."
Step 2: Selecting Presets
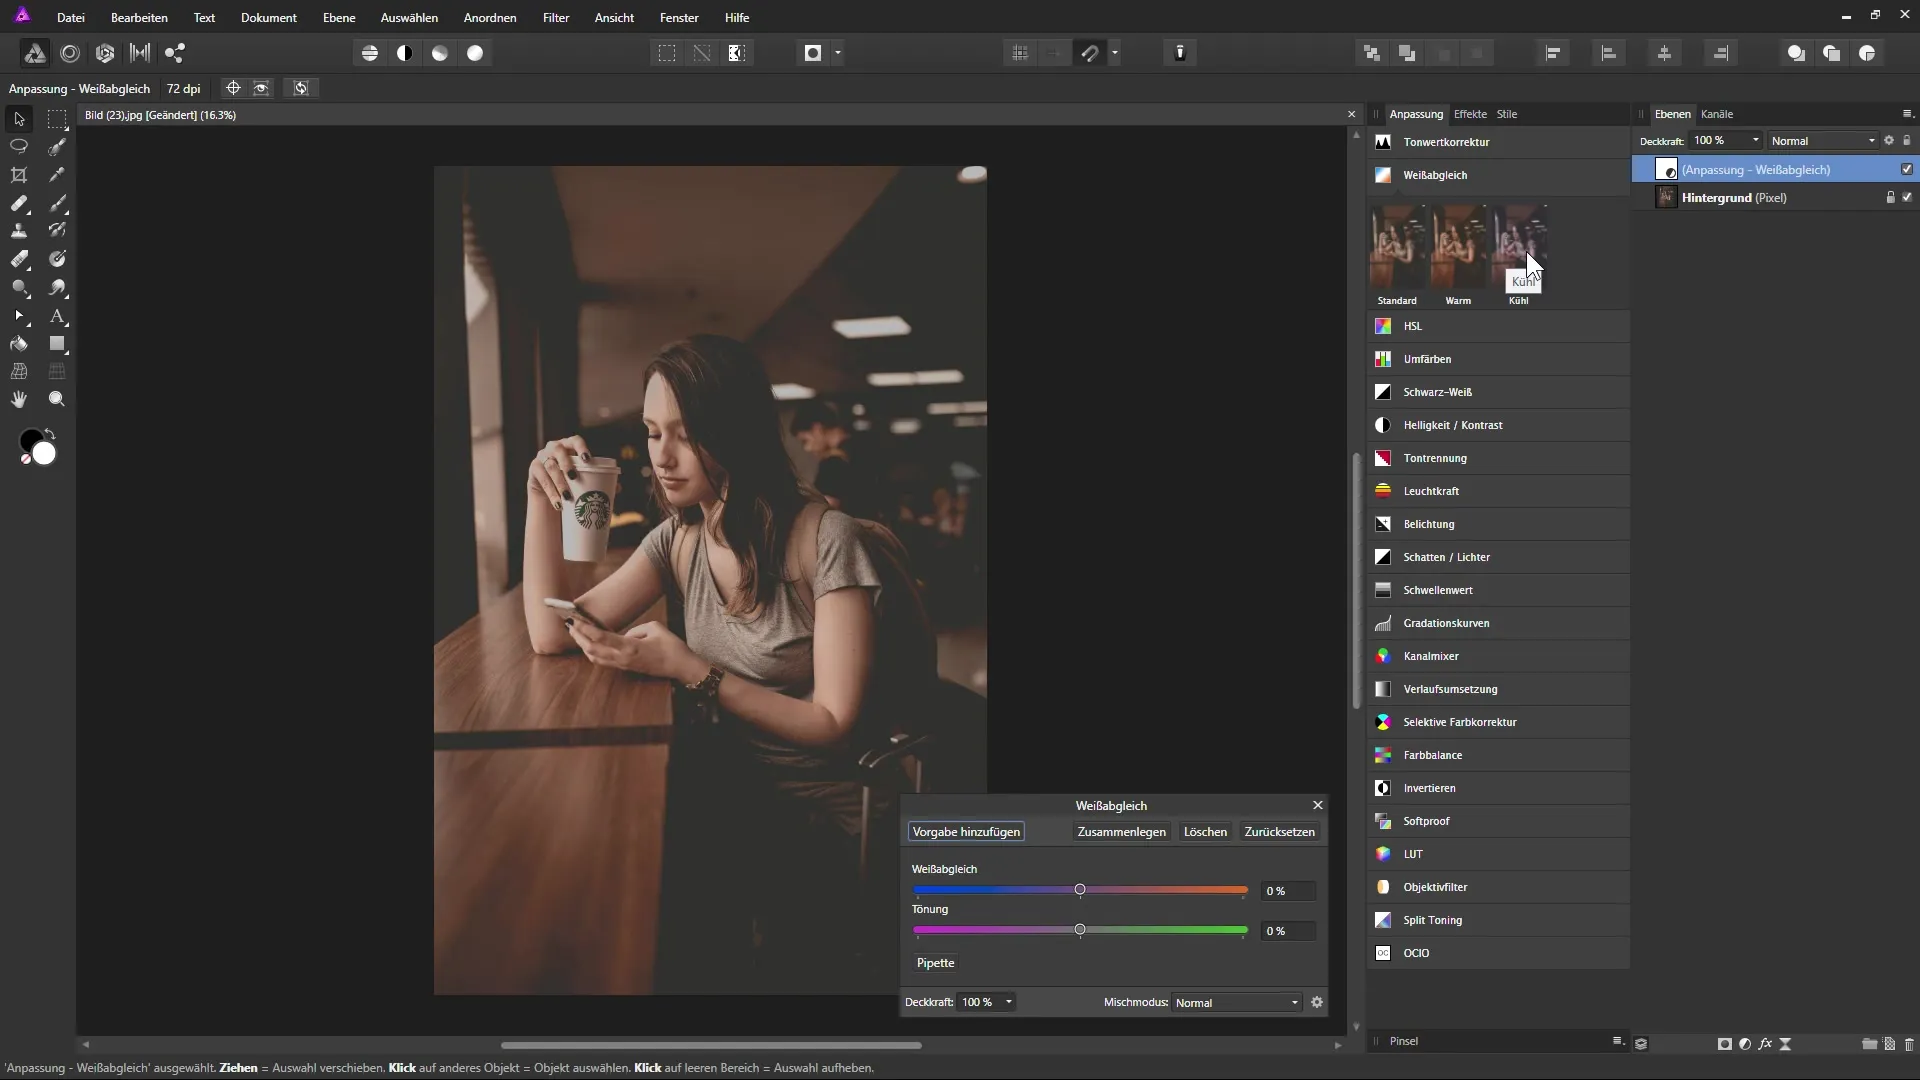
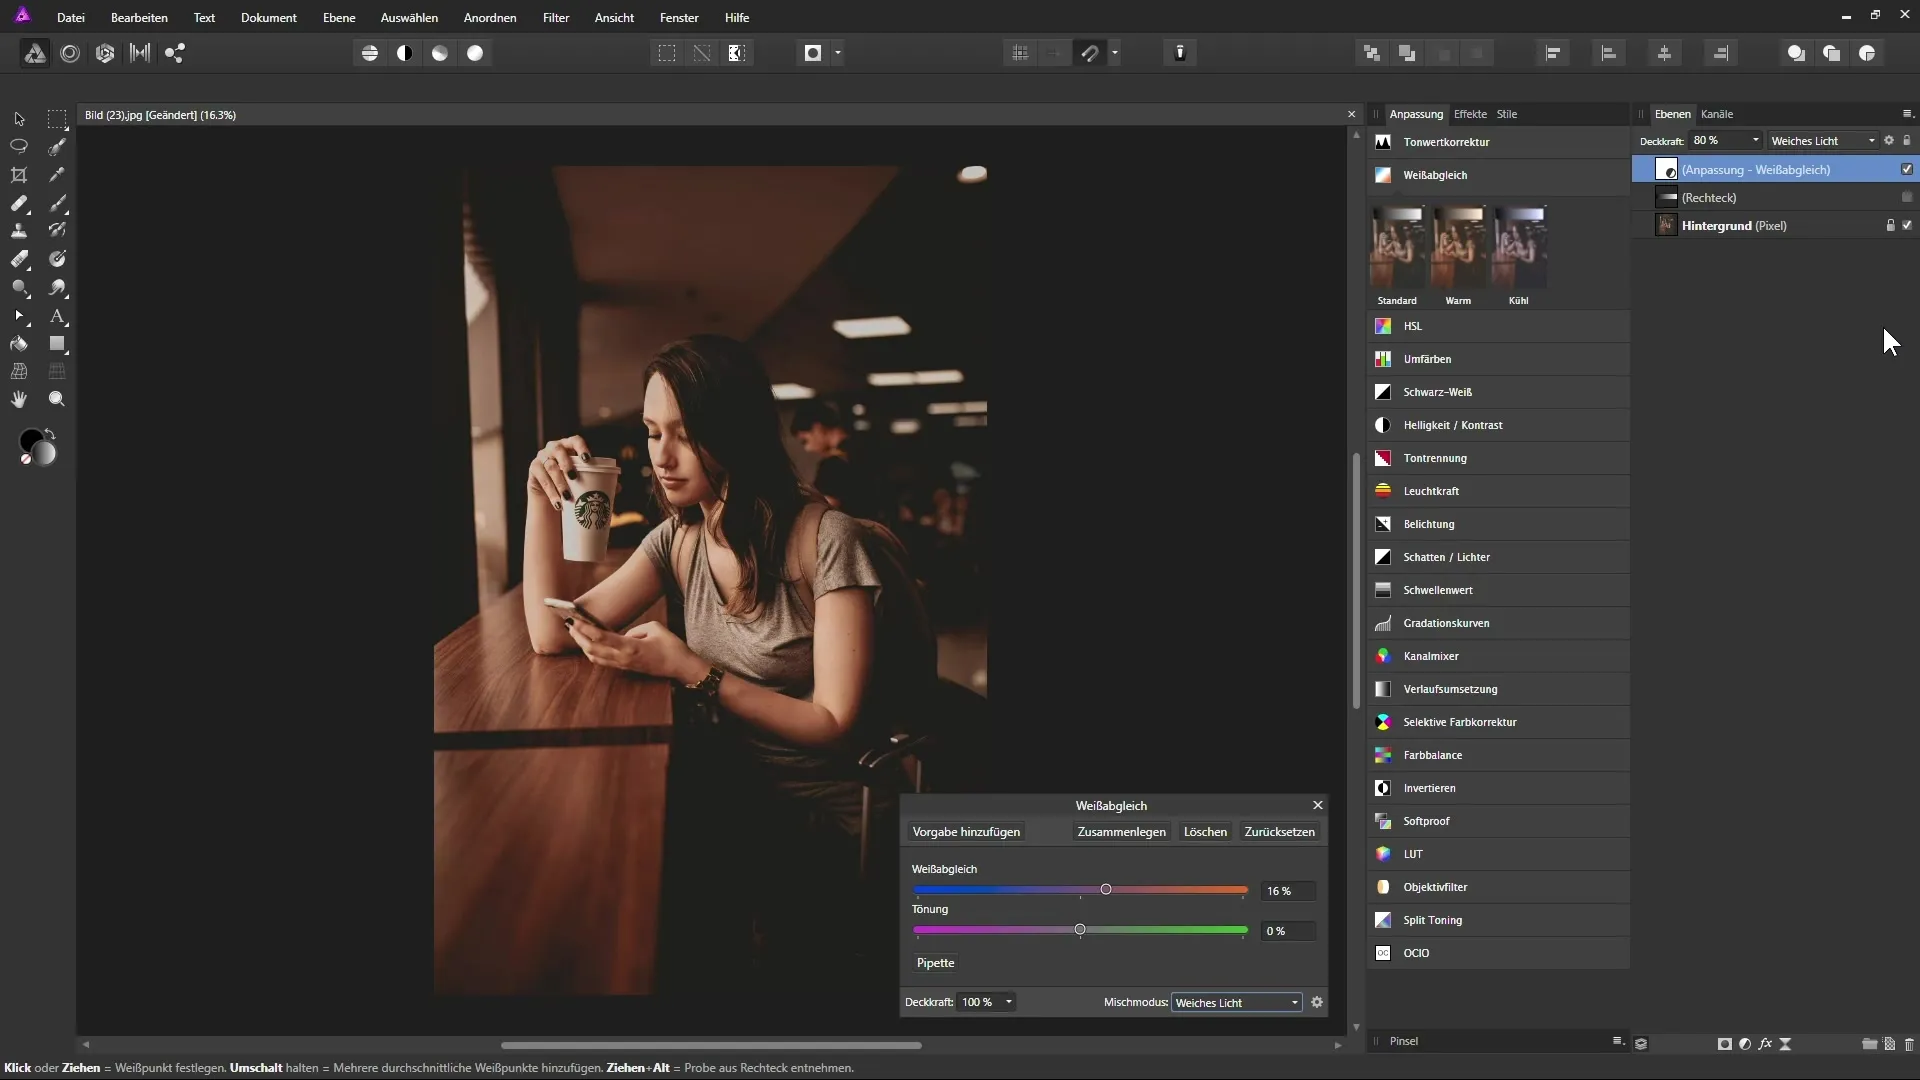
Once the adjustment layer is created, various presets like "Standard," "Warm," and "Cool" will appear in the dialog box. You can use one of these presets to quickly get a first impression of the effect.
Step 3: Adjusting Temperature and Tint
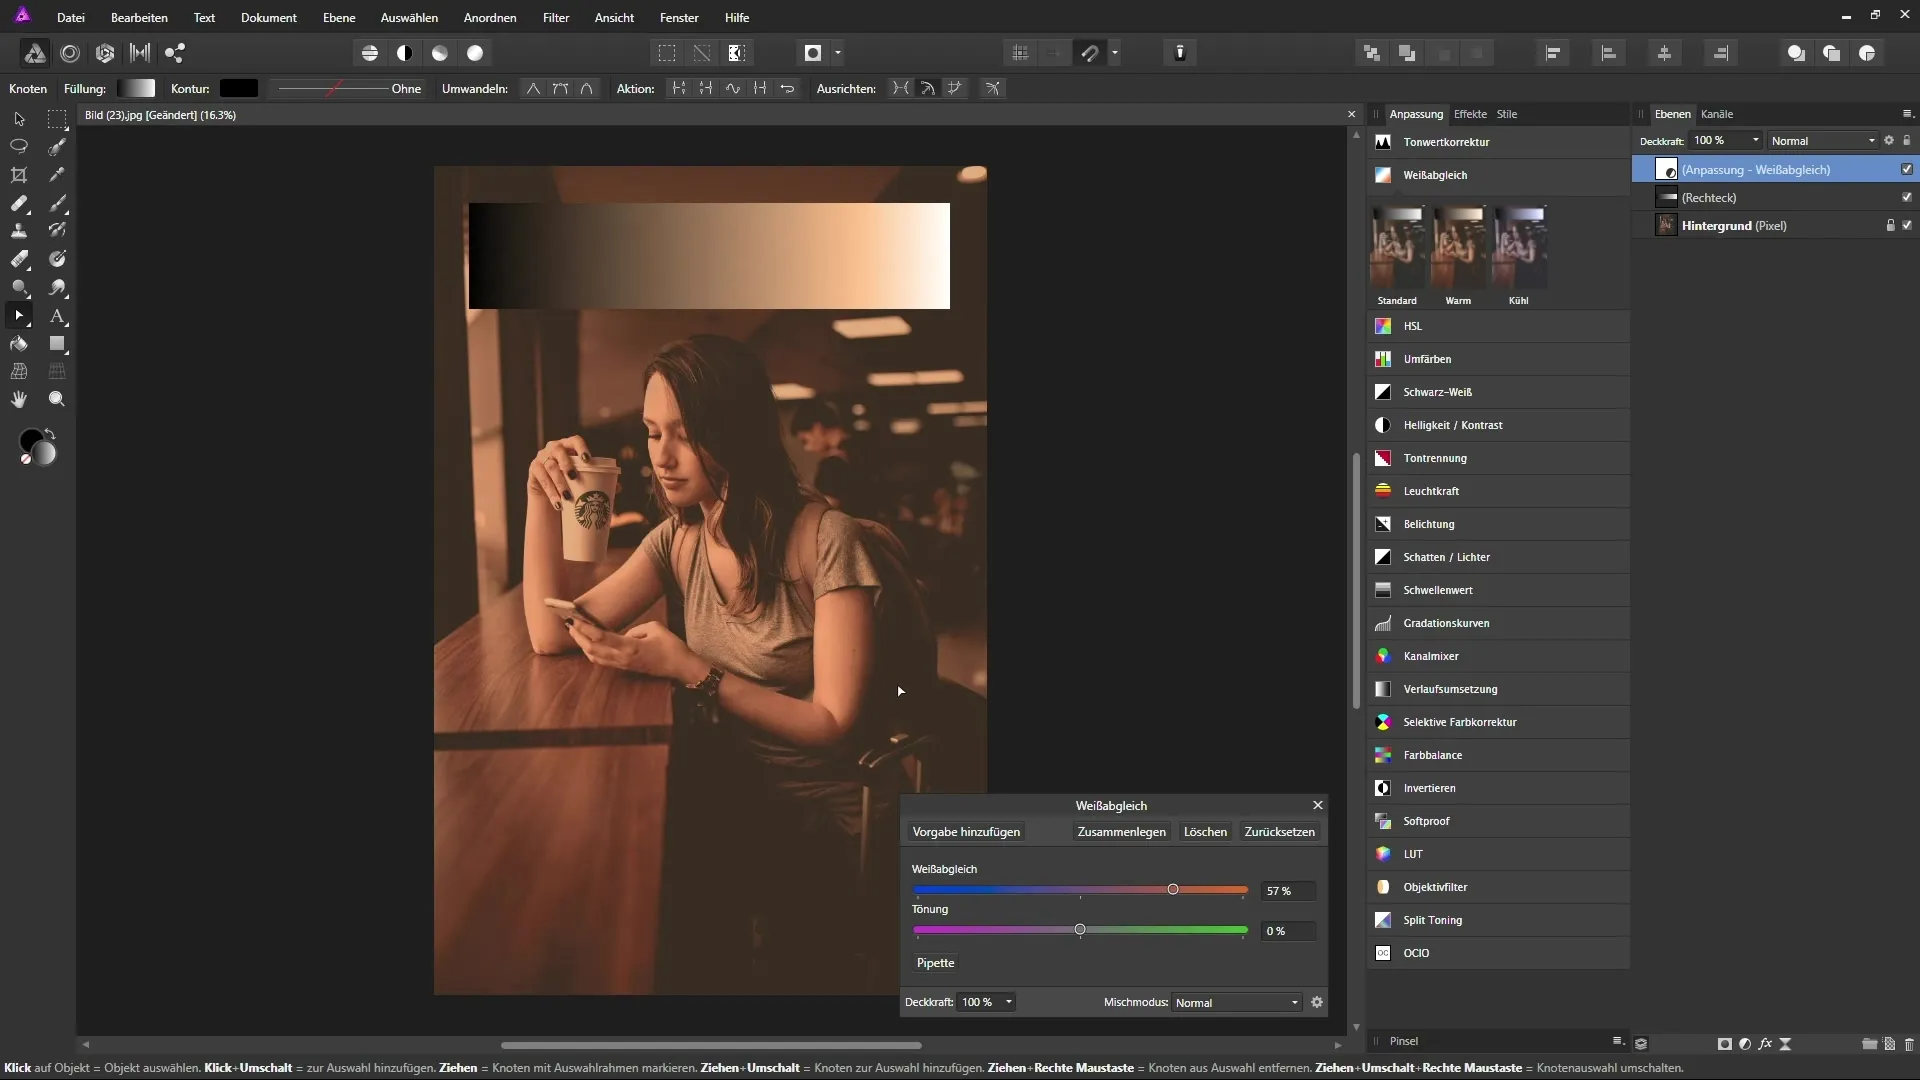
After you have selected a preset, use the sliders to further adjust the color temperature of your image. Moving the top slider to the left cools the image, while moving it to the right creates a warmer color tone.
Step 4: Previewing Changes
Observe the effect of the adjustments. You can see how the midtones, as well as colors not affected by the extremes (black and white), react to your adjustments. This allows you to enhance the desired effect.
Step 5: Creating Custom Presets
If you frequently apply white balance in a similar way, you can save your adjustments as a preset. Click on "Add Preset" in the dialog box and give the new preset a name. In the future, you can easily select this preset for other images.
Step 6: Using the Eyedropper Tool
The eyedropper tool is useful for automatically neutralizing specific areas of your image. Click on the eyedropper and select an area that should appear gray. This will adjust the color values accordingly to create a more natural image.
Step 7: Adding Fine Adjustments
You also have the option to use the second slider for tint adjustment. With this slider, you can add a color cast towards green or magenta, but this should be done cautiously and thoughtfully.
Step 8: Adjusting Contrast
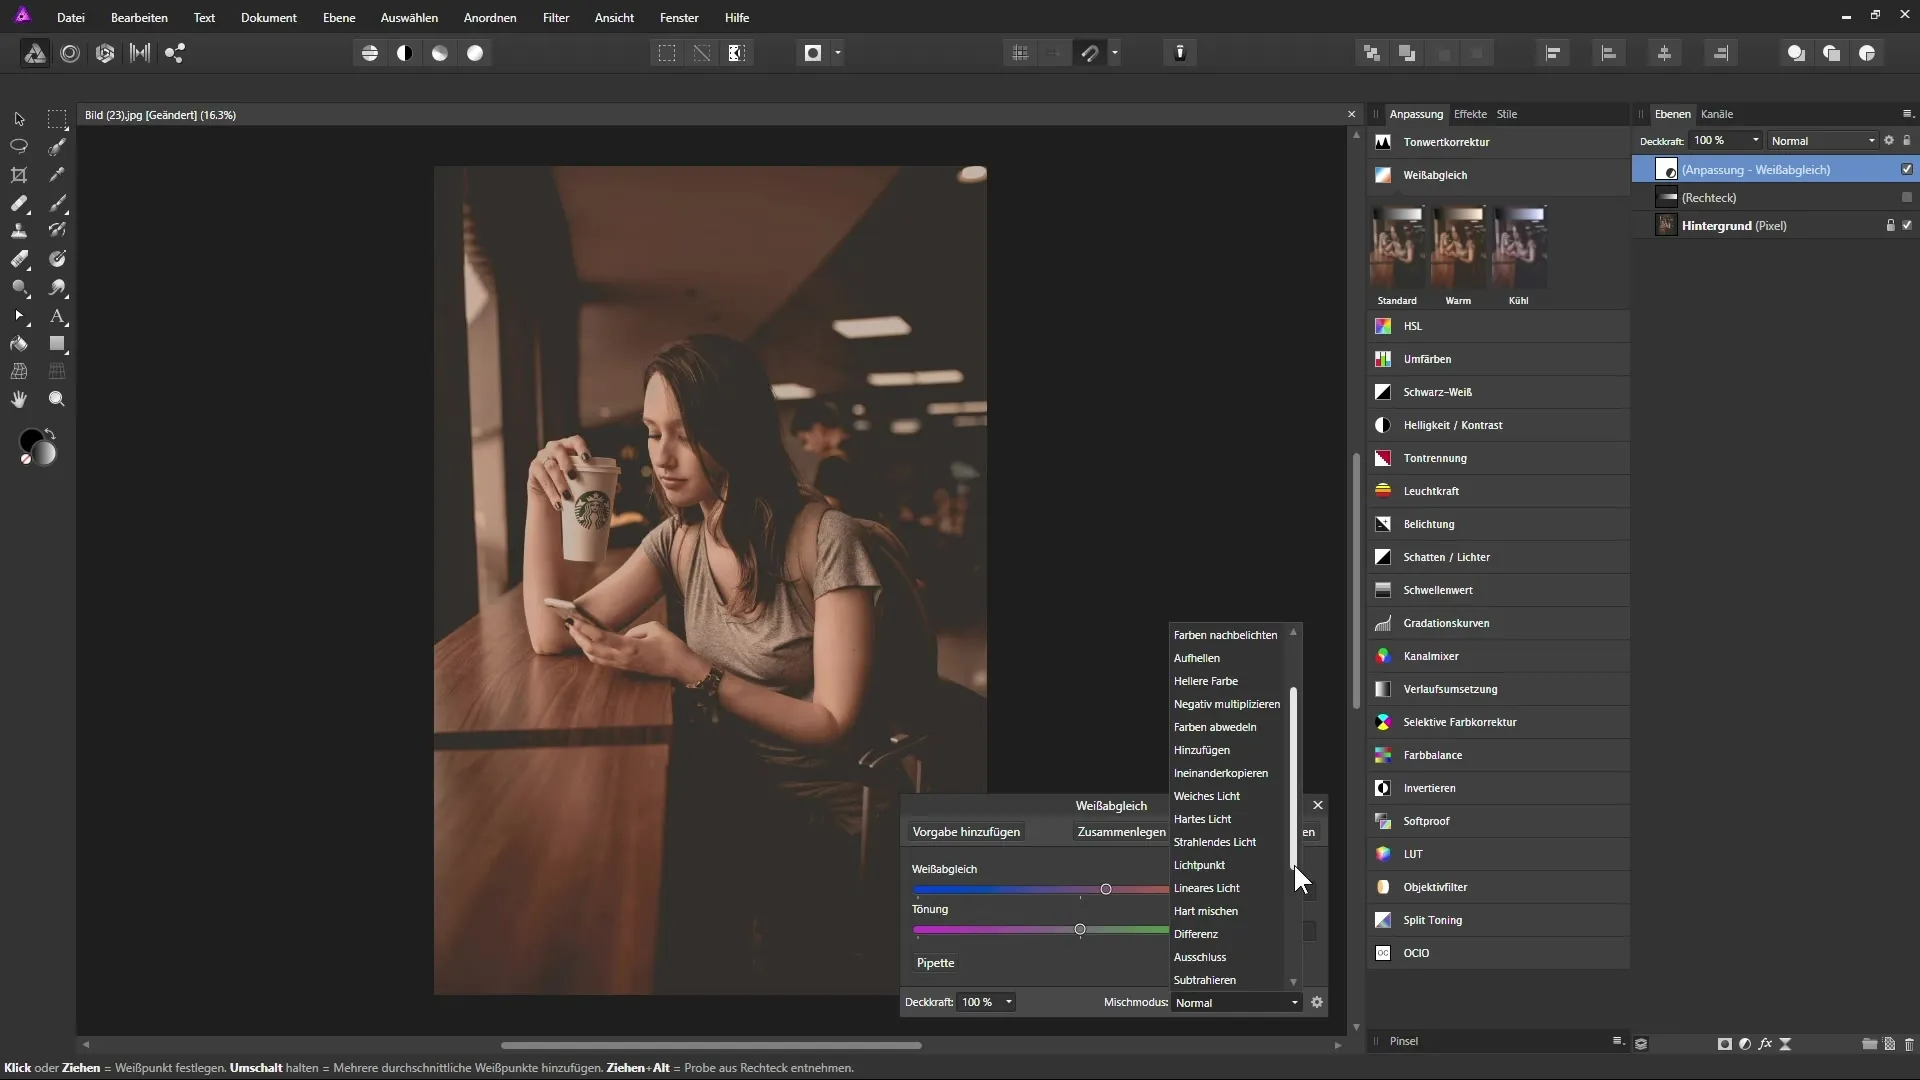
To make the image even more appealing, you can change the layer blending mode. Set it to a contrast-enhancing mode like "Soft Light" to intensify the deeper tones and make the image appear warmer.
Step 9: Adjusting the Strength of the Adjustment Layer
If the adjustments appear too strong, reduce the opacity of the adjustment layer to a desired value, for example, 80%. This way, you maintain the desired effect without making the image look unnatural.
Summary – Effective Use of the White Balance Adjustment Layer in Affinity Photo
In this guide, you have learned how to efficiently use the White Balance Adjustment Layer in Affinity Photo. By creating your own presets, using sliders, and adjusting the layer blending mode, you can optimally set the color temperature and contrast of your images.
FAQ
What is the purpose of the "White Balance" adjustment layer?The White Balance Adjustment Layer allows you to specifically adjust the color temperature and hue of your images.
How do I create my own preset for white balance?After adjusting the values, select the "Add Preset" option and give it a name.
Can I easily undo the white balance?Yes, you can click "Reset" at any time to revert the settings to their original values.
What does the eyedropper do in white balance?The eyedropper is used to select a specific area of the image to neutralize its color and optimize the white balance.
How can I make the image warmer or cooler?Use the sliders for temperature and tint to make your desired color changes.


