When editing images with Affinity Photo, you will quickly notice that there are numerous ways to bring your design ideas to life. A fundamental tool in this context is the adjustment layer "Color Balance". In this tutorial, I will show you how to efficiently use the color balance to specifically change the color look of your images.
Key Insights
The color balance adjustment layer allows you to control the color components in your images precisely. You can selectively tint the shadows, midtones, and highlights, thereby changing the emotional expression of your image. Furthermore, you can save your settings as presets to optimize your workflow.
Step-by-Step Guide
To use the "Color Balance" adjustment layer in Affinity Photo, follow these precise steps:
Step 1: Adjust the Color Balance
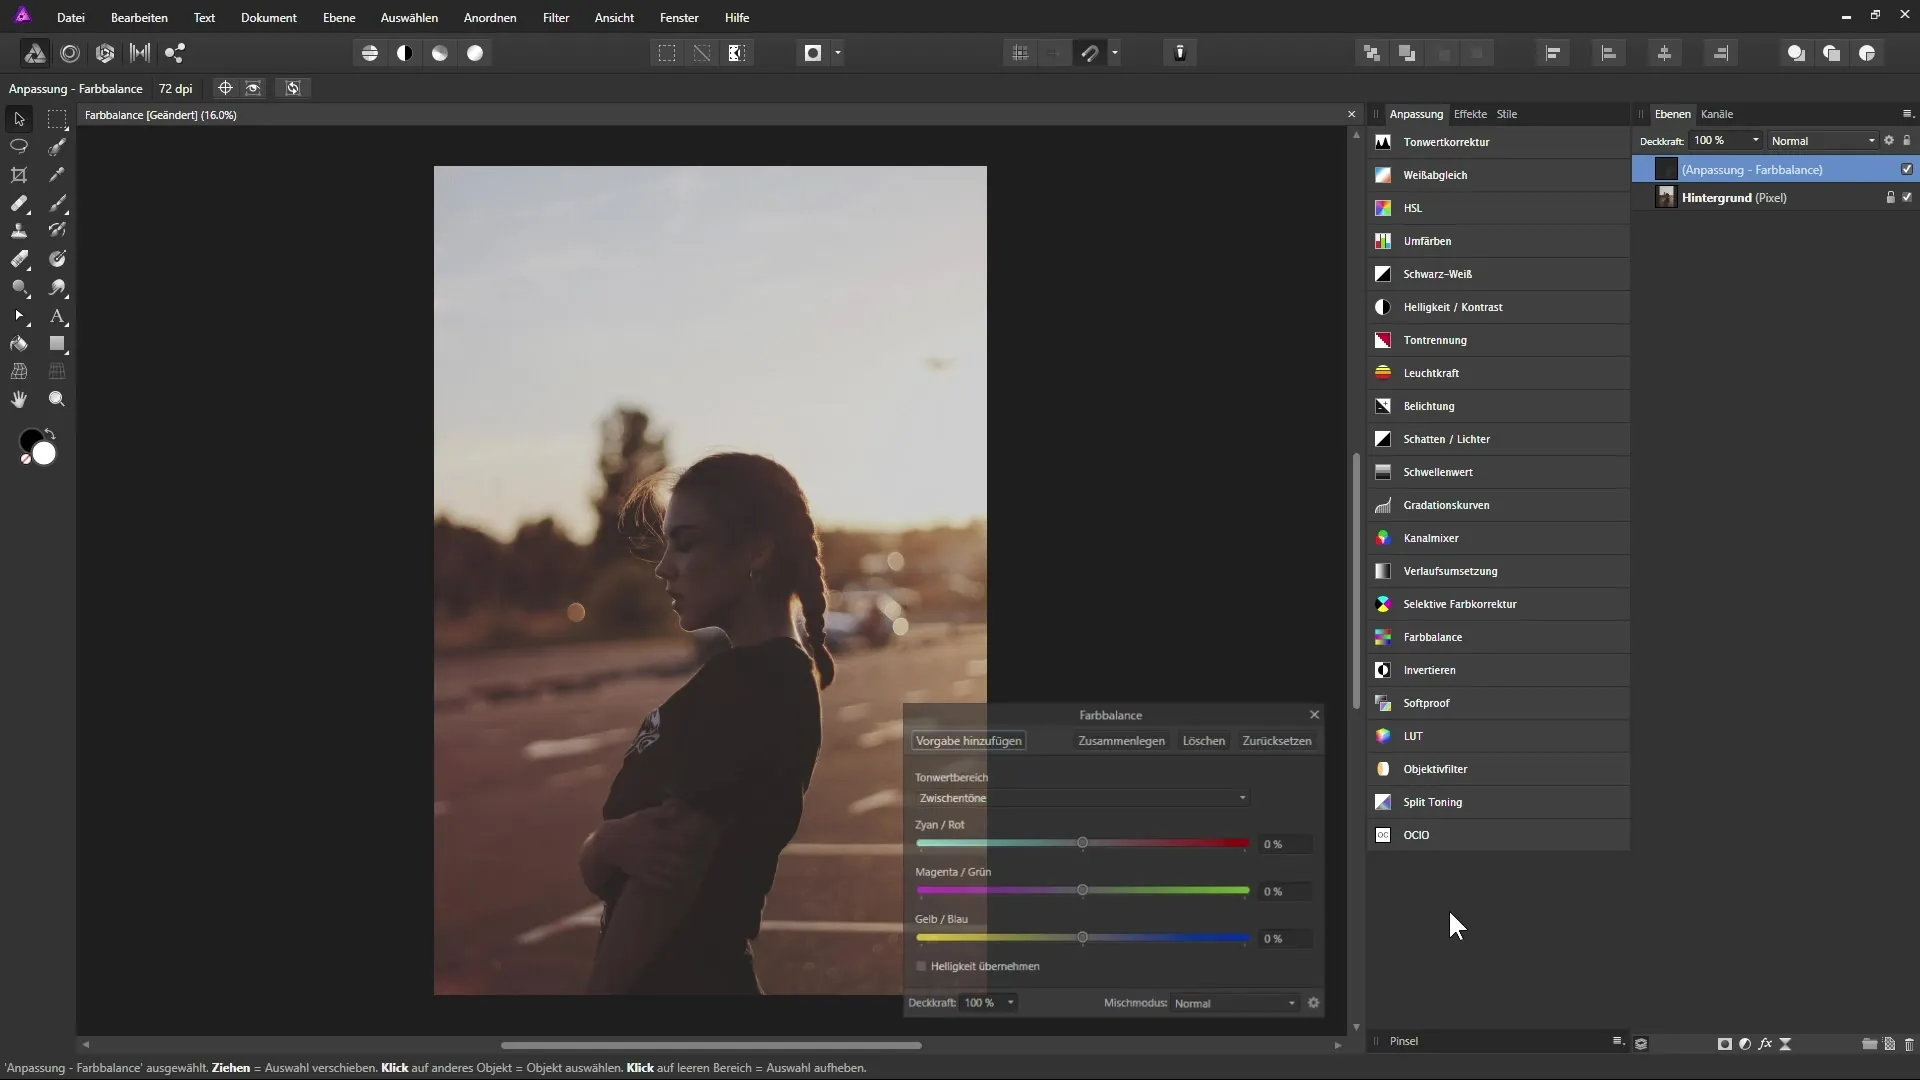
Open your image in Affinity Photo. In my example, I have chosen an image that is positioned as a background layer in the layers palette. The image appears a bit warm, and the shadows are somewhat milky. To change this, we will use the "Color Balance" adjustment layer. Click on the icon for adjustments in the layers palette below and select "Color Balance".
Step 2: Choose the Tonal Ranges
After creating the adjustment layer, a dialog box will appear where you can select different tonal ranges. Here, you have access to the shadows, midtones, and highlights. Now it’s up to you which color change you want to make first. To make the image warmer, start with the shadows.
Step 3: Tint Shadows
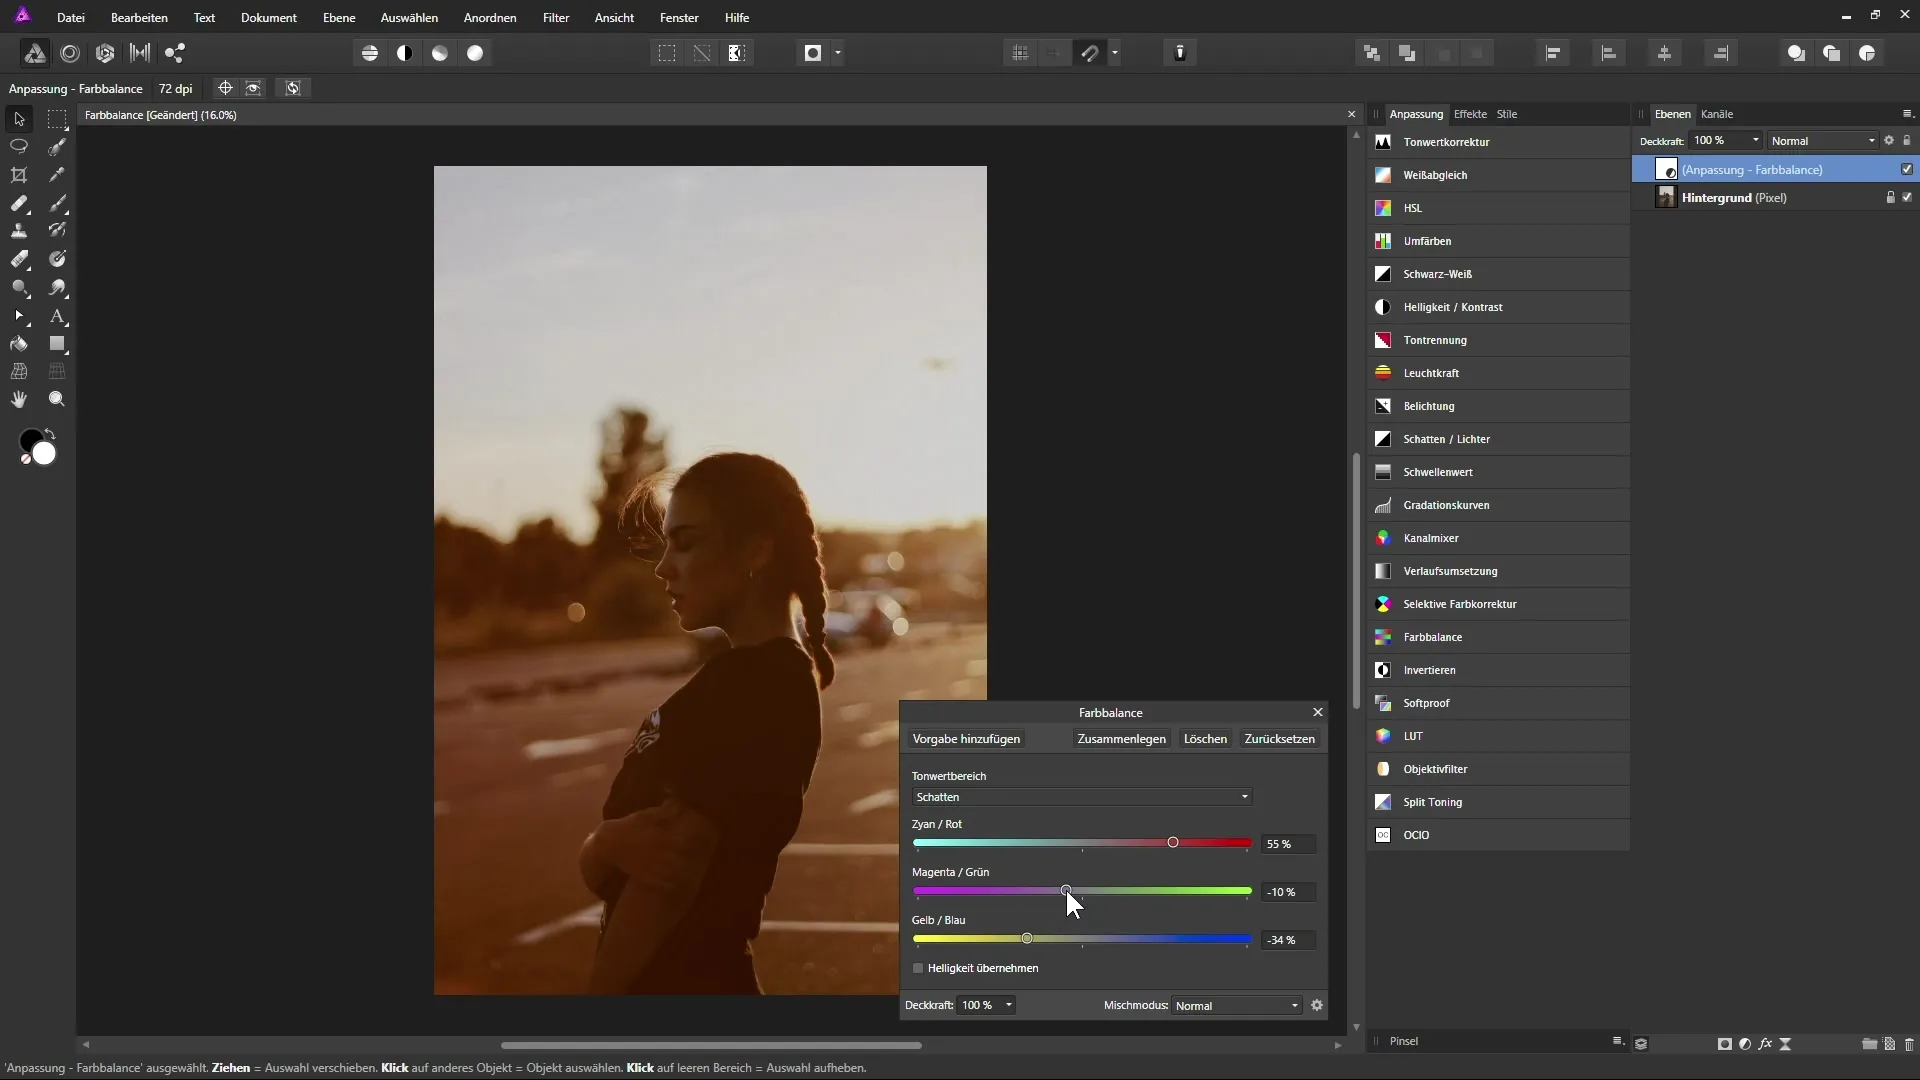
To adjust the shadow color values, drag the upper slider into the red tones. This adds a warm hue to the shadow areas and makes the depths of the image appear more intense. You should be able to see the tint of the image change live. Be careful not to move the sliders too drastically to avoid undesirable effects.
Step 4: Avoid Yellow Tint
After adjusting the shadows, check the effect on the image. An extreme shift in yellow-blue can cause the image to look unnatural and take on a green tint. Use the magenta-green slider to reduce the green again and keep the image harmonious.
Step 5: Adjust Highlights
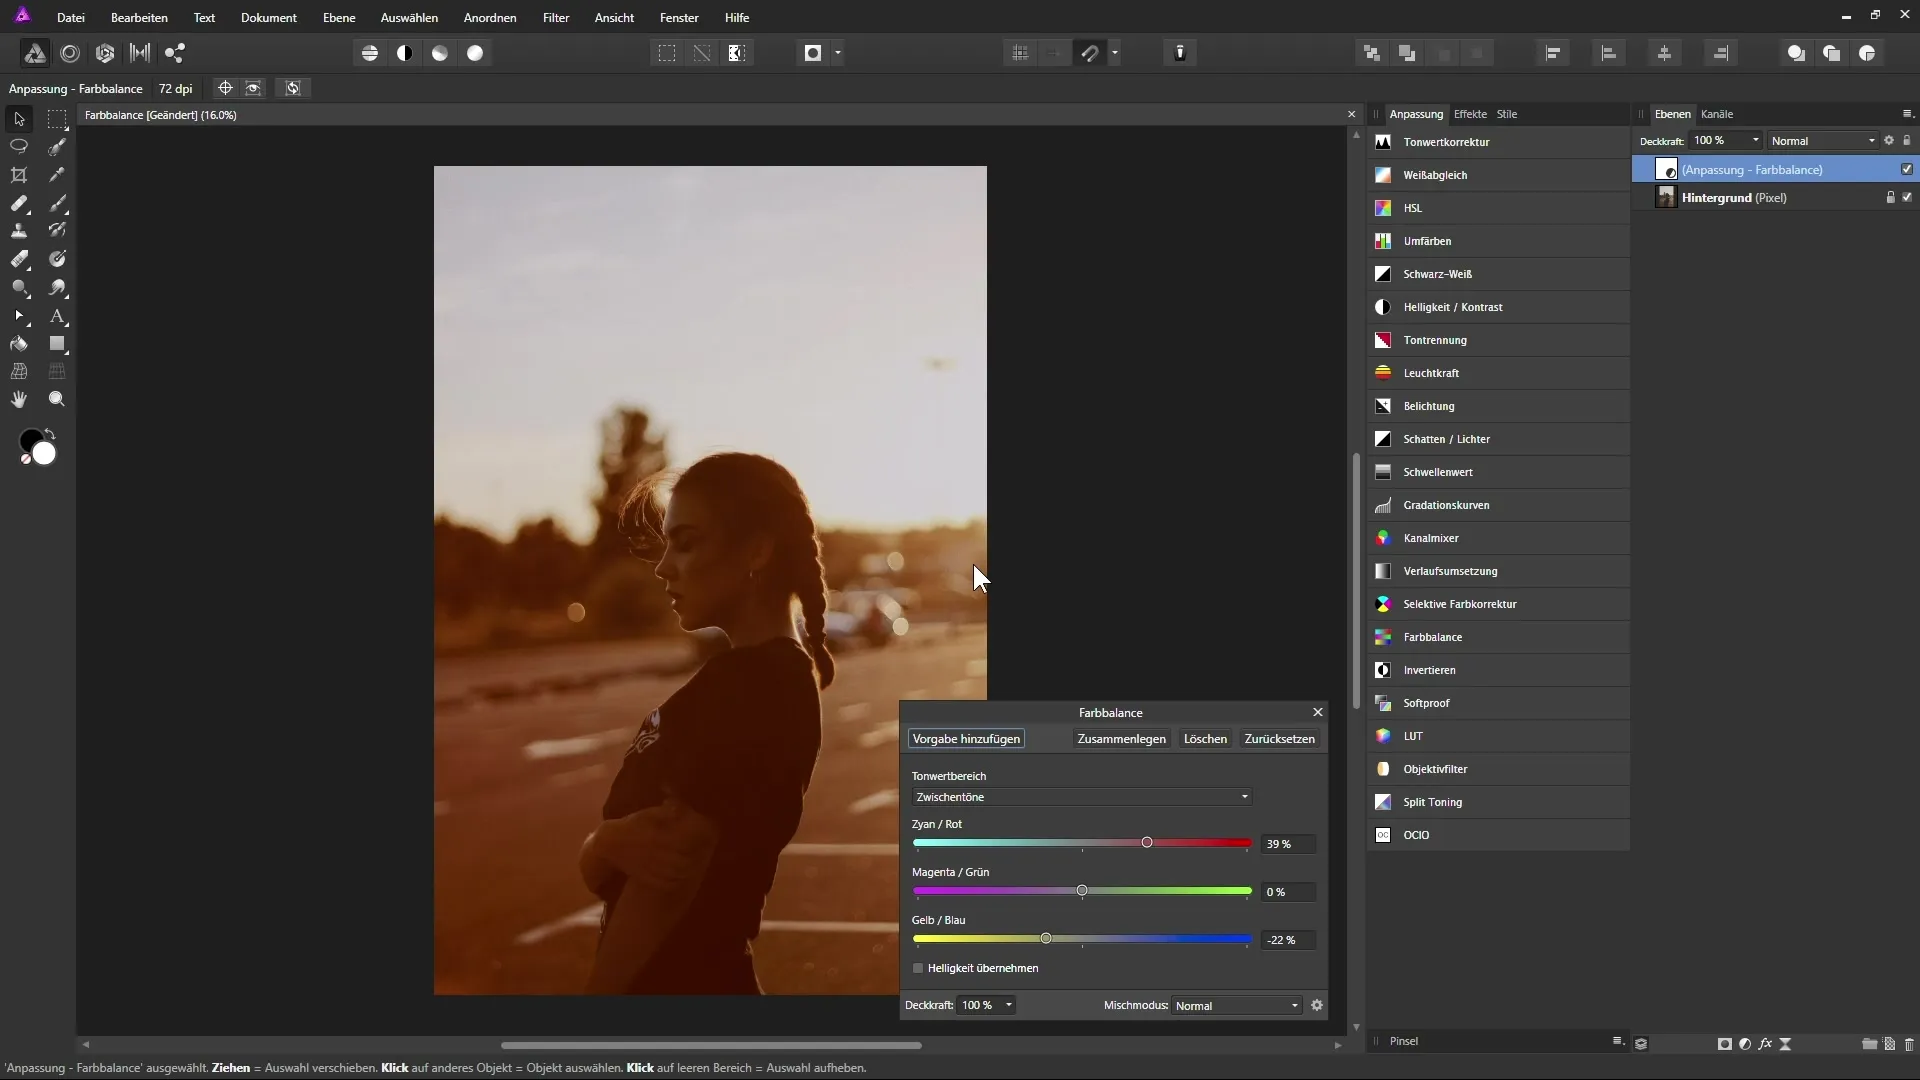
To optimize the highlights of the capture, drag the cyan slider slightly to the left and the yellow-blue slider down. Make sure that the image does not take on a blue tint, but that the highlights remain neutral. This will give you a balanced color balance.
Step 6: Change Midtones
Now you can adjust the midtones to further influence the prevailing color temperature. Drag the red tone slider and the yellow slider to make the image overall a little warmer.
Step 7: Save Presets
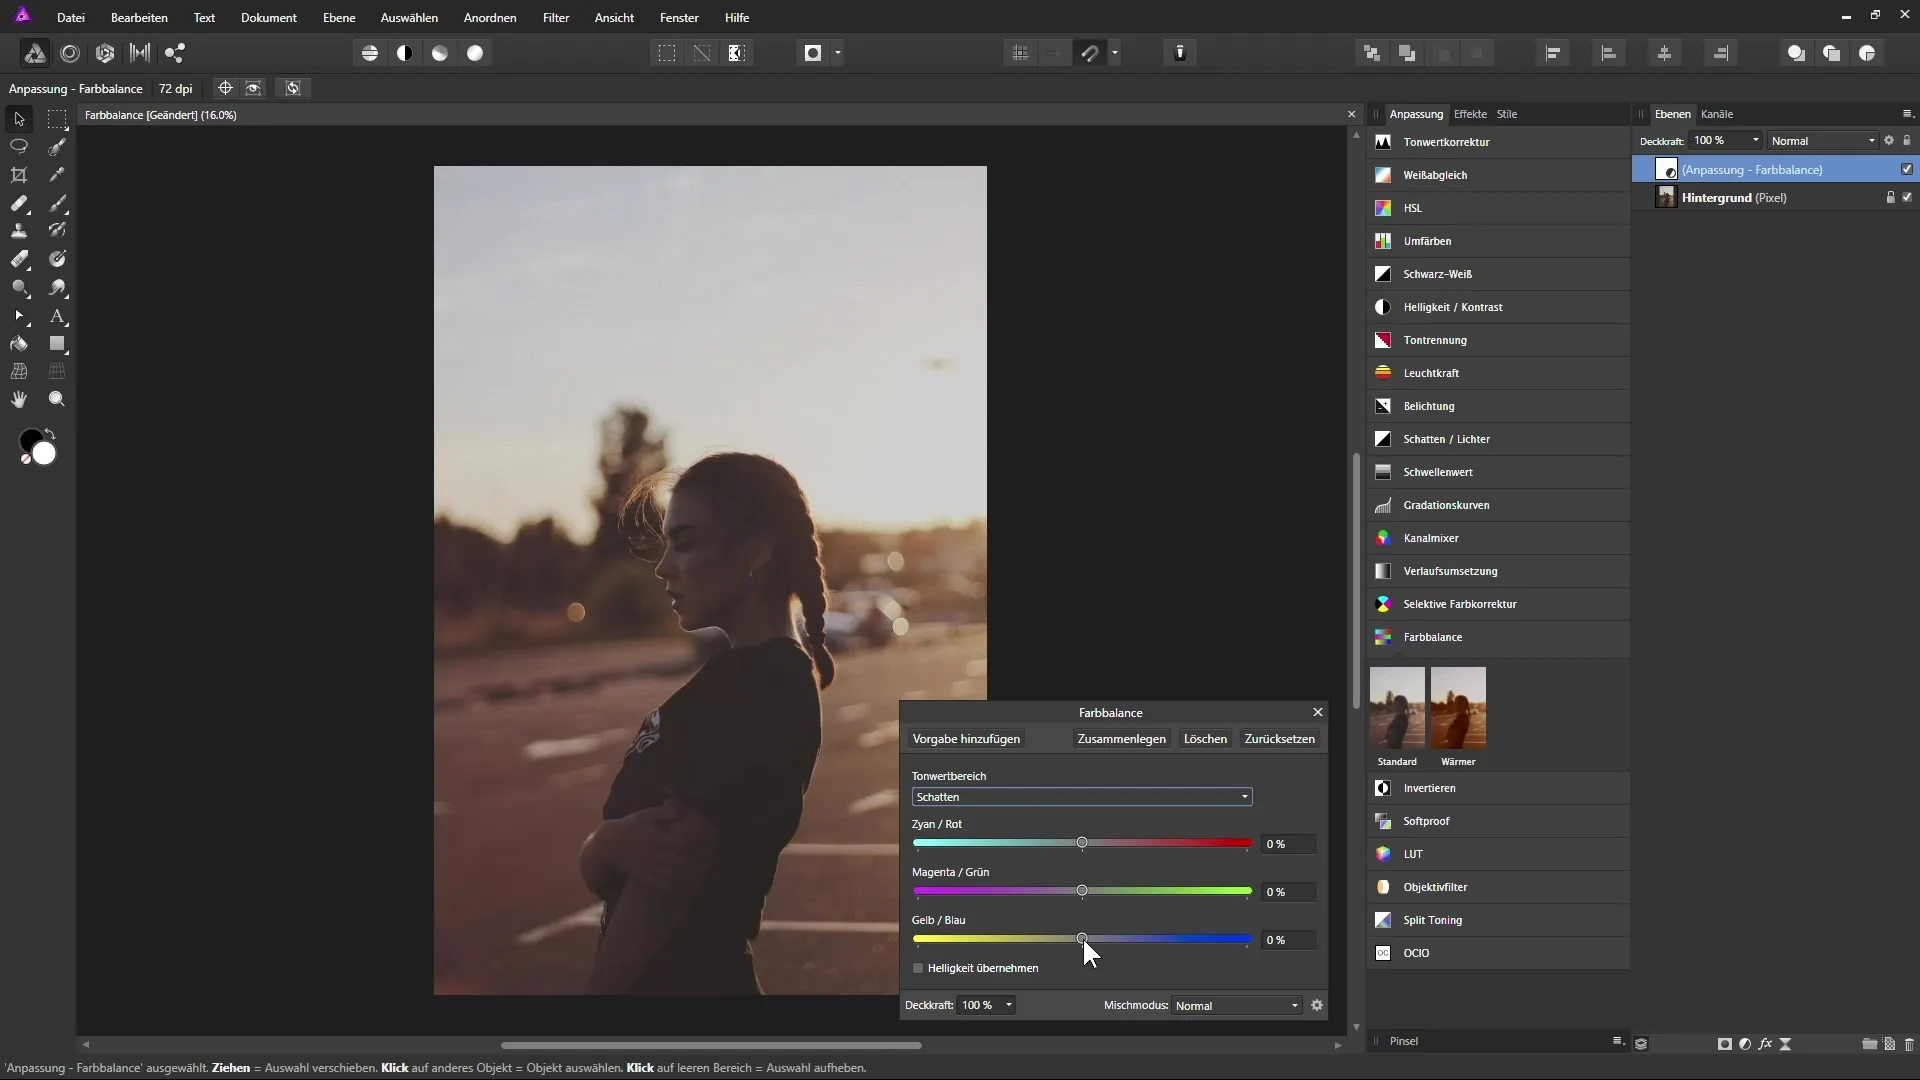
If you are satisfied with the result, you can save this adjustment as a preset. Click on "Add Preset", give the new preset a name like "Warmer", and confirm with "OK". You can use this preset in the future to quickly adjust similar images.
Step 8: Create New Color Looks
To create a new color variation, first delete the existing color balance layer and select "Color Balance" again from the adjustment panel. Now you can reset the sliders to 0% and create a cool color temperature by dragging the cyan slider down and adjusting the highlights and midtones accordingly.
Step 9: Make Further Adjustments
Experiment with the sliders to achieve the desired look. Make sure you don't slide into the purple area on the magenta-green slider. As you make your adjustments, the image will find a balance between the different color values.
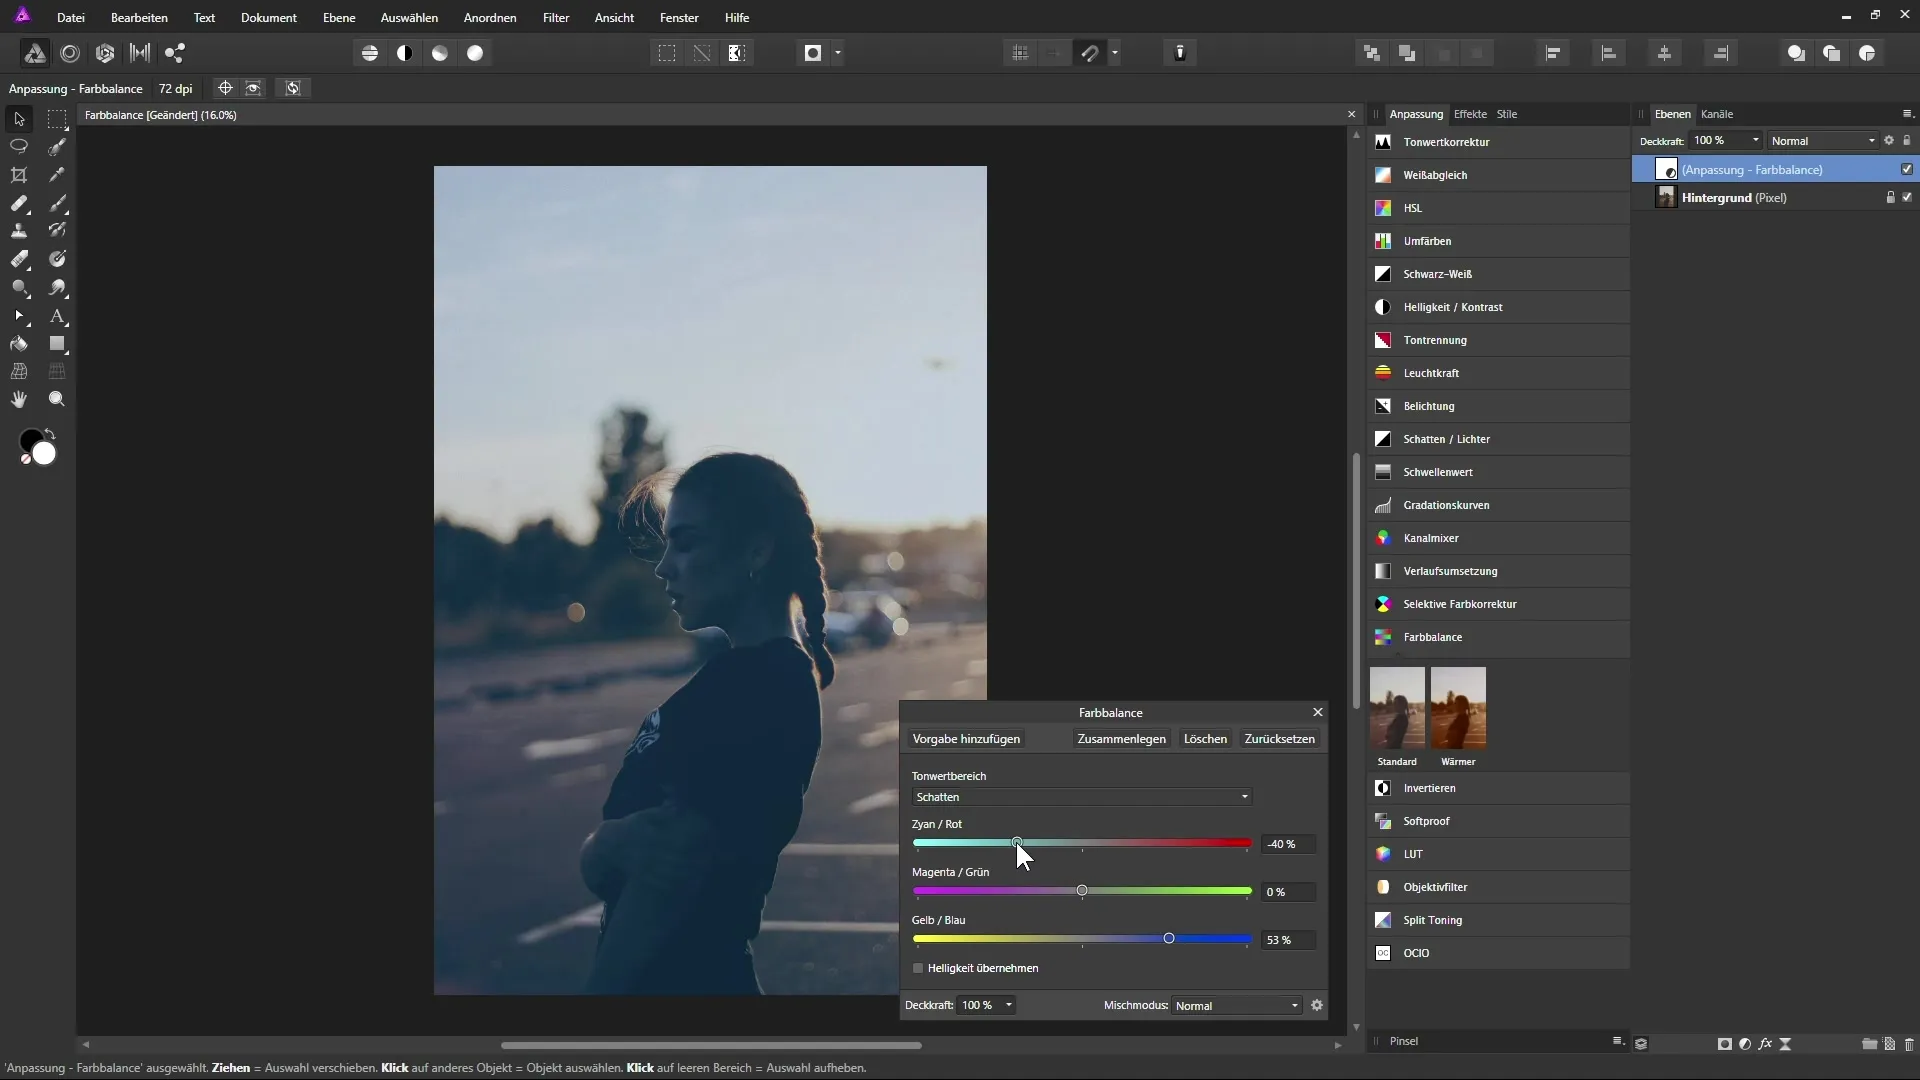
Step 10: Save Presets for Cool Looks
If you are also satisfied with the cooler color tones, save this adjustment as a preset as well. For example, name it "Colder" and confirm the changes.
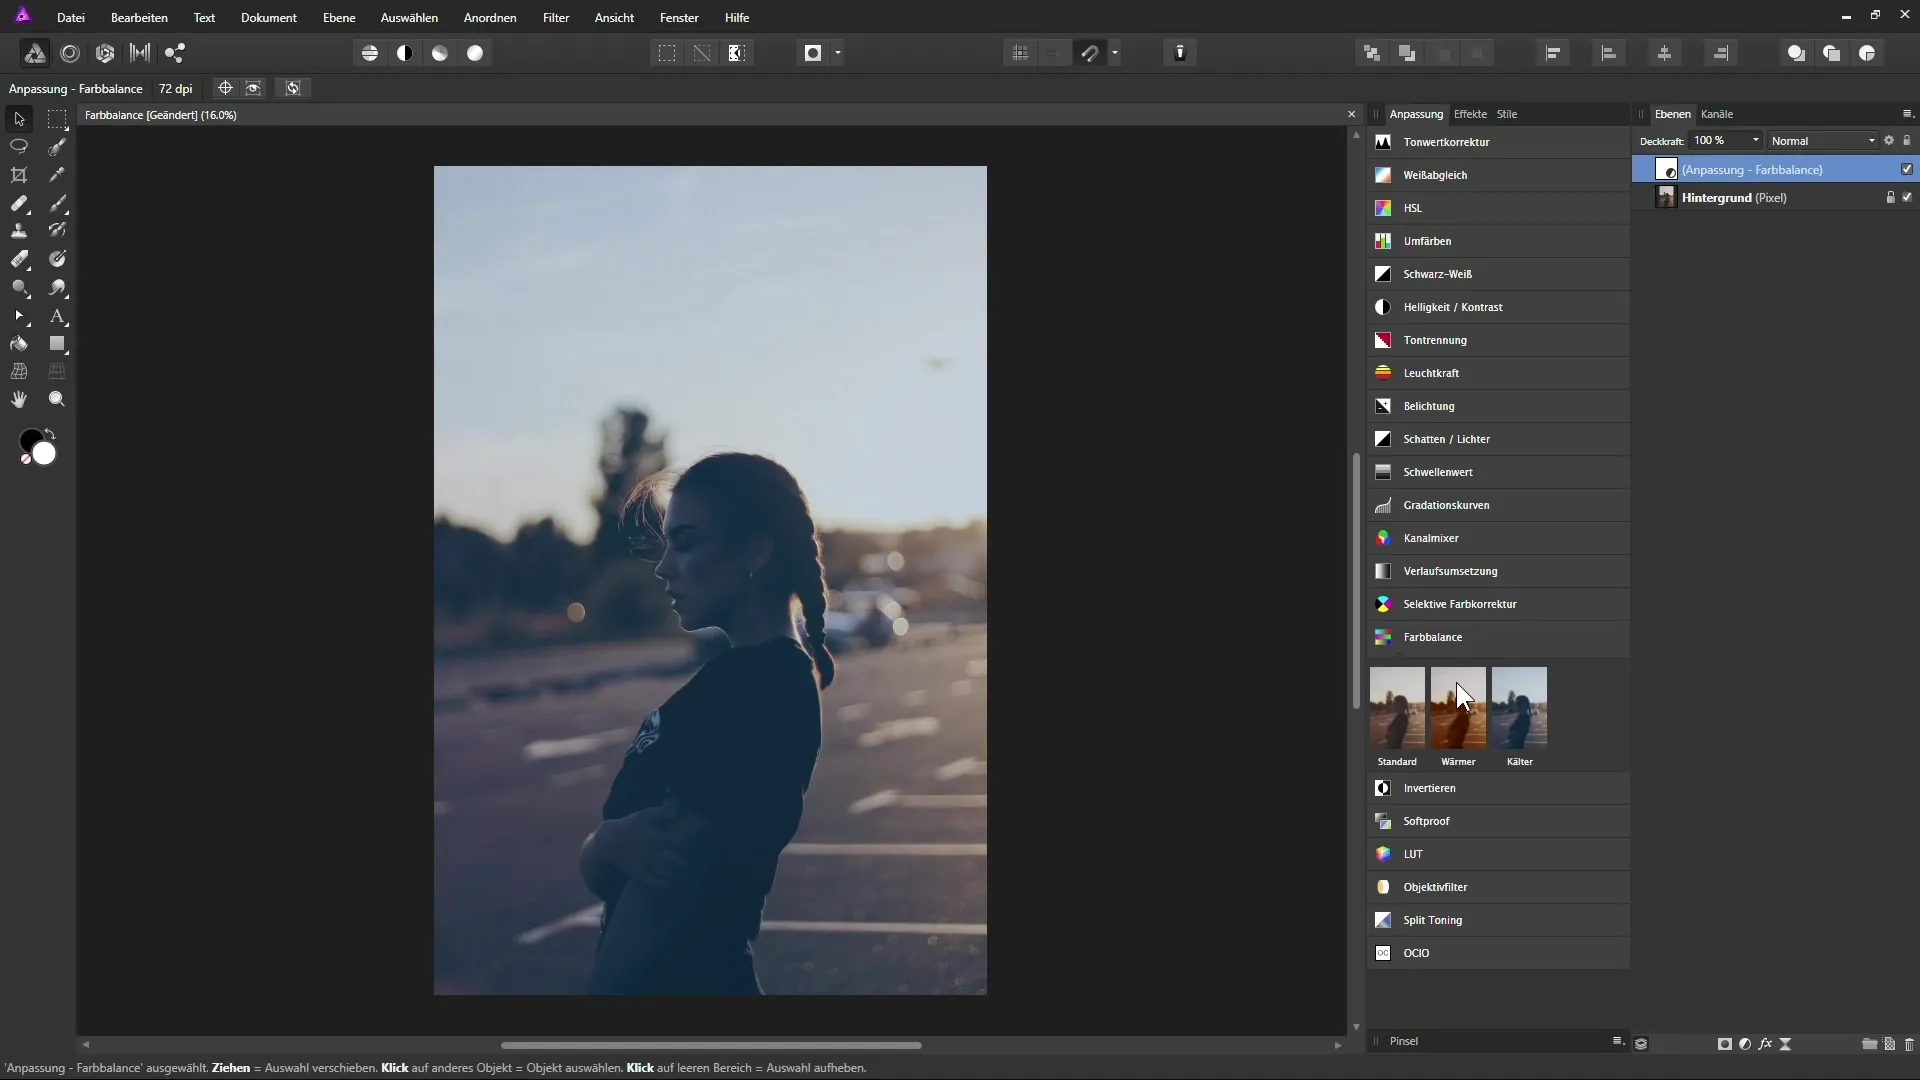
Summary – Effectively Using Color Balance in Affinity Photo
In this tutorial, you have learned the basics of color balance in Affinity Photo. You now know how to adjust the color balance to influence the appearance of your images, as well as how to create your own presets to simplify your workflow.
Frequently Asked Questions
How can I find the Color Balance adjustment layer in Affinity Photo?You can find the adjustment layer in the layers palette under the icon for adjustments.
Can I reduce the effect strength of the color balance?Yes, you can adjust the opacity of the color balance layer to reduce the effect.
How many presets can I save in Affinity Photo?You can save numerous presets and select them as needed to speed up your edits.
How does resetting the sliders work?Click on "Reset" to reset all sliders to the value of 0% and start fresh from there.
Can I apply the color balance to other images as well?Yes, you can apply the saved presets to any images you open in Affinity Photo.


