
Viewing an image in Affinity Photo is quickly done. However, as soon as you retouch an eye, place a brushstroke precisely, or want to keep the subject as a whole in view, proper navigation becomes the foundation of your work. This tutorial shows you how to move around the image, zoom in and out, and make your work significantly easier with the Navigator and additional views.
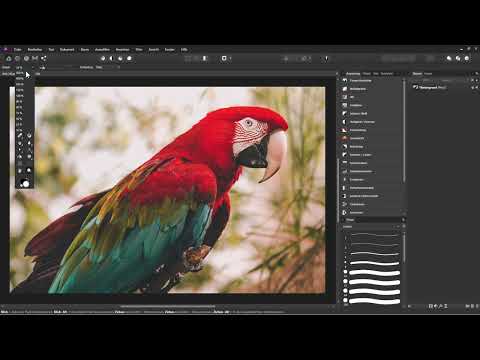
The video is only loaded from YouTube when you play it – data (including your IP address) is then transmitted to YouTube/Google. More in the privacy policy
Key Takeaways
- With the mouse wheel, you zoom in and out of the image regardless of the active tool.
- Keyboard shortcuts such as Ctrl+0, Ctrl+1, and Ctrl+2 through Ctrl+4 quickly take you to fixed views.
- The View Tool and the spacebar only move your view of the image, not the layer itself.
- The Navigator, saved view points, and new views help you edit details precisely without losing sight of the overall image.
Step-by-Step Guide
1. Zooming with the Mouse Wheel
The fastest way to get closer to the image is the mouse wheel. With it, you zoom regardless of which tool is currently active. The prerequisite is that you have adjusted the preferences so that the mouse wheel is used for zooming. If you scroll forward, the view moves into the image. If you scroll backward, you zoom out again. This way, your focus stays exactly on the spot where you are currently working.

2. Fitting the Image with Keyboard Shortcuts
If you have lost yourself too far in the details, you bring the entire image back with the key combination Ctrl+0. The image is scaled so that it fits completely into the available area, regardless of its original size. On a Mac, you use the Command key instead. Alternatively, you can simply double-click the hand icon. The result is identical.

3. Setting the View to 100%
For retouching work, it often makes sense to view the image at a zoom level of 100%. To do this, press Ctrl+1. The image is then displayed at a 1:1 ratio, so that one pixel of the image corresponds exactly to one pixel of your monitor. This lets you assess details realistically, but you must also keep in mind that the entire subject is not visible at once. That is where the scroll bars or the following methods come into play.

4. Moving with the View Tool
Instead of using the scroll bars at the bottom or side edge, you can select the View Tool. Click the hand icon in the toolbar and drag the image in the desired direction while holding down the mouse button. In doing so, you only move the view of the image and not the layer itself. Your pixels therefore stay exactly in their position.

5. Moving with the Spacebar Without Switching Tools
You are often working with a brush or another tool and want to briefly move the view. To do this, hold down the spacebar. The mouse pointer then turns into the View Tool, that is, the little hand. While holding down the spacebar, you click and drag the image to the desired spot. When you release the spacebar, the previous tool is automatically active again and you can continue working right away.

6. Reaching Zoom Levels with Keyboard Shortcuts
With Ctrl+2, Ctrl+3, and Ctrl+4, you get gradually closer to the subject. However, you cannot reach an even higher zoom level with these shortcuts. In that case, you have to zoom in further manually, for example with the Zoom Tool from the next step. You return to the overall view by double-clicking the View Tool. This fits the image again.

7. Working with the Zoom Tool
Select the Zoom Tool in the toolbar, the magnifying glass. One click in the image zooms in step by step, and several clicks bring you ever closer to the detail. You will see a plus sign on the mouse pointer. If you hold down the Alt key, the icon changes to a minus, and each click zooms out. If you drag to the right with the left mouse button held down, it also zooms in, and if you drag to the left, it zooms out. Double-clicking the magnifying glass resets the view to 100%. When the Zoom Tool is active, the context toolbar at the top also changes.

8. Setting the zoom level via the context toolbar
When the Zoom tool is active, you will find a menu with fixed zoom levels in the context toolbar at the top edge. With one click you select a value directly. Alternatively, you can enter the desired percentage value manually in the field. The slider there also allows for continuous adjustment. This is especially handy when you need a specific magnification that cannot be reached exactly with keyboard shortcuts.

9. Using the Navigator
The Navigator is a panel with which you can navigate through the image very quickly and precisely. You open it via the View menu, then Studio, and then Navigator. In the small window you see the complete image. If you zoom in in the main window, a small rectangle appears in the Navigator. This rectangle shows exactly the area you are currently working on. The closer you zoom in on the detail, the smaller it becomes. If you click in the Navigator and drag the rectangle, you move the view precisely to the desired spot.

10. Saving view points
Via the small menu in the Navigator you can display advanced options. There, areas can be saved as view points. Drag the rectangle in the Navigator onto an area you want to edit again later, and click the gear icon. Select Add there. The view is saved and can be recalled at any time with a click. Via the gear you can also rename the view points, which considerably improves clarity when you have many areas.

11. Creating a second view of the image
A particularly helpful function is the new view. It shows you the same image in a second tab, so that you can edit details while keeping the overall image in sight. To do this, you select the item New View in the View menu. Both tabs work with the same file. So you can zoom in closely in one view while the other continues to show the complete image. This is very convenient, for example, when working on individual eyes or fine structures.

12. Detaching views and arranging them on monitors
Affinity Photo does not automatically arrange the views side by side. You have to do that manually. To do so, click on a tab, hold down the mouse button and drag it out of the window. The view is now detached and can be moved freely. If you work with two monitors, you can drag a view onto the second screen and maximize it there. With the command Dock All Windows, all views can be docked again. With Detach All Windows you separate them completely from one another. Also make sure that the toolbar can be covered depending on the window arrangement. You can therefore move it to a different position if necessary so that it always remains visible.

13. Detail work in one view, overview in the other
In the last step, the benefit of it all becomes apparent. In one view, activate the brush, for example, optionally with pressure sensitivity enabled if you are working with a pen. Set a foreground color and use it to outline a detail, for example an eye. In the other view you immediately see the changes in the overall image. In this way you can work in detail on the left and keep the overview on the right. You can create as many views as you like, which is especially useful with large or multiple monitors. With the spacebar you navigate through the image in each view independently of one another.

Summary ??? Navigating Affinity Photo: Using zoom, panning and views
You have seen that in Affinity Photo there is not just one way to navigate through an image. The mouse wheel, keyboard shortcuts such as Ctrl+0, Ctrl+1 and Ctrl+2 to Ctrl+4, as well as the Zoom tool with the Alt key give you quick access to different magnifications. With the View tool and the spacebar you move the view without changing your layers. Via the context toolbar you set precise zoom levels. The Navigator and saved view points bring you back to important areas, and new views allow you to edit detail and the overall image at the same time. Practice the methods one after another until you find the ones that suit your working style.
FAQ
How do I quickly zoom back out to the entire image?Press Ctrl+0 (Command+0 on Mac) or double-click the hand icon in the tools area, and the image will be fitted completely.
Do I move the layer in the image with the View tool?No, the View tool only moves the view of the image; your layers and pixels remain unchanged.
Why can't I zoom further into the image with Ctrl+5?With the keyboard shortcuts you only reach certain zoom levels; for stronger magnification, use the Zoom tool, the context toolbar or the mouse wheel.
Can I open the same image in several views at the same time?Yes, via the View menu and the command New View you create as many views of a single file as you like, which you can zoom and move independently of one another.


