
Pixel graphics look simple at first glance, but they demand great precision. Every pixel counts, and that is exactly where their appeal lies. Affinity Photo offers the Pixel Tool for this, which lets you place individual pixels precisely without the software smoothing the edges. Whether you want to design retro-style game graphics, icons, or small characters: with this guide, you will set up your document, activate the right tool, and learn how to use color gradients and semi-transparent pixels purposefully.
The video is only loaded from YouTube when you play it – data (including your IP address) is then transmitted to YouTube/Google. More in the privacy policy
Key Takeaways
The Pixel Tool places pixels without smoothing and is therefore ideal for true pixel art.
A pixel grid with a spacing of one pixel helps you hit every square precisely.
The width of the tool should be set to one pixel, and the pressure sensitivity of a graphics tablet must remain disabled.
With the HSL view in the color panel, you can create fine color gradations that are well suited for shading.
Pixel-style brush tips and opacity significantly expand your creative possibilities.
Step 1: Prepare the document and a transparent layer
For pixel graphics, you need a small document. In the video, a size of 100 by 100 pixels is used. With this size, you keep an overview, and every pixel remains clearly visible. Also create a new, transparent layer via the Layers panel and give it a meaningful name, such as "Retro". This keeps your motif separate from other elements.

Step 2: Set up a pixel grid
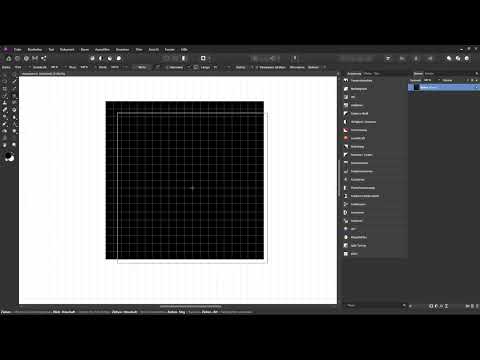
To hit every pixel precisely, a grid is worthwhile. To do this, open the "Grid and Axes" option in the "View" menu and activate the grid. Then deactivate the automatic grid, as it otherwise works with a larger spacing. Enter a value of 1 pixel as the spacing. Now a grid is created in which each square corresponds to exactly one pixel.

If the gray lines bother you, you can reduce their transparency or set a different line color via a color picker. Then zoom into the image so that you can clearly see the individual squares.


The grid can be turned on and off at any time via "View" and "Show Grid". Use this function when you want to switch between the working view and the preview view.
Step 3: Use a transparent background deliberately
When you create a new document, it often shows a white background. If you want a transparent background instead, select the "Transparent Background" option in the document dialog. A checkerboard pattern then appears, which can quickly be confusing while working, especially in combination with the grid. However, this setting is very well suited for pixel graphics with a transparent background. In the video, the motif is nevertheless created on a white background. Keep in mind that you are working on a transparent layer. Once you are finished, you can reactivate the transparency and save the graphic in a format that supports transparency, for example PNG.


Step 4: Select and set up the Pixel Tool
You will find the Pixel Tool in the group of paint brushes in the toolbar. Click on the group and select the Pixel Tool. If it is not visible for you, the toolbar can be customized so that you can place the tool there. Once the tool is active, the context toolbar shows you the width. In the example, it is initially set to 10 pixels.
Set the width to one pixel so that you really place individual pixels. Also pay attention to pressure sensitivity: if you work with a pressure-sensitive pen, the width changes depending on the pressure. Deactivate this option in the context toolbar so that the width remains stable.

Step 5: Painting pixel-perfect and avoiding antialiasing
Now you can place pixels with the Pixel Tool. Move the mouse exactly onto a square of the grid and click. The pixel appears exactly at this spot and is not smoothed. With a normal paintbrush, this would be different, because it creates soft transitions, so-called antialiasing. If you instead paint with the normal brush on an area between two pixels, a medium gray results. This is unsuitable for clear retro graphics.
With the Pixel Tool, every pixel stays clearly defined. That is exactly what you need if you want to create true pixel art.
Step 6: Mixing colors with the HSL view
Pixel graphics often thrive on color gradations. Therefore, open the color palette via "View" and "Studio". There you will find the "Color" section. Via the menu you can choose different displays, such as the color wheel, the slider, or HSL. For pixel art, the slider is recommended, and with HSL you control hue, saturation, and lightness precisely. Choose a hue, such as a vivid red, set the saturation to 100 percent, and then adjust the lightness.
With this method you can create color gradients step by step. If you place light and dark pixels next to each other, shading is created, for example for the face of a comic character. You can gradually make a color darker and thus build up a clean gradient.
Step 7: Using opacity and brush tips
As with the other painting tools, you can also adjust the opacity for the Pixel Tool in the context toolbar. If you set it to 50 percent, for example, the placed pixel becomes semi-transparent. This creates additional blends and transitions that make your graphic look more lively.
Brush tips can also be used with the Pixel Tool. To do this, open the Brushes panel via "View", "Studio", and "Brushes" and choose a category such as "Painting". Many brush tips are already displayed as pixelated in the preview. Simply paint over it once, and you will see how color transitions are created. With these tips you can design backgrounds, blend colors, and create semi-transparency with opacity.


Summary – Pixel Tool in Affinity Photo: Pixel graphics step by step
With the Pixel Tool in Affinity Photo, you create graphics in which every pixel is placed deliberately. You start with a small document and a transparent layer, set up a pixel grid, and set the tool width to one pixel. You deactivate pressure sensitivity so that the width stays stable. With the HSL view in the Color section, you create fine color gradations, and through opacity as well as suitable brush tips, you expand your possibilities. Practicing these steps quickly brings you visible results.
FAQ
What is the Pixel Tool in Affinity Photo used for?The Pixel Tool places individual pixels exactly and without smoothing. It is therefore particularly suitable for pixel art and retro graphics.
Why does my brush stroke look gray between two pixels?The normal paintbrush uses antialiasing and creates soft transitions. Switch to the Pixel Tool so that every pixel stays clearly defined.
How do I set up the pixel grid correctly?Activate the grid via "View" and "Grid and Axis", deactivate the automatic grid, and enter a spacing of one pixel.
Why does my pixel width keep getting larger when using a graphics tablet?Pressure sensitivity is probably activated. Deactivate this option in the context toolbar so that the width stays fixed.
Can I also place semi-transparent pixels with the Pixel Tool?Yes, you set the transparency via the opacity in the context toolbar, for example 50 percent.
How do I save a pixel graphic with a transparent background?After working, activate the transparent background again and save the file in a format that supports transparency, such as PNG.
Which color view is suitable for color gradients in pixel graphics?The slider or the HSL view in the Color section is well suited. With HSL you control hue, saturation, and lightness precisely.


