
Before you edit the first image, it's worth taking a look at the preferences. A few minutes of configuration will save you many steps later, especially for zoom, undo, and color selection. Video trainer Marco Kolditz shows in this tutorial the settings he uses himself for his daily work with Affinity Photo. You don't have to adopt his choices one to one, but every option is worth a test.
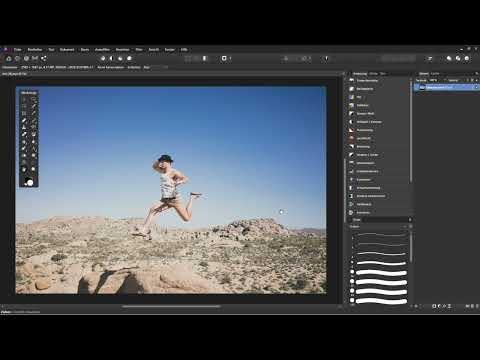
The video is only loaded from YouTube when you play it – data (including your IP address) is then transmitted to YouTube/Google. More in the privacy policy
The guide takes you through the areas General, Interface, Tools, Keyboard Shortcuts, and Miscellaneous. You'll learn what the individual options do and why a change pays off in everyday use.
Key Takeaways
Key Takeaways
- You can find the preferences via "Edit" and "Settings".
- The option "Reopen document on startup" is disabled by default, but it's worth it if you work on projects over several days.
- With the option "Use mouse wheel to zoom", you zoom directly in the image without switching tools.
- By default, Undo and Redo are assigned to Ctrl+Z and Ctrl+Y. Assigning them to F1 and F2 is much more convenient in everyday use.
- With the D key you reset the colors to black and white, with X you swap the active color.
Step-by-Step Guide
Step 1: Open the Preferences
Open Affinity Photo and click "Edit" in the menu bar. There you'll find the entry "Settings". A dialog box opens with several categories through which you control all of the program's basic settings. All of the following steps take place in this window.

Step 2: Reopen Documents on Startup
In the "General" category, select the option "Reopen document on startup". It is disabled by default. If you enable it, Affinity Photo remembers the last opened image. If you close the program and restart it later, the image opens again automatically. This also applies if several images were open at the same time. For projects you work on over several days, this saves a lot of time.

Step 3: Adjust the Interface to Light or Dark
Switch to the "Interface" category. Here you decide whether the program is displayed in light or dark. Marco Kolditz works in Dark Mode because he can concentrate better on the image content. He finds light interfaces glaring by comparison. What matters is your personal preference. Using the sliders, you can also darken or lighten the interface's gray values more finely until the display is comfortable for you.

Step 4: Display the Tool Icons in Black and White
In the interface settings area you'll also find the option for monochrome icons. After the initial installation, the tool icons are displayed in color. If you enable the option, they appear in grayscale. Whether that looks better is a matter of taste. However, calm shades of gray distract less from the image, and that's exactly what this setting aims for.

Step 5: Zoom with the Mouse Wheel
Now switch to the "Tools" category. There you'll find the option "Use mouse wheel to zoom", which is also not enabled by default. As soon as you turn it on, you zoom directly into or out of the image with the mouse wheel. Scrolling forward enlarges the view, scrolling backward reduces it. This convenience is hard to beat in everyday work.

Step 6: Understand and Customize Keyboard Shortcuts
Open the "Keyboard Shortcuts" category. Many functions of Affinity Photo can be called up via key combinations. One example is Ctrl+P, which opens the print dialog. You can also assign your own shortcut to commands that have none. Clicking the cross icon removes a shortcut, and clicking in the input field allows reassignment. If you press the desired key or combination, it is applied.

Step 7: Assign Undo and Redo to Function Keys
By default, Undo is set to Ctrl+Z and Redo to Ctrl+Y. Both combinations require a finger acrobatics that quickly becomes tiring in everyday use. You can find the commands by looking in the "Edit" menu. Marco Kolditz therefore chose F1 for Undo and F2 for Redo. Both keys are right next to each other and can be reached with one finger.

When assigning the F2 key, a warning appears because F1 previously opens the program help. For everyday work, this is not a problem, since many users rarely use the help. You can open the help at any time via the menu if you need it.
The advantage shows in a practical test: You paint a few strokes with the brush, press F1 several times to go back steps, and press F2 to go forward again. This is quick and without detours.
Step 8: Control Colors with Keyboard Shortcuts
Finally, switch to the "Miscellaneous" section. There you will find three commands that are especially helpful in everyday painting: "Set fill to black and white," "Set fill to 50% gray," and "Switch fill context." Marco Kolditz assigns the first command to the D key, the second to Alt+D, and the third to the X key.
The keys work like this: If you press D, black and white are available again as foreground and background colors, without any detour via the color picker. With Alt+D, you quickly switch the active color to a medium gray, which is often needed for portrait retouching, for example. With the X key, you swap the active color between foreground and background. This way you can paint with white, switch to black with X, and continue painting.
These shortcuts work regardless of which color is currently selected. This makes them especially reliable, because you don't have to check the color swatch every time.

Summary – Setting Up Affinity Photo: The Most Important Presets at a Glance
With a few changes in the settings, you adapt Affinity Photo to your way of working. You determine what the interface looks like, whether documents are reopened at startup, and how you zoom. You can also customize keyboard shortcuts that shorten your workflows. Marco Kolditz's suggestions are a good starting point. Over time, you will recognize for yourself which settings make your everyday work easier. Take your time to try out which options suit you.
FAQ
Do I have to adopt all of Marco Kolditz's presets?No, the selection is a suggestion. You decide for yourself which options you adopt and which you don't.
Can I reset keyboard shortcuts later?Yes, you can remove or change any keyboard shortcut. The changes take effect immediately.
What happens if I assign a keyboard shortcut to a command that is already in use?Affinity Photo displays a warning signal and a note indicating which command currently uses the same shortcut. You can still confirm the assignment.
Is the document also opened at startup if I haven't used the program for a long time after closing it?Yes, as long as the option is enabled, the program reopens the most recently used document at the next startup.


