
Anyone who works with Affinity Photo every day knows the problem: the tool you are looking for is hidden somewhere in a group, and by the time you have found it, your workflow has already been interrupted. This is exactly where this guide comes in. You will learn how to design the toolbar and the tool bar so that the tools you really need are always within reach. As an instructor, I will show you step by step which settings are available and how to use them.
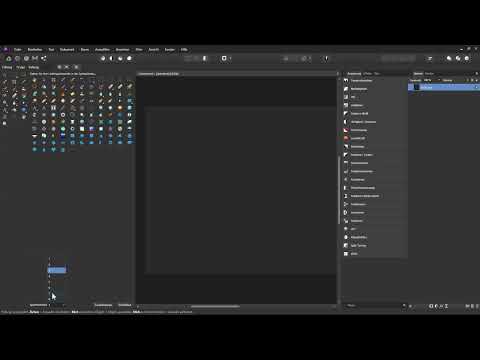
The video is only loaded from YouTube when you play it – data (including your IP address) is then transmitted to YouTube/Google. More in the privacy policy
Key Takeaways
Key Takeaways
- The toolbar contains individual tools and tool groups, which can be recognized by the small arrow icon at the bottom right.
- The toolbar can be placed freely floating or docked on the left with a double-click.
- Via "View" and "Customize Tools", you can add and remove tools and change their order.
- Individual tools can be taken directly from a group into the toolbar.
- The number of columns in the toolbar can be set individually.
- The toolbar at the top can also be redesigned via "Customize Toolbar", for example with alignment buttons.
- With the option "Icon only" or "Icon and Text" you control how the buttons are labeled.
Step-by-Step Guide
Recognizing Tool Groups
The toolbar consists of individual tools and so-called tool groups. At first glance, both look similar. You can recognize a group by a small arrow icon at the bottom right of the button. It shows you that further tools are hidden behind the currently visible tool.

Opening Hidden Tools
To display the other tools in a group, click the visible tool with the left mouse button and keep the button pressed. A menu with all the tools in this group then opens. The currently selected tool is displayed at the very front so that you keep track.
Switching Between Tools Within a Group
If you select a different tool in the menu, it replaces the previous one in the toolbar. So you can quickly switch back and forth within a group. This principle works the same for all groups in the toolbar and saves you many mouse movements.
Understanding the Order of the Tools
You determine the order of the tools in the toolbar yourself. This is the basis for all further customizations, because you should design the toolbar the way that suits your working style. The way there leads through the "Customize Tools" menu, which I will show you in the next step.
Placing the Toolbar Freely
The toolbar can be moved freely around the workspace. In my example, it floats freely above the document. If you want to place it at the edge so that you have a clear view of your image, a double-click on the toolbar is enough. It is then docked on the left, and that is exactly how I continue to work in this video training.
Detaching the Toolbar Again
If you want to let the toolbar float freely again later, simply double-click the docked toolbar once more. It then detaches from the edge again. Whether you use it docked or floating is purely a matter of taste and depends on how you work.
Opening the "Customize Tools" Dialog
For the actual configuration, open the "View" menu in the top bar and select "Customize Tools" there. A window with all available tools then appears on the right. For a better overview, you can also set the display to monochrome, so that the tools are shown in grayscale rather than in color.

Understanding the Two Areas
In the dialog, you see your current toolbar on the left side and all the tools that Affinity Photo provides on the right side. You drag tools from the right area into the toolbar on the left. Tools that are already in your toolbar can also be recognized on the right, for example the View Tool.
Rearranging and Removing Tools
You change the order by clicking a tool, dragging it with the mouse button held down to the desired position in the toolbar, and releasing it there. To remove a tool, simply drag it out of the toolbar and release the mouse button. It then disappears from the toolbar and remains available in the selection area on the right.
Restoring removed tools
If you accidentally removed a tool, you can bring it back via the selection area on the right. Find the tool there and drag it to the desired position in the toolbar, for example at the bottom right. This way you can easily undo the change.
Placing entire groups in the toolbar
You can place not only individual tools but also entire groups in the toolbar. You can still recognize them by the arrow icon at the bottom right. In the example, the group of paint brushes is already clearly visible in the toolbar.
Dragging individual tools out of a group
You can also transfer just one specific tool from a group directly to the toolbar. For example, I very often use a particular paint brush. Therefore, I place it directly in the toolbar instead of searching for it in the group. If the group is still important to you, it also remains available. You then have access to both.
Setting the number of columns
At the bottom of the dialog, you can adjust the number of columns of the toolbar. By default, there are two columns, which work well for me. One column shows all tools one below the other, while three or four columns make the toolbar wider. Choose the option you find the clearest.
Closing or resetting the dialog
With the "Reset" button, you restore the toolbar to the default values after installation. Once you have set everything up to your liking, you close the dialog with "Close". Your customized toolbar is then active immediately.

Customizing the toolbar
The buttons at the top of the toolbar can also be customized individually. To do this, you again select "View" and then "Customize Toolbar". A dialog opens in which all available toolbars and their individual icons are listed.

Rearranging icons in the toolbar
In the dialog, you click an icon, hold down the mouse button, and drag it to the desired position in the top bar. The order of the icons can also be changed this way. You remove an icon by dragging it out of the bar and releasing it there.
Adding alignment buttons to the toolbar
Especially with text and objects, you often align things, for example left-aligned, centered, or right-aligned. Normally, you would first have to open the "Arrange" button and then choose the appropriate option. However, if you need these buttons often, you can place them directly in the toolbar. To do this, you drag them from the dialog to the desired position at the top.
Using alignment with one click
Once the alignment buttons are in the toolbar, a single click is enough to, for example, align left. The "Arrange" group nevertheless remains available in case you need several options at once. So you decide for yourself which way is faster for you.
Setting the labeling of the icons
For beginners, it can be helpful to see the buttons with text. At the bottom of the dialog, you choose between "Icon only" and "Icon and text". With the "Icon and text" option, you immediately recognize what an icon is meant for, for example the Quick Mask or the assistant settings. If the display is too wide for you, simply switch back to "Icon only".

Summary – Affinity Photo: Customizing the toolbar and icon bar individually
With a few simple steps, you turn Affinity Photo into your personal workspace. You recognize tool groups by the arrow icon, rearrange tools via the "Customize Tools" dialog, place the bar floating or docked, and determine the number of columns. You add the buttons you need frequently to the toolbar at the top, and choose whether icons are displayed with text. Feel free to experiment a bit, because all changes can be undone at any time or reset to the default values.
FAQ
Can I reset the toolbar to the default settings later?Yes, open the dialog via View and Customize Tools and click Reset at the bottom. The bar then returns to the tools and settings that were present after installation.
How do I recognize whether a tool belongs to a group?Tool groups show a small arrow icon at the bottom right of the button. If you hold down the left mouse button on this tool, the menu opens with all other tools in the group.
Can I place a single tool from a group directly in the toolbar?Yes, in the Customize Tools dialog you can select a single tool from a group and place it at any position in the bar. The group remains available.
How do I remove a tool from the toolbar?In the Customize Tools dialog, drag the tool out of the bar while holding down the mouse button and release it. It remains in the selection area on the right and can be added again at any time.
How do I change the number of columns in the toolbar?You set the number of columns at the bottom of the Customize Tools dialog. You can choose between a single column and several columns, depending on how much space you need.
Can I display the icons in the top toolbar with text?Yes, select the Customize Toolbar option via View. At the bottom of the dialog, you can specify whether only the icons or icons with accompanying text are displayed.


