
Anyone who wants to give their photo a distinctive look will sooner or later have to deal with the Channel Mixer. This adjustment layer in Affinity Photo intervenes directly in the color channels of your image. You can mix red, green and blue with one another, creating atmospheric tones or preparing a precise black-and-white conversion. In this tutorial you will learn how to make the channels visible, how to use the Channel Mixer correctly, and how to save your own settings as a preset so you can later apply them to other photos with a single click.
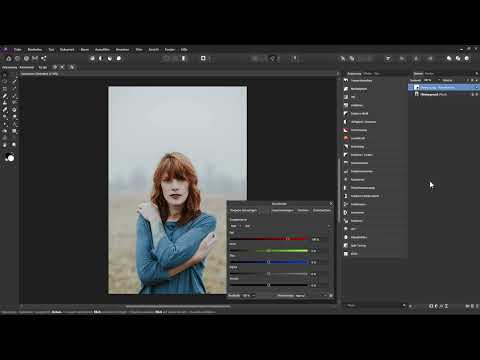
The video is only loaded from YouTube when you play it – data (including your IP address) is then transmitted to YouTube/Google. More in the privacy policy
Key Takeaways
- The Channel Mixer edits the red, green and blue color channels and mixes them with one another.
- With the output channel, you determine which channel is currently being changed. With the sliders, you determine how strongly the other channels contribute to it.
- For a black-and-white conversion, you combine the Channel Mixer with an HSL layer that desaturates the image beforehand.
- Proceed carefully: values that are too extreme will blow out highlights or cause shadows to sink into black.
- Your own settings can be saved as a preset and applied to other images at any time.
Step-by-Step Guide
Making the Image's Color Channels Visible
Before you start turning the sliders, you should know what components your image is made of. To do this, open the Channels panel via the View menu, then Studio, and then Channels. There you will find the red channel, the green channel and the blue channel. Only the combination of all three channels produces the complete color image. Look at the channels individually, because this lets you quickly see which channel carries details such as skin or hair particularly strongly.

Creating the Channel Mixer as an Adjustment Layer
Now create a new adjustment layer. To do this, click the corresponding icon in the Layers panel and select the Channel Mixer. The dialog box with the settings then opens. The most important item here is the output channel, because it determines which channel you are currently editing. At the beginning, you select the red channel, which still shows 100 percent red.

Mixing Red with Green and Blue
In the red channel you can now mix in green and blue. Drag the sliders and watch the preview as you do. If you take back some red, the image quickly takes on a cyan cast. Afterwards you can add a little green to change the mood further. Always compare your changes with the original state so that you can better judge the effect of each slider.

Creating a Different Color Look with Blue
Next, take back some green and mix in blue. This creates another, clearly different color look. Depending on the atmosphere you want to achieve, play with the sliders until you like the result. Keep in mind that every combination of the three channels changes the overall impression.

Adding the HSL Layer for the Black-and-White Conversion
The Channel Mixer alone offers no option to set the image directly to monochrome. For that you need a second adjustment layer. Add an HSL layer via the icon and drag the saturation slider all the way to the left so that the entire image is desaturated. This layer now sits at the very top of the Layers panel.

Switching Back to the Channel Mixer
To control the black-and-white conversion, next double-click the Channel Mixer's thumbnail. This reopens the settings. Now you can work with the sliders again and change the fundamental look of the conversion.
Shifting Brightness Values in a Targeted Way
For example, take back some red and mix in some green. In this example, this makes the hair darker while the top looks brighter. Here too, compare the before and after states to see how the tonal values of individual image areas shift.

Fine-tuning skin, hair and lipstick
For further refinements, you can pull back strongly on green and mix in blue. The hair and the lipstick then look slightly darker, and the skin tones also change noticeably. Especially with portraits, you should therefore look closely so that the skin does not look unnatural.

Proceed with a sense of proportion
Don't overdo it. If you go too far, bright areas can blow out completely into white or dark areas can disappear into black. Therefore, work in small steps and check the preview regularly. Feel free to take your time until the result matches your vision.
Use additional channels for fine-tuning
You can also switch to the green channel or the blue channel at any time and influence the black-and-white conversion further there. Alternatively, there is a simpler method: a Black & White adjustment layer also delivers a good result and can be implemented quickly without the Channel Mixer. Which variant suits you better depends on your working style.

Save the settings as a preset
If you want to apply the same black-and-white effect to other images later, a preset is worthwhile. To do so, click the Add Preset option, assign a meaningful name, for example Black-and-White 1, and confirm with OK. From this moment on, the preset is permanently available.
Apply the preset to an image
For the test, first delete the Channel Mixer layer again. Then select the background layer and click Channel Mixer again in the Adjustment panel. The new adjustment layer is created automatically above the most recently selected layer. In the Adjustment panel, the saved presets also appear below the Channel Mixer.

Select the saved preset
Now simply click on your preset, for example Black-and-White 1. It is applied immediately, and the image appears in the adjusted black-and-white conversion. However, the preview of the preset may look different than expected, with noticeably different colors. The reason is that the HSL layer above has already desaturated the image, so the preview displays the result differently.
Check the result
Finally, check the overall image. Pay particular attention to skin tones, highlights and shadows. If something doesn't fit, you can readjust the settings in the Channel Mixer at any time without having to start the entire edit over.
Summary – Channel Mixer in Affinity Photo: Creating color looks and producing black-and-white images
The Channel Mixer in Affinity Photo is a versatile tool with which you can mix the color channels of your image in a targeted way. You begin with the Channels panel, create an adjustment layer and choose the appropriate output channel. Then you change the color look with the sliders. For a black-and-white conversion, you add an HSL layer with a desaturated image. With a sense of proportion and a saved preset, you save a lot of time on further photos.
FAQ
What is the Channel Mixer in Affinity Photo used for?With the Channel Mixer, you can mix the red, green and blue color channels of an image with each other to create new color looks or prepare a black-and-white conversion.
How do I open the channels of an image?You can find the Channels panel via View, Studio and then Channels. There you see the red, green and blue channels individually.
Why does my image suddenly look cyan when mixing?If you reduce red in the red channel, the color balance shifts toward cyan, because green and blue then dominate.
Can I create a black-and-white image directly with the Channel Mixer?The Channel Mixer alone does not offer a monochrome option. You additionally need an HSL layer that desaturates the image, and you can then use the Channel Mixer for fine-tuning.
How do I save my settings for other images?In the Channel Mixer, click Add Preset, assign a name and confirm with OK. The preset then appears in the Adjustment panel below the Channel Mixer.
How can I tell that I'm overdoing it with the sliders?If bright areas turn completely white or dark areas disappear into black, you have gone too far. Then reduce the settings step by step.


