
A grainy, noisy photo usually occurs when the lighting conditions were poor at the time of capture. The camera then increases the light sensitivity (ISO), and this is exactly what produces the so-called luminance noise, sometimes accompanied by color noise. In this tutorial, you will learn how to reduce noise in Affinity Photo with live filters, remove it completely, or deliberately add it back. What makes it special: All steps are non-destructive, so you can change the settings at any time.
The video is only loaded from YouTube when you play it – data (including your IP address) is then transmitted to YouTube/Google. More in the privacy policy
Key Takeaways
- Luminance noise appears as light and dark grain, color noise as reddish or greenish blotches.
- The "Remove Noise" filter works as a live filter and can be adjusted or deleted at any time.
- Every noise reduction costs detail. You have to find a middle ground between a clean image and preserved structures.
- With a tilt-shift blur, you can selectively edit individual areas of the image and then unify them again with a noise filter.
- The display in the program can show noise as coarser than it actually is. Therefore, check the results at 100% zoom.
Step-by-Step Guide
Step 1: Identify Noise Types
Before you change anything, you should know what you are dealing with. Zoom into your image and look especially at the dark areas, because noise appears particularly clearly there. Luminance noise looks like a fine, light and dark grain that makes the entire image look restless. You can recognize color noise by individual reddish or greenish blotches. However, not every discoloration is noise. Sometimes it comes from an object in the background that actually reflects the color. This example shows you the difference well.

Step 2: Create the "Remove Noise" Live Filter
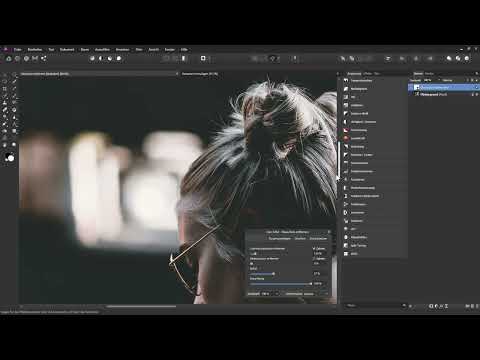
Select your background layer in the Layers panel. Then click the live filter icon at the bottom and choose "Remove Noise". A small dialog window with four sliders opens. To start with, the first two are the crucial ones: "Remove luminance noise" and "Remove color noise". You usually only rarely use the "Detail" slider; more on that later.

Step 3: Reduce Luminance Noise
First, drag the "Remove luminance noise" slider all the way to the right. You will see that the noise decreases, but only slightly. The default value of 50% does hardly anything for many images. That is why the "Extreme" mode is worthwhile. It removes the noise much more strongly, but also works more aggressively on details. Select it and then drag the slider back bit by bit until the result fits.


Step 4: Find the Right Value
In the example, the good result is at around 109%. At this value, the noise has largely disappeared, the facial skin looks natural, and the hair is preserved. If you go back a bit further, the noise visibly returns. It is best to set the value so that you can judge the result as a whole, and if necessary, set it numerically via the input field. The image may look a bit mushy in some places; this is normal when denoising.

Step 5: Deliberately Test the Limits
To understand where this is heading, you can deliberately exaggerate the slider. At very high values, image areas lose all structure. A cheek can then look like mush, while hair suddenly looks painted. This effect is quite appealing for creative looks, but is usually too strong for a realistic portrait. Afterwards, reduce the value back to a reasonable range.
Step 6: Remove Color Noise
Now look at the blotches in the image. Only when you are sure that it is real color noise and not the color of an object, drag the "Remove color noise" slider to the right. Here too: A value that is too strong can make the natural colors fade or distort them. Therefore, observe the effect closely and stop as soon as the blotches disappear.


Step 7: Reduce the Effect with Opacity
If the filter makes the image too soft overall, you don't have to delete it. Instead, pull down the opacity of the filter layer. In the example, it was set to about 80%. This brings back some of the original noise, and some details become visible again. This step works well if you don't want to smooth the image completely, but are looking for a balanced look.

Step 8: Selectively Soften Image Areas
With more complex images, often only a part should look softer, while other areas stay sharp. A Depth of Field filter in "Tilt Shift" mode is suitable for this. Add it as a live filter and adjust the sharp zone so that the sharpness gradient looks coherent in the image. The top and bottom of the image are then strongly blurred.

Step 9: Prevent Transparency at the Edges
After blurring, an unsightly transparency often appears at the edge of the image. Therefore, activate the "Preserve alpha" option in the filter. This keeps these edge areas protected from the blur. Then zoom into the image and check whether the noise is actually distributed differently in the various areas.
Step 10: Selectively Add Noise Back
Now comes the deliberate counterpart. Use the "Add Noise" live filter to add grain over the entire image. The filter should be at the very top of the layers palette so that it affects all layers beneath it, meaning both the original image and the blur. Choose the "Gaussian" variant and set the "Monochrome" mode. When setting the intensity slider, use the grain of the original image as a guide until both areas match. The result then looks more uniform, as if all parts of the image had the same quality.


You can also adjust the opacity of this filter if needed. In the example, it stayed at 100%.

Step 11: Keep an Eye on the Display
One important note at the end: when zooming out, the noise often looks much coarser than it actually is. This is only a display issue within Affinity Photo. Use the Zoom tool and set a zoom level of 100%. Only there can you see what the noise really looks like.

Summary ??? Removing Noise in Affinity Photo: Step by Step
You have learned to distinguish between luminance noise and color noise, to reduce it selectively with the "Noise Reduction" live filter, and to use opacity as a fine control. You also know how to blur individual areas with Tilt Shift and how to bring everything back together coherently with the "Add Noise" filter. The decisive factor is always the compromise: the more noise you remove, the more detail is lost. You decide for yourself which result suits your image.
FAQ
How do I distinguish color noise from a natural color cast?Color noise appears as individual reddish or greenish spots, while a color cast is usually caused by a reflective object in the image and can be specifically attributed to it.
Why does the default value of 50% for luminance noise do hardly anything?For many images the default value is not sufficient, so the "Extreme" mode is recommended, which you can then fine-tune with the slider.
Can I still change the noise reduction later?Yes, since it is a live filter, you can adjust the settings at any time, delete the filter layer again, or change the opacity.
Why does the noise look so coarse when zooming out?This is due to the display in Affinity Photo. At 100% zoom you see the actual result.
Do I always have to add noise back after denoising?No, this is optional. However, artificial noise can help blend differently edited areas together and create a harmonious overall impression.


