
With the Pen tool in Affinity Photo, you don't draw with pixels but with vectors. You place anchor points, connect them into lines and curves, and thus get paths that you can edit at any time. This guide takes you step by step through the basics: from the first anchor point through curves, fills, and strokes to punching out, combining, and masking paths.
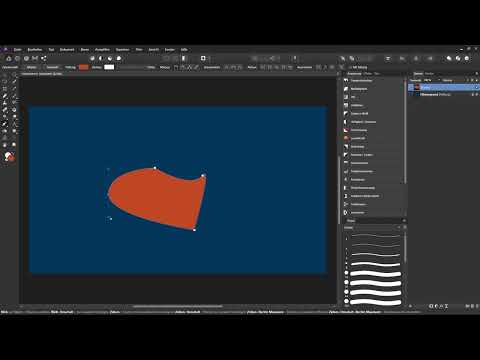
The video is only loaded from YouTube when you play it – data (including your IP address) is then transmitted to YouTube/Google. More in the privacy policy
Key Takeaways
The Pen tool creates paths from anchor points and curves, not pixel lines. Paths remain editable at any time until you convert them into a pixel selection. With the Control key you switch to the Node tool, and with the Alt key you edit individual handles. Using geometry options such as Subtract, Add, and Intersect, you combine paths with one another.
Step 1: Finding and Activating the Tool
You can find the Pen tool in the toolbar. It sits behind its own icon, which shares a group with other path tools. It's faster with the keyboard shortcut P, which activates the tool directly.

Step 2: Setting the First Anchor Points
A simple click in the image sets an anchor point. If you then set a second anchor point, Affinity Photo automatically connects the two with a straight line. You notice that no color has appeared in the image yet. You have merely set points and defined where the path should run.
Step 3: Creating Curves by Dragging
If at the next point you don't just click but hold down the left mouse button and drag, a curve is created between the anchor points. Two small handles appear at the anchor point, with which you control the curvature of the curve. Here too: the path itself remains fully editable.
Step 4: Editing Paths Afterwards
If you switch to the Move tool and click on the background, the image remains unchanged. The path exists as a curve layer in the Layers panel and is selected as soon as you click on it. If you return with the Pen tool, the path can be adjusted further at any time. A path initially has neither fill nor stroke; it consists only of the mathematical description of its lines.
Step 5: Editing Anchor Points and Handles with the Node Tool
If you hold down the Control key, you temporarily switch to the Node tool. With it, you move anchor points and handles without changing the entire path. So with the Control key held down, you can reshape a curve precisely. Both handles of an anchor point move synchronously, so that the curve stays smooth. If you lengthen one handle, the opposite one automatically rotates along with it.
Step 6: Closing an Open Path into a Shape
A path whose beginning and end are not connected is open. To close it, you select the path and click on the first or last anchor point until it appears as a red circle. If you then set another point and subsequently click on the first anchor point, a closed path is created. With the Control key held down, the connection area can be smoothed afterwards.
Step 7: Assigning Fill and Stroke
Once the path is selected in the Layers panel, you assign it a fill via the context toolbar at the top. A click on the fill area opens the color picker. The path keeps its fill even if you move its handles.
You add a stroke via the stroke button. The default width of one point often looks too thin for light strokes, so you simply set the thickness to a larger value, such as five points. In addition, you can change the line style, for example from a solid line to a dashed one.

Step 8: Setting the Stroke Alignment
With the alignment, you determine where the stroke lies relative to the path. You can leave it directly on the path line, have it start inside the path, or have it run outside. The first icon in the alignment removes the stroke again if you no longer need it.
Step 9: Moving Individual Handles Independently
If you want to move a handle independently of the opposite one, hold down the Control and Alt keys, click the handle, and drag it. The curve is deliberately broken at this point. This is especially helpful when tracing objects, for example for a cutout, and you need sharp transitions at certain places.
By holding down the Alt key, you can also remove individual handles. This creates a corner instead of a curve at that point. Conversely, you convert a corner into a curve by clicking and dragging the anchor point or by using the smoothing option in the context toolbar.
Step 10: Extending Handles Precisely
If you only want to extend a handle without moving it sideways, hold down the Control and Shift keys. When dragging, the handle is then stretched exclusively along its direction. This is a useful trick for very precise work.
Step 11: Punching Holes into Paths
To create a cutout, draw a second path inside the first one with the Pen tool active. The new path automatically gets its own curve layer. The stroke of the previous path is carried over, so if necessary, remove it using the "None" icon.
Then select both path layers by clicking the upper one and holding down the Control key while selecting the lower one. In the Geometry section, then choose Subtract. The upper path is subtracted from the lower one, the hole is created, and the Layers panel shows only a single path.

Step 12: Combining Paths and Using Overlaps
The same logic works in the other direction. If you select both paths and set the Add option in the Geometry section, they are merged into one continuous path. If you choose Intersect instead, only the area where both paths overlap remains. The result is placed on its own curve layer.
Step 13: Using Paths as Masks and Pixel Selections
For cutouts, the path is often the most important foundation. When the path is active, you can choose either Mask or Selection in the context toolbar. For the mask to affect the layer beneath it, the path must be located above that layer. The advantage of a path mask: you can readjust it at any time with the Pen tool.

A pixel selection, on the other hand, turns the path into a fixed selection, and the path disappears in the process. Therefore, you should create a backup copy of the layer beforehand, for example with Control and J. After that, you can create a pixel mask from the selection. Pixel masks can be painted more softly, but they lose the adjustability via the path.
Summary – Affinity Photo Pen Tool: Setting, Editing and Combining Paths
The Pen tool in Affinity Photo creates vector-based paths from anchor points and curves. You can access it via the toolbar or with the keyboard shortcut P. With the Control key, Alt key and Shift key, you control handles, corners and curves precisely. Closed paths can be filled and given strokes. Using the Geometry options, you combine paths by subtracting, adding and intersecting. Finally, you can use paths as adjustable masks or as fixed pixel selections for cutouts.
FAQ
What is the difference between the Pen tool and the brush?The Pen tool creates vector paths from anchor points and curves that you can edit at any time. The brush, on the other hand, paints pixels directly into the image.
How do I quickly activate the Pen tool?Press the keyboard shortcut P. Alternatively, you can find the tool in the toolbar.
How do I edit an anchor point without changing the entire path?Hold down the Control key to switch to the Node tool, and then drag the anchor point to the desired location.
How do I separate the handles of an anchor point from each other?Hold down the Control and Alt keys and drag the desired handle. This breaks the curve at that point.
How do I convert a curve into a corner?Hold down the Alt key and click on the anchor point. This removes the handles, and the point becomes a corner.
How do I punch a hole into a filled path?Draw a second path inside the first one, select both path layers, and apply the Subtract option in the Geometry section.
What happens when I create a pixel selection from a path?The path disappears because it is converted into a fixed selection. Therefore, create a backup copy of the layer beforehand.


