
An alarm clock with rounded housing shapes, straight edges and fine details is an ideal practice object for cutting out. This is exactly what video trainer Marco Kolditz uses in this tutorial to show you how to create a clean path around a technical object in Affinity Photo with the Pen Tool. You will learn how to set anchor points, shape curves with handles, skillfully combine straight lines and curves, and finally create a non-destructive path mask or a pixel mask.
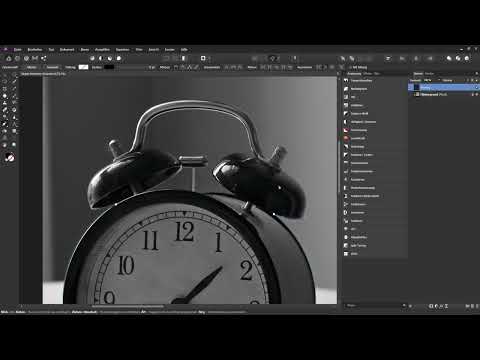
The video is only loaded from YouTube when you play it – data (including your IP address) is then transmitted to YouTube/Google. More in the privacy policy
The tutorial is suitable for anyone who already knows the basics of the Pen Tool. If the tool is still unfamiliar to you, it is worth taking a look at the previous lesson on this topic.
Key Takeaways
A path is made up of anchor points, which you only set where the course of the path actually changes. You shape curves using handles, which you edit with the Control key. With the combination of the Control and Alt keys, you remove or detach individual handles in order to separate straight lines and curves cleanly. For cutting out, you subtract inner paths from the outer path so that only the actual object remains. The path mask remains editable, while a pixel mask is created from a selection.
Step-by-Step Guide
Step 1: Activate the Pen Tool and work with the Node Tool
First, select the Pen Tool in the toolbar. You can also conveniently access it using the keyboard shortcut P. The Node Tool, which you need for fine-tuning, is in the same tool group. You don't have to select it via the toolbar: with the Pen Tool active, simply hold down the Control key and you switch immediately to the Node Tool. As soon as you release the Control key, you are back at the Pen Tool. You will use this switching constantly throughout the entire process.

Step 2: Navigate and set the first anchor point
Now zoom into the image and find a spot where your path should begin. To move the image section, hold down the space bar and drag with the mouse. This way you move comfortably through the entire photo without constantly switching tools. Then click on the desired starting point at the edge of the object. The first anchor point is created, but nothing happens yet in the Layers panel. The path layer is only created once you set the second anchor point.

Step 3: Shape curves with anchor points and handles
Many beginners set an unnecessary number of anchor points right next to each other. This leads to uneven paths and a lot of rework. Instead, pay attention to where the course actually curves. To create a curve, you click on the spot and keep the mouse button pressed. If you now drag, two small handles appear, with which you shape the curve.
To edit a handle afterwards, you switch to the Node Tool by holding down the Control key, click on the handle and drag it in the desired direction. You also move the anchor point itself while holding down the Control key, until the blue path runs exactly along the edge of the object. It often helps to also use the opposite handle to achieve a smooth transition.

Step 4: Create straight lines and remove handles
Not every section is curved. For straight edges, you remove the handles of an anchor point. To do this, hold down the Control and Alt keys and click on the respective handle. It disappears, and the anchor point then describes a curve in only one direction or none at all. With this technique, continuous, clean straight lines are created, for example on a straight foot or on an edge of the housing.
If you don't want to remove a handle but only move it independently of the other, you also hold down the Control and Alt keys, click on the handle and drag it. This way, both sides of an anchor point can be controlled separately.

Step 5: Trace the outer path completely
Work your way step by step around the entire outer edge of the alarm clock. You have to look closely, especially at tight corners. Set an anchor point and adjust the handles so that the path does not lie outside the object, but directly on the edge or minimally inside. Especially in areas where you have to go around a corner, it helps to deliberately change the handle of the previous point. Take your time with this section. With every repetition, your results become noticeably more precise.
When the outer path is finished, you will see the path displayed in blue, including all anchor points. It sits on its own path layer in the Layers panel. Rename this layer, for example to "Outer path", so you can keep track later.

Step 6: Capture inner areas with additional paths
The outer path also includes areas that do not belong to the alarm clock and where the background should be visible. These gaps must become transparent later. To do this, you create additional paths inside the outer path. Set a new anchor point and drag to create the curve. Here, too, the same rule applies: a visible path only appears from the second anchor point onward, and you shape every curve using the handles. Separate straight lines and curves consistently by removing unnecessary handles with the Control and Alt keys.
Rename each inner path meaningfully, for example to "inner left" and "inner right". This way you keep an overview when you combine multiple paths with each other later.

Step 7: Create a backup and combine the paths
Before you continue working, you should create a backup. Select the path "Outer path" and press Control and J to create a copy. Rename it, for example, to "Outer path backup" and hide it. Now it's time to combine them. Select the top path, hold down the Shift key, and click on "Outer path". This way you select all paths in between at the same time.
The two inner paths should be subtracted from the outer path. To do this, select the geometry option in the Layers panel and use the "Subtract" command. Afterwards, only a single path remains. Rename it to "Alarm clock path". It now really only encompasses the alarm clock itself.
Step 8: Fill the path as a test
To check the result, select the alarm clock path and fill it with any color in the context toolbar at the top, for example a gray value. The alarm clock is now displayed in gray, while the remaining areas show the background of the original image. This way you can see immediately whether the contour is right. Afterwards, you can remove the fill again.

Step 9: Create a path mask
For a non-destructive cutout, drag the alarm clock path downward in the Layers panel and place it between the photo's thumbnail and its name. A blue vertical line shows you the insertion position. When you release it, a path mask is created. The big advantage: you can edit it at any time. To do this, select the Pen tool, hold down the Control key, and move individual anchor points until the cutout fits perfectly.

Step 10: Alternatively, create a pixel mask
If you would rather convert the selection into pixels, that works as well. Select the alarm clock path and click "Selection" in the context toolbar. The selection is now visible. Then select the background layer and click the icon for a new mask in the Layers panel. A pixel mask is created. You can then deselect the selection with Control and D. The object is now cut out.
Summary ??? Cutting out a technical object with the Pen tool in Affinity Photo
You have seen how to cleanly cut out an alarm clock in Affinity Photo using the Pen tool. You placed anchor points only where they were necessary, shaped curves using handles, and created straight lines by removing individual handles. With backups, the subtraction of inner paths, and the subsequent path or pixel mask, you have achieved a result that you can refine further at any time. With every exercise, the tool becomes more familiar and the paths become precise more quickly.
FAQ
How do I quickly switch to the Node tool?With the Pen tool active, hold down the Control key and you are immediately in the Node tool. When you release the key, you return to the Pen tool.
Why isn't a path layer created at the first click?The path layer is only created as soon as you set the second anchor point. A single point does not yet form a path.
How do I remove a handle to get a straight line?Hold down the Control and Alt keys and click on the handle. It disappears, and the segment becomes straight.
How do I move one handle independently of the other?Hold down the Control and Alt keys, click the handle, and drag it. Both sides of an anchor point can thus be controlled separately.
How do I navigate through the image while drawing?Hold down the space bar and drag with the mouse. This way you move the image section without switching tools.
Why shouldn't I set an anchor point at every centimeter?Too many anchor points create uneven paths and make later editing more difficult. Set points only where the course really changes.
How do I remove inner areas from the outer path?Create inner paths and subtract them from the outer path. To do this, select all paths and use the "Subtract" command in the Layers panel.
Why should I create a backup before combining?The backup can be created with Control and J. If the result doesn't fit, you can fall back on the original outer path at any time.
What is the difference between a path mask and a pixel mask?The path mask remains editable and can be adjusted with the Pen tool at any time. The pixel mask is created from a selection and can therefore no longer be changed directly via the path.
How do I deselect a selection?Press Control and D, and the selection is deselected.


