
Make an image visible only in certain areas, let transitions blend smoothly, or isolate a subject without losing pixels: you use layer masks for this. They are among the most important tools in Affinity Photo because they work non-destructively. Your original image remains untouched, and every change can be undone or adjusted later. In this tutorial, you'll get to know the different types of masks and learn how to create, edit, and combine them.
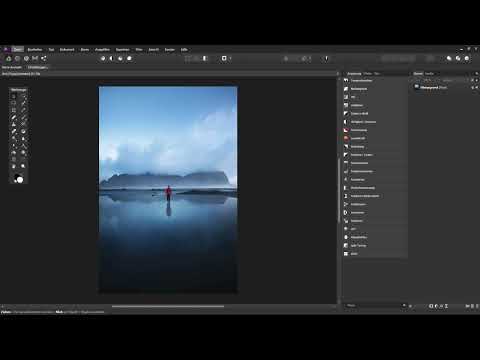
The video is only loaded from YouTube when you play it – data (including your IP address) is then transmitted to YouTube/Google. More in the privacy policy
Key Takeaways
- Black hides, white reveals, shades of gray create transparency.
- You create masks using the mask icon at the bottom of the Layers panel. Holding down the Alt key creates a black mask.
- You paint pixel masks with a brush or gradient; vector masks are created from shapes and remain adjustable afterwards.
- A mask acts as a masking layer on all layers beneath it. Its position in the Layers panel determines what it affects.
- Selections can be converted into masks, and masks can be converted back into selections.
- Multiple masks on one layer can be edited independently of each other.
Step-by-Step Guide
Step 1: Create the first mask
Load your image into Affinity Photo. The background layer is often locked, but that doesn't interfere with masking. Select the layer in the Layers panel and click the mask icon at the bottom. A white mask is created, which leaves everything visible. Therefore, nothing changes in the image at first. If you hold down the Alt key while clicking instead, you create a black mask that hides the entire layer. The checkerboard pattern then shows you that nothing is visible anymore.

Step 2: Check masks and select them precisely
To check the content of a mask, hold down the Alt key and click on the mask's thumbnail. You then see only the mask, for example completely black or white. Clicking on the layer brings the image back. When selecting the mask, make sure to click exactly on the thumbnail. If you click on the name or the area in between, you are working on the layer instead of the mask.

Step 3: Reveal areas with the Paint Brush
With a black mask, the image is completely transparent. To make parts visible again, select the Paint Brush tool and set the color to white. Make sure the mask is selected and paint over the desired areas. The preview immediately shows where the image appears. By holding down the Alt key, you can check at any time that the areas are actually white in the mask.

Step 4: Create smooth transitions with a gradient
The Gradient tool is well suited for soft transitions. Select the mask, activate the gradient, and drag it from bottom to top. Set black at the bottom and white at the top. The image is then hidden at the bottom edge and revealed at the top edge. In between, partial transparencies are created that form a soft transition. With an Alt-click on the mask, you can see the gradient in grayscale.

Step 5: Invert and delete masks
With Ctrl+I, you reverse the effect of a selected mask. Everything that was black before becomes white, and vice versa. If you want to remove a mask, drag it onto the trash icon at the bottom of the Layers panel, or select it and press the Delete key. Afterwards, the entire image is visible again.

Step 6: Control the hardness of the Paint Brush
With the Paint Brush, you use the hardness to determine how sharp the edge of the mask is. With a hardness of 100 percent, you get a hard contour. If you reduce the hardness to 0 percent, the transition becomes soft. It's best to test this on a test mask and check the result using the Alt key and a click on the thumbnail.
Step 7: Understand the mask as a masking layer
A mask in Affinity Photo is a masking layer that acts like a child layer of the layer above or below it. If you drag the mask all the way to the top in the Layers panel, nothing changes in the image at first. However, it now affects all layers beneath it. If you create an orange fill layer and drag it over the mask, it will also be masked according to this logic. The position of the mask thus determines which layers it affects.
Step 8: Punching holes in layers with masks
If the mask is at the very top, it effectively punches holes in all the layers beneath it. You then see the transparent area through the fill layer and the background layer. If you instead move the mask between the fill layer and the background, it only affects the fill layer. This way you determine exactly which layers are affected. By moving the mask in the Layers panel, you can change this at any time.

Step 9: Creating selection masks
Masks do not necessarily have to be painted with the brush. Choose the Lasso or Freehand Selection tool and drag a selection around an area. With the layer active and the selection active, click the mask icon at the bottom. The mask then shows only the selected area. The selection remains active afterward. If you deselect it with Ctrl+D, the mask remains.
Step 10: Turning a mask back into a selection
Sometimes you need the content of a mask as a selection, for example to process it further. To do this, hold down the Ctrl key and click the mask's thumbnail. Affinity Photo immediately creates a selection along the bright areas of the mask. With Ctrl+D you deselect this selection again.
Step 11: Combining multiple masks on one layer
A layer can have multiple masks that influence each other but remain individually adjustable. Select the fill layer, create another mask, and paint over an area in black with a soft, larger brush. The first mask remains untouched by this. If you hide the second mask, the first is completely intact again. This principle is especially practical for tasks such as beauty retouching, where you want to control several adjustments independently of each other.
Step 12: Creating a path mask with a shape layer
In addition to pixel masks, there are path masks, which are particularly suitable for technical objects with straight lines or clear curves. For example, choose the Ellipse tool and drag out a shape. While dragging, hold down the Shift key to get a perfect circle. The shape is a shape layer, and its color does not matter for the mask. To turn it into a mask, drag the shape layer onto the vertical bar between the thumbnail and the name. Hitting this bar takes a bit of practice. When you release, the path mask is created.
Step 13: Adjusting path masks afterward
A big advantage of path masks is that you can correct them at any time. Select the mask with the Move tool and move the circle to the desired position. You can also enlarge, shrink, or rotate the shape. With Alt-click on the thumbnail, you see the mask in its form. Note: only the position and size of the shape matter, not its color.
Step 14: Applying layer effects to masks
Masks can also be edited with layer effects. One example is the Gaussian Blur, which you apply to the path mask via the FX icon in the layer effects. This makes the edge of the mask softer. The effects themselves are covered in more detail in a separate guide. When you no longer need the effect, you simply deactivate it again via the FX icon.

Step 15: Combining path and pixel masks
You can combine a path mask with a pixel mask. To do this, choose the Brush tool, set the color to black and the hardness to 0 percent. Then paint over an area that you want to hide additionally. Since both masks remain separate, you can show and hide each one individually. This way, complex cutouts can be built up step by step.
Step 16: Using the Erase blend mode
A mask is not the only way to make areas transparent. With the Erase layer blend mode, a layer punches out all the layers beneath it. To do this, create a text or a pixel layer above other layers and select the Erase entry in the layer blend modes. With a pixel layer at 0 percent hardness, this creates a soft transition. The blend mode is particularly suitable for quick breakthroughs and light effects.
Summary ??? Mastering layer masks in Affinity Photo: Selectively hiding areas
Layer masks are a versatile tool in Affinity Photo with which you can show or hide areas of a layer. Black hides, white reveals, and shades of gray create transparency. You work with pixel masks, which you paint or fill with gradients, or with path masks, which you create from shapes and adjust at any time. Selections can be converted into masks and vice versa. Since masks act as masking layers on the layers beneath them, you determine through their position in the Layers panel which layers are affected. With multiple masks, you combine different adjustments without altering the original image.
FAQ
How do I create a black mask instead of a white one?Hold down the Alt key while clicking the mask icon at the bottom of the Layers panel, and a black mask will be created that completely hides the layer.
How do I see the content of a mask?Hold down the Alt key and click the mask's thumbnail. Clicking the layer brings the image back.
How do I invert the effect of a mask?Select the mask and press Ctrl+I. Black areas become white and white areas become black.
What is the difference between a pixel mask and a path mask?A pixel mask is created by painting or using gradients with grayscale values, while a path mask is based on shapes or paths that can be moved, scaled, and rotated afterward.
How do I convert a mask back into a selection?Hold down the Ctrl key and click the mask's thumbnail. Use Ctrl+D to deselect again.
Why is my mask suddenly affecting other layers?A mask acts as a masking layer on all layers below it. Move it in the Layers panel to change its area of effect.


