
Before you start retouching, coloring, or compositing in Affinity Photo, your image first has to get into the program. That is exactly what this tutorial is about. You will learn the classic ways via the menu, quick techniques using drag-and-drop, and how to handle foreign file formats such as Photoshop files. I will also show you how to keep track of things when many documents are open at the same time.
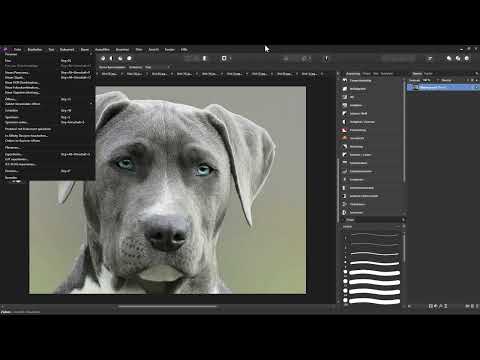
The video is only loaded from YouTube when you play it – data (including your IP address) is then transmitted to YouTube/Google. More in the privacy policy
The starting point is an empty program window with no open document. The tools are then inactive, and that is exactly why all of the following steps begin with opening a file.
Key Takeaways
- The classic way is via "File > Open". In the file dialog, you can preview images beforehand in the preview window.
- Each opened image gets its own tab. With Ctrl + Tab, you switch between them in a flash.
- You select multiple files with the Shift or Ctrl key and open them together.
- If you drag a file from Explorer onto an open document, it is placed there as a new layer. If you drop it outside the document, it opens as its own document.
- Photoshop files (PSD) can be opened, but not all functions are compatible. Text and filters on smart objects are particularly affected.
Step-by-Step Guide
Step 1: Load an Image via "File > Open"
The classic is the "File" menu item with the "Open" command. After clicking, a selection window appears that resembles the Windows Explorer. Here you navigate to the storage location of your image file, select it, and confirm with "Open". The image then appears in the program window.

Step 2: Use the Preview Window
Before you commit, you can click an image in the selection window. A larger preview then appears. By dragging its edge, you change the size of the view. Clicking again hides the preview. This way you reliably find the right image before you open it.

Step 3: Understand the Background Layer
After opening, your photo is present in the Layers panel as a background layer. This layer is locked by default. This means you cannot yet move it with the Move tool. You remove the lock in the Layers panel. How to work with layers will be covered in detail in a later tutorial.

Step 4: Check File Name, Storage Location, and Zoom Level
At the top of the document window, you see the file name. When you hover the mouse over it, the full storage location on your hard drive is displayed. In parentheses you will also find the current zoom level. Pay attention to it, because the zoom level determines how much of the image you currently see.
Step 5: Switch Between 100% and Fit
If you want to view the image one to one, that is, at 100% zoom, double-click the Zoom tool. Alternatively, press Ctrl + 1. To fit the image completely into the window again, double-click the View tool or press Ctrl + 0. The image is always displayed to fit, regardless of its size.

Step 6: Read Image Dimensions and Color Information
Select the View tool in the toolbar, recognizable by the small hand. The context toolbar at the top then adapts. There you see width and height in pixels as well as the number of megapixels. The bar also shows you the color format, such as RGB/A, where the A stands for alpha or transparency, the color depth of 8 bit, and the current color profile.

Step 7: Open a Second Image and Switch Between Tabs
If you open another image via "File > Open", it appears immediately in a new tab above the document window. Clicking the respective tab shows you the corresponding image. Switching is even faster with the key combination Ctrl + Tab.

Step 8: Use the window list as an alternative
Besides the tabs, you can have all open documents listed under "Window". There you can see all currently available images and switch between them with a single click. This option is especially handy when you lose track of things.
Step 9: Open multiple images at the same time
You don't have to open each image individually. In the selection window, select the first image and hold down the Shift key. Clicking the last image also selects all the files in between. If you want to select individual, non-adjacent files, hold down the Ctrl key instead and click the desired images one after another. Then confirm with "Open".

Step 10: Keep track when you have many tabs
With numerous open documents, the tabs become very narrow, and the file names are barely legible. A double-arrow icon then appears. Clicking it shows you the complete list of all open images. The document currently displayed is marked with a checkmark.

Step 11: Close documents and check the startup option
You close images using the small x in the respective tab. Affinity Photo currently has no menu item that closes all documents at once. If you quit the program and open it again, the previously opened documents are reloaded, provided the setting "Reopen documents on startup" is enabled. You can find it under "Edit > Preferences > General". Disable this option if you want to start with an empty workspace the next time you launch.

Step 12: Find recently used files again
Affinity Photo saves the ten most recently opened files. You can find them under "File > Open Recent". Clicking an entry opens the image directly. You can clear the list at any time using the "Clear" entry at the bottom.

Step 13: Show the storage location in Explorer
If you can't remember where an image is located on your hard drive, the command "File > Open Folder in Explorer" will help. This opens the folder containing the document in Explorer, and the file is already highlighted.

Step 14: Open directly via drag and drop
The fastest way is via Explorer. Select the desired image and drag it with the mouse button held down into the Affinity Photo window. When you release the mouse button, the image opens as a new document.

Step 15: Be careful when dropping onto an open document
If you drag a second image onto an already open document, it is not opened as a separate file. Instead, it ends up as a new layer in the existing document, above the existing layers. If you want to open the image separately instead, drag it to the area outside the document frame, for example onto the top bar, and release it there.

Step 16: Place an image deliberately in the document
If you want to place an image within an existing document, you can likewise drag it in from Explorer or use the command "File > Place". The mouse pointer then changes. Clicking in the center of the document determines where the center point of the new image will be.
Step 17: Open Photoshop files (PSD)
Affinity Photo can also open files in PSD format, that is, Photoshop's default format. To do so, choose "File > Open" and, if necessary, switch the file type in the file dialog to "All Documents". After opening, you will see all layers of the original Photoshop file in the Layers panel.

Step 18: Recognize the limitations of importing
A PSD import does not always work completely. Simple layers such as image layers, curves adjustments, color balances, or shapes usually remain editable. A blur on a layer, on the other hand, has already been applied and can no longer be adjusted. Text layers from Photoshop are also often rasterized, so you can no longer edit them as text. Smart objects with filters are also problematic. Therefore, whenever possible, plan your work in Affinity Photo yourself from the start, instead of shuffling a file back and forth between the two programs.

Summary ??? Opening Images in Affinity Photo: All Ways at a Glance
You now know the most important ways to load images in Affinity Photo. The menu item "File > Open" offers you a preview window and multiple selection. Tabs, the window list, and Ctrl + Tab help you keep track. The Explorer can be integrated via drag-and-drop, but you should pay attention to the drop location. With PSD files, always check which layers actually remain editable.
FAQ
What is the fastest way to open an image in Affinity Photo?The fastest way is drag-and-drop: Drag the file from the Explorer into the program window, and release it outside of an open document.
Why does my image end up as a layer in another document?You dragged the file onto an already open document. Instead, drop it outside the document frame so that it opens as its own document.
Can I open several images at the same time?Yes, in the file dialog you select a range with the Shift key or individual images with the Ctrl key and confirm with "Open".
How do I switch quickly between open images?Press Ctrl + Tab, click on the corresponding tab, or use the list under "Window".
Why can't the background layer be moved?The background layer is locked by default. Unlock it in the Layers panel before you move it.
Will my documents be reopened after a restart?That depends on the option "Reopen documents on startup" under "Edit > Preferences > General". If it is active, the documents are loaded again.
Can I close all documents at once?In the current version there is no command for this. Close the tabs individually via the x or quit the program.
Can I fully edit Photoshop files in Affinity Photo?Not always. Simple layers usually work well, while text, smart objects with filters, and already applied effects are only partially editable or not editable at all.


