
With the Gradient Map, you can not only recolor an image but also control its colors and brightness levels in a targeted way. The tool does not work with the existing colors of your photo, but with its tonal values, meaning the gradations between black and white. That is exactly what makes it so versatile: You can create black-and-white conversions, mix duotone or sepia tones, and develop entire color looks. In this tutorial, I will guide you through the complete workflow in Affinity Photo, from analyzing the histogram to saving your own presets.
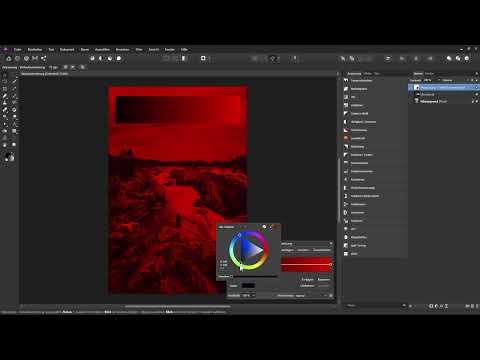
The video is only loaded from YouTube when you play it – data (including your IP address) is then transmitted to YouTube/Google. More in the privacy policy
Key Takeaways
The Gradient Map is based on the tonal values of an image, not on its colors. The left area of the gradient represents the dark tones, the right area the light tones. With anchor points, you determine which color is assigned to which tonal value level. You save your own presets so that you can recall your favorite looks at any time.
Analyzing the Source Image and the Histogram
Before you work with the gradient, you should know which tonal values actually occur in your photo. Open your image in Affinity Photo. It is available as a background layer. To take a look at the distribution of brightness values, go to the Studio area via the View menu and open the Histogram there.
There you can see how the tonal values are distributed from pure black to pure white. In the example, the tonal values only begin at a dark gray and end at a very light gray. So the image contains neither a completely black nor a completely white pixel. This is an advantage, especially for photos that are to be printed later, because it results in neither crushed shadows nor blown-out highlights. Close the histogram afterwards, you won't need it for the further work.

Creating a Rectangle Layer with a Black-and-White Gradient
To better understand the effect of the Gradient Map, you need a template that contains all tonal values. To do this, you create a rectangle layer by simply drawing out an area with the Rectangle Tool. You set the fill of this rectangle to a gradient from black to white. This way you see a continuous tonal gradient in the layer, which later forms the basis for the coloring.

Adding the Gradient Map as an Adjustment Layer
Above the rectangle layer, you now create an adjustment layer of the type Gradient Map. Don't worry if the image looks very colorful at first. By default, a gradient from red through green to blue is stored. This gradient is applied to all tonal values below it. So dark areas are colored red, midtones green, and light areas blue.
In the dialog box of the adjustment layer, you see the gradient with its anchor points. Each anchor point represents a color at a specific position in the tonal range.

Applying the Gradient Map to the Black-and-White Gradient
To make the coloring easier to follow, it is worth looking at the effect on the black-and-white gradient. The rectangle layer now shows the tonal values that are colored by the gradient. You can clearly see that the darkest tones appear red, the midtones green, and the lightest tones blue. The tones in between follow the gradient smoothly.

Changing the Color Distribution with Anchor Points
Now it gets interesting. You can drag individual anchor points out of the gradient to remove colors in a targeted way. To do this, click the middle anchor point, hold down the left mouse button, and drag it out of the gradient. The anchor point disappears, and you are left with only a gradient from red to blue. This makes the effect softer, since the midtones now lie between the two remaining colors.

With the Reverse button, you flip the gradient. Then the blue is on the left and the red on the right. Feel free to try this out to see how the mood of your image changes.

Choosing colors and adjusting the gradient
You don't have to keep the garish default colors. Select an anchor point and click on the color swatch to set a new color. Keep in mind that the dark tonal values are on the left side and the light ones on the right side. For example, if you set a white on the right side and a black on the left, you instantly get a clean black-and-white conversion based on the tonal values of your image.

Adding additional anchor points
You can add as many anchor points as you like within the gradient. Simply click on the line of the gradient, and a new anchor point will be created at that spot. If you need a point exactly in the middle between two existing anchor points, select the left anchor point and click Insert. This automatically creates a new point in the middle between it and the next anchor point. You can repeat this procedure as often as you like.

The new anchor points can then be edited in the same way. Select a point, click on Color, and choose a different tone, such as a red or a specific shade of gray. This is how you fine-tune your black-and-white conversion down to the finest detail.

Moving anchor points and fine-tuning the tonal value distribution
Anchor points can not only be colored but also moved. If you drag them to the left or right, it changes which tonal ranges are emphasized more or less. In the example, after the adjustment the dark areas dominate, and the transition to light gray tones is much softer. In this way, you can refine the look of your image step by step.

You remove anchor points by selecting them and clicking Delete. Alternatively, you can simply drag an anchor point out of the line while holding down the left mouse button.

Creating duplex, sepia, and mixed tones
Classic looks can be created with just a few steps. For a duplex conversion, for example, you replace the black in the dark area with a cooler blue tone. This creates a two-color effect in which the shadows and the highlights are toned differently.

For a sepia look, you choose a brownish color tone for the anchor points and make it a little darker. And a sepia conversion is already achieved. If you reverse the gradient, you also get a negative. You can likewise place an orange tone in the middle so that the image looks warmer overall, or use a completely different color such as a green tone.


Creating and saving your own presets
If you use the gradient map frequently, it's worth saving your own presets. If you create a new gradient map via the Adjustment panel, you will first see the default colors, which are of little use. You can remove the middle anchor point, choose a black on the left side and a white on the right, and darken the gradient according to your own preferences. And you already have a clean black-and-white conversion.

Then click Add Preset, give your preset a name such as Black-and-White 1, and confirm with OK. From then on, it appears as a choice in the presets area. With a right-click on a preset, you can delete it again, so that only the presets you actually want to use remain.

Incidentally, in the presets area you will also find ready-made looks. A preset such as Nuclear tints your image in red and yellow tones. A click on the black-and-white preset then takes you back to the classic conversion.

Summary ??? Gradient Map in Affinity Photo: Explained Step by Step
The Gradient Map is a versatile tool that lets you colorize images based on their tonal values. You start by analyzing the histogram, create a template with a black-and-white gradient, and add the adjustment layer on top of it. Then you use anchor points to control which colors the dark, mid, and light tones receive. You can reverse gradients, insert, move, or delete anchor points, and use them to develop black-and-white, duotone, sepia, or color looks. Save your favorite settings as presets so you can quickly recall them for every new project. Feel free to experiment extensively with the gradient, because that's how you discover the looks that suit your photos best.
FAQ
Do I have to use a rectangle layer for the Gradient Map?No, the rectangle layer only serves as a template so that you can see the effect on the tonal values right away. You can also place the adjustment layer directly over your actual image.
Why does my image look so colorful after adding the adjustment layer?By default, a gradient from red through green to blue is applied. It is applied to all tonal values until you adjust the colors to your liking.
How do I create a black-and-white conversion with the Gradient Map?Choose a black on the left side of the gradient and a white on the right side. The tonal values of your image will then be converted to grayscale.
How do I add a new anchor point at a specific position?Click on the gradient line, and a new anchor point will be created at that spot. For exact placement midway between two points, use the Insert button.
How do I remove an anchor point again?Select the anchor point and click Delete. Alternatively, drag it out of the gradient line while holding down the left mouse button.
How do I save my own Gradient Map as a preset?Adjust the gradient and click Add Preset. Enter a name and confirm with OK. The preset will then be available to you in the presets area.
How do I delete a saved preset?In the presets area, right-click the preset and select the option to delete.
Can I also create a sepia look with the Gradient Map?Yes, choose brownish tones for the anchor points and adjust the brightness. This quickly gives you a sepia effect.


