
Editing a large image on screen quickly becomes tedious if you can't make out details or constantly have to scroll back and forth. This is exactly where the View Tool and the Zoom Tool in Affinity Photo come in. They don't change the image itself, only your view of it. In this tutorial, you will get to know both tools, learn how to zoom in and out smoothly using the mouse, keyboard, and context toolbar, and discover how rulers and measurements help you with your work.
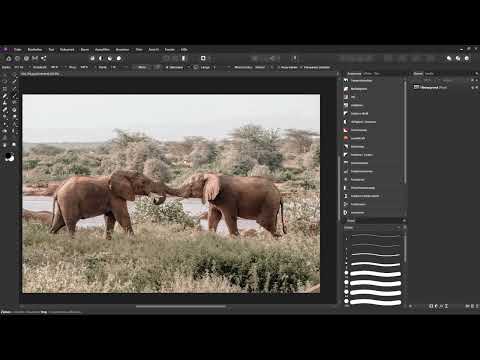
The video is only loaded from YouTube when you play it – data (including your IP address) is then transmitted to YouTube/Google. More in the privacy policy
Key Takeaways
- The View Tool (hand icon) only moves your view of the document, not the image itself.
- The Zoom Tool (magnifying glass) enlarges and reduces the view by clicking, dragging, or selecting a frame.
- With the mouse wheel, the space bar, and keyboard shortcuts, you can quickly switch between zoom levels and navigation.
- Via the context toolbar, you set zoom levels and see document information such as dimensions, megapixels, and color format.
- Rulers and units of measurement can be shown and changed under "View".
Step-by-Step Guide
The Two Tools at a Glance
You can find both tools in the toolbar. You recognize the View Tool by the small hand icon, and the Zoom Tool by the magnifying glass with the plus or minus symbol. At the beginning, it is recommended to open the example image and try out the tools one after another.

Zooming with the Mouse Wheel
The fastest way to zoom in or out of the image is via the mouse wheel. If you push it forward, the view enlarges; backward, it shrinks. This function can be activated under "Edit" and "Preferences" if it is not yet set up for you. I recommend that you use this setting permanently, because it saves an incredible amount of time.
Zooming with the Zoom Tool by Clicking
Select the Zoom Tool. With each click, you get closer to the image. If you additionally hold down the Alt key, the icon changes to a minus, and each click then zooms out a little. This way you can go into areas in a targeted manner and gain distance again without switching tools.


Smooth Zooming by Dragging
If you want to work more precisely, hold down the left mouse button and move the mouse to the right. This lets you zoom smoothly into the image. If you drag to the left, the view shrinks accordingly. This method is particularly suitable when you are looking for a zoom level that lies between the fixed presets.

Enlarging Specific Areas with a Frame
With the Zoom Tool, you can also mark a specific section. Hold down the Alt key and drag a frame around the desired area. As soon as you release the mouse button, exactly this content is displayed enlarged. This is especially handy when you want to check or retouch a small detail.

Restoring the Full View
If you have zoomed in a lot, you can bring back the complete image with the key combination Ctrl and zero. The image is then automatically fitted to the current document window. Alternatively, a double-click on the hand icon is enough, which also fits the view.


Setting Zoom Levels via the Context Toolbar
If you like to be exact, use the context toolbar of the Zoom Tool. There, in the "Zoom" area, you can type in a value numerically or choose one of the preset options, such as 100 percent. At 100 percent, one pixel of the image corresponds exactly to one pixel on your monitor, which is crucial for assessing sharpness and details. Zooming is just as easy with the slider in the context toolbar.

Navigating with the View Tool
The View Tool is used to move the visible area. Clicking and dragging changes your view of the document without changing anything in the image. A double-click fits the view to the window again completely. It is especially useful that you can call up the View Tool briefly at any time, even when another tool is active. To do this, hold down the spacebar. An example: With the Paint Brush active, the mouse pointer turns into the hand icon while you hold the spacebar. When you release the key, you immediately continue working with the Paint Brush.


Reading Document Information in the Context Toolbar
As soon as you have the View Tool active, the Context Toolbar displays important information about the open document. This includes the dimensions in pixels, the number of megapixels, the color format such as RGB with 8 bits, and the embedded color profile. If camera data is also stored in the image, it is displayed as well. In the example it is missing, which is why only the basic data appears.

Changing Units of Measurement
You can also select the units via the Context Toolbar. Pixels are set by default. If you switch to millimeters, meters, or inches, initially nothing visibly changes in the display in the document window. The new units only become relevant when you show rulers, because that is where the measurements actually become visible.
Showing Rulers
Go to the "View" menu and select "Show Rulers". Rulers now appear at the top and on the left, starting with the zero point in the upper left corner of the document. The values depend on the selected unit. If you switch from pixels to millimeters, for example, you immediately see the exact millimeter values. In daily work you often stay with pixels, but for print projects a different unit can make more sense. You can hide the rulers at any time via the same menu.

Zooming with the Keyboard
You can also zoom using the keyboard, although in coarser steps. With Ctrl and the one you reach 100 percent, with Ctrl and the two 200 percent, with Ctrl and the three 400 percent, and with Ctrl and the four 800 percent. You cannot zoom in further using the keyboard. For finer levels, use the mouse wheel or the Context Toolbar.


Summary ??? Affinity Photo View and Zoom Tool: Mastering Navigation in the Document
The View Tool and the Zoom Tool are your most important companions when you want to work precisely in Affinity Photo. The hand icon moves your view, the magnifying glass enlarges and reduces it. With the mouse wheel, the spacebar, marquee selections, and keyboard shortcuts, you quickly get to any spot. The Context Toolbar gives you exact zoom values and document information, and the rulers help you check measurements in the desired unit. Practice the tools on any image, and navigation will quickly become routine.
FAQ
How do I zoom quickly with the mouse?Use the mouse wheel: scroll forward to zoom in, backward to zoom out. If this function is not active, you can enable it under Edit and Preferences.
What is the difference between the View Tool and the Zoom Tool?The Zoom Tool changes the magnification of the view. The View Tool merely moves the visible area without changing the zoom factor.
How do I display the entire image again?Press Ctrl and the zero. The image is then fitted to the current document window. Alternatively, a double-click on the hand icon helps.
How can I use the Hand Tool without switching the active tool?Hold down the spacebar. The mouse pointer then temporarily changes to the hand icon. After you release it, you work with the previous tool again.
How do I set a zoom level of 100 percent?You can press Ctrl and the one or select the value 100 percent in the Context Toolbar in the Zoom area. At this level, one image pixel corresponds to one monitor pixel.
What are the rulers for?The rulers show measurements along the top and left edges of the document. The values depend on the selected unit, such as pixels or millimeters.


