
Imagine you have worked on a photo for hours, raised the contrast, adjusted the colors, and retouched an area. Later you notice that the contrast is too strong after all. Without layers, you would have to start over. With layers, you simply change the layer in question and everything else remains untouched. That is exactly what this tutorial is about: You will learn how to work with layers in Affinity Photo, how to name, arrange, and group them, and how to combine them with shapes and masks.
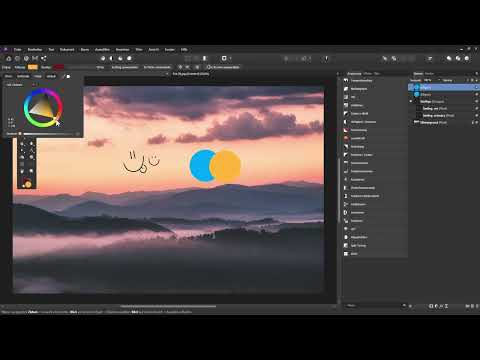
The video is only loaded from YouTube when you play it – data (including your IP address) is then transmitted to YouTube/Google. More in the privacy policy
The guide is based on the second part of the basics series "Working with Layers". You can follow all the steps directly if you open an image of your own and work alongside the video.
Key Takeaways
- Layers enable non-destructive editing, in which the original image remains unchanged.
- Each new layer is created above the most recently selected layer, not necessarily at the very top.
- A background layer is locked by default and must be unlocked before it can be moved.
- Pixel layers are rasterized, whereas shape layers stay sharp even when resized.
- With Ctrl (multiple selection) and Shift (range selection), you select layers selectively in order to group them.
- Clipping masks and vector masks limit the visibility of a layer to the area of a layer beneath it.
Step 1: Show the Layers Panel and Understand the Background Image
Before you get started, you need the Layers palette. If it is not visible on your screen, open the View menu, choose Studio, and then click Layers. The palette will then appear on your screen.
Now take a close look at the Layers palette. A newly opened image appears there as a background layer. On the left you see a small preview, and next to it the name. For a new image, this is automatically "Background". The type of layer is shown in parentheses, in this case a pixel layer.


Step 2: Unlock the Background Layer
To the right of the background layer, you will find a small lock icon. It indicates that the layer is protected. If you now select the Move tool and drag on the image, nothing happens, even though the layer is highlighted in blue. It is selected but cannot be moved.
If you still want to move or scale the layer, click the lock icon at the top right of the active layer. This removes the protection, and instead of the small X symbols, anchors appear on the transformation frame. If you want to reactivate the protection, click the lock again.
Step 3: Control the Visibility and Names of Layers
To the right of each layer there is a small checkbox with a checkmark. This determines whether the layer is visible. If you remove the checkmark, the layer is hidden. If you set it again, it reappears in the image. This way you can check at any time how your image looks with or without certain layers.
Names can also be changed at any time. Simply click on the current name of the layer and type in a new one. With the Escape key, you cancel the input if you want to keep the old name, as is often sensible for the background.
Step 4: Create and Delete New Pixel Layers
At the bottom of the Layers palette you will find several icons. With the icon for new pixel layers, you create an empty, transparent layer. It appears without a name, and in parentheses you only see that it is a pixel layer.
It is important where the new layer is created. It is always inserted above the most recently selected layer. So if you select the background and then create a new layer, it sits directly above the background and not at the very top. You should keep this in mind when your layer list gets longer.
To delete a layer, select it and press the Delete key. Alternatively, drag it via drag-and-drop onto the small trash can icon at the bottom of the palette. With Ctrl + Z, you can undo a deletion at any time.
Step 5: Paint on a Pixel Layer and Work with the Transformation Frame
As soon as the empty layer is selected, you can draw directly on it with the paintbrush. In the example, a smiley with its tongue sticking out is created. Since pixels are painted onto a transparent surface here, this is called a pixel layer. This layer is rasterized, meaning it consists of individual pixels.
If you then select the Move tool, a transformation frame automatically appears around all pixels of the active layer. With the anchors, you can enlarge, shrink, squash, or rotate the content. Clicking in the middle of the frame allows you to move the content. We will cover the rotate and transform functions in more detail in a later video.
Keep one thing in mind while painting: The transformation frame always encloses all pixels of the layer. If you paint another smiley on the same layer, the frame becomes correspondingly larger. If you want to move both smileys independently of each other, it is therefore worth using a separate layer for each of them.
Step 6: Create a second layer and deselect
So create another empty layer. Choose a different color, such as a shade of red, and paint a second smiley. When you switch to the Move tool, you will see a transformation frame again, this time only for the new layer. You can now drag the second smiley to a different spot independently of the first.
If you no longer want to leave a layer selected, simply click outside the document area. The selection disappears, and the transformation frames are hidden as well.
Step 7: Name layers meaningfully
The thumbnails to the left of the layers help you recognize the content. With dark subjects, such as the black smiley, however, the preview is hard to read. That is why you should name your layers right away, especially in more complex projects. Otherwise, after a few weeks you will no longer know what is on which layer and which changes you made there.
To do so, click on the default text "Pixel" and enter a descriptive name. In the example, one layer is called "Smiley red", the other "Smiley black".
Step 8: Select and group layers with Ctrl and Shift
Since both layers contain small smileys, it makes sense to group them. To do so, select the top layer, hold down the Ctrl key, and click on the second layer. Both layers are now selected at the same time.
If you want to select several layers at once that lie directly below one another, you can do this with the Shift key. Click on the top layer, hold Shift, and then click on the bottom layer. All layers in between are selected as well. So Ctrl is for individual layers, Shift for a contiguous range.
To group, press Ctrl + G. Alternatively, click on the small folder icon at the bottom of the palette. The group can then be renamed by double-clicking, for example to "Smileys". With the small arrow icon, you open and close the group.
Step 9: Create shape layers with the ellipse
Besides pixel layers, there are shape layers. In the tool palette, select a shape tool, in the example an ellipse. Clicking and holding down shows more shapes to choose from. Then you drag the shape out directly in the image. Holding down the Shift key creates a perfect circle.
You do not have to create a layer manually, because Affinity Photo creates it automatically when you draw. In the Layers palette, you can recognize it by the preview and by the label "Ellipse" in parentheses.
The biggest advantage of a shape layer is that you can enlarge and shrink it as often as you like. The edge stays sharp because the shape is stored as a vector. With the Move tool, you place the circle at the desired position. You change the fill color at the top in the context toolbar or via the color picker.
Step 10: Duplicate layers
Do you need a second ellipse? Instead of drawing it anew, you can duplicate the layer. Select the layer and press Ctrl + J. The copy lies directly above the original. Alternatively, you can copy with Ctrl + C and paste with Ctrl + V. The copy then appears above the selected layer.
Then move the copy with the Move tool and change its color, for example to an orange tone. Since you look from top to bottom in the Layers palette, the top layer is in front. The orange ellipse therefore covers the blue one. Name the layers accordingly, for example "Circle orange" and "Circle blue", and then group them as "Circles".
Step 11: Change the order within a group
If you want to change the order of the circles so that the blue circle is on top, you must first select the layer. You can click it directly in the Layers palette. Alternatively, click on the circle in the image. Note, however, that clicking on the image selects the entire group if the layers are in a group.
To select a single layer within the group, hold down the Ctrl key and click on the desired circle. Then drag the layer in the palette to the desired position. A blue bar shows you where the layer will land. When you release, the blue circle now lies above the orange one.
Step 12: Creating and Releasing Clipping Masks
A particularly useful concept is the clipping mask. If you drag a layer in the palette so that its bar appears slightly offset to the right, it becomes a sublayer of the layer above it. In the example, you drag the orange circle under the blue one. After that, the orange circle is only visible within the blue circle.
You can still move the orange circle around in the image. However, it always remains restricted to the area of the blue circle. If you want to release this link again, drag the layer out of the clipping mask. Make sure that the bar stays continuous. If you drag the layer too far down, it leaves the group completely. If you then hide the group, you will notice that the orange circle no longer belongs to it.
Step 13: Creating Vector Masks from Shape Layers
An alternative to the clipping mask is the vector mask. To do this, you drag the layer in the palette between the thumbnail and the name of the layer above it. After releasing, a mask appears that only shows content where your shape layer is located. Since the shape is a path, this is also called a path mask.
The mask can be clicked and moved. In the image, you will still see the original path of the orange circle. With the vector mask, you can control very precisely which area of the blue circle is visible.
Step 14: Editing Groups, Masks, and Shapes Selectively
When you click on a group, only the visible area is selected. You can move or scale it, whereby the shape layer and mask are moved together. If, on the other hand, you click directly on the mask, it can be moved and scaled independently of the blue circle.
It becomes more difficult if you only want to adjust the blue circle. In the version of Affinity Photo current at the time of the video, this is not directly possible. You first have to release the mask from the circle by dragging it out. Then you adjust the blue circle and subsequently create the mask again from the orange circle.
Summary ??? Understanding Affinity Photo Layers: Step by Step to Non-Destructive Editing
Layers are the foundation of every clean image editing workflow in Affinity Photo. You work non-destructively, can make changes at any time, and keep control over your original image. You have learned how to show the layers palette, control locks and visibility, name and create layers. In addition, you have distinguished between pixel and shape layers, selected layers with Ctrl and Shift, formed groups, and applied clipping masks as well as vector masks. If you internalize these basics, further work with more complex projects will be much easier for you.
FAQ
Why can't I move the background layer?The background layer is locked by default. With the layer active, click the lock icon at the top right to remove the protection.
Where is a new layer inserted?A new layer is always created above the most recently selected layer, not necessarily at the very top of the palette.
How do pixel layers and shape layers differ?Pixel layers consist of individual pixels and are rasterized. Shape layers are vectors and stay sharp when resized.
How do I select multiple layers at once?With Ctrl you select individual layers, with Shift a contiguous range between two layers.
What is the difference between a clipping mask and a vector mask?With a clipping mask, the layer is displayed as a sublayer of a layer above it. The vector mask uses the path of a shape layer as a mask for the layer beneath it.
How can I quickly duplicate a layer?Select the layer and press Ctrl + J. Alternatively, copy with Ctrl + C and paste with Ctrl + V.


