
A low-hanging sun turns every car into a subject with warm light and long shadows. At the same time, it presents you with a challenge: the light is blinding, the body quickly becomes too dark, and reflections can ruin the result. In this tutorial, you accompany Florian on an evening shoot, where he shows step by step how he sets the camera position, chooses the angle, and gets the exposure under control in backlight.
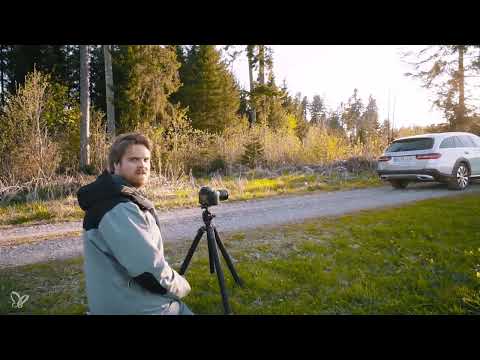
The video is only loaded from YouTube when you play it – data (including your IP address) is then transmitted to YouTube/Google. More in the privacy policy
Key Takeaways
The location and the position of the sun determine the rest. Before you set up the camera, you should check where the sun is and which obstacles, such as trees, filter its light.
The car is photographed from an angle of about 45 degrees. With two thirds rear and one third side, you emphasize the distinctive details such as the diffuser, exhaust pipes, and taillights.
The camera sits slightly below the taillights. This height looks dynamic and makes the vehicle appear powerful.
The exposure is set manually and adjusted step by step. A slight overexposure of the sun is often acceptable, as long as the car remains sufficiently bright.
The polarizing filter is only fine-tuned at the end. By rotating it and finding the right angle to the side surface, you reduce reflections on the paint and windows.
Step-by-Step Guide
Step 1: Assessing the Location and the Sun
Begin by getting an overview of the situation. In the video, the sun is still high enough to shine through a conifer, and the evening mood is noticeably setting in. Florian therefore drives back a few meters, away from the edge of the forest, so that the sun no longer falls so strongly through the branches. During your own shoot, make sure that the background stays calm and that the light is not broken up by distracting obstacles.

Step 2: Determining the Views
Before you commit to a perspective, take a few shots from different angles. Florian first photographs the front and the side and then switches to the rear, because the diffuser, exhaust pipes, and lights stand out particularly well there. Especially with vehicles with a distinctive design, it is worth emphasizing the details that make up the car's character. So think about which side of the vehicle is the most interesting, and then plan your series accordingly.

Step 3: Choosing the Angle and Position
Now it is about the composition. Florian decides on a view in which two thirds of the rear and one third of the side are visible. To do this, he goes to the rear corner of the car and takes an angle of roughly 45 degrees. From there, he takes a few steps down, that is, farther away from the vehicle, and takes a test shot. This first test shot immediately shows you whether the framing is right or whether you need to correct something.

Step 4: Fine-Tuning the Position
The test shot makes it clear that there is too much side in the picture and that the camera is too close to the car. Florian therefore goes two steps back and slightly to the side. What matters here is that the sun is now directly behind the vehicle and its light falls almost directly into the lens. This backlight creates a special mood, but also causes the typical challenge with exposure. Take your time with this adjustment, because even a few centimeters of difference noticeably change the look of the image.

Step 5: Setting the Focal Length, Tripod, and Camera Height
For this shot, Florian chooses a focal length of about 35 millimeters. This keeps the vehicle well captured in the frame without looking distorted. He then mounts the camera on a tripod, which ensures steady and precise shots. After that, he checks the height. His camera is located slightly below the taillights and yet noticeably higher than in the first shot. This way, the car looks powerful without the perspective seeming artificial.

Step 6: Setting the exposure manually
This is where the crucial technical part begins. Florian sets the aperture to f/8 to achieve sufficient depth of field. He sets the ISO value to 200 and switches to manual mode. The camera's exposure meter suggests a value, which Florian takes as a starting point. Then he takes a first shot with autofocus and checks the result on the display. The car still looks very dark, because the bright sun influences the light meter.

Step 7: Adjusting the exposure and aligning the image
Florian increases the exposure step by step so that the vehicle shows more detail. In doing so, he deliberately accepts that the sun overexposes a little. He evaluates the overall image and concludes that the mood of the picture is right. Then he does the final alignment of the image, readjusts the focus, and prepares the polarizing filter. In this phase, make sure that highlights and shadows are in a reasonable balance and that the car doesn't disappear into the dark.

Step 8: Reducing reflections with the polarizing filter
The polarizing filter is particularly important for this shot. Florian explains that reflections on the paint and the windows only disappear if the light source is at the right angle to the lens and the filter. He therefore positions himself at a much sharper angle to the side panel than in his first position. Then he rotates the filter until the reflections are filtered out as well as possible. Take your time with this step and keep checking the result on the display, because the effect only becomes apparent as you rotate it.

Step 9: Pressing the shutter and checking the result
Before Florian presses the shutter, he zooms into the image in live view mode to check the sharpness at key points. Only then does he take the shot. The so-called three-quarter shot from behind is thus in the can. At the end, Florian emphasizes that a good photo doesn't necessarily require a lot of equipment, but above all planning. An appealing car at a suitable location, plus good light, is often enough.

Summary – Car Photography at Sunset: Step-by-Step Guide
You have seen how Florian plans and carries out a shot with the sun low in the sky. Success begins with choosing the location and the right perspective. Then you decide on an angle of about 45 degrees, which harmoniously combines the rear and the side. With a tripod, a suitable focal length, and a manually adjusted exposure, you keep control over the image. Finally, the polarizing filter ensures that reflections disappear and the paint color comes across clearly. With a bit of patience and a few test shots, you can create a photo that captures the mood of the evening.
FAQ
Why is the sun behind the car so problematic in this shot?Backlighting creates strong contrasts. The car quickly becomes too dark, while the sun strongly influences the light meter. That is why manual exposure control makes sense.
Why does Florian choose an angle of 45 degrees?This angle shows both the shape and the details of the vehicle. Two thirds rear and one third side emphasize the distinctive design and look dynamic.
Why should the camera be positioned slightly below the taillights?A slightly lower position makes the car look more powerful and present. Too high or too low can distort the proportions of the vehicle.
Why does Florian use a tripod?A tripod keeps the camera steady and enables precise alignment as well as control over framing and height. It also makes exposure bracketing easier to carry out.
Why is the polarizing filter only used at the very end?The effect depends heavily on the angle to the light source and to the vehicle. Only once position and alignment are fixed can the filter be rotated optimally and reflections reduced.
Is expensive equipment necessary for shots like this?No. Florian emphasizes that good planning, a suitable location, and the right light are what matter most. Impressive results can be achieved even with simple equipment.


