

Anyone who photographs through a ship's window often ends up with a distracting reflection in the picture. The photo is not lost because of this, though. In Photoshop, the reflection can be removed quite well with the Patch tool, the Clone Stamp, and a blur filter. I'll show you step by step how to proceed, and explain what you should pay attention to at the critical points.
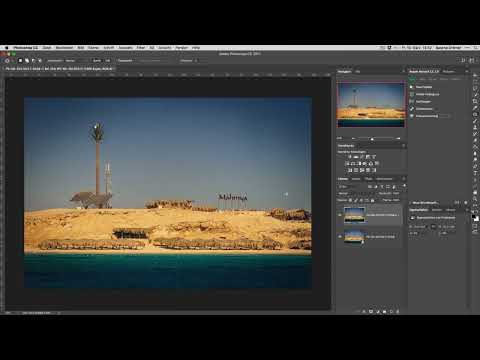
The video is only loaded from YouTube when you play it – data (including your IP address) is then transmitted to YouTube/Google. More in the privacy policy
Key Takeaways
- Always work on a copy of the image and rasterize the layer before working with retouching tools.
- The Patch tool is suited for larger, uniform areas, the Clone Stamp for fine structures and remnants.
- With a merged layer and a mask, you limit the blur to the area where it is really needed.
Step-by-Step Guide
Step 1: Copy the Layer
Open your photo in Photoshop. Before you change anything, duplicate the layer, for example with Ctrl+J on Windows or Cmd+J on a Mac. This way the original image remains intact, and you can go back at any time.

Step 2: Rasterize the Layer
Right-click the copied layer and select "Rasterize Layer". Only then can you apply pixel-based tools such as the Patch tool or the Clone Stamp to the layer.

Step 3: Remove Larger Areas with the Patch Tool
Select the Patch tool and feel free to zoom in a little. Trace around the reflection at an edge and move the selection a bit to the side, to where the background looks similar. Photoshop then takes over the structure and color from that spot. Often the reflection has already disappeared after the first pull.

Step 4: Carefully Rework the Edge Areas
At the bottom edge of the image you need to proceed more carefully, because the structure there is finer. Work in small sections and apply the Patch tool briefly several times. A large selection all at once, on the other hand, quickly leads to visible transitions. If necessary, move the area slightly to the side again until the transition looks coherent.
Step 5: Remove Distracting Cloud Remnants at the Top
In the upper area, a shape remains that could be interpreted as a cloud. Whether they are clouds is debatable. However, since the shape doesn't fit the lighting conditions of the day, it's best to remove it with the Patch tool as well. What matters is that the sky looks uniform afterwards.

Step 6: Edit Fine Details with the Clone Stamp
Select the Clone Stamp and adjust the brush size to the spot where you are working. Hold down the Alt key and click on an area that is to serve as the source. Then paint over the reflection. It is normal that the brightness at this spot doesn't match the rest yet. You will even this out in the next steps.

Step 7: Smooth Structures with the Patch Tool
After the Clone Stamp, some structures are sometimes still visible. So take the Patch tool again and trace along the edge. Keep a little distance from the edge so that the selection isn't too close to the flawed spot. Then drag the area to a suitable spot. Afterwards, the correction is hardly noticeable.

Step 8: Create a Merged Layer
If blemishes are still visible, create a merged layer. To do this, press Shift+Alt+Cmd+E on a Mac, or Shift+Alt+Ctrl+E on Windows. Photoshop copies all visible layers onto a new layer. The work underneath is preserved this way, and you can apply the blur without destroying anything.

Step 9: Apply Gaussian Blur
In the menu, open the "Blur Filter" and select "Gaussian Blur." The default value of 50 pixels is too strong for this image. Reduce the radius to about 20 pixels. This makes the sky softer without the effect looking artificial. Keep an eye on the preview while doing so.

Step 10: Limit the Blur with a Mask
The effect should only apply to the sky, not to the entire image. Therefore, create a layer mask while holding down the Alt key. This creates a black mask that completely hides the blur. With the mask, you can now make the effect visible again in a targeted way.

Step 11: Reveal Selectively with the Gradient Tool
Set the foreground color to white. Select the Gradient Tool with the "Foreground to Transparent" setting and drag a long gradient across the sky. The blur will gradually become visible there. The mask ensures that the foreground and the subject remain sharp.

Step 12: Correct an Effect That Is Too Strong
If the effect is too strong in some places, press the X key. This swaps the foreground and background colors, and black is now the active color. Drag the gradient again over the affected areas to hide the blur there again. You can repeat this step as often as needed until the result is right.

Step 13: Give the Layer a Meaningful Name
Give the layer a descriptive name, such as "Gaussian Blur." Double-click the layer name to open the input field. Especially in a project with many layers, this helps you keep an overview at all times.
Step 14: Critically Review the Result
Finally, view your image in the overall view. The reflection should no longer be noticeable. Anyone who doesn't know that the photo was taken through a window pane will generally not notice it. Still, zoom in to 100 percent once, because residual traces can become visible especially in print.

Summary – Removing Reflections in Photoshop: Step-by-Step Guide
You have learned how to remove a reflection in Photoshop step by step. You start with a copied and rasterized layer and remove larger areas with the Patch Tool. You use the Clone Stamp for fine details. Then you create a merged layer, apply the Gaussian Blur, and limit it to the sky with a mask. With this approach, your vacation photo stays natural and without visible traces of the window pane.
FAQ
Why do I have to rasterize the layer before retouching?Because pixel-based tools such as the Patch Tool and the Clone Stamp can only be applied to pixel layers.
When do I use the Clone Stamp instead of the Patch Tool?The Clone Stamp is suitable for fine structures and small remnants, while the Patch Tool covers larger, uniform areas better.
Why do I combine the Gaussian Blur with a mask?The mask ensures that the effect only applies where it is needed, for example in the sky, while the subject stays sharp.
How do I undo a mistake?With Ctrl+Z (Cmd+Z on a Mac) you undo the last step, with Alt+Ctrl+Z (Cmd+Alt+Z on a Mac) you go back further.

