Post-processing photos is an art that allows you to present the best moments of your vacation even more impressively. In this tutorial, you’ll learn how to effectively add sun rays to your images using Adobe Photoshop. This will not only enhance the atmosphere of your photos but also captivate the viewer.
Key Takeaways
- Simulate sun rays using the selection tool.
- Adjust tonal values for realistic effects.
- Use the gradient tool for a harmonious transition.
- Duplicate and transform layers to create different light rays.
- Organize layers for better clarity.
Step-by-Step Guide
To add vacation photos sun rays, you’ll need Adobe Photoshop. Let’s begin the process.
Step 1: Selecting the Area
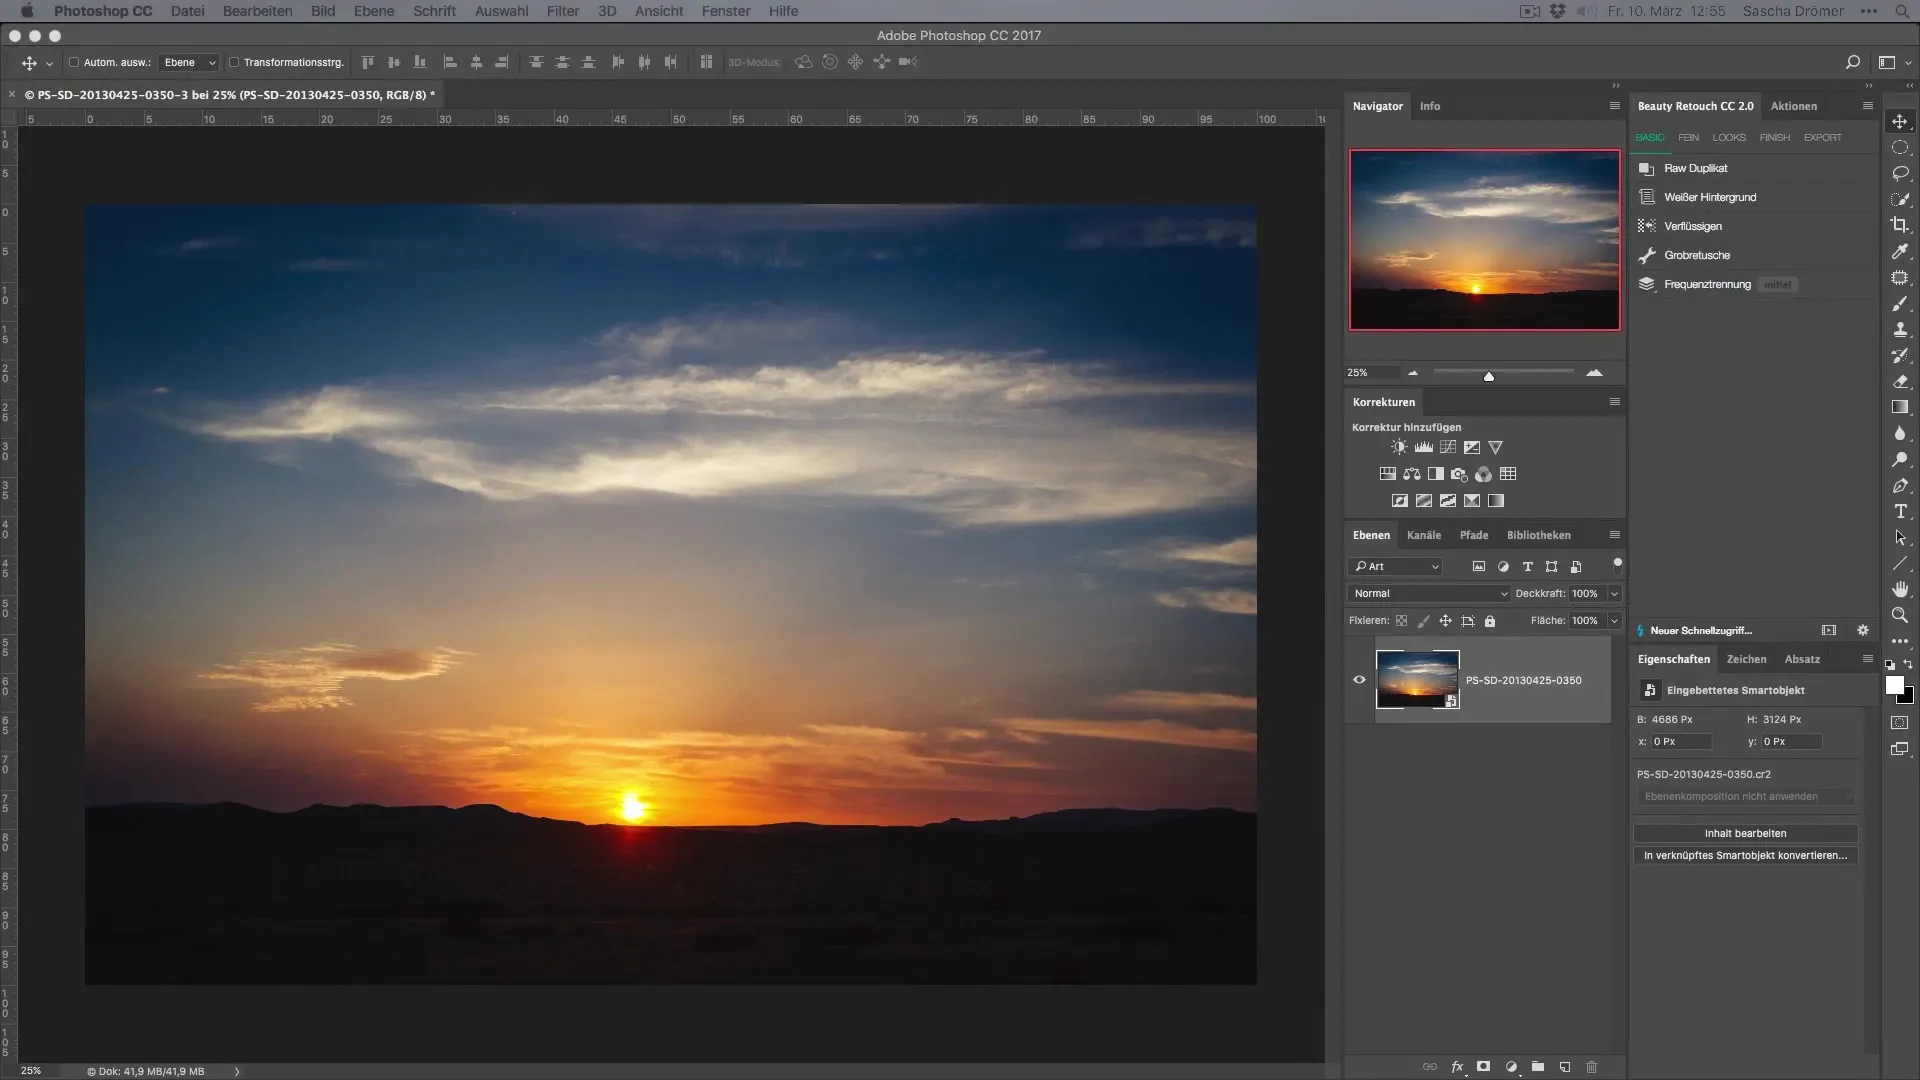
Start with the image you want to add sun rays to. Select the Elliptical Marquee tool from the toolbar. With this tool, place a narrow, elongated selection in the area where the sun rays should appear. This selection simulates the region where light would shine through trees or clouds.

Step 2: Levels Adjustment
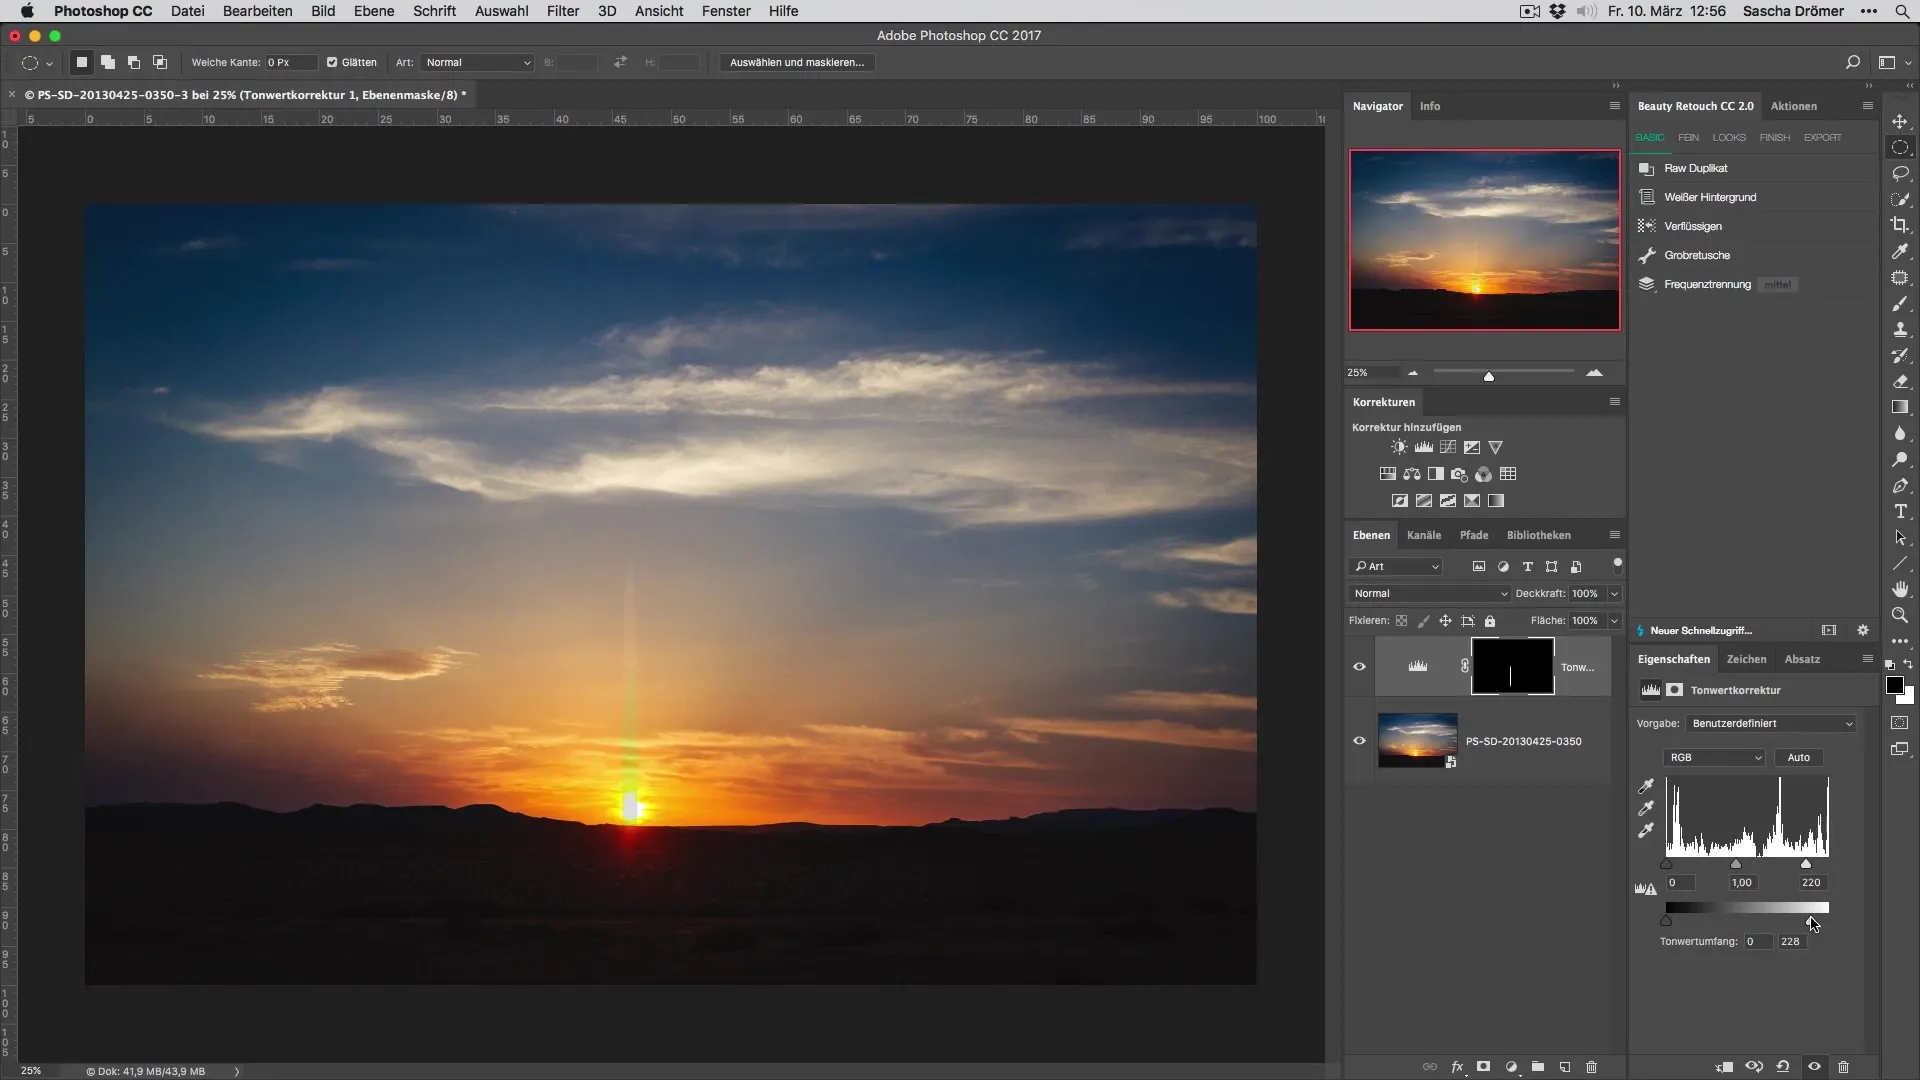
After making the selection, go to the Levels adjustment. You can also use Curves, but here we’ll work with Levels. Slightly lower the contrast to create a smooth transition. The Levels adjustment already gives your image a certain softness needed for sun rays.

Step 3: Use the Gradient Tool
The Gradient Tool is now your best friend. With the Shift key held down, drag a short gradient from bottom to top to create a smooth transition. Then drag a long gradient from the top edge of your image downward. This enhances the illusion of light beams entering the image.
Step 4: Increase Intensity
In this step, you can adjust the gradient to make the effect stronger. It’s important to find a balance here. Too intense rays can look unrealistic. Optimize the gradient to achieve the right intensity.
Step 5: Duplicate Layers
Now it’s time to continue the creative work with layers. Duplicate the current layer using CMD + J (or Ctrl + J on Windows). You will need multiple layers for different sun rays, but you can duplicate them all now and adjust them later.
Step 6: Transform Layers
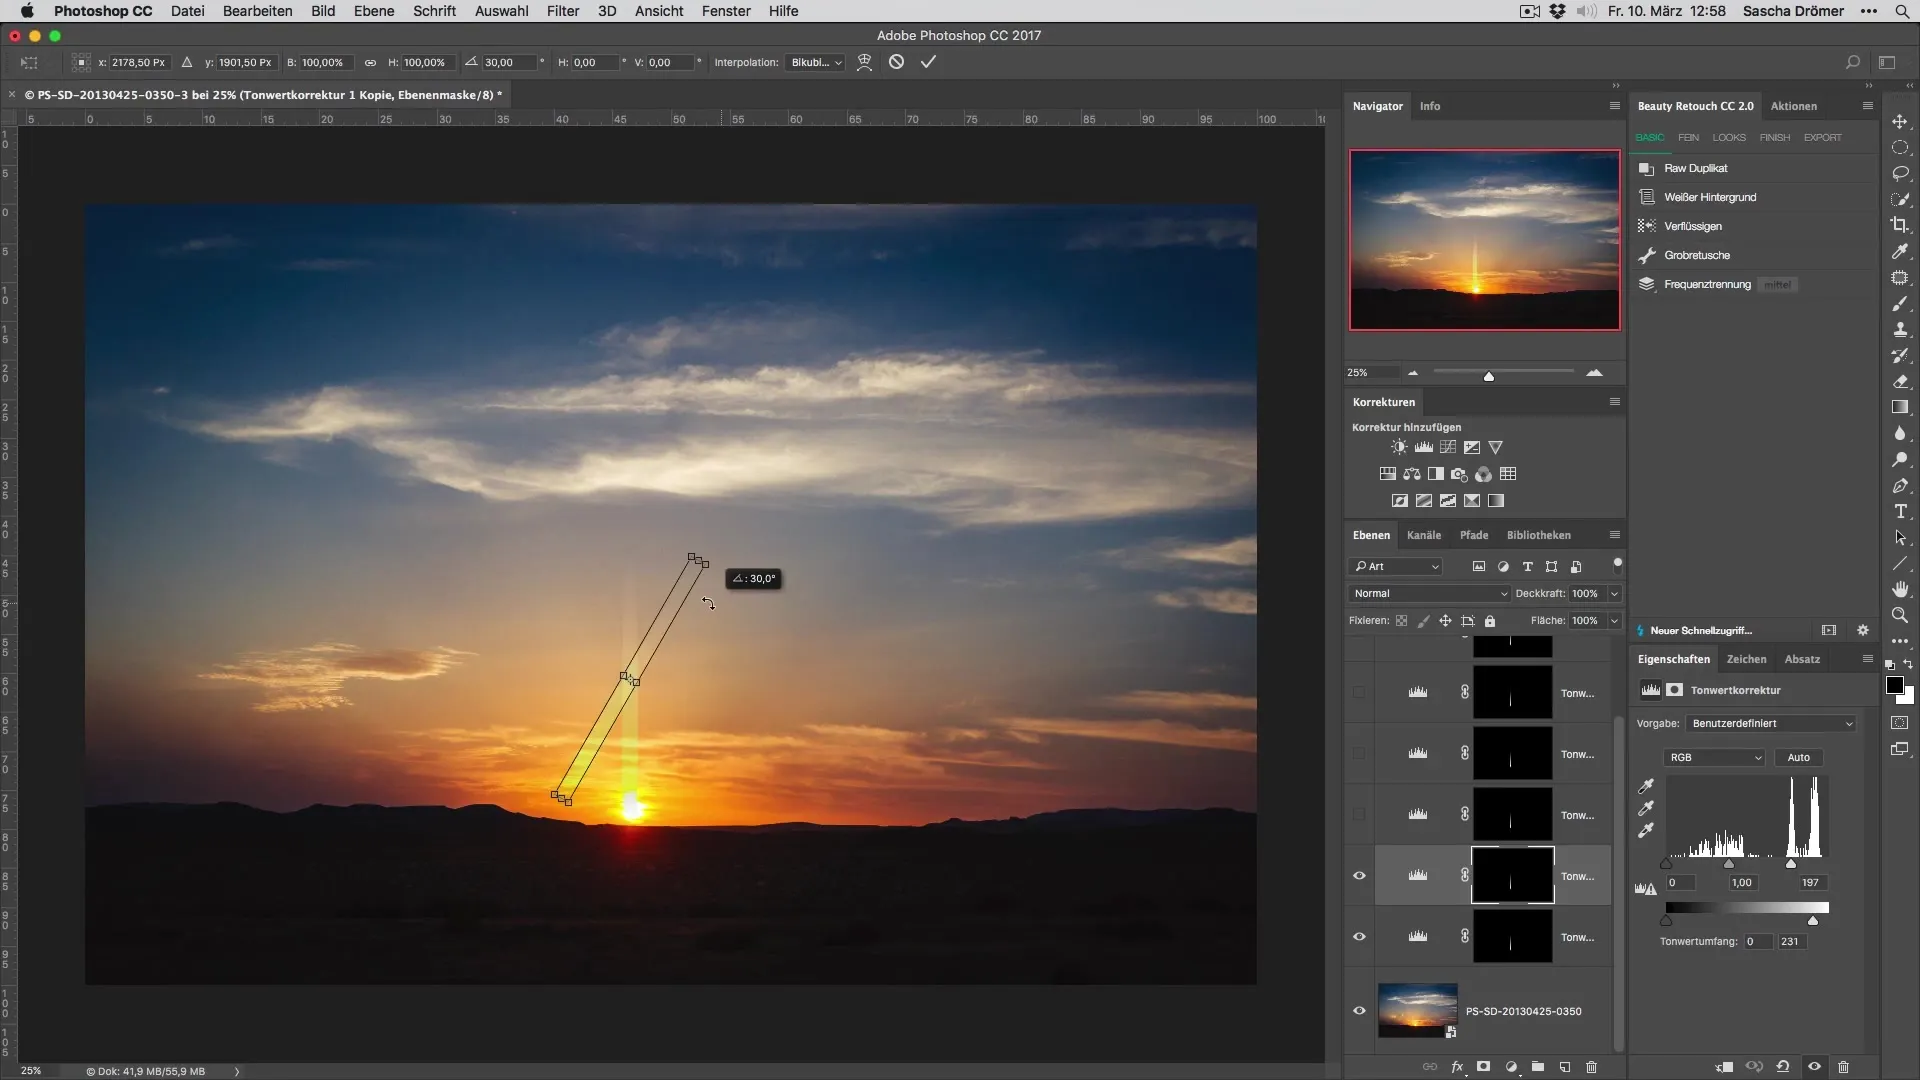
Hide all layers except the second one. Activate the Transform tool by pressing CMD + T (or Ctrl + T). Hold the Shift key to change angles in 25° increments. Move and rotate the layers effectively to create different sun rays.

Step 7: Adjust Rays
Now position each ray as desired and adjust the angle. Here you can get creative—each sun ray doesn’t have to look the same. You may want to vary them a bit to make the effect more interesting.
Step 8: Organize Layers
Once you’ve positioned the rays, select all the layers you’ve created. Hold the Shift key and click on the top and bottom layers. Then click the folder icon to group all the rays into a folder. This makes it easier to work with many layers and stay organized.
Step 9: Adjust Opacity
To achieve the final effect, adjust the opacity of the entire folder. It’s recommended to set the opacity to around 40% to get a subtle yet effective result. Check the before-and-after result and make further adjustments if needed.
Summary – Enhancing Vacation Photos with Sun Rays
Adding sun rays to your photos is a great way to bring more atmosphere to your images. With the right tools in Photoshop, you can easily achieve stunning results that make your memories even more vivid.
Frequently Asked Questions
How can I find the selection tool?The selection tool is located in the toolbar on the left side.
Can I use other tools for the gradient?Yes, you can use other tools, but the Gradient Tool provides the best results for this effect.
What if the sun rays don’t look realistic?Experiment with layer opacity and angles to achieve a more natural look.
Do I need special Photoshop skills?A basic understanding of Photoshop is helpful, but this guide takes you through each step.
Can I change the layers at any time?Yes, as long as you don’t rasterize the layers permanently, you can make changes at any time.


